הקדמה
This manual provides detailed instructions for the setup, operation, maintenance, and troubleshooting of your HP ProStudio 4 AiO G1i All-in-One Computer. Refer to this guide for optimal performance and longevity of your device.
Your HP ProStudio 4 AiO G1i is a powerful all-in-one desktop computer designed for efficiency. This package includes the main unit, power adapter, HP 125 v2 Wired Keyboard, and HP 125 Wired Mouse.
סעטאַפּ
1. אַנפּאַקינג און פּלייסמאַנט
Carefully remove all components from the packaging. Place the HP ProStudio 4 AiO G1i on a stable, flat surface with adequate ventilation around the unit.
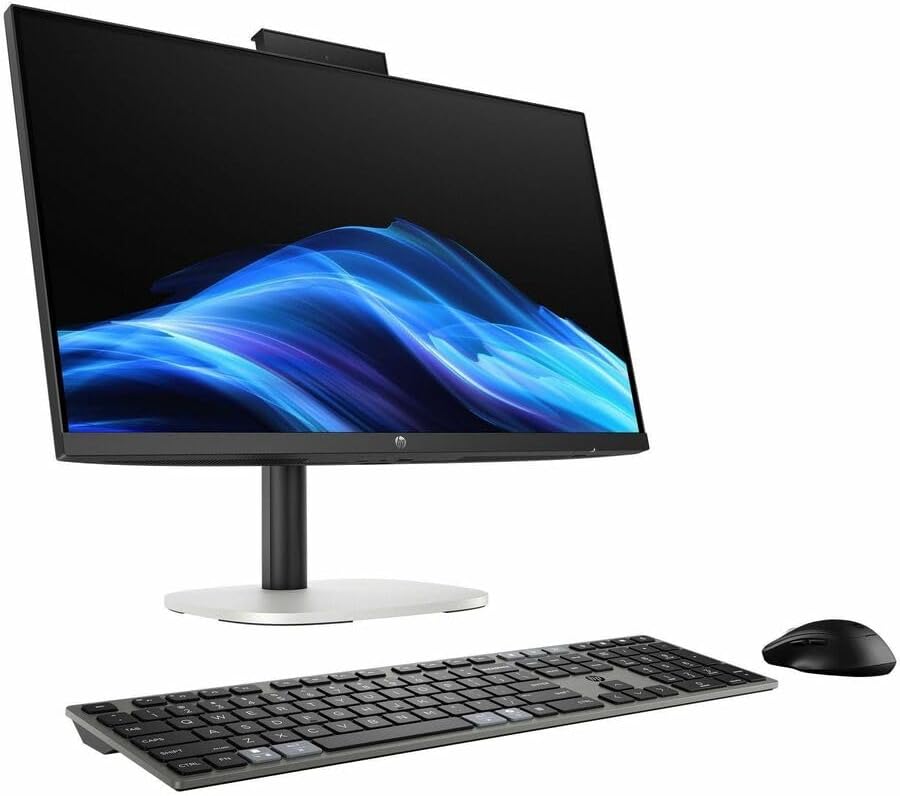
Figure 1: HP ProStudio 4 AiO G1i All-in-One Computer with included keyboard and mouse.
2. קאַנעקטינג פּעריפעראַלס
- Connect the HP 125 v2 Wired Keyboard to an available USB port on the computer.
- Connect the HP 125 Wired Mouse to another available USB port.
- אָפּשיקן צו די הינטן view בילד פֿאַר פּאָרט לאָקאַציעס.

פיגורע 2: דערציען view of the HP ProStudio 4 AiO G1i, showing various ports for connectivity.
3. מאַכט קאַנעקשאַן
- Connect the power adapter cable to the power input port on the rear of the computer.
- Plug the other end of the power adapter into a grounded electrical outlet.
4. ערשטע אויפשטארט
- Press the power button, typically located on the side or bottom bezel of the display.
- Follow the on-screen instructions to complete the Windows 11 Pro operating system setup, including language selection, network connection, and user account creation.
אַפּערייטינג
1. Windows 11 Pro Basics
The HP ProStudio 4 AiO G1i runs on Windows 11 Pro. Familiarize yourself with the Start Menu, Taskbar, and File Explorer for basic navigation and application management. Consult Microsoft's official documentation for detailed Windows 11 Pro usage guides.
2. נעץ קאַנעקטיוויטי
- ווי-פי: To connect to a wireless network, click the Wi-Fi icon in the system tray, select your desired network, and enter the password if prompted. The system supports 802.11ax for high-speed wireless connections.
- בלועטאָאָטה: To pair Bluetooth devices, go to סעטטינגס > בלועטוט און דעווייסעס. Ensure Bluetooth is enabled and select 'Add device' to pair.
3. Using Integrated Features
The All-in-One design includes an integrated webcam and microphone, typically located at the top bezel of the display. These are ready for use with video conferencing applications and voice commands.

פיגורע 3: שפּיץ view of the HP ProStudio 4 AiO G1i, showing the integrated webקאַם און מיקראָפאָן.
4. קינסטלעכע אינטעליגענץ מעגלעכקייטן
Equipped with an Intel Core Ultra 7 processor, this system features integrated AI capabilities designed to enhance performance and user experience in compatible applications. These features operate in the background to optimize tasks and workflows.
וישאַלט
1. רייניקונג
- פאַרשטעלן: ניצט אַ ווייכע, לינט-פֿרייע שטאָף ספּעציעל דיזיינד פֿאַר עלעקטראָניק.ampen the cloth slightly with water or a screen cleaner solution (do not spray directly onto the screen).
- עקסטעריע: Wipe the exterior surfaces with a soft, dry cloth. Avoid abrasive cleaners or solvents.
- ווענטילאַטיאָן: זיכער מאַכן אַז די ווענטילאַציע עפענונגען זענען ריין פון שטויב און שטערונגען צו פאַרמייַדן איבערהיצונג.
2. ווייכווארג דערהייַנטיקונגען
Regularly check for and install updates for Windows 11 Pro and HP drivers. This ensures system stability, security, and optimal performance. You can typically find updates through Windows Update in Settings.
3. דאַטן באַקאַפּ
Periodically back up your important data to an external drive or cloud storage service to prevent data loss in case of system failure.
טראָובלעשאָאָטינג
This section addresses common issues you might encounter. For more complex problems, refer to HP's official support resources.
קיין מאַכט
- Ensure the power adapter is securely connected to both the computer and a working electrical outlet.
- באַשטעטיקן אַז די עלעקטרישע ווענטיל אַרבעט דורך אַרײַנשטעקן אַן אַנדער דעוויס.
קיין ווייַז
- קוק אויב די קאָמפּיוטער איז פּאַוערד אויף.
- If an external monitor is connected, ensure it is powered on and correctly connected.
קלאַוויאַטור אָדער מויז רעאַגירט נישט
- זיכער מאַכן אַז די USB קייבלס פֿאַר די קלאַוויאַטור און מויז זענען פעסט אַרייַנגעשטעקט אין די קאָמפּיוטער'ס USB פּאָרטן.
- פרובירט זיי צו קאנעקטן צו פארשידענע USB פּאָרטן.
פּאַמעלעך פאָרשטעלונג
- שליסט אומנייטיקע אַפּליקאַציעס וואָס לויפן אין הינטערגרונט.
- קוקט נאָך און אינסטאַלירט אַלע וואַרטנדיקע ווינדאָוז אָדער דרייווער דערהייַנטיקונגען.
- זיכער מאַכן גענוג ווענטילאַציע צו פאַרמייַדן טערמישע טראָטאַלינג.
ספּעסאַפאַקיישאַנז
| שטריך | באַשרייַבונג |
|---|---|
| מאָדעל נומער | C72S2UT#ABA |
| ווייַז גרייס | 23.8 אינטשעס |
| פאַרשטעלן האַכלאָטע | 1920 רענטגענ 1080 (פול הד) |
| פּראַסעסער | אינטעל קאָר אולטראַ 7 (5.3 GHz) |
| באַראַן | 16 גיגאבייט דדר5 |
| סטאָרידזש | 512 GB NVMe SSD |
| אָפּערייטינג סיסטעם | Windows 11 פּראָ |
| ווירעלעסס קאַנעקטיוויטי | 802.11ax, בלועטוט |
| פּראָדוקט דימענשאַנז (LxWxH) | 29.3 X 18.9 X 7.8 אינטשעס |
| פּונקט וואָג | 13.89 פונט |
וואָראַנטי און שטיצן
This HP product is covered by a standard manufacturer's warranty. For detailed warranty information, terms, and conditions, please refer to the documentation included with your product or visit the official HP support webפּלאַץ.
For technical assistance, driver downloads, or further troubleshooting, please visit the HP שטיצן webפּלאַץ. When contacting support, please have your product model number (C72S2UT#ABA) and serial number readily available.