1. הקדמה
This manual provides essential information for the safe and efficient operation, setup, and maintenance of your Crivit Parkside PASL 4000 B2 LED Work Light with Charging Station. Please read these instructions carefully before first use and keep them for future reference.
2. זיכערקייַט אינסטרוקציעס
שטענדיק אָבסערווירן גרונטלעכע זיכערהייט מיטלען ווען איר ניצט עלעקטרישע אַפּאַראַטן צו רעדוצירן דעם ריזיקאָ פון פייער, עלעקטרישן קלאַפּ און פערזענלעכע שאָדן.
- Do not expose the device to rain or moisture. Use only in dry environments.
- ויסמיידן קוקן גלייַך אין די געפירט ליכט.
- Do not attempt to open or modify the device or battery.
- האַלטן אויס פון דערגרייכן פון קינדער.
- Ensure the charging station is connected to a suitable power outlet (100-240V ~ 50/60 Hz).
- די לעדס זענען נישט ריפּלייסאַבאַל.
3. פּעקל אינהאַלט
Carefully unpack all items and ensure all components are present and undamaged. If any parts are missing or damaged, contact customer support.
- Crivit Parkside PASL 4000 B2 LED Work Light
- טשאַרדזשינג סטאַנציע
- USB Cable (approx. 150 cm)
- מאַכט אַדאַפּטער
- מאַונטינג מאַטעריאַל
- ינסטרוקטיאָן מאַנואַל (דעם דאָקומענט)
4. פּראָדוקט איבערview
The Crivit Parkside PASL 4000 B2 is a versatile LED work light designed for various tasks, featuring multiple lighting modes and convenient mounting options. It includes a powerful lithium-ion battery and a dedicated charging station.
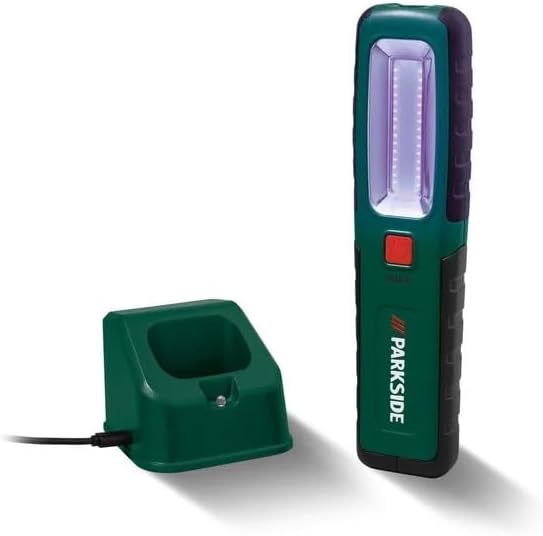
Figure 1: Crivit Parkside PASL 4000 B2 LED Work Light and its charging station.
שליסל פֿעיִקייטן:
- Three Lighting Functions: זייַט לamp, spotlight, and UV light.
- ינטעגראַטעד וסב פּאָרט: פֿאַר טשאַרדזשינג עקסטערנע דעוויסעס.
- 4-Level Charge Indicator: ווײַזט דעם איצטיקן באַטאַריע סטאַטוס.
- Magnetic Base and Hook: For flexible positioning.
- אַדזשאַסטאַבאַל שטיין: Allows for precise light angle adjustment.
- Wall-Mountable Charging Station: Convenient storage and charging.
5. סעטאַפּ
5.1 ערשט טשאַרדזשינג
- Connect the USB cable to the charging station and the power adapter.
- Plug the power adapter into a suitable electrical outlet (100-240V ~ 50/60 Hz).
- Place the LED work light into the charging station. Ensure proper contact.
- The 4-level charge indicator on the lamp will illuminate to show charging progress. Allow the lamp to fully charge before first use.
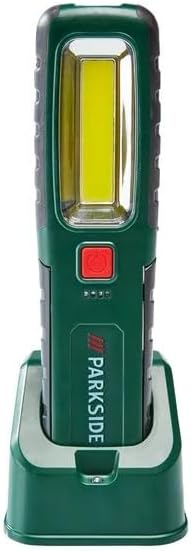
Figure 2: Work light in charging station, showing charge indicators.
5.2 מאַונטינג די טשאַרדזשינג סטאַנציע
The charging station can be wall-mounted using the provided mounting material. Choose a dry, stable location near a power outlet.
6. אַפּערייטינג ינסטרוקטיאָנס
6.1 Power On/Off and Light Mode Selection
Press the red power button on the front of the work light to cycle through the different lighting modes:
- ערשטער דרוק: Activates the side lamp (main work light).
- צווייטע דרוק: Switches to the spotlight (top light).
- דריטע דרוק: Activates the UV light (for detecting coolants, greases, or dirt).
- פערטע דרוק: קער אַוועק די ליכט.

Figure 3: Close-up of the LED panel and power button.
6.2 באַטערי לעוועל ינדיקאַטאָר
The 4-level LED indicator on the lamp displays the remaining battery charge. Each illuminated LED represents approximately 25% of the battery capacity.
6.3 Using the Integrated USB Port (Power Bank Function)
The work light features an integrated USB port, allowing you to use its internal battery to charge small external devices such as smartphones. Connect your device's USB charging cable to the port on the work light.
6.4 Positioning the Work Light
The PASL 4000 B2 offers several options for hands-free use:
- מאַגנעטיק אַטאַטשמאַנט: די הינטן פון די לamp has strong magnets for attaching to metallic surfaces.
- פאָלדינג הוק: An integrated folding hook allows you to hang the lamp.
- אַדזשאַסטאַבאַל שטיין: די לamp includes a stand with a powerful magnet and adjustable angle for directing light precisely.

Figure 4: Work light magnetically attached under a car hood.

פיגורע 5: דערציען view showing hook and magnets.
7. וישאַלט
7.1 רייניקונג
Wipe the work light and charging station with a dry, soft cloth. Do not use abrasive cleaners or solvents. Ensure the device is dry before charging or use.
7.2 באַטערי קער
To prolong battery life, avoid completely discharging the battery. Recharge the lamp regularly, even if not in frequent use. Store the device in a cool, dry place when not in use for extended periods.
7.3 LED Replacement
The LEDs in this work light are not replaceable. If the LEDs fail, the entire unit must be replaced.
8. טראָובלעשאָאָטינג
If you encounter issues with your Crivit Parkside PASL 4000 B2, refer to the following common problems and solutions:
- ליכט טוט נישט קער אויף:
- Check if the battery is charged. Place the lamp אין די טשאַרדזשינג סטאַנציע.
- פאַרזיכערן די מאַכט קנעפּל איז געדריקט ריכטיק.
- Lamp איז נישט טשאַרדזשינג:
- Verify that the charging station is properly connected to a power source.
- פאַרזיכערן די לamp is correctly seated in the charging station, making good contact with the charging pins.
- Check the USB cable and power adapter for any damage.
אויב די פראבלעם בלייבט נאך פרובירן די לייזונגען, ביטע קאנטאקטירט קאסטומער סופארט.
9. ספּעסאַפאַקיישאַנז
| שטריך | באַשרייַבונג |
|---|---|
| סאָרט | Crivit / Parkside |
| מאָדעל נומער | PASL 4000 ב2 |
| פּראָדוקט דימענסיעס (לamp) | Approx. 5.8 x 23 cm (W x H) |
| Product Dimensions (Charging Station) | אומגעפער 87.5 x 8.6 x 6.8 ס״מ (ברייט x טיף x הויך) |
| Weight (Lamp) | בעערעך. 270 ג |
| מאַטעריאַל | פּלאַסטיק |
| מאַכט מקור | באַטאַרייע פּאַוערד |
| באַטערי טיפּ | ליטהיום-יאָן (3.7 וו / 4000 מאַה) |
| מאַכט אַדאַפּטער אַרייַנשרייַב וואָלtage | 100-240 וו ~ 50/60 הז |
| ליכט מקור טיפּ | געפירט |
| Luminous Flux (Side Lamp) | אומגעפער 360 לומען |
| Luminous Flux (Spotlight) | אומגעפער 100 לומען |
| Operating Time (Side Lamp) | Approx. 3.5 hours (at full charge) |
| Operating Time (Spotlight) | Approx. 8 hours (at full charge) |
| קאָליר טעמפּעראַטור | בעערעך 6000 ק |
| פֿעיִקייטן | Multifunction, UV light, Integrated USB port, Magnetic base, Folding hook, Adjustable stand |
10. וואָראַנטי און שטיצן
Information regarding specific warranty terms and customer support contacts is not available in the provided product data. Please refer to the documentation included with your purchase or contact the retailer for details on warranty coverage and technical assistance.


