1. הקדמה
This manual provides comprehensive instructions for the installation, operation, maintenance, and troubleshooting of the Vivotek FE9391-EHV-V2 12MP Outdoor Fisheye IR Illumination Camera. Please read this manual thoroughly before using the product to ensure proper setup and functionality. Retain this manual for future reference.
2. פּראָדוקט איבערview
2.1 שליסל פֿעיִקייטן
- 12 Megapixel Effective Still Resolution for high-quality imaging.
- Fisheye Lens with 1.2mm focal length for wide-area surveillance.
- Integrated IR Illumination for clear night vision up to 20 meters.
- WDR Pro technology for optimal image visibility in high contrast lighting.
- H.265/H.264/MJPEG compression for efficient video streaming.
- IP66-rated weather-resistant enclosure for outdoor use.
- Motion-only alert type for event detection.
- Wi-Fi Connectivity Protocol for flexible network integration.
2.2 פּעקל אינהאַלט
באַשטעטיקן אַז אַלע זאכן זענען פאַראַן אין פּעקל:
- Vivotek FE9391-EHV-V2 Camera Unit
- מאָנטירונג קיט (שרויף, אַנקערס)
- וואָטערפּרוף קאַנעקטער
- שנעל ינסטאַללאַטיאָן גייד
- Software CD (or download link information)
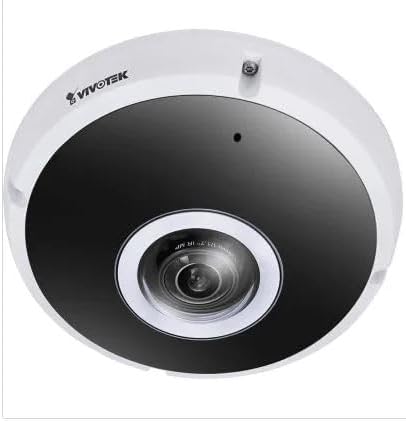
פיגורע 2.1: פראָנט view of the Vivotek FE9391-EHV-V2 12MP Outdoor Fisheye IR Illumination Camera, showing the lens and IR illuminators.
3. זיכערקייַט אינפֿאָרמאַציע
- לייענען אַלע ינסטראַקשאַנז קערפאַלי איידער ייַנמאָנטירונג און אָפּעראַציע.
- Ensure the power source matches the camera's requirements (Corded Electric).
- פרובירט נישט צו צענעמען אדער מאדיפיצירן די קאמערא. דאס וועט בטל מאכן די גאראנטיע.
- Avoid pointing the camera directly at strong light sources for extended periods.
- די אינסטאַלאַציע זאָל דורכגעפירט ווערן דורך קוואַליפֿיצירטע פּערסאָנעל אין לויט מיט די לאָקאַלע עלעקטרישע קאָודן.
- Protect cables from being walked on or pinched.
4. סעטאַפּ און ייַנמאָנטירונג
4.1 מאָונטינג אָרט
Select a suitable outdoor location for mounting. Consider the desired surveillance area, proximity to power, and network connectivity (Wi-Fi or wired Ethernet). The camera is IP66 rated for outdoor use.

Figure 4.1: Dimensional drawing of the Vivotek FE9391-EHV-V2 camera, showing a diameter of 150mm and height of 68.2mm.
4.2 גשמיות ינסטאַלירונג
- צוגרייטן די מאַונטינג ייבערפלאַך: Use the provided mounting template (if included) to mark drill holes.
- בויער האָלעס: באָרט פּילאָט לעכער און אַרײַנשטעלן וואַנט אַנקערס אויב נייטיק.
- באַוואָרענען די אַפּאַראַט: Attach the camera base securely to the mounting surface using the provided screws.
- פאַרבינדן קאַבלעס:
- מאַכט: פאַרבינדן די מאַכט קאַבלע צו אַ פּאַסיק מאַכט מקור.
- נעץ: Connect an Ethernet cable for wired network access, or ensure Wi-Fi signal strength is adequate for wireless connection. Use the waterproof connector for outdoor Ethernet connections.
- סטרויערן די אַפּאַראַט ווינקל: Loosen the adjustment screws (if applicable) to position the fisheye lens for optimal coverage. Tighten screws once adjusted.

Figure 4.2: An Ethernet cable with an RJ45 connector, used for wired network connectivity.
4.3 ערשטע נעץ קאָנפיגוראַציע
After physical installation and power-up, the camera needs to be configured on your network.
- אַנטדעקן די קאַמעראַ: Use the Vivotek IP Utility software (available on the manufacturer's webזייטל) צו אַנטדעקן די קאַמעראַ אויף דיין נעץ.
- Assign IP Address: Assign a static IP address or ensure it obtains an IP address via DHCP.
- אַקסעס Web צובינד: עפענען א web בלעטערער און אַרייַן די קאַמעראַ'ס IP אַדרעס צו אַקסעס עס web-באזירט קאַנפיגיעריישאַן צובינד.
- לאָגין: Enter the default username and password (refer to the Quick Installation Guide for defaults). Change the default password immediately for security.
- Wi-Fi סעטאַפּ (אויב אָנווענדלעך): Navigate to the network settings and configure the Wi-Fi connection if you are using wireless connectivity.
5. אַפּערייטינג ינסטרוקטיאָנס
5.1 לעבן View
Once configured, you can access the live video feed through the web interface or compatible Vivotek surveillance software.
- Web בלעטערער: לאָגין זיך אַרײַן אין דער קאַמעראַ web interface and navigate to the "Live View" סעקציע.
- Surveillance Software: Add the camera to your Vivotek NVR or VMS (Video Management Software) for centralized monitoring.
- מאָביל אַפּ: Download the Vivotek mobile app and add your camera for remote viewing.

פיגורע 5.1: עקסample of surveillance footage from multiple cameras displayed on a tablet device, demonstrating remote monitoring capabilities.

Figure 5.2: A monitor displaying a split-screen view of four camera feeds, labeled CAM1 through CAM4, illustrating a typical surveillance setup.
5.2 רעקאָרדינג און סטאָרידזש
The camera supports various recording options:
- לאקאלע סטאָרידזש: Insert a microSD card (not included) into the camera's slot for edge recording. Configure recording schedules and event triggers (e.g., motion detection).
- נעץ ווידעא רעקאָרדער (NVR): Connect the camera to a compatible NVR for continuous or event-based recording.
- וואָלקן סטאָרידזש: Some Vivotek models or third-party services may offer cloud storage integration. Refer to the camera's web interface for specific options.
5.3 באַוועגונג דעטעקציע און וואָרענונגען
קאָנפיגורירן באַוועגונג דעטעקשאַן זאָנעס און סענסיטיוויטי סעטטינגס אין די קאַמעראַ ס web interface. When motion is detected, the camera can trigger actions such as:
- Recording video to local storage or NVR.
- Sending email notifications with snapshots.
- Uploading footage to an FTP server.
6. וישאַלט
- לענס רייניקונג: Gently wipe the camera lens with a soft, clean cloth. For stubborn dirt, use a lens cleaning solution designed for optical surfaces. Do not use abrasive cleaners.
- הויז רייניקונג: רייניקן די קאַמעראַ הויזינג מיט אַדamp שטאָף. פֿאַרמײַדט ניצן שטאַרקע וואַשפּולווער אָדער סאָלווענטן.
- Firmware דערהייַנטיקונגען: Regularly check the Vivotek website for firmware updates. Updating firmware can improve performance, add features, and enhance security.
- קאַבלע דורכקוק: Periodically inspect all cables for signs of wear or damage, especially for outdoor installations.
- ענוויראָנמענטאַל קאָנטראָל: זיכער מאַכן אַז די קאַמעראַ'ס אַפּערייטינג סביבה בלייבט אין די ספּעציפֿישע טעמפּעראַטור און הומידיטי ריינדזשאַז.
7. טראָובלעשאָאָטינג
7.1 קיין ווידעא פיד
- טשעק מאַכט: Ensure the camera is receiving power. Verify power adapter and cable connections.
- נעץ קאַנעקשאַן: Confirm the Ethernet cable is securely connected or that the Wi-Fi signal is strong and the camera is connected to the correct network.
- IP אַדרעס: Verify the camera's IP address and ensure it is not conflicting with another device on the network.
- פירעוואַלל: Check if any firewall settings on your network or computer are blocking access to the camera.
7.2 שלעכטע בילד קוואַליטעט
- ריין לענס: זיכער מאַכן אַז די קאַמעראַ לענס איז ריין און פריי פון שטויב אָדער שמוץ.
- לייטינג טנאָים: Adjust camera settings for optimal exposure in varying light conditions. Ensure IR illuminators are functioning at night.
- האַכלאָטע סעטטינגס: Verify that the video resolution and quality settings are configured appropriately in the camera's web צובינד.
- נעץ באַנדווידט: נישט גענוג נעץ באַנדווידט קען פירן צו אַ צעבראָכענע אָדער נידעריק-קוואַליטעט ווידעא. קאָנטראָלירט נעץ לאָוד.
7.3 באַוועגונג דעטעקציע אַרבעט נישט
- אַקטיווירן באַוועגונג דעטעקציע: Ensure motion detection is enabled in the camera's settings.
- Sensitivity and Zones: Adjust motion detection sensitivity and define detection zones correctly.
- רעקאָרדינג פּלאַן: Verify that the recording schedule is active for motion-triggered events.
8. ספּעסאַפאַקיישאַנז
| שטריך | דעטאַל |
|---|---|
| מאָדעל נומער | FE9391-EHV-V2 |
| עפעקטיוו נאָך האַכלאָטע | 12 מפּ |
| לענס | 1.2mm Fisheye Lens |
| IR באַלויכטונג קייט | 20 ם |
| WDR טעכנאָלאָגיע | WDR Pro |
| ווידעא קאַמפּרעשאַן | ה .265 / ה .264 / מדזשפּעג |
| קאַנעקטיוויטי פּראָטאָקאָל | ווי-פי |
| אינטערנאַציאָנאַלע פּראַטעקשאַן שאַץ | IP66 |
| מאַכט מקור | קאָרדעד עלעקטריק |
| פּראָדוקט דימענשאַנז (L x W x H) | 5.9 X 5.9 X 2.68 אינטשעס (150 X 150 X 68.2 מם) |
| פאַבריקאַנט | Vivotek ינק. |
| רעקאָממענדעד ניצט | דרויסנדיק זיכערהייַט |
9. וואָראַנטי און שטיצן
For warranty information, technical support, and additional resources, please visit the official Vivotek webפּלאַץ אָדער קאָנטאַקט זייער קונה סערוויס אָפּטיילונג.
- פאַבריקאַנט: Vivotek ינק.
- Webפּלאַץ: www.vivotek.com (עקסampדער לינק, דער פאקטישער לינק קען זיין אנדערש)
- קאָנטאַקט: אָפּשיקן צו די webזייטל פֿאַר רעגיאָנאַלע שטיצע קאָנטאַקט אינפֿאָרמאַציע.
Please have your model number (FE9391-EHV-V2) and purchase date available when contacting support.