1. הקדמה
א דאנק פארן קויפןasing the COSTWAY Outdoor Propane Patio Heater. This manual provides essential information for the safe assembly, operation, maintenance, and troubleshooting of your new heater. Please read all instructions carefully before use and retain this manual for future reference.
This 40,000 BTU propane heater is designed to provide warmth and ambiance to your outdoor living spaces, featuring a dancing flame and portable design with wheels for easy movement.
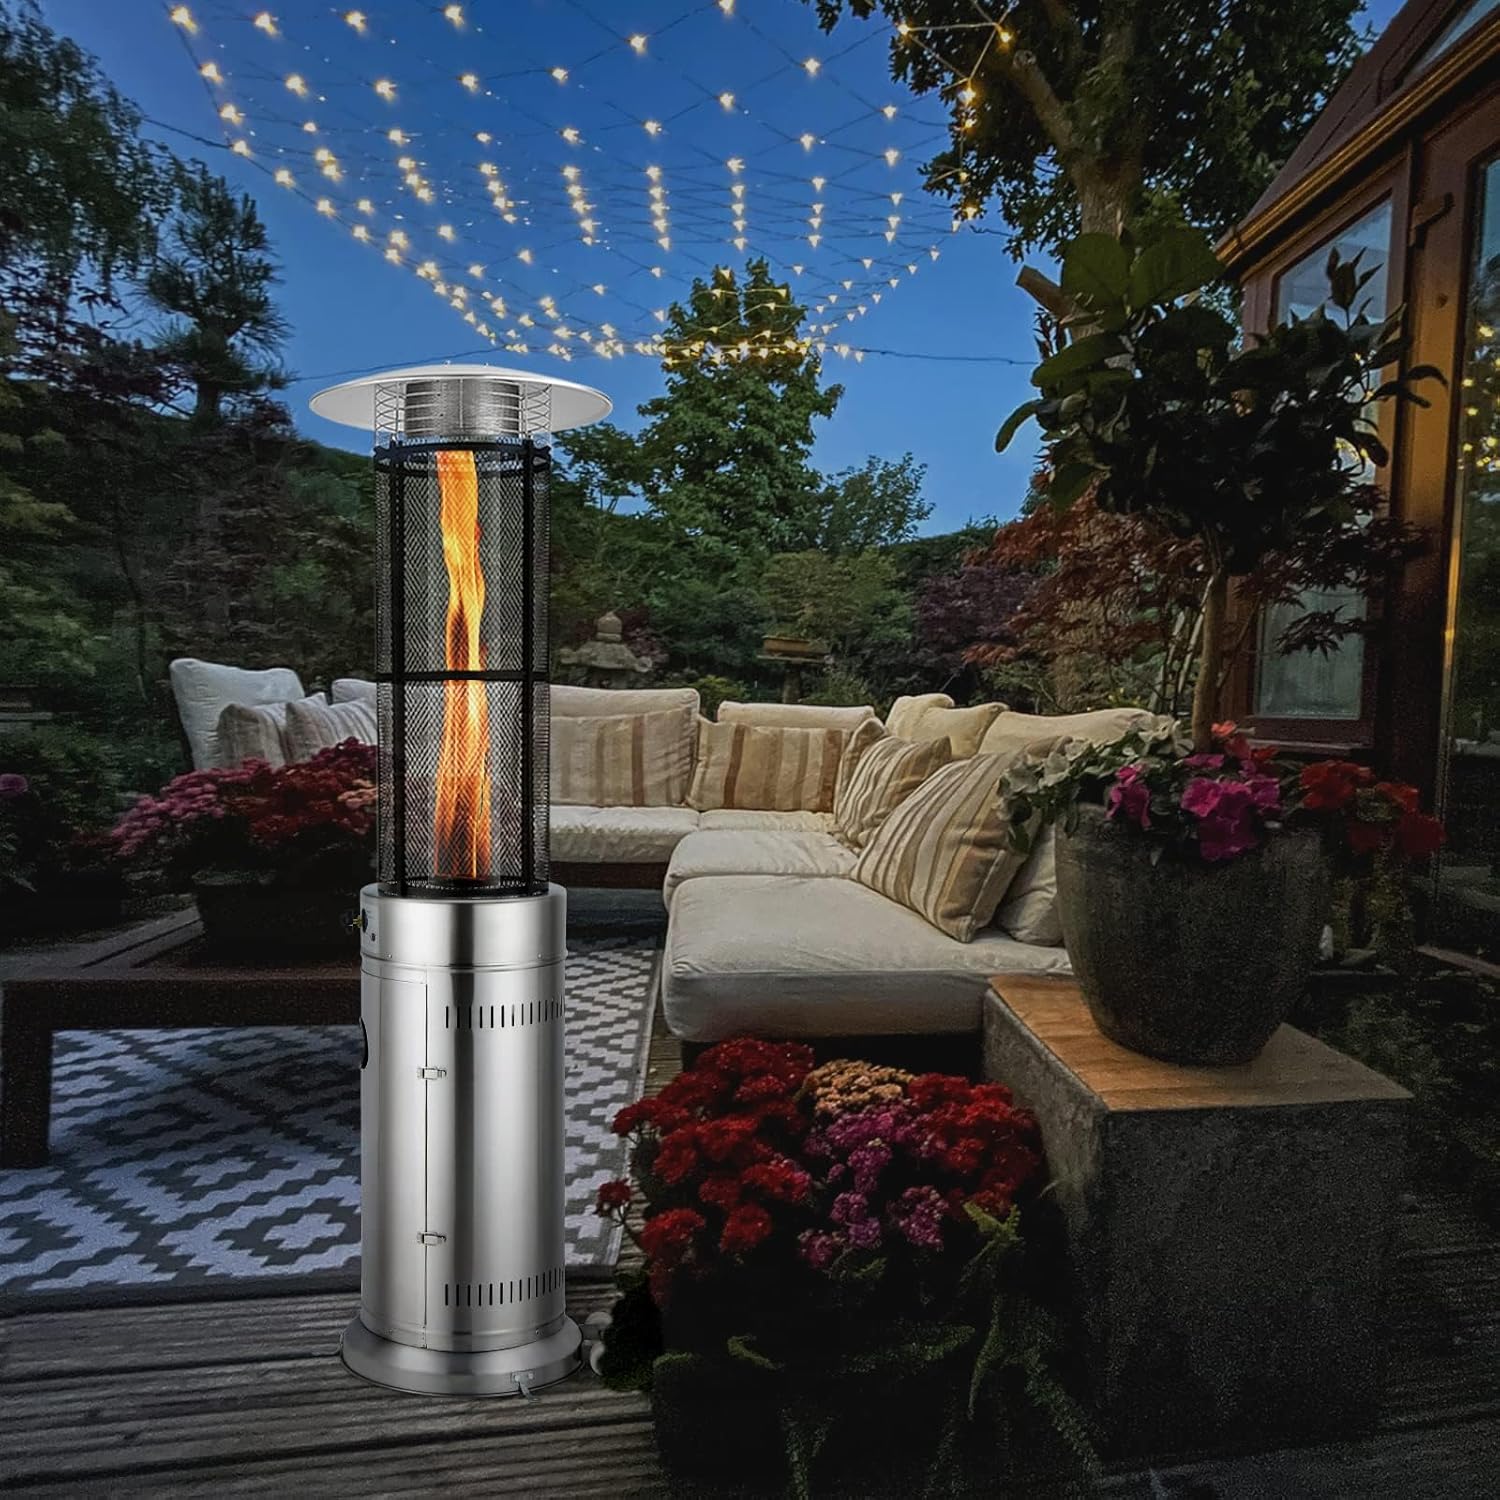
Image 1.1: The COSTWAY Outdoor Propane Patio Heater providing warmth in an outdoor patio setting.
2. וויכטיק סאַפעטי אינפֿאָרמאַציע
ווארענונג: For outdoor use only. Never operate this heater indoors or in enclosed spaces. Improper installation, adjustment, alteration, service, or maintenance can cause injury or property damage. Read the installation, operating, and maintenance instructions thoroughly before installing or servicing this equipment.
- Always keep the heater area clear and free from combustible materials, gasoline, and other flammable vapors and liquids.
- Maintain proper clearances from combustible materials: 24 inches from sides and rear, 36 inches from top.
- ענשור טויגן ווענאַליישאַן בעשאַס אָפּעראַציע.
- Dual Safety Protections: This heater is equipped with tip-over protection, which automatically shuts off the gas supply if the heater is accidentally knocked over. It also features flame protection, which cuts off the gas if the flame extinguishes.
- Do not store a spare liquid propane (LP) cylinder under or near this appliance.
- Always use the heater on a firm, level surface. Four ground nails are provided for higher stability.
- קיינמאָל לאָזן די כיטער אַנאַטענדיד בשעת אין אָפּעראַציע.
- האַלטן קינדער און פּעץ אַוועק פון די כיטער.

Image 2.1: Illustration of the heater's dual safety features: automatic shut-off upon tipping and flame-out protection.
3. פּעקל אינהאַלט
Before assembly, ensure all parts are present and undamaged. If any parts are missing or damaged, do not attempt to assemble or operate the heater. Contact customer service for assistance.
- Heater Base Assembly
- Heat-Resistant Glass Tube
- Metal Mesh Guard
- Premium Top Reflector
- Gas Hose and Regulator (Excess Flow Valve)
- Portable Wheels (2)
- Ground Fixers (4)
- האַרדווער פּאַק (שרויף, ניסלעך, וואַשערס)
- ינסטראַקשאַנז מאַנואַל
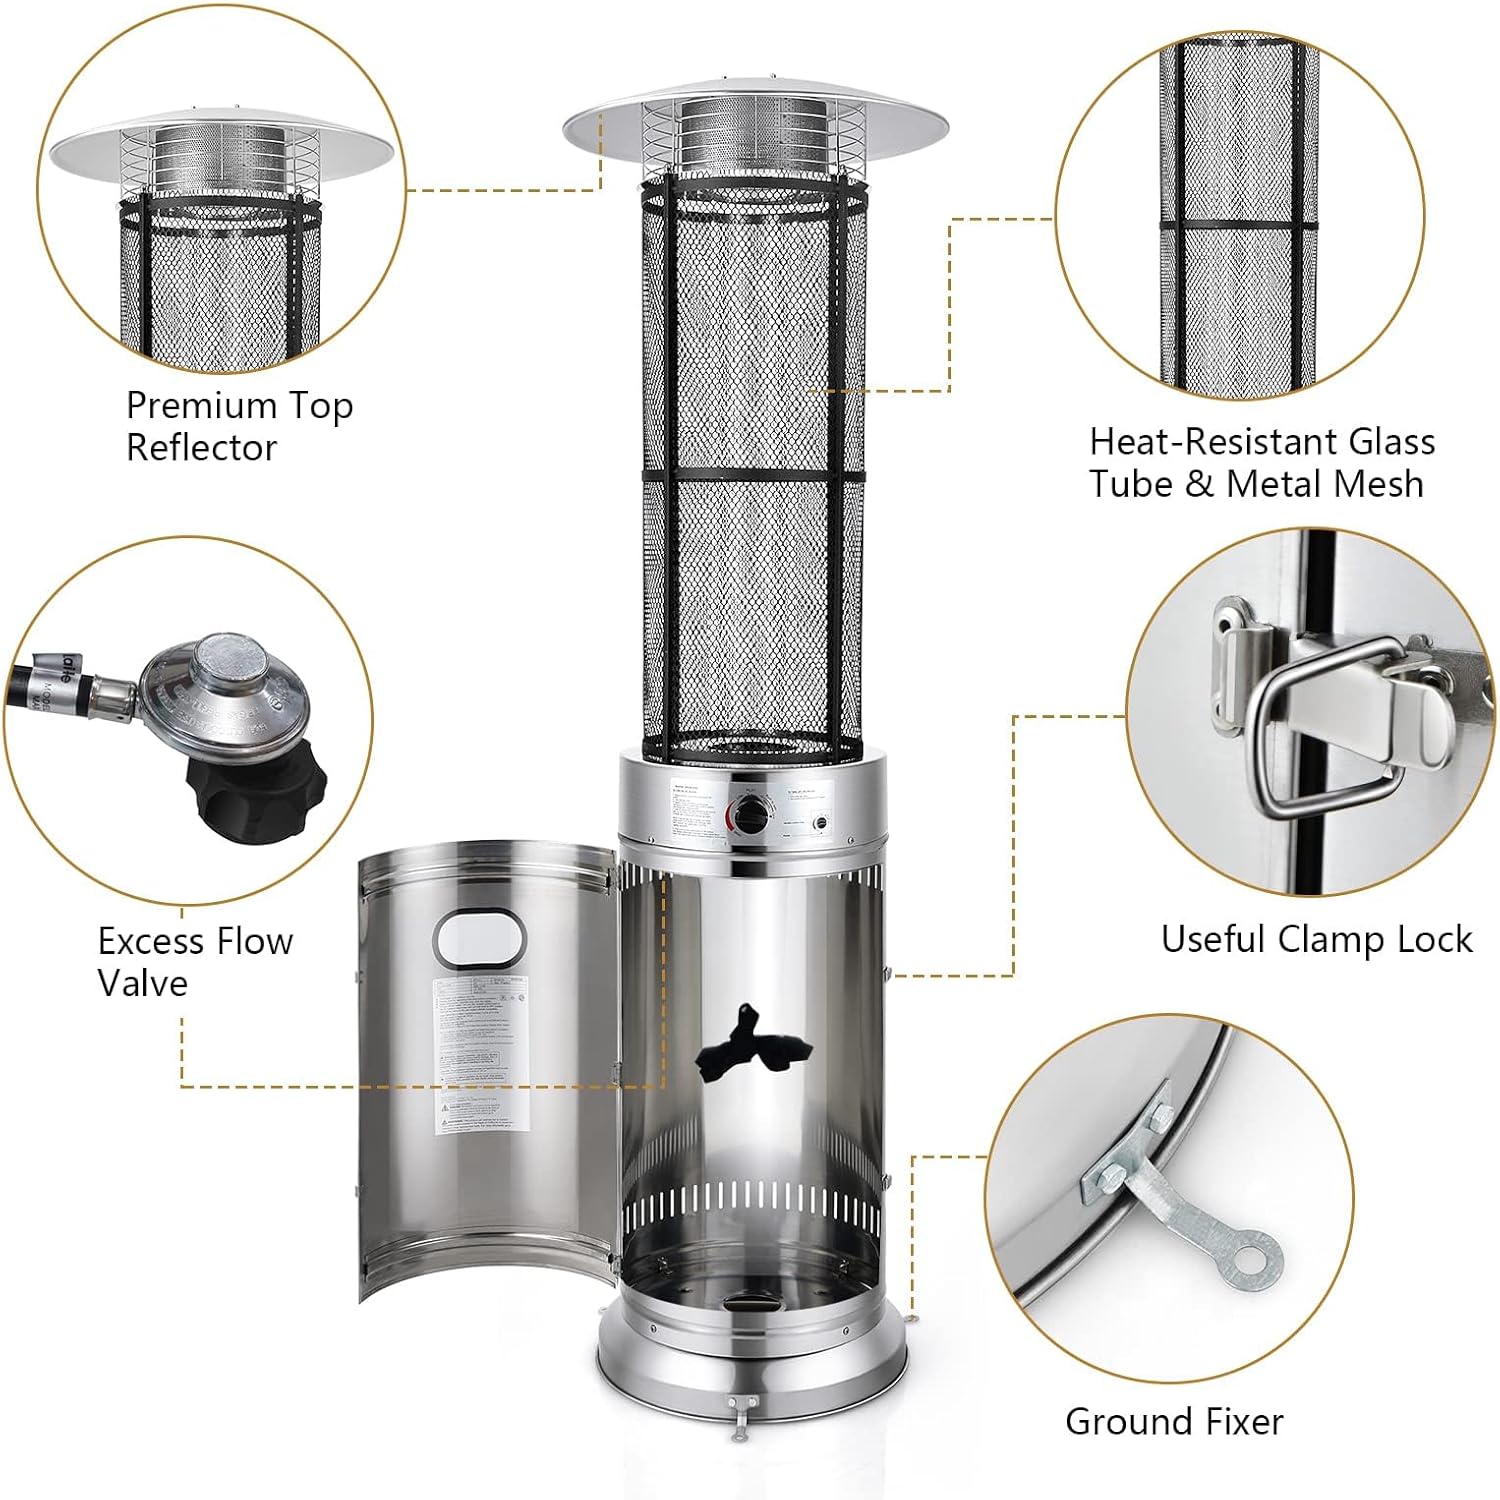
בילד 3.1: דעטאַלירט view of the heater's main components and accessories.
4. אַסעמבלי אינסטרוקציעס
Assembly is required. Follow the detailed instructions provided in the included manual. A 20 lbs propane cylinder tank is required for operation and is not included with the heater.
- אָפּלייגן קאַמפּאָונאַנץ: פֿאָרזיכטיק אַרויסנעמען אַלע טיילן פֿון דער פֿאַרפּאַקונג און לייגן זיי אויס אויף אַ ריינער, גלאַטער ייבערפֿלאַך.
- צוטשעפּען ווהעעלס: Secure the two portable wheels to the designated points on the heater base using the provided hardware.
- Install Glass Tube and Mesh: Carefully insert the heat-resistant glass tube into the central column. Then, attach the metal mesh guard around the glass tube, securing it according to the manual's diagrams.
- Mount Top Reflector: Place the premium top reflector onto the upper section of the heater, ensuring it is securely fastened.
- פאַרבינדן גאַז שלאַנג: Attach the gas hose with the excess flow valve to the heater's gas inlet. Ensure all connections are tight.
- Secure Base Panels: Assemble the base panels around the propane tank compartment, using the useful clamp lock to secure them.
- Install Ground Fixers: For added stability, install the four ground fixers to the base of the heater, especially if placing on soft ground.
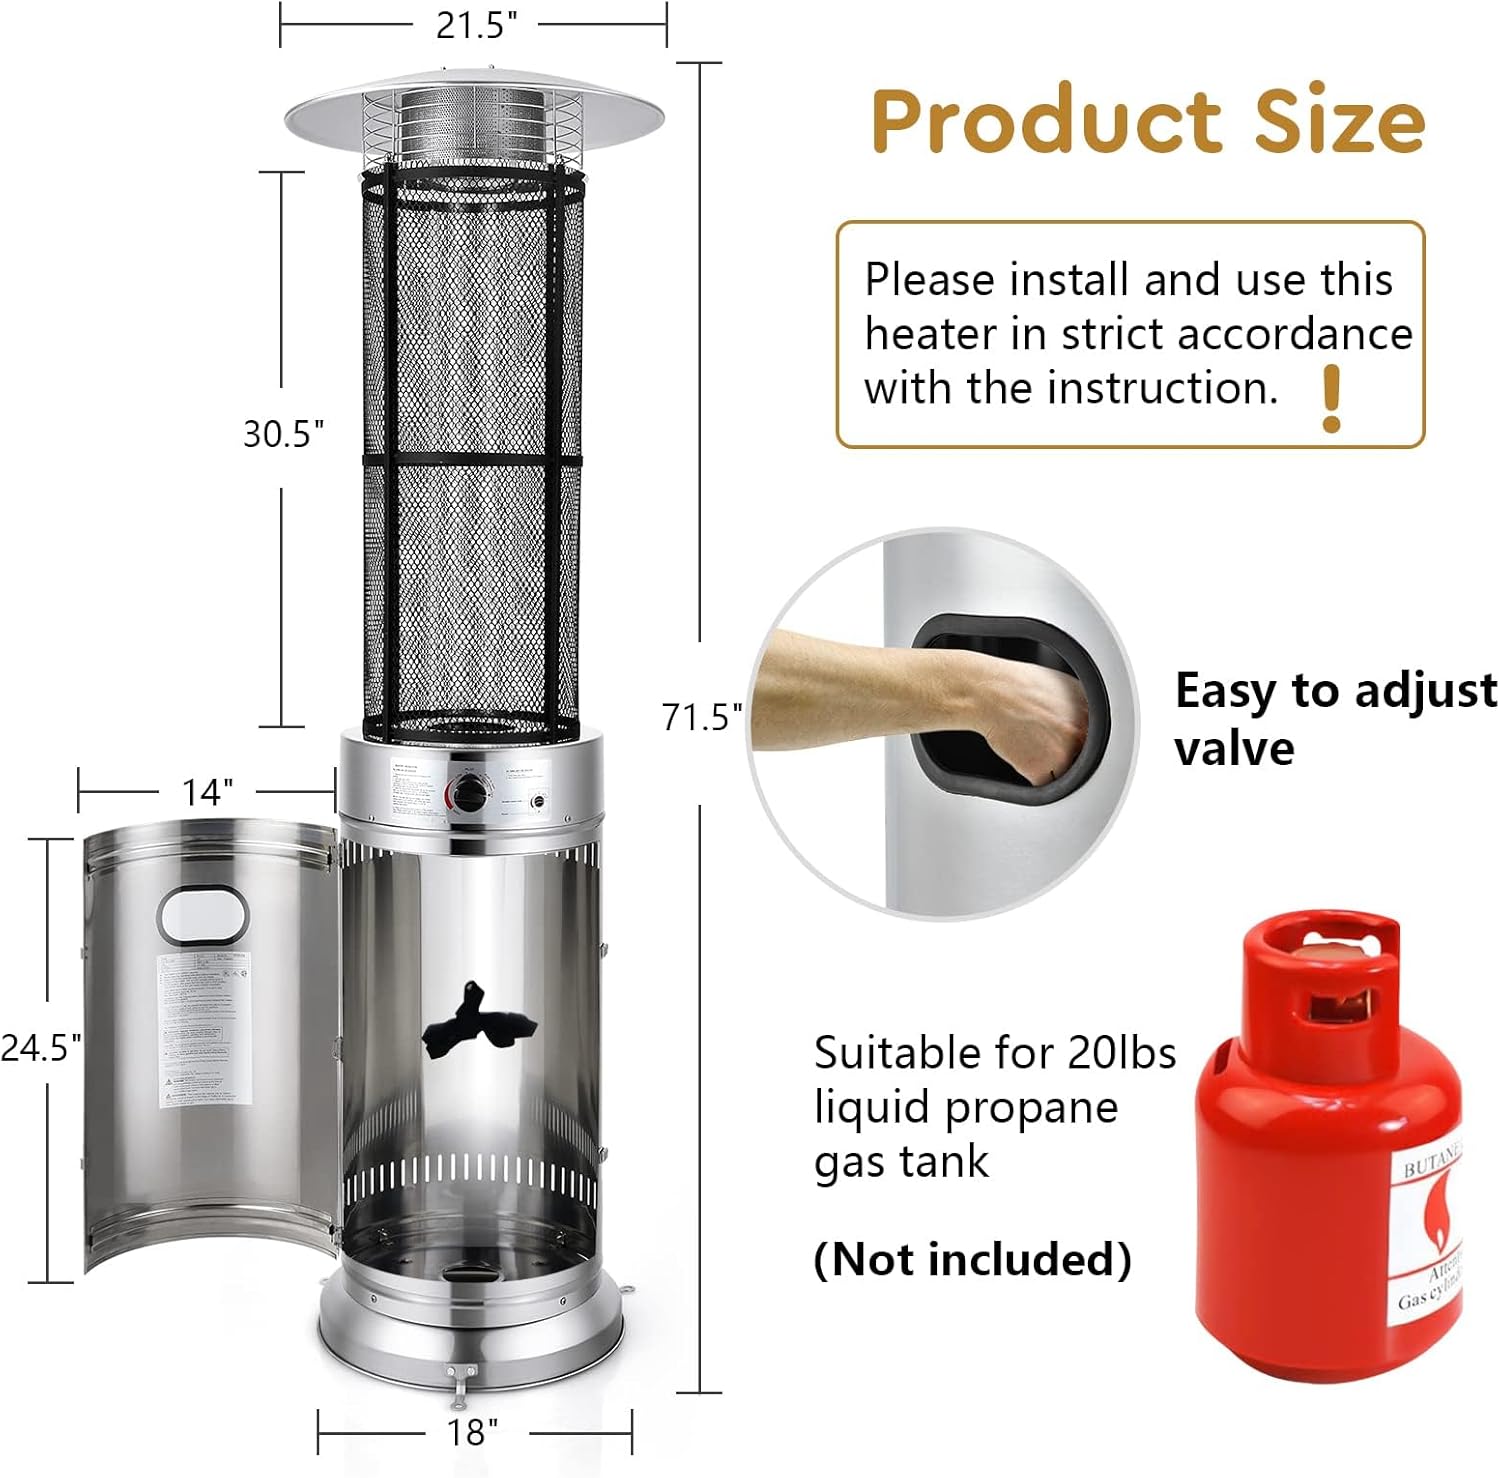
Image 4.1: Product dimensions and key components for assembly, including the propane tank compartment.
5. Setup and Gas Connection
Before connecting the propane tank, ensure the heater is placed in a suitable outdoor location, away from any combustible materials and with adequate ventilation.
- Propane Tank Requirement: This heater operates with a standard 20 lbs liquid propane (LP) cylinder tank (not included). Ensure the tank is full and in good condition.
- Place Propane Tank: Open the heater's base door and carefully place the 20 lbs propane tank inside the designated compartment.
- פֿאַרבינדן רעגולאַטאָר: Connect the regulator assembly from the heater to the propane tank valve. Turn the regulator coupling nut clockwise until it is fully tightened. Do not overtighten.
- ליק טעסט: After connecting the tank, perform a leak test. Mix a solution of soapy water (50% soap, 50% water). Apply the solution to all gas connections. If bubbles appear, there is a leak. Tighten the connection or replace the faulty part. Do not use the heater if a leak is detected.
- עפֿענען גאַז ווענטיל: Slowly open the main valve on the propane tank fully counter-clockwise.
6. אַפּערייטינג ינסטרוקטיאָנס
The heater features an easy-to-operate ignition system. Always ensure the area is clear before ignition.
- Prepare for Ignition: זיכער מאַכן אַז דער פּראָפּאַן טאַנק ווענטיל איז גאָר אָפֿן.
- Ignite Pilot Light: Depress and turn the control knob counter-clockwise to the "IGNITE" - "PILOT" position. Keep the knob depressed for approximately 60 seconds to allow gas to flow and the pilot light to establish. You may hear a click as the igniter sparks.
- Verify Pilot Light: Once the pilot light is lit, continue to hold the knob for a few more seconds, then release. If the pilot light goes out, repeat step 2.
- אַדזשאַסטירן היץ סעטטינג: After the pilot light is stable, turn the control knob to your desired heat setting: "LOW" or "HIGH". The dancing flame will become visible and heat will radiate outwards.
- צו קער אַוועק: Turn the control knob clockwise to the "OFF" position. Close the valve on the propane tank.

Image 6.1: The control knob for easy ignition and heat adjustment, along with the portable wheels.
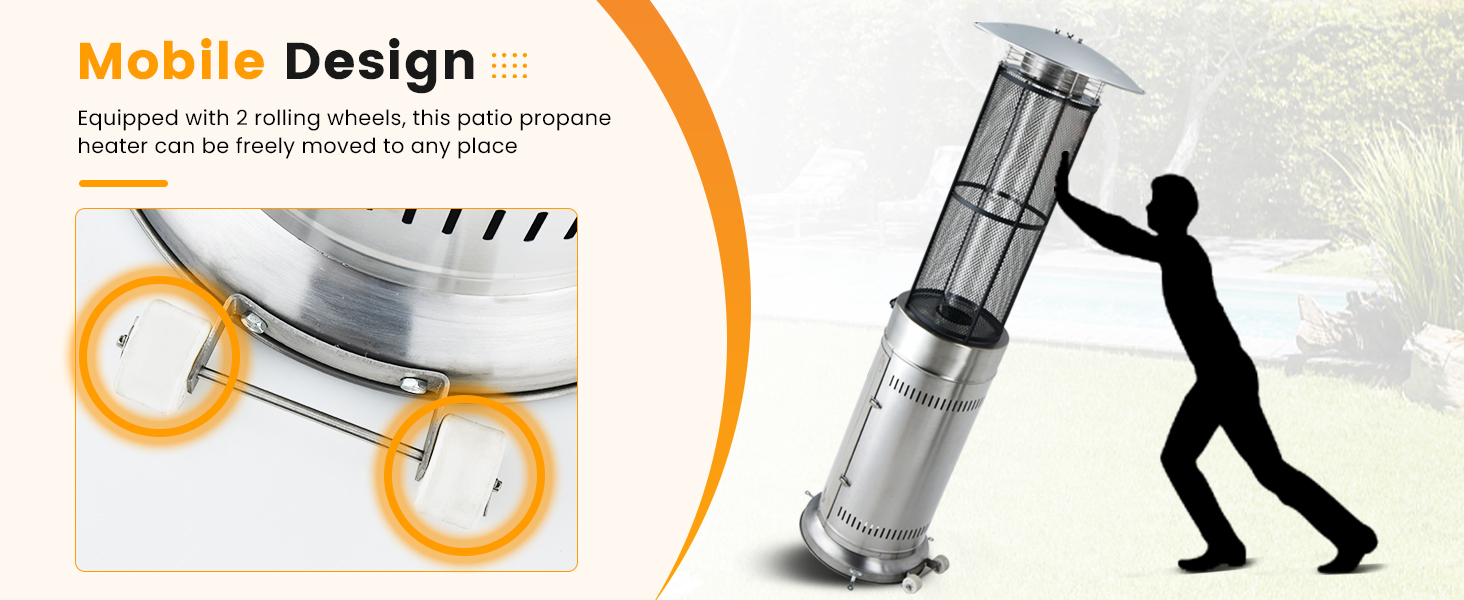
Image 6.2: Visual guide for starting and controlling the heater, including the convenient control knob and easy-to-adjust valve.
7. וישאַלט
Regular maintenance ensures safe and efficient operation of your patio heater.
- רייניקונג: Keep the exterior surfaces clean. Use a soft, damp cloth to wipe down the stainless steel. Do not use abrasive cleaners or solvents. Ensure the heater is completely cool before cleaning.
- ברענער און גלאז רער: Periodically inspect the burner and glass tube for any obstructions (e.g., spider webs, debris). Clean gently with a soft brush if necessary.
- גאַז קאַנעקשאַנז: Regularly check all gas connections for tightness and signs of wear. Perform a leak test at the beginning of each heating season or if the gas tank has been disconnected.
- סטאָרידזש: When not in use for extended periods, disconnect the propane tank and store the heater in a dry, protected area. Consider using a weather-resistant cover.
8. טראָובלעשאָאָטינג
If you encounter issues with your heater, refer to the following common problems and solutions.
| פּראָבלעם | מעגלעך סיבה | לייזונג |
|---|---|---|
| כיטער וועט נישט אָנצינדן. | No gas flow; Pilot light not established; Igniter issue. | Ensure propane tank valve is fully open. Depress control knob longer during pilot ignition. Check for gas leaks. Ensure igniter electrode is clean and properly spaced. |
| נידעריק היץ רעזולטאַט. | Low gas pressure; Obstruction in burner; Inadequate ventilation. | Check propane tank level. Ensure burner is clear of debris. Operate in a well-ventilated area. |
| Flame goes out during operation. | Low gas pressure; Tip-over safety activated; Wind. | Check propane tank level. Ensure heater is on a stable surface. Relocate heater to a less windy area if possible. |
| שמעקן פון גאַז. | גאַז רינען. | Immediately turn off gas at the tank. Perform a leak test. Do not operate until leak is resolved. If smell persists, evacuate the area and contact emergency services. |
9. ספּעסאַפאַקיישאַנז
| שטריך | דעטאַל |
|---|---|
| סאָרט | קאָסטוויי |
| מאָדעל נומער | 70860US-CYPO |
| היץ רעזולטאַט | 40,000 BTU |
| באַהיצונג קאַווערידזש | 10 FT in Diameter |
| ברענוואַרג טיפּ | Propane (20 lbs tank not included) |
| פּראָדוקט דימענשאַנז | 18"ד רענטגענ 18"וו רענטגענ 71.5"ה |
| פּונקט וואָג | 36 פונט |
| ספּעציעלע פֿעיִקייטן | Fast Heating, Portable Wheels, Tip-Over Protection, Flame Protection |
| דרינענדיק / דרויסנדיק באַניץ | בלויז דרויסנדיק |
| קאָליר | זילבער |
10. וואָראַנטי און שטיצן
For warranty information or technical support, please refer to the contact details provided at the point of purchase or visit the official COSTWAY webזייטל. האַלט אייער קויף קוויטל ווי אַ באַווייַז פון קויפן.


