1. הקדמה
This manual provides essential information for the safe and efficient operation of your Hisense 100L9G Laser TV Projector. Please read it thoroughly before using the product and retain it for future reference.
פּעקל אינהאַלט
באַשטעטיקט אַז אַלע זאכן וואָס זענען אויסגערעכנט אונטן זענען אַרייַנגערעכנט אין אייער פּעקל:
- Hisense 100L9G Laser TV Console
- 100-inch Ambient Light Rejecting (ALR) Screen
- מאַכט שנור
- ווייַט קאָנטראָל
- רייניקונג קיט

Image 1.1: Hisense 100L9G Laser TV Projector and 100-inch ALR Screen setup.
ווידעא 1.1: אפיציעל איבערview of the Hisense L9G Laser TV features and capabilities.
2. זיכערקייַט אינפֿאָרמאַציע
אָבסערווירן די פאלגענדע זיכערהייט מיטלען צו פאַרמייַדן שעדיקן צו די פּראָדוקט און ענשור באַניצער זיכערהייט:
- לייזער זיכערקייַט: Do not look directly into the projector lens when the unit is operating. The laser light can cause eye damage.
- ווענטילאַטיאָן: זיכערט זיך אז עס איז דא גענוג ווענטילאציע ארום דעם פראיעקטאר. בלאקירט נישט די ווענטילאציע עפענונגען.
- מאַכט צושטעלן: Use only the provided power cord and connect to a grounded outlet.
- פליסיק ויסשטעלן: האַלט דעם פּראָיעקטאָר ווײַט פֿון וואַסער אָדער אַנדערע פֿליסיקייטן.
- רייניקונג: Use a soft, dry cloth for cleaning. Refer to the Maintenance section for detailed cleaning instructions.
3. סעטאַפּ
3.1 פּראָיעקטאָר פּלאַצירונג
The Hisense 100L9G is an Ultra Short Throw (UST) projector. Place the projector on a stable, flat surface directly below the intended projection area on the screen. The distance from the wall will determine the image size. For a 100-inch screen, refer to the projector's quick setup guide for precise placement measurements.
3.2 ALR Screen Assembly
Follow the separate assembly instructions provided with your 100-inch Ambient Light Rejecting (ALR) screen. Ensure the screen is securely mounted and perfectly flat for optimal image quality.
3.3 קאַנעקשאַנז
Connect your devices to the projector using the appropriate ports on the rear panel.

Image 3.1: Rear panel connections including HDMI, USB, LAN, and audio ports.
- הדמי: Connect your external devices (e.g., Blu-ray player, gaming console, cable box) to the HDMI ports. HDMI 2 (eARC) supports Audio Return Channel for compatible sound systems.
- וסב: פֿאַרבינדט USB סטאָרידזש דעוויסעס פֿאַר מעדיע פּלייבאַק אָדער ווייכווארג דערהייַנטיקונגען.
- לאן: פֿאַרבינדט אַן עטערנעט קאַבל פֿאַר אַ דראָטיקער אינטערנעט פֿאַרבינדונג.
- דיגיטאַל אַודיאָ אַרויס (אָפּטיש): פֿאַרבינדן זיך צו אַן עקסטערנעם אַודיאָ ופֿנעמער אָדער סאַונדבאַר.
- אַודיאָ אַרויס (3.5 מ״מ): Connect to headphones or external speakers.
- מאַכט: Connect the power cord to the AC IN port and then to a power outlet.
4. ערשטע סעטאַפּ און קאָנפיגוראַציע
4.1 מאַכט אויף
After connecting all cables, press the power button on the projector or the remote control to turn on the unit. The Hisense logo will appear on the screen.
4.2 ערשטמאָליקע סעטאַפּ וויזאַרד
Upon first power-on, the projector will guide you through an initial setup wizard. This includes:
- שפּראַך סעלעקציע
- נעץ פֿאַרבינדונג (Wi-Fi אָדער עטהערנעט)
- גוגל אקאונט אריינלאָגירן (פֿאַר אַנדרויד טעלעוויזיע פֿונקציעס)
- Channel scan (if connecting an antenna)
- Image alignment and focus adjustment
4.3 בילד סעטטינגס
Access the picture settings menu to adjust brightness, contrast, color, and sharpness to your preference. The 100L9G features TriChroma laser technology for enhanced color accuracy and brightness.

Image 4.1: The Hisense 100L9G provides a bright picture suitable for various room lighting conditions.
5. Operating Your Laser TV
5.1 רימאָוט קאָנטראָל
Use the provided remote control to navigate menus, adjust settings, and control playback. Familiarize yourself with the button layout for common functions like power, input, volume, and smart TV access.
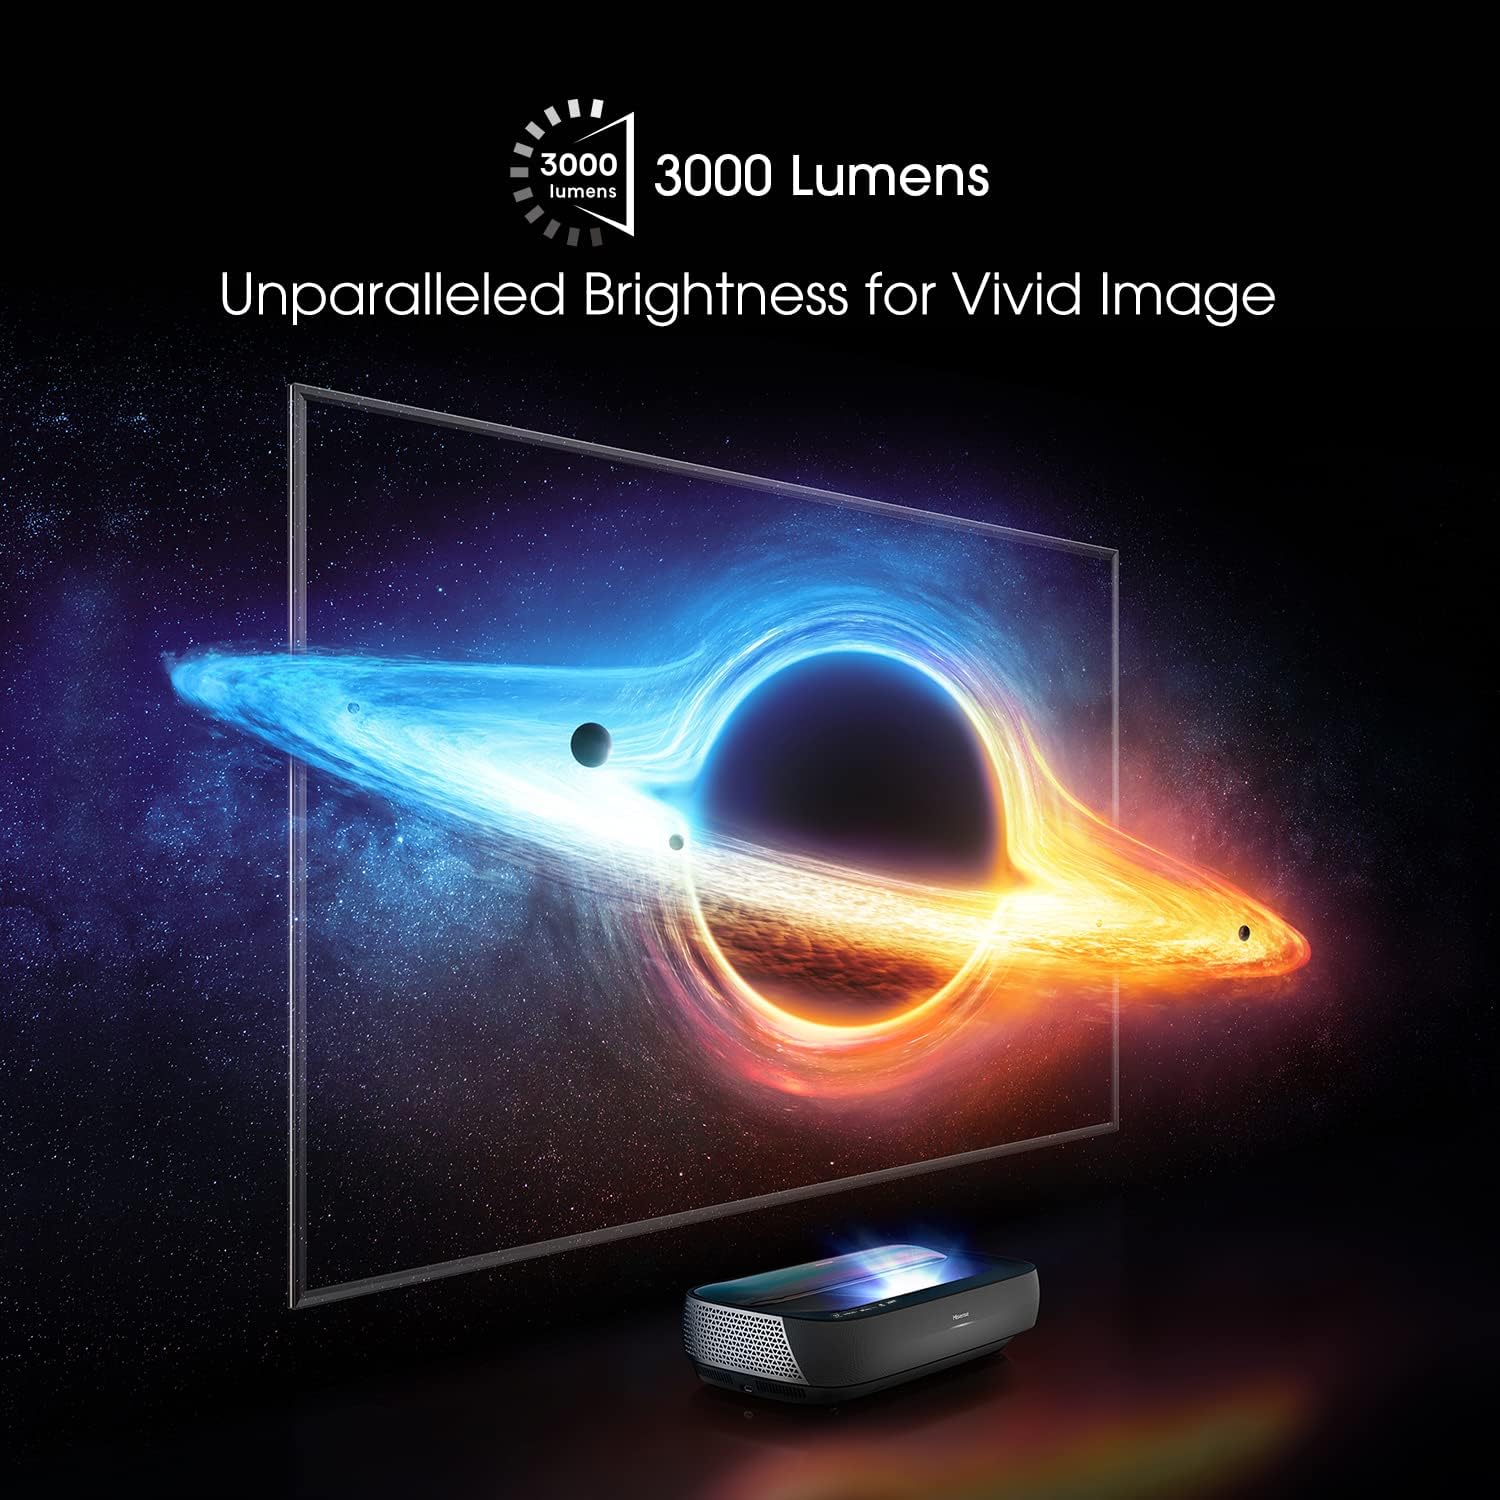
Image 5.1: The remote control for the Hisense 100L9G Laser TV.
5.2 אַרייַנשרייַב סעלעקציע
Press the 'Input' button on the remote to switch between connected HDMI devices, built-in apps, or other sources.
5.3 סמאַרט טעלעוויזיע פֿעיִקייטן (אַנדרויד טעלעוויזיע)
The 100L9G runs on Android TV, providing access to a wide range of streaming apps, Google Assistant, and Chromecast built-in. Navigate the Android TV interface using the remote control.
5.4 Audio Settings (Dolby Atmos)
The projector features built-in 40W Dolby Atmos sound. Access the audio settings menu to customize sound modes, equalizer settings, and ensure Dolby Atmos is enabled for compatible content.

Image 5.2: The Hisense 100L9G features integrated Dolby Atmos sound for immersive audio.
6. אַוואַנסירטע פֿעיִקייטן
6.1 TriChroma Laser Engine
The 100L9G utilizes a TriChroma laser engine with pure red, green, and blue lasers, achieving 107% of the BT.2020 color space for a wide and accurate color reproduction.

Image 6.1: TriChroma laser technology uses three distinct lasers for superior color performance.
6.2 פֿילם־מאַכער מאָדע
Activate Filmmaker Mode to experience movies and TV shows as the creators intended, with original aspect ratios, colors, and frame rates preserved.
6.3 HDR10/HLG Support
The projector supports HDR10 and HLG formats, delivering enhanced contrast and color detail with compatible content.
6.4 MEMC Technology
Motion Estimation, Motion Compensation (MEMC) technology provides smooth motion for fast-paced content, reducing blur and judder.
7. וישאַלט
7.1 רייניקן דעם פּראָיעקטאָר
Regularly clean the exterior of the projector with a soft, dry, lint-free cloth. Do not use abrasive cleaners or solvents. For the lens, use a specialized lens cleaning cloth and solution, following the instructions in the provided cleaning kit.
7.2 Cleaning the ALR Screen
Gently wipe the ALR screen surface with a soft, dry microfiber cloth. Avoid applying pressure or using harsh chemicals, as this can damage the screen's special coating. Refer to the screen's specific cleaning instructions.
7.3 לאַזער ליכט מקור
The laser light source has an estimated operating life of 25,000 hours. No user maintenance is required for the laser module itself.
8. טראָובלעשאָאָטינג
If you encounter issues with your Hisense 100L9G Laser TV, refer to the following common problems and solutions:
| פּראָבלעם | מעגלעך לייזונג |
|---|---|
| קיין מאַכט | Check if the power cord is securely connected to both the projector and the power outlet. Ensure the outlet is functional. |
| קיין בילד | Verify the correct input source is selected. Check HDMI cable connections. Ensure the projector lens is not obstructed. |
| נעבעך בילד קוואַליטעט | Adjust focus and keystone correction. Check picture settings (brightness, contrast, color). Ensure the screen is clean and flat. |
| קיין געזונט | Check volume levels. Ensure external audio devices are correctly connected and selected. Verify audio output settings. |
| ווייַט קאָנטראָל נישט ארבעטן | Replace batteries. Ensure there are no obstructions between the remote and the projector. |
אויב די פראבלעם בלייבט נאך פרובירן די לייזונגען, ביטע קאנטאקטירט Hisense קאסטומער סופארט.
9. ספּעסאַפאַקיישאַנז
| שטריך | באַשרייַבונג |
|---|---|
| מאָדעל נומער | 100L9G-CINE100 |
| ווייַז האַכלאָטע | 3840 רענטגענ 2160 (4K UHD) |
| ברייטנאַס | 3000 לומענס |
| ליכט מקור | טריטשראָמאַ לייזער |
| ליכט מקור אַפּערייטינג לעבן | 25,000 שעה |
| Color Space Coverage | 107% BT.2020 |
| פאַרשטעלן גרייס | 100 Inches (with ALR Screen) |
| אַודיאָ רעזולטאַט | 40W with Dolby Atmos |
| אָפּערייטינג סיסטעם | אַנדרויד טעלעוויזיע |
| קאַנעקטיוויטי | HDMI (3x, including eARC), USB (2x), LAN, Digital Audio Out, Audio Out, 802.11 ac/b/g/n Wi-Fi, Bluetooth |
| מאַכט קאַנסאַמשאַן | 320 וואטס |
| Dimensions (Projector) | 610mm (W) x 346mm (D) x 155mm (H) (Approximate, based on image) |
10. וואָראַנטי און שטיצן
10.1 וואָראַנטי אינפֿאָרמאַציע
The Hisense 100L9G Laser TV Projector comes with a 2-year manufacturer's warranty. Please retain your proof of purchase for warranty claims. The warranty covers defects in materials and workmanship under normal use.
10.2 קונה שטיצן
For technical assistance, troubleshooting beyond this manual, or warranty service, please contact Hisense customer support. Visit the official Hisense website for contact details and the most up-to-date support information.
היסענס אפיציעל Webפּלאַץ: www.hisense-usa.com


