1. הקדמה
This manual provides comprehensive instructions for the installation, operation, and maintenance of your Keonjinn LED Bathroom Mirror. Designed for modern bathrooms, this mirror features integrated LED lighting, dimmable brightness, and an anti-fog function to enhance your daily routine. Please read this manual thoroughly before installation and use to ensure safe and optimal performance.

Image: The Keonjinn LED Bathroom Mirror installed above a vanity, showcasinזײַן באַלויכטענעם ראַם און גלאַטן דיזײַן.
2. זיכערקייַט אינפֿאָרמאַציע
Your safety is paramount. Please adhere to the following precautions during installation and operation:
- טראָגט שטענדיק זיכערהייט ברילן בעת אינסטאַלאַציע צו באַשיצן אייערע אויגן.
- Installation requires a minimum of two people due to the mirror's size and weight.
- It is highly recommended that installation be performed by a qualified electrician to ensure proper wiring and electrical safety.
- The anti-fog function automatically turns off after one hour of continuous use to prevent overheating. If further defogging is needed, press the defogging button again.
- This mirror is designed for auxiliary lighting and is not intended as the sole light source for a room.
- Ensure the power supply is disconnected before any installation, maintenance, or cleaning procedures.
3. פּאַקינג רשימה
ביטע באַשטעטיקן אַז אַלע קאָמפּאָנענטן זענען פאַראַן איידער איר הייבט אָן די אינסטאַלאַציע:
- שפּיגל רענטגענ 1
- קלאַמער רענטגענ 2
- Screws x (4+2)
- וואנט אנקערס-א
- וואנט אנקערס-ב
- Positioning Ruler x 1
Required tools (not included): Electric Drill, Hammer, Marker Pen, Level.
4. ינסטאַלירונג
The Keonjinn LED Bathroom Mirror offers flexible installation options, supporting both plug-in and hardwired connections. It can be mounted vertically or horizontally using French cleat brackets for secure attachment.
4.1 פאַר-ינסטאַלירונג סטעפּס
- Unpack the mirror carefully from its multi-layered packaging. Inspect for any damage.
- Determine the desired mounting orientation (vertical or horizontal) and location. Ensure adequate space around the mirror for optimal aesthetic and function. For a 36"L x 30"W mirror, it is suitable for 36"-42" vanities. Recommended space height is >42" above the vanity.
- Turn off the main power supply at the circuit breaker before beginning any electrical work.

Image: The mirror can be installed horizontally or vertically to suit your bathroom layout.

Image: Tips for selecting the right mirror size relative to your vanity and surrounding fixtures.
4.2 אויפשטעלן דעם שפּיגל
- Use the provided positioning ruler to mark the drill hole locations on the wall. Ensure the ruler is level.
- Drill holes at the marked spots. Insert the appropriate wall anchors (A or B depending on wall type) into the drilled holes.
- Mount the two French cleat brackets securely to the wall using the provided screws. Ensure they are firmly attached and level.
- Carefully lift the mirror with assistance and slot it onto the mounted brackets. Ensure the mirror is securely seated.

Image: Detail of the easy French cleat mounting system on the back of the mirror.
4.3 עלעקטריקאַל קאַנעקשאַן
The mirror supports both plug-in and hardwired connections. Choose the method suitable for your installation.
- פּלוגין: Connect the mirror's power cord to a standard wall outlet.
- האַרדווירעד: For a seamless look, hardwire the mirror directly into your electrical system. This allows control via a normal wall switch. Consult a professional electrician for this method.

Image: The mirror can be connected via plug or hardwired to a wall switch.
4.4 אינסטאַלאַציע ווידעאָס
For a visual guide, please refer to the official installation videos:
Video: "How to Install the LED Bathroom Mirror" - This video provides a step-by-step guide on the installation process of the LED bathroom mirror.
Video: "Keonjinn LED front light mirror installation effect" - This video demonstrates the visual effect of the installed LED front light mirror.
5. אָפּעראַציע
The Keonjinn LED Bathroom Mirror is designed for intuitive operation with touch-sensitive controls.
5.1 Power and Brightness Control
The mirror features a dimmable LED light. A simple tap on the power button will turn the mirror light on or off. To adjust the brightness (from 10% to 100%), press and hold the power button. The mirror has a memory function that remembers your last brightness setting.

Image: Long press the touch button to adjust brightness, with memory function to recall your preferred setting.

Image: Smooth dimming from 10% to 100% allows for customizable lighting.
5.2 אַנטי-נעפּל פונקציע
The anti-fog function is controlled separately from the light. Tap the anti-fog button to activate it. This feature quickly clears condensation from the mirror surface, ensuring a clear reflection even after a hot shower. The anti-fog function will automatically turn off after one hour of continuous use to prevent overheating.

Image: One touch activates the anti-fog feature for a clear mirror.

Image: Fast and safe defogging clears the mirror in minutes and includes an automatic shut-off.
5.3 Operation Videos
See the mirror's features in action:
Video: "Keonjinn bathroom mirror with lights 6000k" - A demonstration of the mirror's lighting features.
Video: "Keonjinn LED Bathroom Vanity Mirror Anti-Fog Dimmable" - This video highlights the anti-fog and dimmable features of the mirror.
6. וישאַלט
To keep your Keonjinn LED Bathroom Mirror in pristine condition, follow these simple maintenance guidelines:
- רייניקונג: Use a soft, lint-free cloth and a non-abrasive glass cleaner. Spray the cleaner onto the cloth, not directly onto the mirror, to avoid liquid seeping into the electrical components.
- ויסמיידן האַרב קעמיקאַלז: Do not use cleaners containing ammonia, vinegar, or abrasive particles, as these can damage the mirror's surface or frame.
- שטויב: Regularly dust the mirror and its frame with a dry, soft cloth.
- עלעקטריקאַל קאַמפּאָונאַנץ: Ensure the mirror is completely dry before restoring power after cleaning. Do not attempt to service the internal electrical components yourself.
7. טראָובלעשאָאָטינג
If you encounter any issues with your mirror, refer to the following common troubleshooting steps:
| פּראָבלעם | מעגלעך סיבה | לייזונג |
|---|---|---|
| געפירט לייץ טאָן ניט קער אויף. | No power supply; loose connection; faulty wiring. | Check if the power outlet is working. Ensure all electrical connections are secure. If hardwired, verify the wall switch is on and consult an electrician if necessary. |
| די אַנטי-נעפּל פונקציע אַרבעט נישט. | Anti-fog function timed out (1 hour); power issue. | Press the anti-fog button again. Check power supply to the mirror. |
| Brightness adjustment not working. | Incorrect operation; internal fault. | Ensure you are pressing and holding the power button to adjust brightness. If the issue persists, contact customer support. |
| Mirror fogs up despite anti-fog being on. | Excessive humidity; anti-fog area limitation. | Ensure bathroom ventilation is adequate. The anti-fog function covers a specific area of the mirror, not the entire surface. |
| Mirror is flickering when hardwired. | Connected to a dimmer switch. | This mirror has a built-in dimmer. Do not connect it to an external dimmer switch. Replace the external dimmer with a standard on/off switch. |
If these steps do not resolve the issue, please contact Keonjinn customer support for further assistance.
8. ספּעסאַפאַקיישאַנז
| שטריך | דעטאַל |
|---|---|
| סאָרט | Keonjinn |
| פּראָדוקט דימענשאַנז | 36"ל x 30"ברייט |
| פאָרעם | רעקטאַנגגיאַלער |
| ראַם מאַטעריאַל | גלאז |
| מאַונטינג טיפּ | Wall Mount (French Cleat) |
| ספּעציעלע פֿעיִקייטן | Lighted, Dimmable, Anti-Fog, Touch Sensor, Frameless, Tempered Glass |
| קאָליר טעמפּעראַטור | 6000K (קיל ווייַס) |
| מאַטעריאַל | 5mm High Quality Glass with Silver Coating |
| פּונקט וואָג | 5 פונט |
| מאַכט דרייווער | UL-Listed LED power driver |

Image: Product dimensions and suitability for various vanity sizes.

Image: High density LED strip ensures brighter and more uniform light.

Image: Strong and safe tempered glass is resistant to breakage.
9. וואָראַנטי & שטיצן
Keonjinn is committed to providing high-quality products and excellent customer service.
- וואָראַנטי: דער פּראָדוקט קומט מיט אַ 2 יאָר וואָראַנטי.
- צוריקקער און אויסטויש: For products that arrive in damaged condition, please send photos of the damaged mirror, and you will receive a free replacement without returning the damaged one.
- Free Repair: Enjoy free mirror repair within 3 years of purchase.
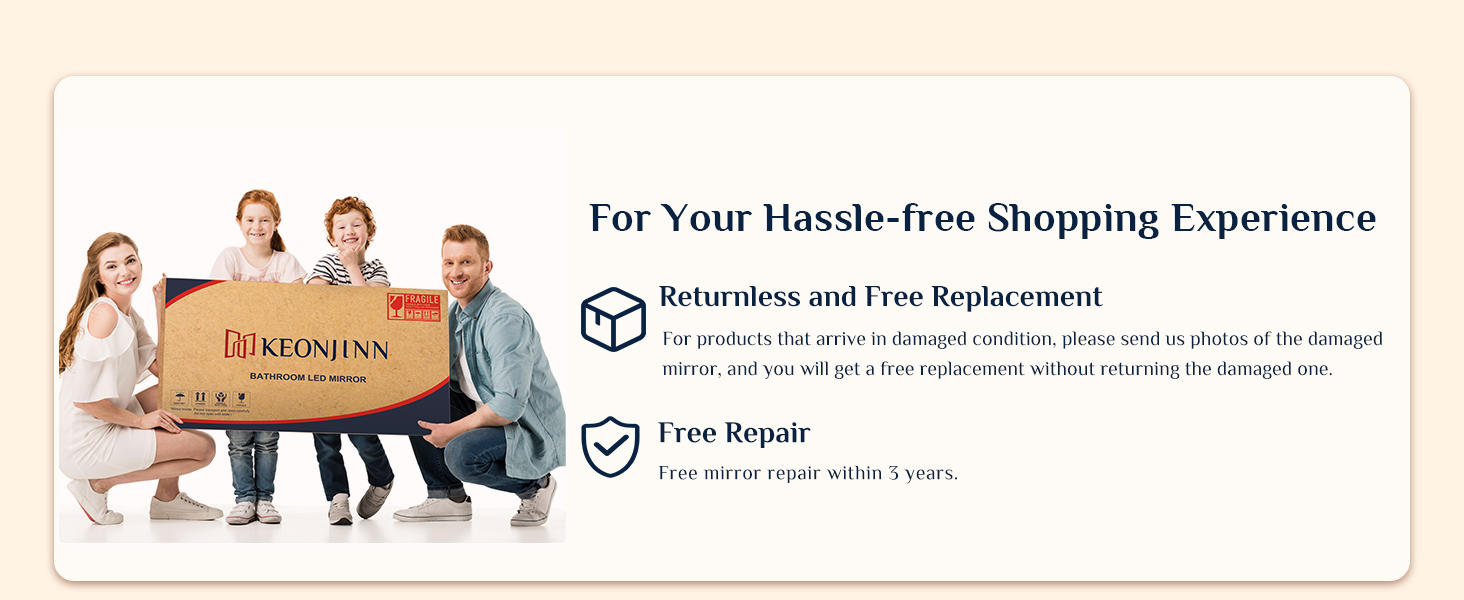
Image: Keonjinn offers a hassle-free shopping experience with robust support policies.
9.1 קאָנטאַקט שטיצן
If you need support regarding Keonjinn products or orders, follow these steps:
- Locate the product on the platform where you purchased it and click on the "Keonjinn" brand name.
- Select "Ask a question" on the page to access the Seller Messaging Assistant.
- In the chat window, follow the prompts to type your question and submit it. Please include any personal information, such as email address, physical address, phone numbers, or credit card numbers, only if specifically requested by the seller.

Image: Steps to contact Keonjinn customer support.


