1. הקדמה
Welcome to the user manual for your Nokia 216 Dual SIM mobile phone. This guide provides essential information to help you set up, operate, and maintain your device. The Nokia 216 (RM-1187) is a classic feature phone designed for reliable communication, featuring dual SIM capability, a 2.4-inch display, and a VGA camera.
Please read this manual carefully to ensure proper use and to get the most out of your phone.
2. פּעקל אינהאַלט
זיכער מאַכן אַז אַלע זאכן זענען פאַראַן אין דיין פּראָדוקט פּאַקעט:
- Nokia 216 Dual SIM Mobile Phone (RM-1187)
- באַטערי
- מאַכט אַדאַפּטער
- וסב קאַבלע
3. דיווייס איבערview
Familiarize yourself with the key components of your Nokia 216 phone.
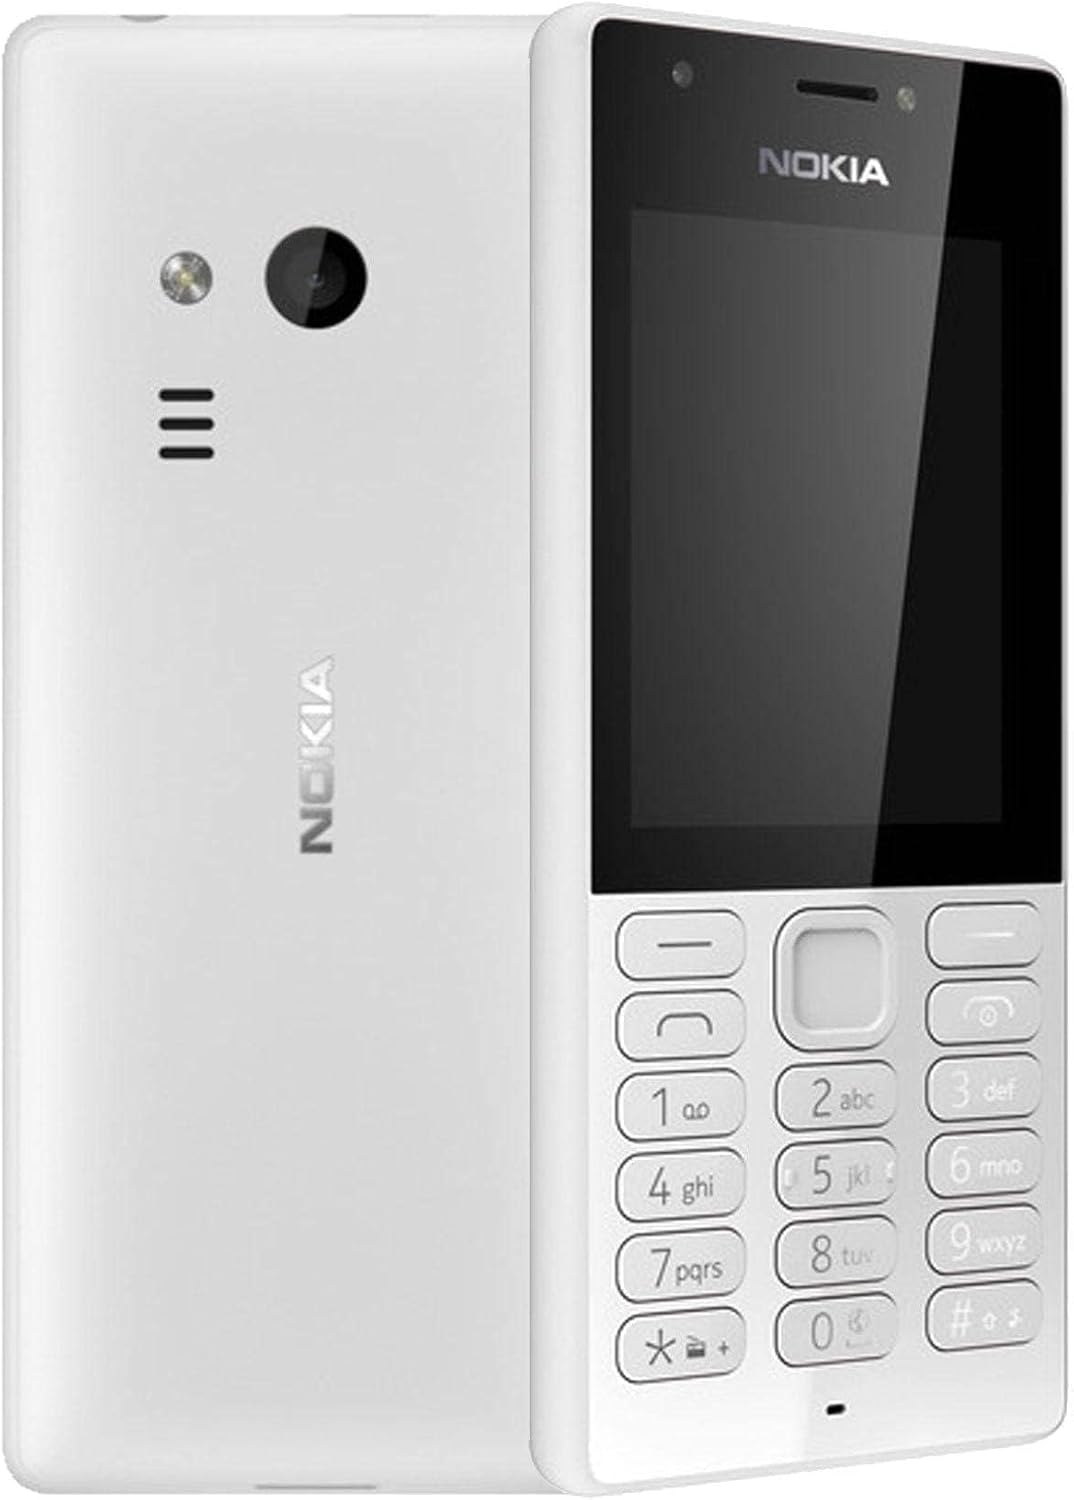
פיגורע 3.1: פראָנט און צוריק view of the Nokia 216 Dual SIM mobile phone. The front shows the display, earpiece, and numeric keypad. The back features the rear camera, LED flash, and loudspeaker grille.

פיגורע 3.2: פראָנט view of the Nokia 216 Dual SIM mobile phone. This image highlights the 2.4-inch display, the navigation keys, and the alphanumeric keypad for dialing and text input.

פיגורע 3.3: צוריק view of the Nokia 216 Dual SIM mobile phone. This view shows the rear VGA camera lens, the LED flash, and the Nokia branding.
שליסל קאַמפּאָונאַנץ:
- ווייַז: 2.4-inch QVGA screen.
- קיפּאַד: Alphanumeric keypad for dialing and text entry, with navigation keys.
- דערציען אַפּאַראַט: VGA camera with LED flash.
- הילכיקער: For audio playback and hands-free calls.
- מיקראָפאָן: For voice input during calls and recordings.
- 3.5 מם אַודיאָ דזשאַק: פֿאַר כעדפאָונז אָדער עקסטערנע רעדנערס.
- טשאַרדזשינג פּאָרט: Micro-USB port for charging and data transfer.
4. סעטאַפּ
4.1. Insert SIM Card(s)
- אויסלעשן דעם טעלעפאָן און אָפּשטעקן יעדן טשאַרדזשער.
- Carefully remove the back cover by prying it open from the notch.
- אויב די באַטאַרייע איז אין, הייבן עס אויס.
- Insert the SIM card(s) into the designated slot(s) with the gold contacts facing down. For dual SIM models, ensure both SIMs are correctly seated.
- If applicable, insert a microSD card into its slot for additional storage.
- פאַרבייַטן די באַטאַרייע.
- גלייכט אויס דעם הינטערשטן דעקל און דריקט עס פעסט ביז עס קליקט אריין אין פלאץ.
4.2. אָפּצאָל די באַטאַרייע
- פאַרבינדן די מאַכט אַדאַפּטער צו אַ וואַנט ווענטיל.
- Plug the micro-USB end of the cable into the phone's charging port.
- דער באַטעריע אינדיקאַטאָר אויפן עקראַן וועט ווײַזן דעם טשאַרדזשינג סטאַטוס.
- אַמאָל גאָר אויפגעלאָדן, אָפּשטעקן דעם טשאַרדזשער פֿון טעלעפאָן און דערנאָך פֿון דער וואַנט אַוטלעט.
5. אַפּערייטינג ינסטרוקטיאָנס
5.1. מאַכט אויף / אויסגעלאשן
- צו מאַכט אויף: Press and hold the power key (usually the red 'End Call' key) until the phone vibrates and the Nokia logo appears.
- צו מאַכט אַוועק: Press and hold the power key until the 'Power off' option appears on the screen, then select it.
5.2. מאכן קאַללס
- From the home screen, enter the phone number using the numeric keypad.
- Press the green 'Call' key to initiate the call.
- To end a call, press the red 'End Call' key.
5.3. שיקן טעקסט מעסעדזשעס (SMS)
- גיין צו מעניו > אַרטיקלען > שאַפֿן אָנזאָג.
- טיפּ דיין אָנזאָג ניצן די קיפּאַד.
- אַרייַן די טעלעפאָן נומער פון דעם באַקומער אָדער סעלעקטירן פון קאָנטאַקטן.
- אויסקלייַבן שיקן.
5.4. ניצן די קאַמעראַ
- גיין צו מעניו > אַפּאַראַט.
- ראַם דיין שאָס ניצנדיק דעם דיספּליי.
- דריק דעם צענטער נאַוויגאַציע קנעפּל צו נעמען אַ פאָטאָ.
6. וישאַלט און קער
To ensure the longevity and optimal performance of your Nokia 216, follow these care guidelines:
- Keep the device dry: Moisture can damage electronic circuits.
- Use original accessories: Only use batteries, chargers, and accessories approved by Nokia.
- ריין דזשענטלי: Use a soft, clean, dry cloth to clean the surface of the device.
- ויסמיידן עקסטרעם טעמפּעראַטורעס: Do not expose your device to very high or low temperatures.
- שעפּן מיט זאָרג: ויסמיידן דראַפּינג אָדער אונטערטעניק די מיטל צו שטאַרק ימפּאַקץ.
7. טראָובלעשאָאָטינג
If you encounter issues with your Nokia 216, try these common troubleshooting steps:
| פּראָבלעם | לייזונג |
|---|---|
| דער טעלעפאָן טוט נישט קער אויף | Ensure the battery is charged. Connect the charger and try again. Check if the battery is properly inserted. |
| קיין נעץ סיגנאַל | Check if the SIM card is correctly inserted. Move to an area with better network coverage. Restart the phone. |
| די באַטאַרייע איז נישט טשאַרדזשינג | Ensure the charger is properly connected to both the phone and the power outlet. Try a different power outlet or charger. Check for any damage to the charging port. |
| קען נישט מאַכן אָדער באַקומען רופן | Check network signal. Ensure your SIM card is active and has sufficient credit/plan. Verify that call barring is not enabled. |
8. ספּעסאַפאַקיישאַנז
| שטריך | דעטאַל |
|---|---|
| סאָרט | נאָקיאַ |
| מאָדעל נאָמען | RM-1187 |
| אָפּערייטינג סיסטעם | Symbian 9.1 (Series 30) |
| פאַרשטעלן גרייס | 2.4 אינטשעס |
| פאַרשטעלן האַכלאָטע | 240 X 320 בילדצעלן |
| דערפרישן קורס | 90 הז |
| אינסטאַלירטע ראַם גרייס | 256 מב |
| זכּרון סטאָרידזש קאַפּאַסיטי | 3.9 GB (Internal, likely for system/apps, expandable via microSD) |
| קפּו מאָדעל | A10 |
| סעליאַלער טעכנאָלאָגיע | 2G |
| דראָטלאָזע קאָמוניקאַציע טעכנאָלאָגיעס | סעליאַלער |
| קאַנעקטיוויטי טעכנאָלאָגיע | יו-עס-בי, בלועטוט, וויי-פיי |
| גפּס | א-גפּס |
| Primary Device User Interface | Buttons, Numeric Keypad, Microphone |
| אַנדערע קאַמעראַ פֿעיִטשערז | Rear Camera (VGA) |
| אַודיאָ דזשאַק | 3.5 מם |
| פאָרם פאַקטאָר | קלאַסיש |
| קאָליר | גרוי |
| רעדן צייט | אַרויף צו 18 שעה |
| פּונקט וואָג | 339 גראַמז |
| פּעקל דימענשאַנז | 13.4 X 12.6 X 3.6 סענטימעטער |
| וואָס איז אין די קעסטל | מאַכט אַדאַפּטער, וסב קאַבלע |
9. וואָראַנטי און שטיצן
For warranty information, please refer to the warranty card included in your product package or visit the official Nokia website. If you require further assistance or technical support, please contact Nokia customer service through their official channels.
האַלט אייער קויף קוויטל ווי אַ באַווייַז פון קויפן פֿאַר וואָראַנטי קליימז.


