1. הקדמה
This manual provides detailed instructions for the installation, operation, and maintenance of your ZEBRONICS H81 LGA 1150 Socket Motherboard. Designed for Intel Core i7/i5/i3 processors, this ATX motherboard supports DDR3 memory and features an Intel H81 Chipset. Please read this manual thoroughly before proceeding with installation to ensure proper functionality and to prevent damage.

בילד 1: הויפּט view of the ZEBRONICS H81 LGA 1150 Motherboard, showcasing its layout and components.
2. ספּעסאַפאַקיישאַנז
The following table outlines the key technical specifications of the ZEBRONICS H81 Motherboard:
| שטריך | באַשרייַבונג |
|---|---|
| פּראָסעססאָר סופּפּאָרט | Intel Core i7/i5/i3 processors (LGA 1150 Socket) |
| טשיפּסעט | Intel H81 |
| זכּרון שטיצן | 2 x DDR3 dual-channel slots, 1066/1333/1600MHz, Max 32GB |
| לאַן | Realtek 8105E 100/1000 Mbps |
| אַודיאָ | Realtek 662, 3x Audio Jacks for 6 channel HD Audio |
| צוריק פּאַנעל פּאָרץ | 1x USB Mouse/Keyboard, 1x VGA, 1x HDMI, 2x USB 3.0, 2x USB 2.0, 1x LAN, 3x Audio Jacks |
| אויף-באָרד קאַנעקטערז | Front panel, Speaker, Front panel audio, USB 2.0, 4x SATA, 4-pin CPU fan, SYS fan, 24-pin ATX power, 4-pin ATX 12V power, Clear CMOS header |
| יקספּאַנשאַן סלאָץ | 1 x PCI Express x16 סלאָט |
| פאָרם פאַקטאָר | אַטקס |
| דימענשאַנז | 21.3 X 5.7 X 26.8 סענטימעטער |
| וואָג | 560 ג |

Image 2: Visual representation of key features including H81 Chipset, DDR3 support, LGA 1150 socket, HDMI, 5.1 Audio, 100/1000 LAN, 4 SATA ports, and PCIe slot.
3. סעטאַפּ גייד
פֿאָלגט די סטעפּס פֿאַר ריכטיקער אינסטאַלאַציע פֿון אייער מאַדערבאָרד און אירע קאָמפּאָנענטן:
- צוגרייטונג: Ensure your computer case is compatible with the ATX form factor. Gather necessary tools including a screwdriver, thermal paste, and anti-static wrist strap.
- אינסטאַלירן סי-פּי-יו: Open the CPU socket lever. Carefully align the CPU with the socket (match the golden triangle on the CPU with the triangle on the socket) and gently place it in. Close the lever to secure the CPU. Apply a thin, even layer of thermal paste to the CPU's heat spreader.
- אינסטאַלירן סי-פּי-יו קולער: Mount the CPU cooler according to its manufacturer's instructions, ensuring good contact with the CPU and proper fan orientation. Connect the CPU fan cable to the 4-pin CPU fan connector on the motherboard.
- אינסטאַלירן ראַם: Open the clips on both ends of the DDR3 memory slots. Align the RAM modules with the slots, ensuring the notch on the module matches the key in the slot. Press down firmly on both ends until the clips snap into place.
- מאָונט מוטערבאָרד: Install the I/O shield into the rear opening of your computer case. Carefully place the motherboard into the case, aligning the screw holes with the standoffs. Secure the motherboard with screws.
- פאַרבינדן מאַכט: Connect the 24-pin ATX main power connector and the 4-pin ATX 12V CPU power connector from your power supply to the corresponding ports on the motherboard.
- פֿאַרבינדן סטאָרידזש דעוויסעס: Use SATA cables to connect your hard drives or SSDs to the SATA ports on the motherboard. Connect the power cables from your power supply to these devices.
- פֿאַרבינדן די פראָנט פּאַנעל קייבאַלז: Connect the power switch, reset switch, HDD LED, power LED, and front panel audio/USB cables from your case to the respective headers on the motherboard. Refer to the motherboard diagram for correct pin assignments.
- Install Expansion Cards (Optional): If installing a graphics card or other PCI Express cards, insert them into the appropriate slots and secure them with a screw.
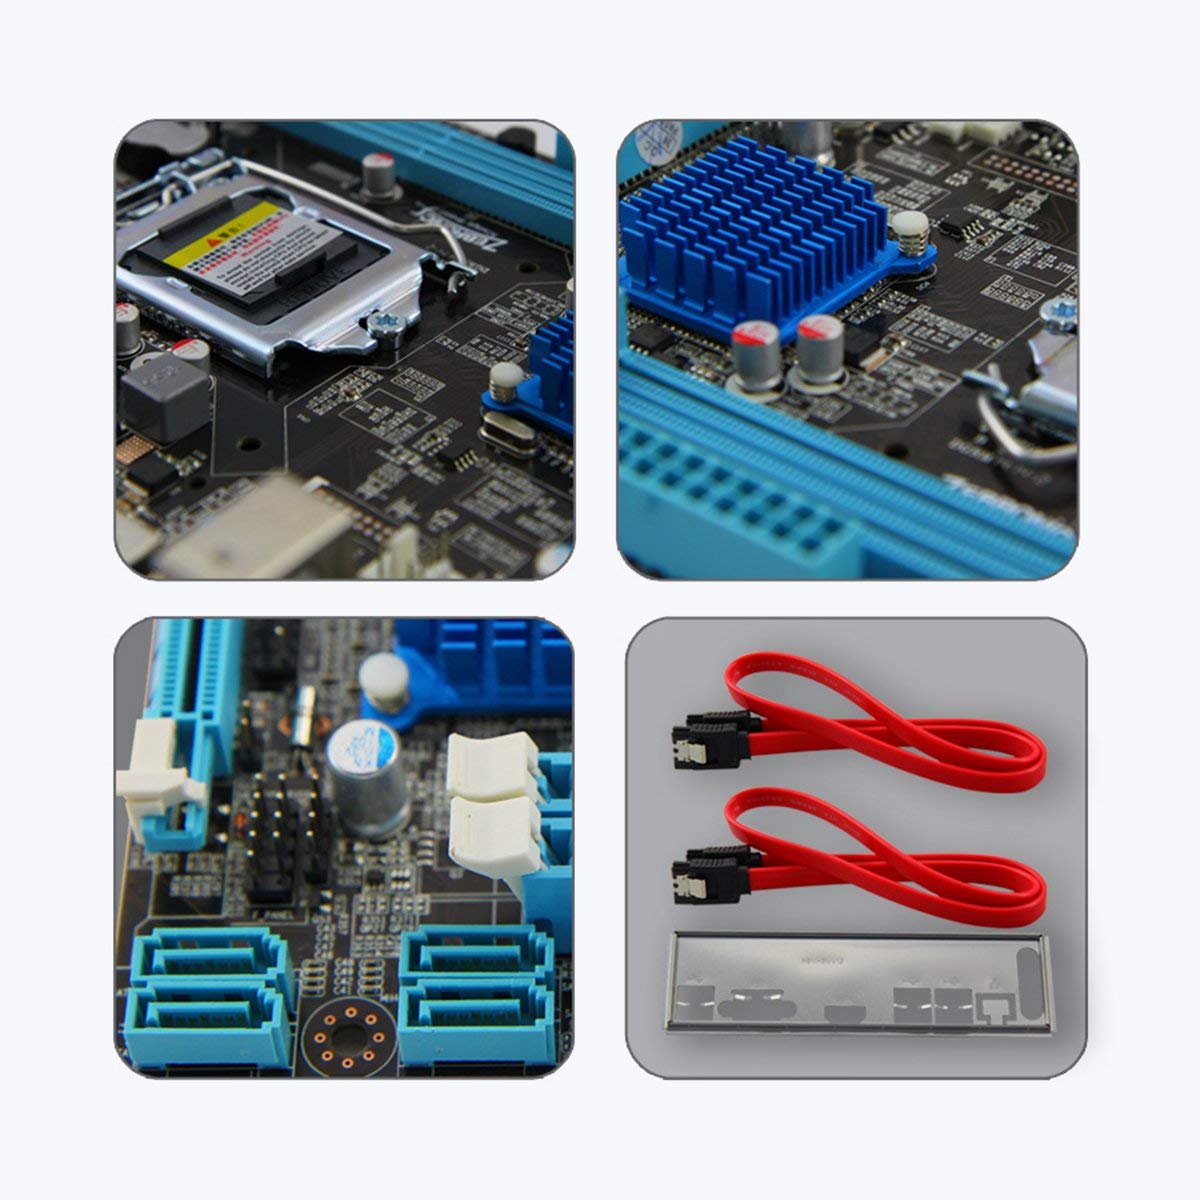
בילד 3: נאָענט־אַרויף views of motherboard components such as the CPU socket, chipset heatsink, SATA ports, and included accessories like SATA cables and the I/O shield.
4. אַפּערייטינג ינסטרוקטיאָנס
Once all components are installed and connected, you can power on your system:
- ערשט מאַכט אויף: After ensuring all connections are secure, connect your monitor, keyboard, and mouse. Plug in the power cord and press the power button on your computer case.
- בייאָוס/UEFI סעטאַפּ: During startup, repeatedly press the designated key (usually DEL or F2) to enter the BIOS/UEFI setup utility. Here you can configure boot order, system time, and other advanced settings. Save changes and exit to continue booting.
- אַפּערייטינג סיסטעם ינסטאַלירונג: Insert your operating system installation media (USB drive or DVD) and follow the on-screen prompts to install the OS.
- דרייווער ינסטאַלירונג: After OS installation, install the necessary drivers for your motherboard (chipset, LAN, audio, graphics) from the included driver CD or the ZEBRONICS webפּלאַץ.
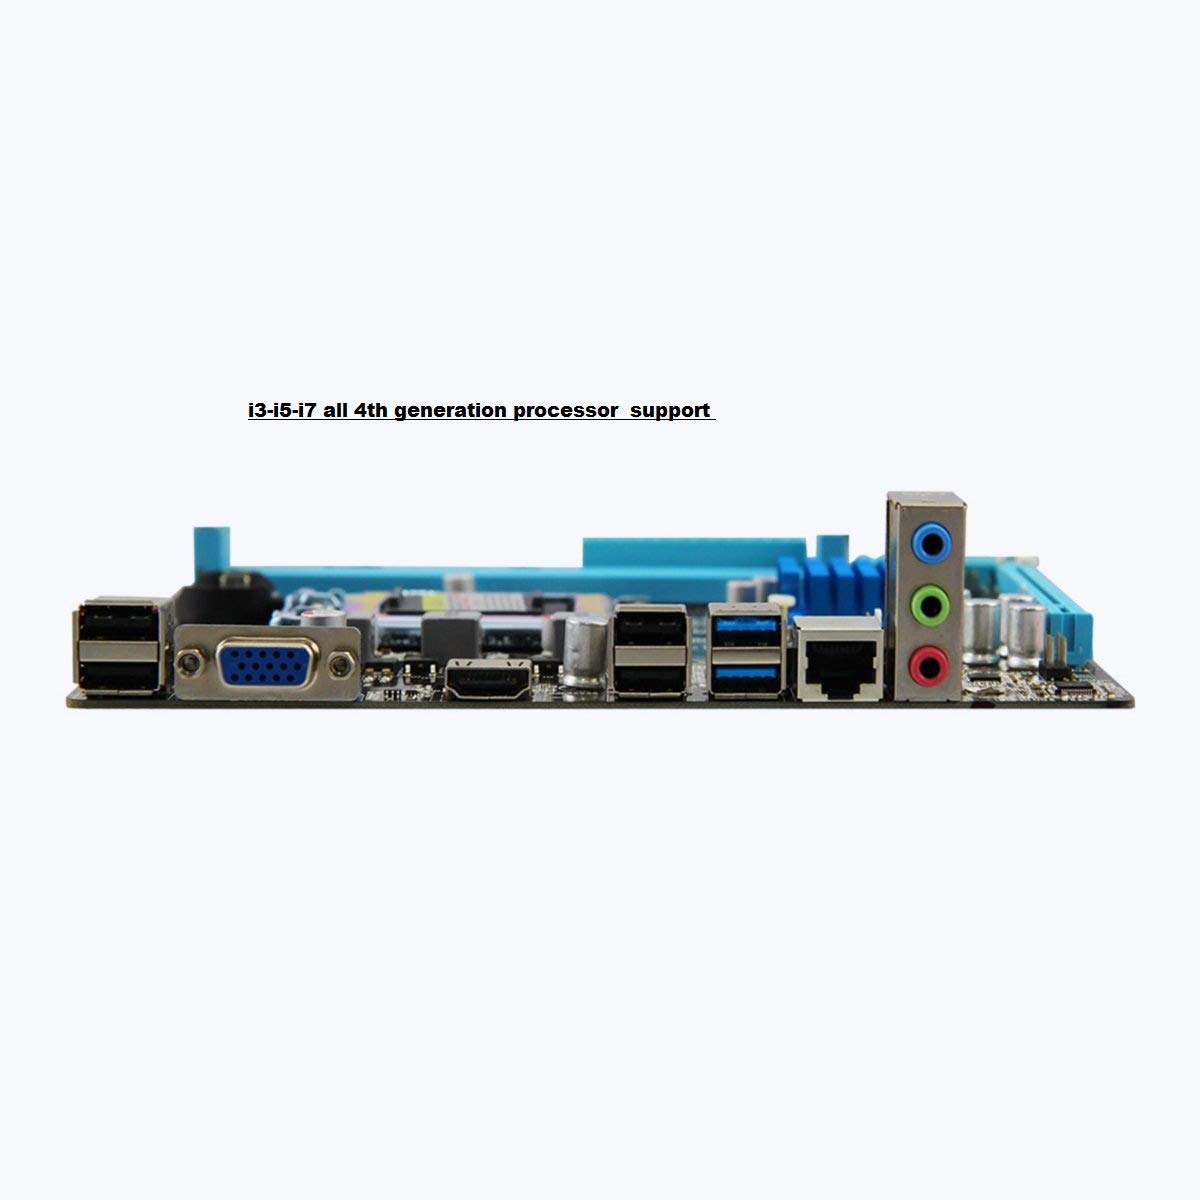
Image 4: Rear I/O panel of the ZEBRONICS H81 Motherboard, showing ports for USB, VGA, HDMI, LAN, and audio.
5. וישאַלט
רעגולערע אויפהאלטונג העלפט זיכער מאכן די לאנגעוויטי און אפטימאלע פערפארמאנס פון אייער מאדערבאארד:
- באַזייַטיקונג פון שטויב: רייניקט פּעריִאָדיש שטויב פֿון אינעווייניק פֿון אייער קאָמפּיוטער קעסטל, ספּעציעל פֿון היץ-זינקען און פֿענטערס, ניצנדיק קאָמפּרעסירטע לופֿט. מאַכט זיכער אַז די סיסטעם איז אויסגעלאָשן און נישט אַרויסגעטראָגן פֿון די פּלאָג איידער איר רייניקט.
- דרייווער דערהייַנטיקונגען: Keep your motherboard drivers (chipset, LAN, audio) updated to the latest versions available from the ZEBRONICS official webזייטל צו ענשור קאָמפּאַטאַבילאַטי און פאָרשטעלונג.
- בייאָוס/UEFI דערהייַנטיקונגען: Only update the BIOS/UEFI if necessary, following the instructions provided by ZEBRONICS carefully. Incorrect BIOS updates can render your motherboard inoperable.
- קאַבלע פאַרוואַלטונג: זיכער מאַכן אַז אינעווייניקסטע קאַבלען זענען אָרדנטלעך גערוטעד צו פֿאַרבעסערן די לופטפֿלוס און פֿאַרמייַדן שטערונג.
6. טראָובלעשאָאָטינג
אויב איר טרעפט פּראָבלעמען מיט אייער מאַדערבאָרד, זעט די פאלגענדע געוויינטלעכע טראָובלעשווטינג טריט:
- קיין מאַכט / קיין שטיוול:
- Check all power connections (24-pin ATX, 4-pin ATX 12V, CPU fan).
- זיכער מאַכן אַז די מאַכט צושטעל איז אנגעצינדן און אַרבעט.
- באַשטעטיקן די פֿאַרבינדונג פֿון דעם פֿראָנט פּאַנעלס מאַכט סוויטש.
- Try clearing the CMOS (refer to the Clear CMOS header on the motherboard).
- קיין ווייַז:
- Ensure the monitor is connected to the correct video output (VGA or HDMI on the motherboard, or dedicated graphics card).
- Reseat the RAM modules. Try booting with only one RAM module.
- אויב איר ניצט אַ ספּעציעלע גראַפיקס קאַרטל, זאָרגט אַז עס איז ריכטיק אײַנגעזעצט און באַפֿעסטיקט.
- סיסטעם אינסטאביליטעט/קראכן:
- קוק צי עס איז נישט איבערהיצנדיק. זיכער מאך זיכער אז דער סי-פי-יו קולער איז ריכטיג אינסטאלירט און אז די פעןס דרייען זיך.
- לויפט זכּרון דיאַגנאָסטיק מכשירים צו קאָנטראָלירן ראַם אָרנטלעכקייט.
- Update motherboard drivers and BIOS/UEFI.
- Peripheral Issues (USB, LAN, Audio):
- Ensure drivers for these components are installed and up to date.
- קאָנטראָלירט די פיזישע פֿאַרבינדונגען פֿון קאַבלען און דעוויסעס.
- Test with different peripherals to isolate the issue.
7. וואָראַנטי און שטיצן
Your ZEBRONICS H81 Motherboard comes with a 2 יאָר וואָראַנטי provided by CORE COMPUTERS. Please retain your proof of purchase for warranty claims.
For technical support, driver downloads, or further assistance, please visit the official ZEBRONICS support webפּלאַץ אָדער קאָנטאַקט זייער קונה דינסט.


