
1. הקדמה
This manual provides essential information for the proper installation, use, and maintenance of your LOKLNEYK Bread Machine Mixing Bucket. This replacement part is designed for specific Midea bread maker models to ensure optimal baking performance. Please read these instructions carefully before use.
2. פּראָדוקט איבערview
The LOKLNEYK Bread Machine Mixing Bucket is a high-quality replacement pan designed to fit various Midea bread machine models. It features an aluminum alloy construction for durability and efficient heat transfer.
שליסל פֿעיִקייטן:
- אפילו היץ פאַרשפּרייטונג: Ensures consistent baking results by preventing unevenly cooked bread.
- ניט-שטעקן ינלענדיש: Facilitates easy dough release and simplifies cleaning.
- Secure Sealing Design: Minimizes heat loss and prevents ingredient spillage during operation.
- דעטאַטשאַבלע פּלאַן: Allows for easy removal, cleaning, and replacement.
- מאַטעריאַל: Constructed from durable aluminum alloy.

Figure 2.1: The LOKLNEYK Bread Machine Mixing Bucket, showing its full form and handle.

פיגורע 2.2: ינלענדיש view of the mixing bucket, highlighting the non-stick coating and the central spindle for the mixing paddle.
3. סעטאַפּ און ייַנמאָנטירונג
Before installing the new mixing bucket, ensure your bread machine is unplugged and completely cooled. Remove the old bucket if present.
- Inspect the New Bucket: Carefully examine the new LOKLNEYK mixing bucket for any signs of damage from shipping.
- Clean the Bread Machine Cavity: Ensure the cavity where the bucket sits in your bread machine is clean and free of debris.
- Insert the Mixing Paddle: If your mixing paddle is separate, attach it to the spindle at the bottom of the new bucket. Ensure it is securely seated.
- Place the Bucket: Carefully lower the new mixing bucket into the bread machine's baking chamber. Align the bottom drive shaft of the bucket with the corresponding mechanism in the bread machine.
- Secure the Bucket: Gently twist or push down the bucket until it locks securely into place. Refer to your bread machine's original manual for specific locking mechanisms.

Figure 3.1: Underside of the mixing bucket, illustrating the drive shaft connection point for the bread machine.

פיגורע 3.2: דעטאַילעד view of the drive shaft mechanism at the base of the bucket, crucial for proper installation.
4. אַפּערייטינג ינסטרוקטיאָנס
Once the mixing bucket is correctly installed, you can proceed with your bread-making process.
- לייג ינגרידיאַנץ: Place your ingredients into the mixing bucket according to your recipe. Always add liquids first, followed by dry ingredients, and yeast last.
- נאָענט דעקל: Close the lid of your bread machine securely.
- אויסקלייַבן פּראָגראַם: Choose the desired baking program on your bread machine.
- אָנהייבן באַקן: Press the start button. The mixing bucket will facilitate the kneading and baking process.
- אַראָפּנעמען ברויט: Once the baking cycle is complete, carefully remove the hot mixing bucket from the bread machine using oven mitts.
- Release Bread: Invert the bucket to release the baked bread. The non-stick coating should allow for easy removal. If the mixing paddle remains in the bread, carefully remove it.
5. וישאַלט און רייניקונג
Regular cleaning will extend the life of your mixing bucket and ensure hygienic operation.
- קיל אַראָפּ: Always allow the mixing bucket to cool completely before cleaning.
- אַראָפּנעמען רעשט: Use a soft cloth or sponge to wipe away any dough or bread residue from the interior and exterior of the bucket. Avoid abrasive cleaners or scouring pads, as these can damage the non-stick coating.
- האַנט וואַשן רעקאַמענדיד: Wash the bucket by hand with warm, soapy water. Rinse thoroughly.
- גאָר טרוקן: Ensure the bucket is completely dry before storing or reinstalling it in the bread machine.
- מיש-פּאַדל: Clean the mixing paddle separately and ensure its spindle area is free of debris.
באַמערקונג: Do not immerse the bottom of the bucket, especially the drive shaft mechanism, in water for extended periods, as this may affect its functionality.
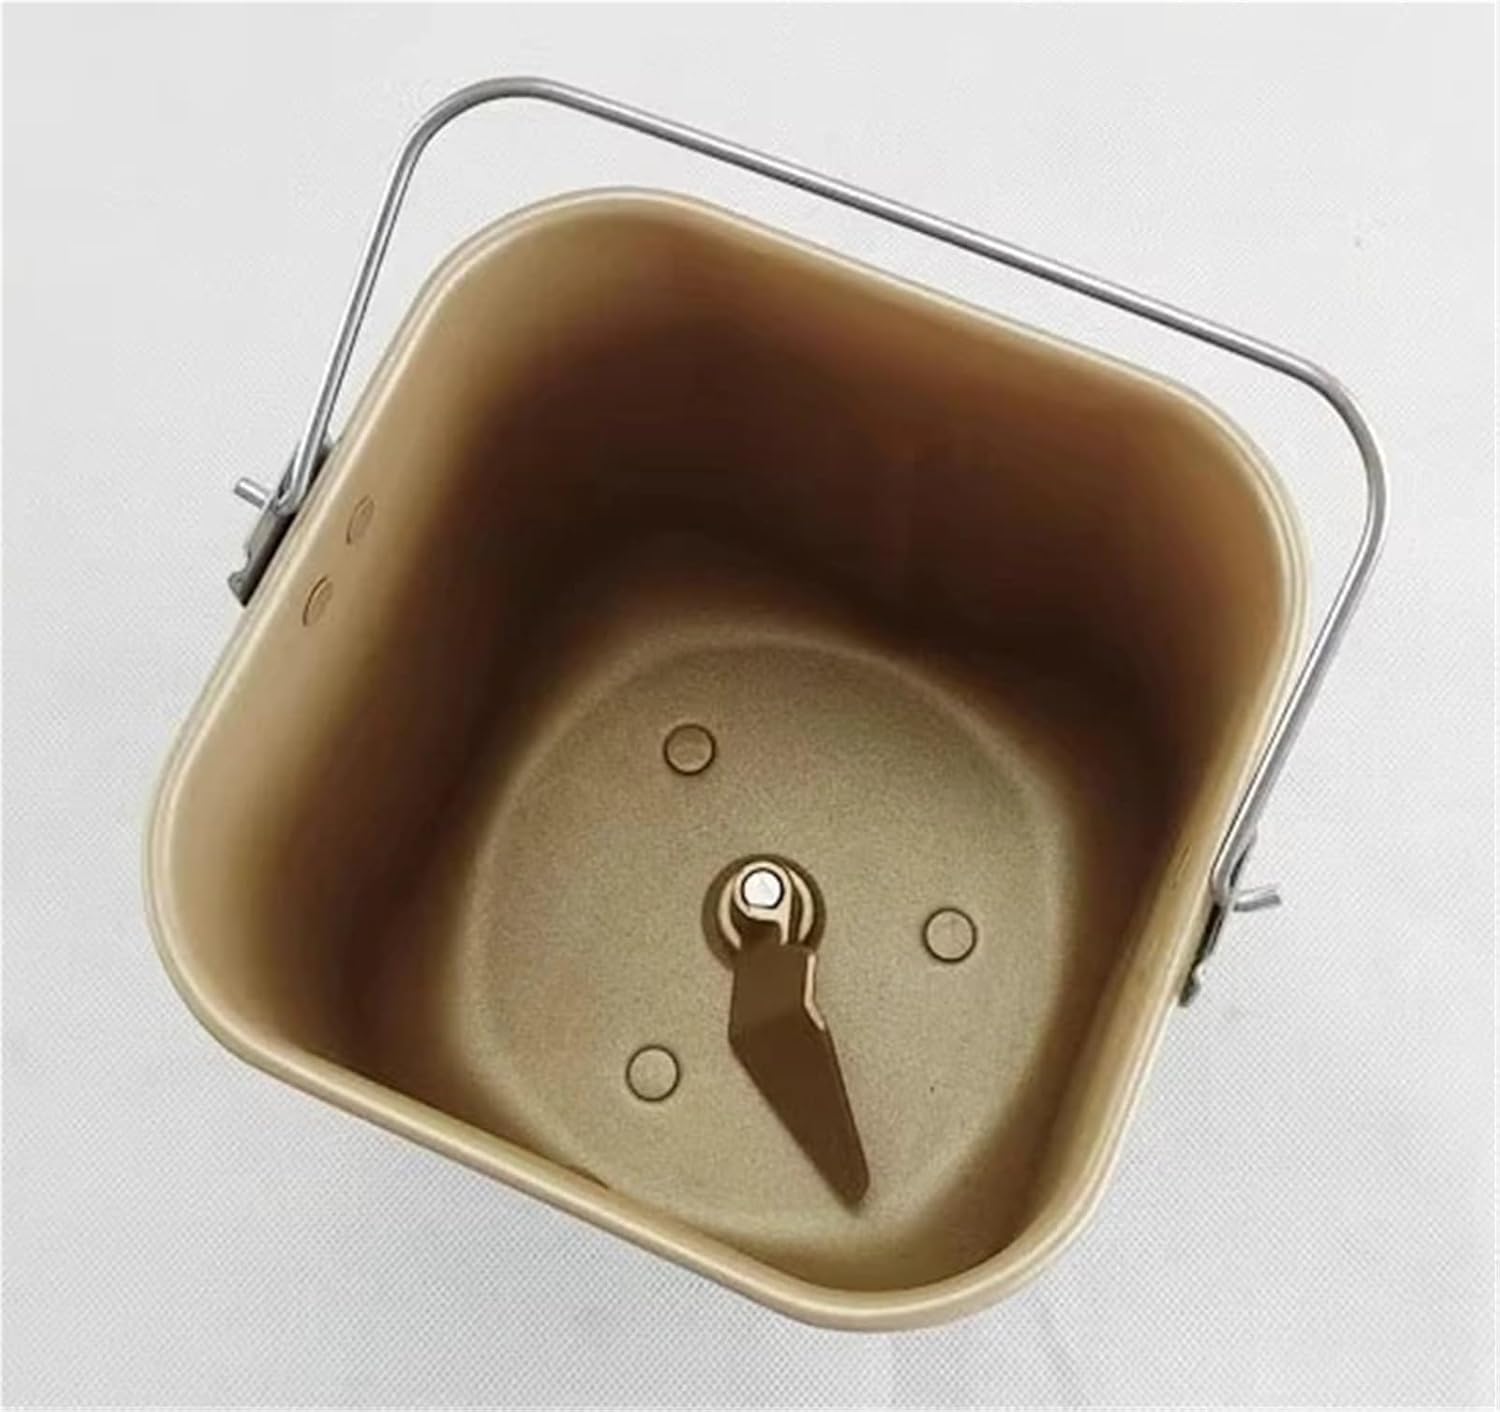
Figure 5.1: Interior side view of the mixing bucket, demonstrating the smooth, non-stick surface designed for easy cleaning.
6. טראָובלעשאָאָטינג
If you encounter issues with your mixing bucket, consider the following common solutions:
- Bread Sticks to Bucket:
לייזונג: Ensure the non-stick coating is intact. Always allow the bread to cool slightly before attempting to remove it. A small amount of cooking oil or spray can be applied before adding ingredients if sticking persists. - Bucket Not Seating Properly:
לייזונג: Check for any obstructions in the bread machine cavity or on the bottom of the bucket. Ensure the drive shaft is correctly aligned with the bread machine's mechanism. - אומגלייכע באַקן:
לייזונג: Verify that the bucket is fully seated and secure in the bread machine. Ensure the bread machine itself is on a level surface. - Mixing Paddle Not Turning:
לייזונג: Ensure the mixing paddle is correctly attached to the spindle inside the bucket. Check if the bucket's drive shaft is properly engaged with the bread machine's motor.
7. ספּעסאַפאַקיישאַנז
| אַטריביוט | דעטאַל |
|---|---|
| Part Number Compatibility | EHS15APPR, EHS15APPGS, THS15BB, AHS15AC |
| מאַטעריאַל | אַלומינום צומיש |
| פּונקט וואָג | 1.76 אונסעס |
| פּעקל דימענשאַנז | 0.39 X 0.39 X 0.39 אינטשעס |
| סאָרט | LOKLNEYK |
8. וואָראַנטי און שטיצן
For any questions regarding the LOKLNEYK Bread Machine Mixing Bucket, please refer to the seller's return policy and contact information provided at the point of purchase. This product is a replacement part, and its warranty coverage typically aligns with the seller's standard return and replacement policies.
For specific operational issues related to your Midea bread machine, please consult your original bread machine manual or contact Midea customer support.