
1. הקדמה
This manual provides detailed instructions for the installation, operation, and maintenance of your Jennov K4-P52-V18 Wireless Solar Video Surveillance Camera Kit. Please read this manual thoroughly before using the product to ensure proper setup and functionality. Keep this manual for future reference.
2. פּעקל אינהאַלט
Carefully unpack the box and verify that all the following items are included:
- 1 x NVR (V18) with Built-in 10-inch Touchscreen Monitor
- 4 x Wireless Solar Cameras
- 1 x 500GB HDD (Built-in)
- קסנומקס רענטגענ מאַוס
- 1 x NVR Power Adapter
- 1 x 9V Battery (for NVR, included)
- 1 x באַניצער מאַנואַל (דאָס דאָקומענט)
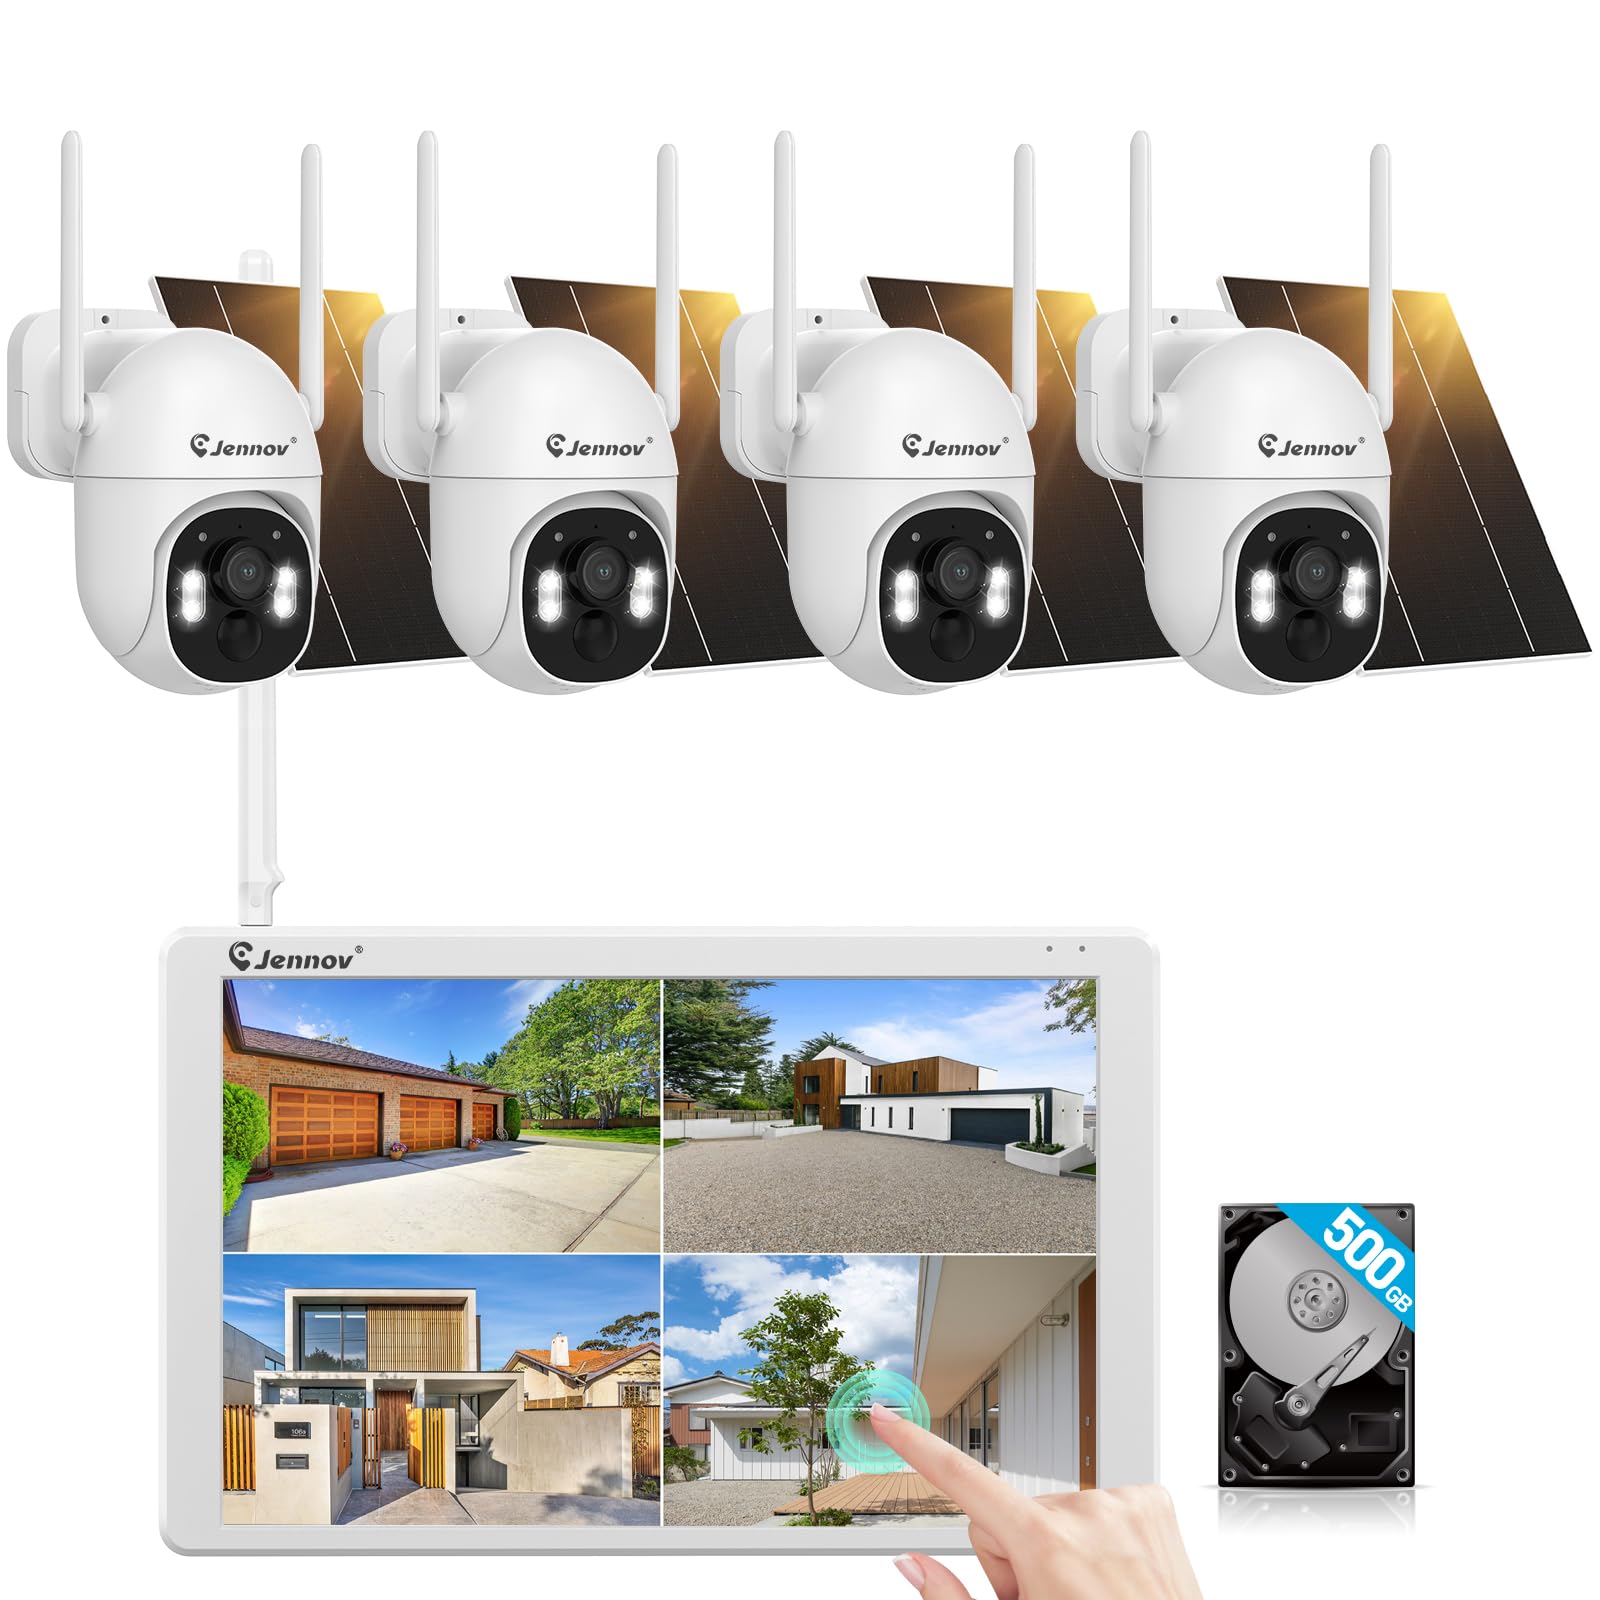
בילד: איבערview of the Jennov K4-P52-V18 Wireless Solar Video Surveillance Camera Kit, showing the NVR with monitor and multiple cameras.
3. פּראָדוקט איבערview
The Jennov K4-P52-V18 is a comprehensive wireless video surveillance system designed for outdoor security. It features a 10-channel NVR with an integrated 10-inch touchscreen monitor for direct viewing and control. The system includes four 1920p resolution cameras, each powered by a solar panel, offering wireless connectivity and PTZ (Pan-Tilt-Zoom) functionality for flexible monitoring. A 500GB hard disk drive (HDD) is pre-installed for local video storage.
4. סעטאַפּ
4.1 NVR סעטאַפּ
- אָרט: Place the NVR in a secure, central location within your property, ensuring it is within Wi-Fi range of the cameras.
- מאַכט קשר: Connect the NVR power adapter to the NVR's power input and then to a power outlet. The NVR will power on automatically.
- מויז קשר: Connect the included USB mouse to a USB port on the NVR for navigation.
- ערשטע בוט: The NVR will boot up and display the initial setup wizard on the 10-inch touchscreen. Follow the on-screen prompts to configure basic settings such as language, time zone, and password.
4.2 אַפּאַראַט ינסטאַלירונג
- אָרט סעלעקציע: Choose suitable outdoor locations for each camera, ensuring a clear line of sight to the monitoring area and sufficient sunlight exposure for the solar panel. The cameras are designed for wall mounting.
- מאָונטינג: Use the provided mounting hardware to securely attach each camera to a wall or other stable surface. Adjust the camera angle for optimal coverage.
- סאָלאַר פּאַנעל קאַנעקשאַן: Ensure the solar panel is securely connected to the camera and positioned to receive maximum direct sunlight throughout the day.
- פּאָרינג (אויב נייטיק): The cameras are typically pre-paired with the NVR. If a camera does not connect automatically, refer to the NVR's on-screen menu for manual pairing instructions.
4.3 נעטוואָרק קאָנפיגוראַטיאָן
צו געבן ווייַט viewing and software updates, connect the NVR to your home Wi-Fi network:
- On the NVR touchscreen, navigate to סיסטעם סעטטינגס > נעץ.
- אויסקלייַבן ווי-פי and choose your network from the list of available networks.
- Enter your Wi-Fi password and confirm the connection.
5. אַפּערייטינג ינסטרוקטיאָנס
5.1 לעבן View
After successful setup, the NVR will display the live feed from all connected cameras on the 10-inch monitor. You can tap on a specific camera feed to view עס אין פול פאַרשטעלן.
5.2 PTZ קאָנטראָל
For cameras with PTZ functionality:
- In full-screen live view, look for PTZ control icons on the screen.
- Tap the directional arrows to pan (left/right) and tilt (up/down) the camera.
- Use the zoom in/out icons to adjust the optical or digital zoom.
5.3 רעקאָרדינג און פּלייבאַק
The system automatically records video to the built-in 500GB HDD based on motion detection or continuous recording settings. To access recorded footage:
- פון די הויפּט מעניו, אויסקלייַבן פּלייַבאַקק.
- Choose the desired camera and date/time range.
- Use the timeline to navigate through recordings and play back events.
5.4 רימאָוט אַקסעס
Download the official Jennov mobile application (available on iOS and Android) to view live feeds, playback recordings, and receive alerts remotely. Follow the app's instructions to add your NVR system using its unique ID or QR code.
6. וישאַלט
- רייניקונג: Regularly clean the camera lenses and solar panels with a soft, damp cloth to ensure clear images and efficient solar charging. Do not use harsh chemicals.
- ווייכווארג דערהייַנטיקונגען: Periodically check for firmware updates for the NVR and cameras through the system settings or the mobile app to ensure optimal performance and security.
- HDD פאַרוואַלטונג: The 500GB HDD will overwrite older footage once full. If you need to retain specific recordings, back them up to an external USB drive.
- באַטערי טשעק: Ensure the 9V battery in the NVR is functioning correctly, especially if experiencing power interruptions.
7. טראָובלעשאָאָטינג
| פּראָבלעם | מעגלעך סיבה | לייזונג |
|---|---|---|
| קיין בילד אויף NVR מאָניטאָר | NVR not powered on; Camera not connected/powered; Loose cable | Check NVR power adapter; Ensure cameras are charged and within range; Reconnect all cables securely. |
| Cameras not recording | Recording settings incorrect; HDD full or faulty | Verify recording schedules in NVR settings; Check HDD status and free space; Format HDD if necessary (this will erase all data). |
| ווייטער צוטריט ארבעט נישט | NVR not connected to internet; Incorrect app settings | Check NVR Wi-Fi connection; Ensure NVR is online; Re-add NVR to the mobile app. |
| PTZ קאָנטראָל רעאַגירט נישט | Camera power issue; Software glitch | Check camera power and solar charging; Restart the camera and NVR. |
8. ספּעסאַפאַקיישאַנז
| שטריך | דעטאַל |
|---|---|
| מאָדעל נומער | K4-P52-V18 |
| סאָרט | דזשעננאָוו |
| קאַנעקטיוויטי טעכנאָלאָגיע | ווירעלעסס, ווי-פי |
| מאַכט מקור | זונ - פּאַוערד |
| ספּעציעלע פֿעיִקייטן | PTZ Technology, 10-inch Touchscreen Monitor |
| ווידעא קאַפּטורע רעסאָלוטיאָן | 1920 פּ |
| מאַונטינג טיפּ | וואנט בארג |
| אַרייַנגערעכנט קאַמפּאָונאַנץ | NVR (V18), 4 Cameras, 500GB HDD (Built-in), Mouse, NVR Adapter, 9V Battery |
| פּראָדוקט דימענשאַנז | 18 X 39 X 27 סענטימעטער |
| פּונקט וואָג | 4.16 קג |
| פאַבריקאַנט | Shenzhen Dianchen Industrial Co.,Ltd |
9. וואָראַנטי און שטיצן
For warranty information and technical support, please refer to the documentation provided with your purchase or contact Jennov customer service directly. Contact details can typically be found on the manufacturer's official webוועבזייטל אדער אויף דער פּראָדוקט פּאַקאַדזשינג.