
1. הקדמה
Thank you for choosing the KEENSTAR 20Bar Espresso Machine. This manual provides essential information for the safe operation, maintenance, and troubleshooting of your new espresso machine. Please read it thoroughly before first use and keep it for future reference.
2. וויכטיק סאַפעטי אינסטרוקציעס
- לייענען אַלע ינסטראַקשאַנז איידער ניצן די אַפּפּליאַנסע.
- דו זאלסט נישט פאַרבינדן הייס סערפאַסיז. ניצן כאַנדאַלז אָדער נאַבז.
- צו באַשיצן קעגן פייער, עלעקטריש קלאַפּ, און שאָדן צו מענטשן, טאָן ניט ייַנטונקען שנור, פּלאַגז אָדער אַפּפּליאַנסע אין וואַסער אָדער אנדערע פליסיק.
- נאָענט השגחה איז נייטיק ווען קיין אַפּפּליאַנסע איז געניצט דורך אָדער לעבן קינדער.
- אָפּשטויסן פון די ווענטיל ווען ניט אין נוצן און איידער רייניקונג. לאָזן צו קילן איידער איר שטעלן אויף אָדער נעמען אַוועק טיילן, און איידער רייניקונג די אַפּפּליאַנסע.
- דו זאלסט נישט אַרבעטן קיין אַפּפּליאַנסע מיט אַ דאַמידזשד שנור אָדער צאַפּן אָדער נאָך די אַפּפּליאַנסע מאַלפאַנגקשאַנז, אָדער איז דאַמידזשד אין קיין שטייגער.
- די נוצן פון אַקסעסערי אַטאַטשמאַנץ וואָס זענען נישט רעקאַמענדיד דורך דער פאַבריקאַנט פון די אַפּפּליאַנסע קען פירן צו פייַער, עלעקטריש קלאַפּ אָדער שאָדן צו מענטשן.
- דו זאלסט נישט נוצן ינ דרויסן.
- דו זאלסט נישט לאָזן די שנור הענגען איבער די ברעג פון טיש אָדער טאָמבאַנק, אָדער אָנרירן הייס סערפאַסיז.
- צי ניט שטעלן אויף אָדער לעבן אַ הייס גאַז אָדער עלעקטריש בורנער, אָדער אין אַ העאַטעד ויוון.
- שטענדיק צושטעלט דעם שטעקער ערשט צום עלעקטרישן אפאראט, דערנאך שטעקט דעם שנור אריין אין דער וואנט-אויסגאבע. כדי צו אפשטעלן, דרייט יעדן קאנטראל צו "אויס", און דערנאך נעמט ארויס דעם שטעקער פון דער וואנט-אויסגאבע.
- דו זאלסט נישט נוצן די מיטל פֿאַר אנדערע ווי בדעה נוצן.
- זייט זייער פארזיכטיג ווען איר באַזייַטיקט הייסן פארע.
- דער מיטל איז בלויז פֿאַר הויזגעזינד נוצן.
3. פּעקל אינהאַלט
ביטע קאָנטראָלירט דעם אינהאַלט פֿון דער פּאַקעט בײַם אויספּאַקן די קעסטל צו זיכער מאַכן אַז אַלע זאַכן זענען דאָ און נישט געשעדיגט.
בילד: All components included in the KEENSTAR 20Bar Espresso Machine package. This includes the main unit, portafilter with handle, single and double shot filters, coffee spoon with tamper, and a removable drip tray. The water tank and steam nozzle are also visible.
- KEENSTAR 20Bar Espresso Machine Main Unit
- פּאָרטאַפילטער שעפּן
- 1-Shot Filter Basket
- 2-Shot Filter Basket
- Coffee Spoon with Tamper
- רימווואַבאַל דריפּן טאַץ
- באַניצער מאַנואַל
4. פּראָדוקט איבערview
Familiarize yourself with the various parts of your espresso machine.

בילד: פראָנט view of the KEENSTAR 20Bar Espresso Machine, showcasing its sleek stainless steel design and key operational areas.
- וואַסער טאַנק: Detachable, 1.1 Liter capacity. Located at the back of the machine.
- קאָנטראָל פּאַנעל: Intuitive touch screen for selecting brew options (Espresso, Americano, Espresso Cool, Steam, ON/OFF, 2X Espresso).
- פּאָרטאַפילטער: האַלט געמאָלענע קאַווע צום ברויען.
- דאַמף שטעקן: For frothing milk for lattes and cappuccinos. Features a 360-degree rotation.
- דריפּן טאַץ: רימווואַבאַל פֿאַר גרינג רייניקונג.
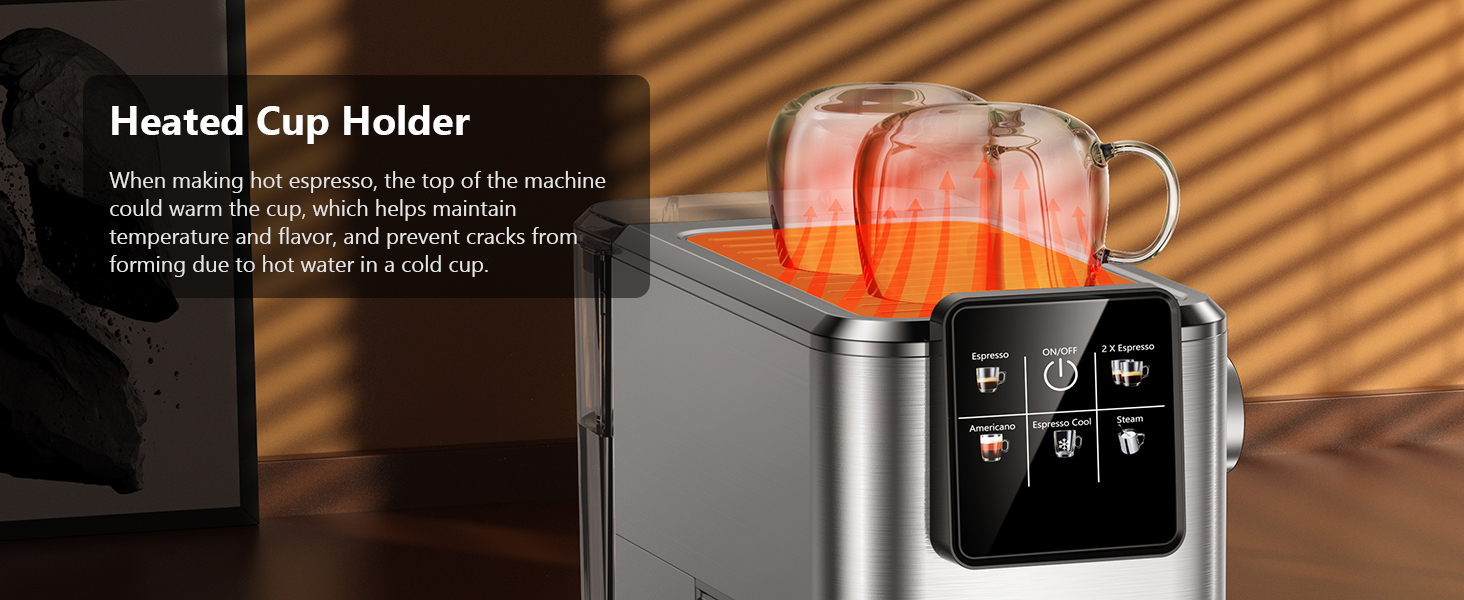
- Heated Cup Holder: Located on top of the machine to warm cups, maintaining coffee temperature.
5. סעטאַפּ
5.1 Initial Use and Priming
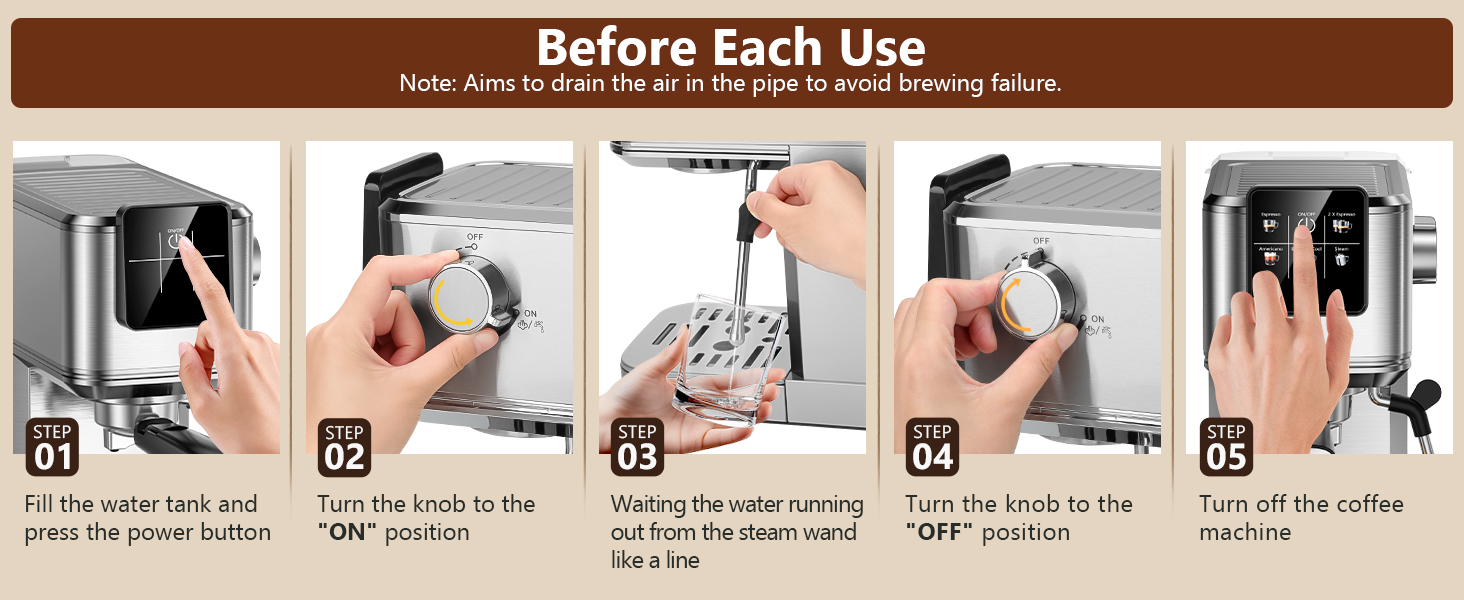
Before first use, or if the machine has not been used for a long time, it is essential to prime the system to ensure proper operation and remove any air from the pipes.
- Fill the water tank with fresh water and place it back into the machine. Ensure the tank cover is properly closed.
- Plug the machine into a power outlet. The ON/OFF button on the touch screen will illuminate.
- Press the ON/OFF button to turn on the machine. The indicator lights will blink as the machine preheats.
- Once the indicator lights are steady, the machine is ready.
- שטעלן אַ ליידיק גלעזל אונטער די פּאַרע שטעקל.
- Turn the steam knob to the "ON" position. Water will run out from the steam wand like a line. Let it run for about 10-15 seconds to purge air.
- Turn the steam knob to the "OFF" position.
- Press the ON/OFF button to turn off the machine. The machine is now primed and ready for use.

בילד: Visual steps for priming the espresso machine before its first use or after a period of inactivity. This process drains air from the internal pipes.
5.2 וואַסער טאַנק פילונג
The water tank has a maximum capacity of 1200ml. Do not exceed the maximum fill line to prevent overflow.
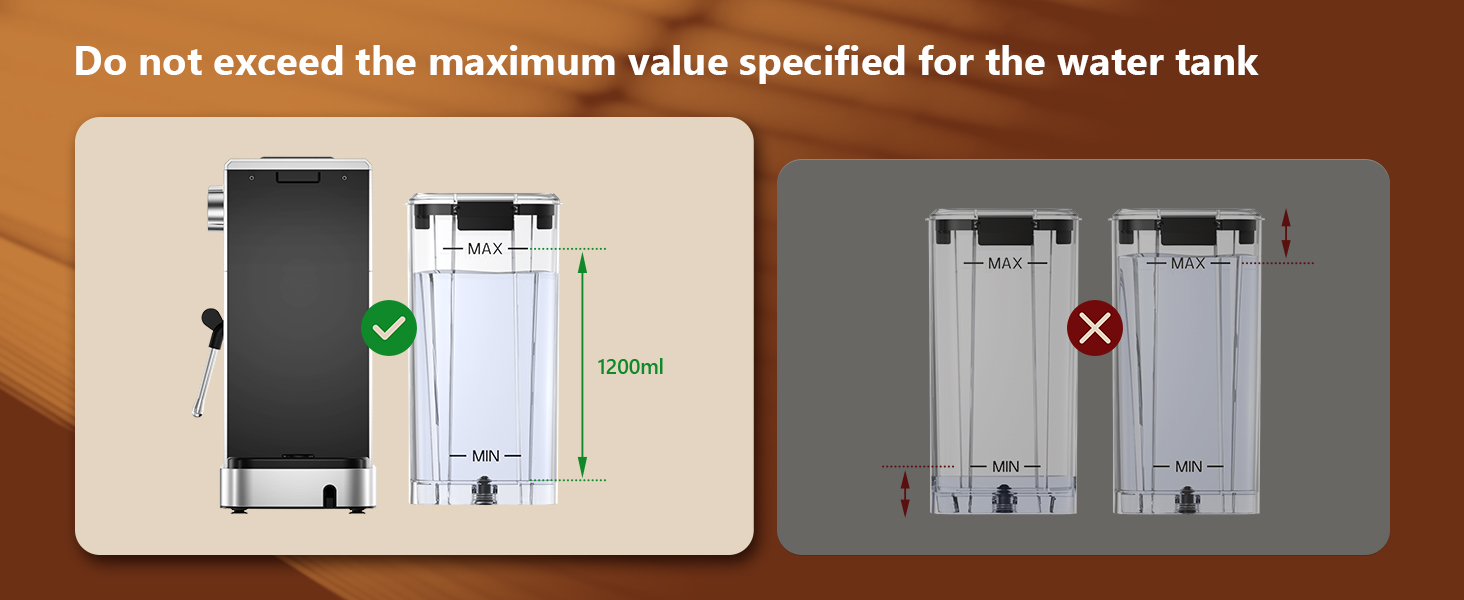
בילד: Guidance on filling the water tank, indicating the 1200ml maximum fill level to avoid overfilling.
6. אַפּערייטינג ינסטרוקטיאָנס
6.1 ברוינג עספּרעסאָ
The machine features a 20-bar pressure system and pre-soak technology for rich espresso extraction.
- Ensure the steam knob is set to the "OFF" position before brewing coffee.
- Fill the water tank with fresh water and press the ON/OFF button to power on. Wait for the indicator to become steady, signifying preheating is complete.
- Select the appropriate filter basket (1-shot or 2-shot) and place it into the portafilter.
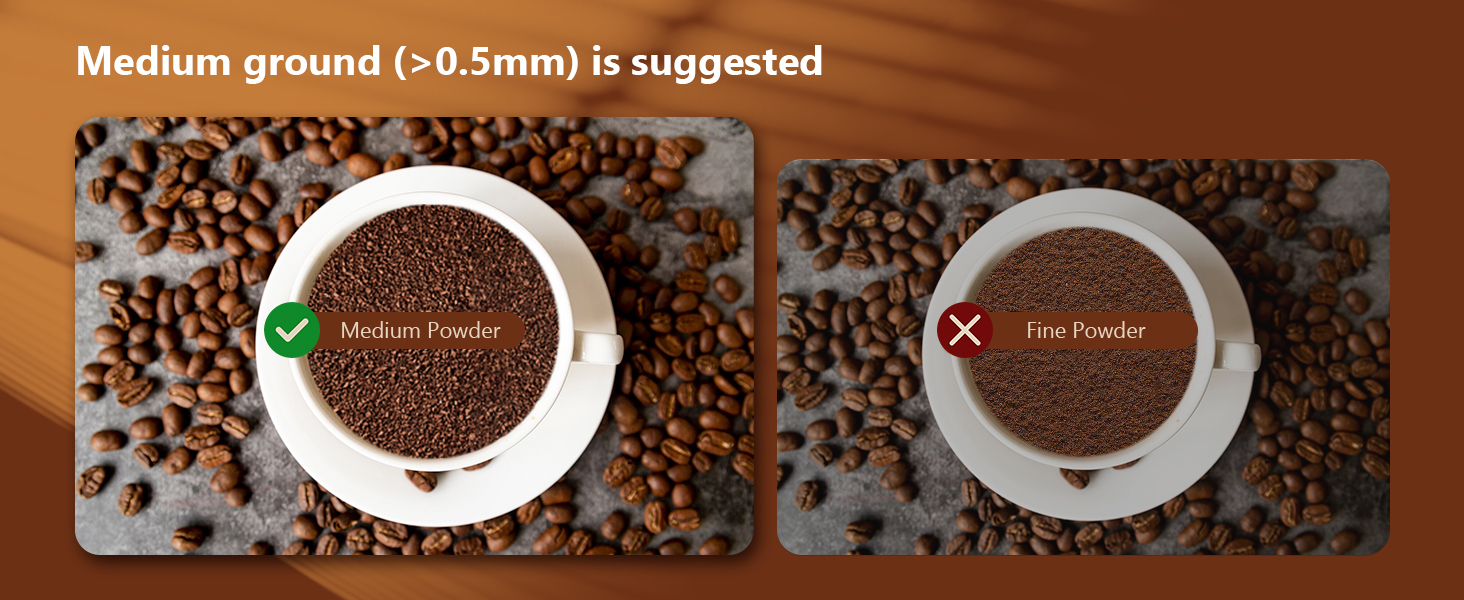
- Add ground coffee to the filter basket. Use medium ground coffee (greater than 0.5mm) for optimal results.
- Tamp the ground coffee firmly and evenly using the coffee tampער.
- Attach the portafilter to the machine, ensuring it is fully locked into place.
- לייגט אייער גלעזל(ען) אויף די טראָפּן טאַץ אונטערן פּאָרטאַפילטער.
- Select "Espresso" for a single shot or "2 X Espresso" for a double shot on the touch screen. The machine will begin brewing.
- אזוי שנעל ווי די ברוי איז פארטיג, וועט די מאשין זיך אויטאמאטיש אפשטעלן.

בילד: Step-by-step visual instructions for brewing espresso, from preparing the machine to the final extraction.
בילד: Illustration demonstrating the correct way to lock the portafilter before brewing to prevent leaks and ensure proper extraction.

בילד: Recommended coffee grind size (medium, >0.5mm) for optimal espresso extraction, contrasting it with fine ground coffee.
6.2 Making Cold Brew Espresso
This machine offers a rapid cold brew function, producing smooth cold brew in as little as 10 minutes.
- Ensure the water tank is filled with iced water for the cold brew function.
- Prepare the portafilter with ground coffee as described in Section 6.1.
- Attach the portafilter to the machine and place a cup underneath.
- Select "Espresso Cool" on the touch screen. The machine will begin the cold brew process.
- Enjoy your rapid cold brew espresso.

בילד: The espresso machine preparing cold brew, emphasizing the requirement for iced water in the tank.
6.3 שאום מילך
The powerful steam wand allows you to create creamy microfoam for lattes and cappuccinos.
- Fill the water tank with fresh water and press the ON/OFF button to power on.
- Press the "Steam" button on the touch screen to preheat the steam function. The indicator will blink during preheating and become steady when ready.
- After preheating, turn the steam knob to the "ON" position to release any remaining water in the pipe before frothing.
- Insert the steam nozzle approximately 1 inch into the surface of your milk.
- Gradually turn the steam knob to increase steam until the desired foam consistency is achieved.
- Once finished, turn the steam knob to the "OFF" position and clean the steam wand immediately.
בילד: Visual instructions for frothing milk, detailing the steps from preheating to creating microfoam.
7. וישאַלט און רייניקונג
רעגולערע רייניקונג גאַראַנטירט די לאַנגלעבעדיקייט און אָפּטימאַלע פאָרשטעלונג פון דיין עספּרעסאָ מאַשין.
- אַלגעמיינע רייניקונג: ווישן די יקסטיריער פון די מאַשין מיט אַדamp שטאָף. דו זאלסט נישט נוצן אַברייסיוו קלינערז אָדער סקאָוערז.
- דריפּן טאַץ: The removable drip tray should be emptied and cleaned regularly.
- פּאָרטאַפילטער און פילטער קערב: נאך יעדן באניץ, נעמט ארויס דעם פארטאפילטער און ווארפט אוועק די גענוצטע קאווע גרינד. שווענקט אויס דעם פארטאפילטער און פילטער קערב אונטער רינענדיק וואסער.
- דאַמף שטעקן: גלייך נאכן שאוםן מילך, ווישט אפ דעם פארע-שטעקן מיט אדווערטייזמענט.amp cloth to prevent milk residue from drying. Purge steam briefly to clear any internal blockages.
- וואַסער טאַנק: רייניקט דעם וואַסער טאַנק פון צייט צו צייט מיט אַ מילדן וואַשפּולווער און שווענקט גוט אויס.
- דעסקאַלינג: Depending on water hardness, descale the machine every 2-3 months. Follow the instructions provided with a suitable descaling solution.

בילד: Important cleaning instruction: All accessories must be washed by hand and are not dishwasher safe.
8. טראָובלעשאָאָטינג
זעט דעם אָפּטייל פֿאַר געוויינטלעכע פּראָבלעמען און זייערע לייזונגען.
| פּראָבלעם | מעגלעך סיבה | לייזונג |
|---|---|---|
| קיין קאַווע גיט נישט אויס / שטייטער פלוס |
|
|
| Water leaks from portafilter edge |
|
|
| דאַמף־שטאַנג פּראָדוצירט נישט קיין דאַמף |
|
|
| קאַווע איז נישט גענוג הייס |
|
|
9. ספּעסאַפאַקיישאַנז
- סאָרט: KEENSTAR
- מאָדעל נאָמען: דזש.ה.-C5210
- דרוק סיסטעם: 20 בר
- מאַכט: 1350 וו
- וואַסער טאַנק קאַפּאַציטעט: 1.1 Liters (37oz)
- פּראָדוקט דימענשאַנז: 11.8"ד רענטגענ 12.6"וו רענטגענ 5.5"ה
- נומער וואָג: 4.6 פונט
- מאַטעריאַל: ומבאַפלעקט שטאָל
- ספּעציעלע שטריך: Programmable, Touch Screen, Milk Frother, Hot & Rapid Cold Brew
- קאַווע אַרייַנגאַנג טיפּ: ערד קאַווע
- פילטער טיפּ: ריוזאַבאַל
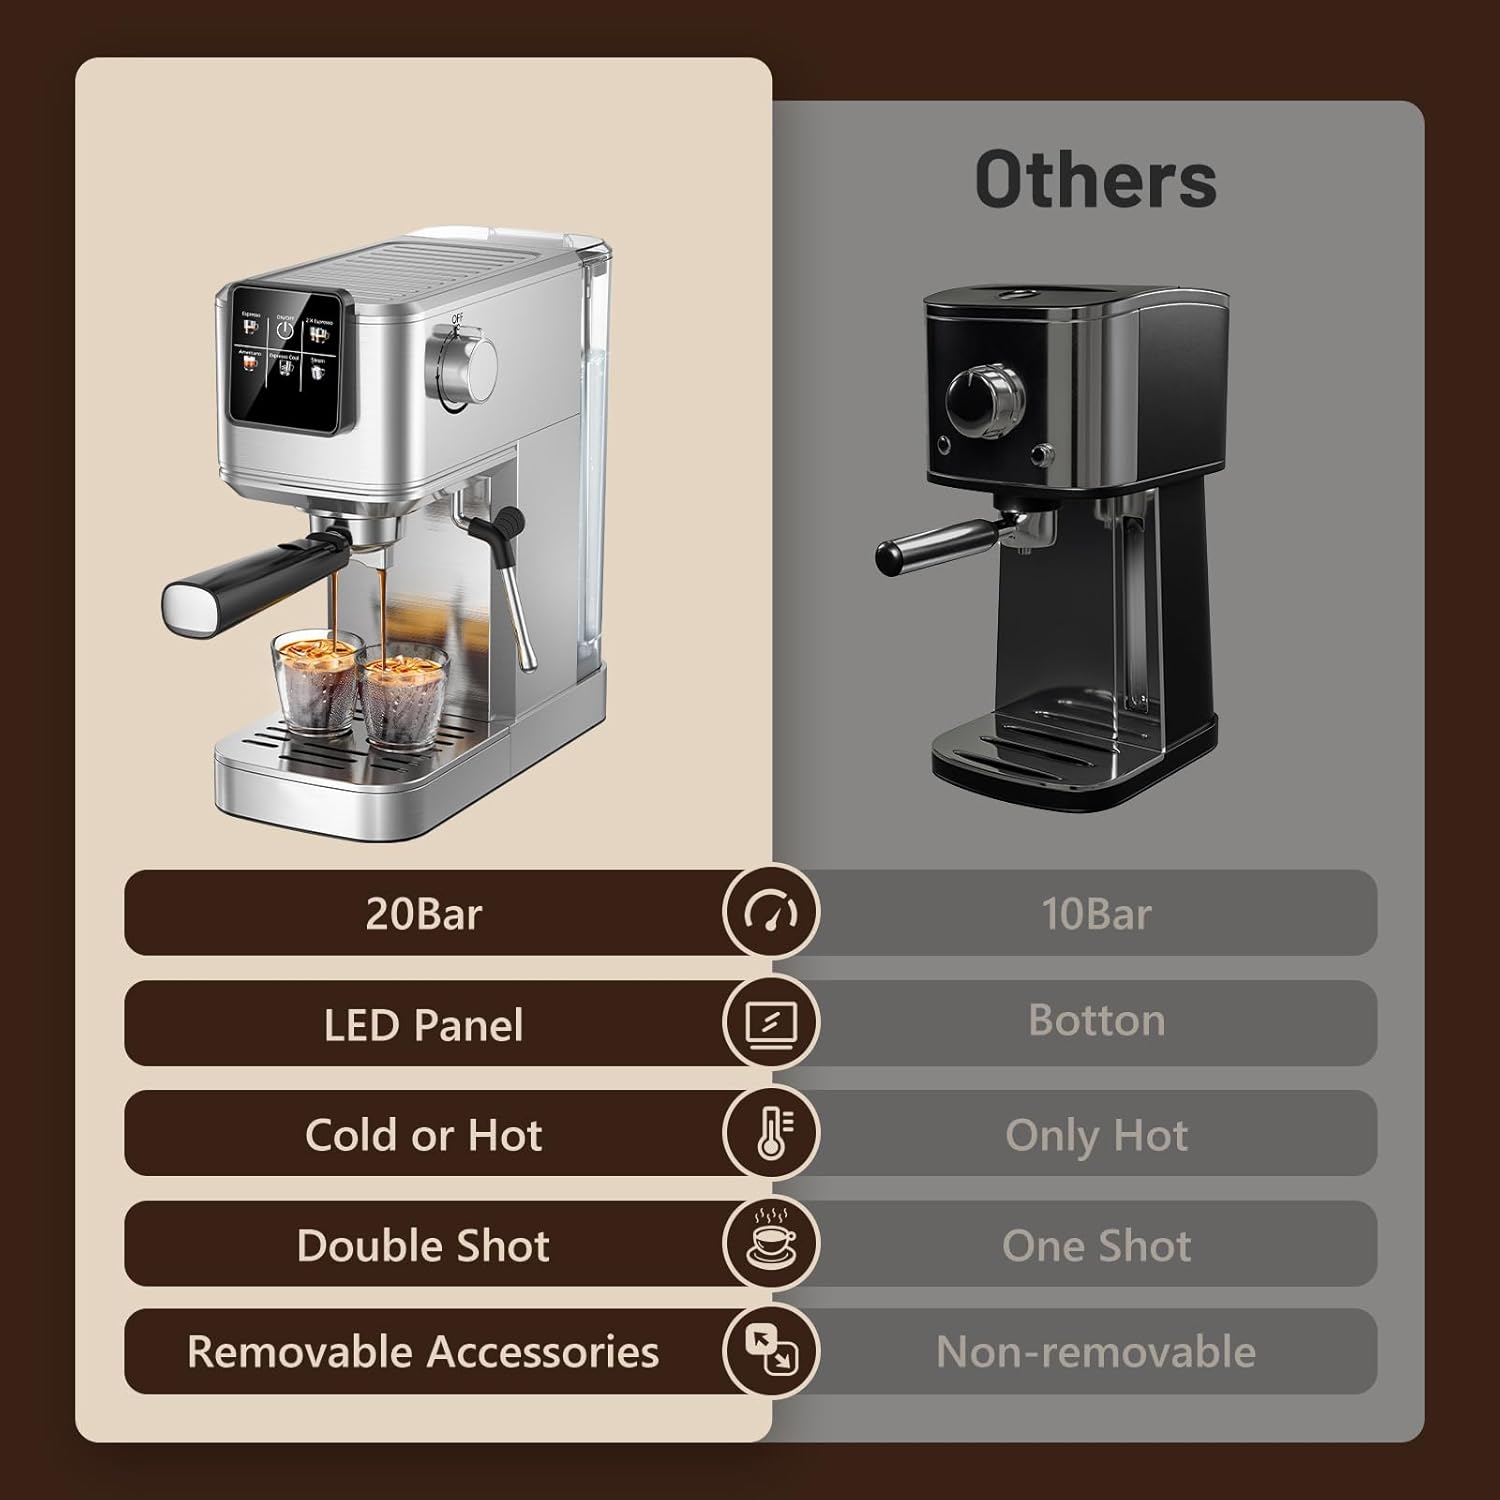
בילד: Feature comparison of the KEENSTAR machine, emphasizing its 20Bar pressure, LED panel, and versatility for hot and cold beverages.

בילד: Dimensions of the KEENSTAR espresso machine, indicating its compact size.
10. וואָראַנטי און שטיצן
For warranty information or technical support, please refer to the contact details provided on the product packaging or visit the official KEENSTAR webזייטל. האַלט דיין קויפן באַווייַז פֿאַר קיין וואָראַנטי קליימז.