
הקדמה
This manual provides detailed instructions for the setup, operation, and maintenance of your AOOSTAR MACO AMD Ryzen 7 H255 Mini PC. Please read this guide thoroughly before using your device to ensure optimal performance and longevity.

Image: The AOOSTAR MACO AMD Ryzen 7 H255 Mini PC, showcasinג זײַן קאָמפּאַקטן דיזײַן.
ווידעא: איבערview of the AOOSTAR MACO Mini PC, demonstrating its features and potential uses in various environments.
וואָס איז אַרייַנגערעכנט
באַשטעטיקן אַז אַלע זאכן זענען פאַראַן אין פּעקל:
- 1 x AOOSTAR MACO AMD Ryzen 7 H255 Mini PC
- 1 x 120W Power Supply
- 1 x HDMI קאַבלע
- 1 x SSD קאָאָלינג פּאַד
- 1 x מאַונטינג שרויף שטעלן
סעטאַפּ אינסטרוקציעס
1. Hardware Installation (RAM and SSD)
The AOOSTAR MACO H255 Mini PC is available as a barebones unit, requiring separate installation of RAM and SSD. This unit supports dual-channel DDR5 5600MHz RAM (expandable up to 128GB) and dual M.2 2280 NVMe PCIe4.0x4 SSDs (expandable up to 8TB).
- צוגרייטן דעם מיני פּיסי: Ensure the device is powered off and disconnected from all power sources.
- צוטריט צו אינערלעכע קאמפאנענטן: Carefully open the Mini PC chassis to expose the RAM and SSD slots. Refer to the diagram below for component location.
- אינסטאַלירן ראַם: Insert DDR5 SODIMM modules into the dual-channel slots, ensuring they are seated firmly until the clips lock into place.
- אינסטאַלירן SSD: Insert M.2 2280 NVMe PCIe4.0x4 SSDs into the designated slots. Secure them with the provided mounting screws. Apply the SSD cooling pad if included.
- נאָענט שאַסי: Reassemble the Mini PC chassis securely.

בילד: אינערלעך view of the AOOSTAR MACO Mini PC, highlighting the dual M.2 SSD slots and dual-channel DDR5 RAM slots.

Image: Diagram illustrating the dual M.2 SSD and dual-channel RAM configuration within the Mini PC.
2. קאַנעקטינג פּעריפעראַלס
Connect your monitor, keyboard, mouse, and other peripherals to the appropriate ports on the Mini PC.
- ווייַז: Use the HDMI or DisplayPort to connect to your monitor. The device supports up to four 4K displays simultaneously.
- USB דעוויסעס: Connect your keyboard, mouse, and other USB devices to the available USB 3.2 Gen2, USB 3.0, or USB4 ports.
- נעץ: Connect an Ethernet cable to one of the two 2.5G Ethernet ports for wired network access, or use the integrated WiFi 6 for wireless connectivity.
- מאַכט: Connect the 120W power supply to the DC input port and then to a power outlet.

בילד: הינטערשטע view of the AOOSTAR MACO Mini PC, displaying the array of available ports including OCuLink, USB4, HDMI, DisplayPort, Ethernet, and audio jack.
3. ערשטע בוט און אפערירן סיסטעם אינסטאַלאַציע
After connecting all hardware, press the power button to start the Mini PC. If you purchased a barebones unit, you will need to install an operating system (e.g., Windows 11 Pro) and relevant drivers.
- אָפּערירן סיסטעם אינסטאַלאַציע: Follow the standard procedure for installing your chosen operating system from a bootable USB drive.
- דרייווער ינסטאַלירונג:
- Chipset & GPU: Download the Auto-Detect and Install tool from AMD.com for the Ryzen 7 H255 chipset and Radeon 780M graphics drivers.
- Wi-Fi און בלועטוט: Use the Intel Driver & Support Assistant from Intel.com to obtain the latest wireless drivers.
- עטהערנעט: Visit the AOOSTAR downloads page (if available) or Intel's website for drivers for the Intel 226V LAN Port.
אַפּערייטינג ינסטראַקשאַנז
1. Power On/Off and Fingerprint Unlock
To power on the device, press the power button. The AOOSTAR MACO Mini PC features a one-touch fingerprint sensor for secure and quick login.
- מאַכט אויף: Press the power button located on the front of the unit.
- ופשליסן פינגערפּרינט: Once configured in your operating system's security settings, simply touch the fingerprint sensor to wake and log in without needing a password. This feature utilizes enterprise-grade encryption for data protection.

Image: The AOOSTAR MACO Mini PC with its integrated one-touch fingerprint sensor for secure access.
2. מולטי-דיספּליי קאָנפיגוראַציע
The Mini PC supports connecting up to four 4K displays simultaneously, allowing for extended desktop environments and enhanced productivity.
- Connect monitors to the available HDMI and DisplayPort outputs.
- Configure display settings within your operating system to extend or duplicate your desktop across multiple screens.
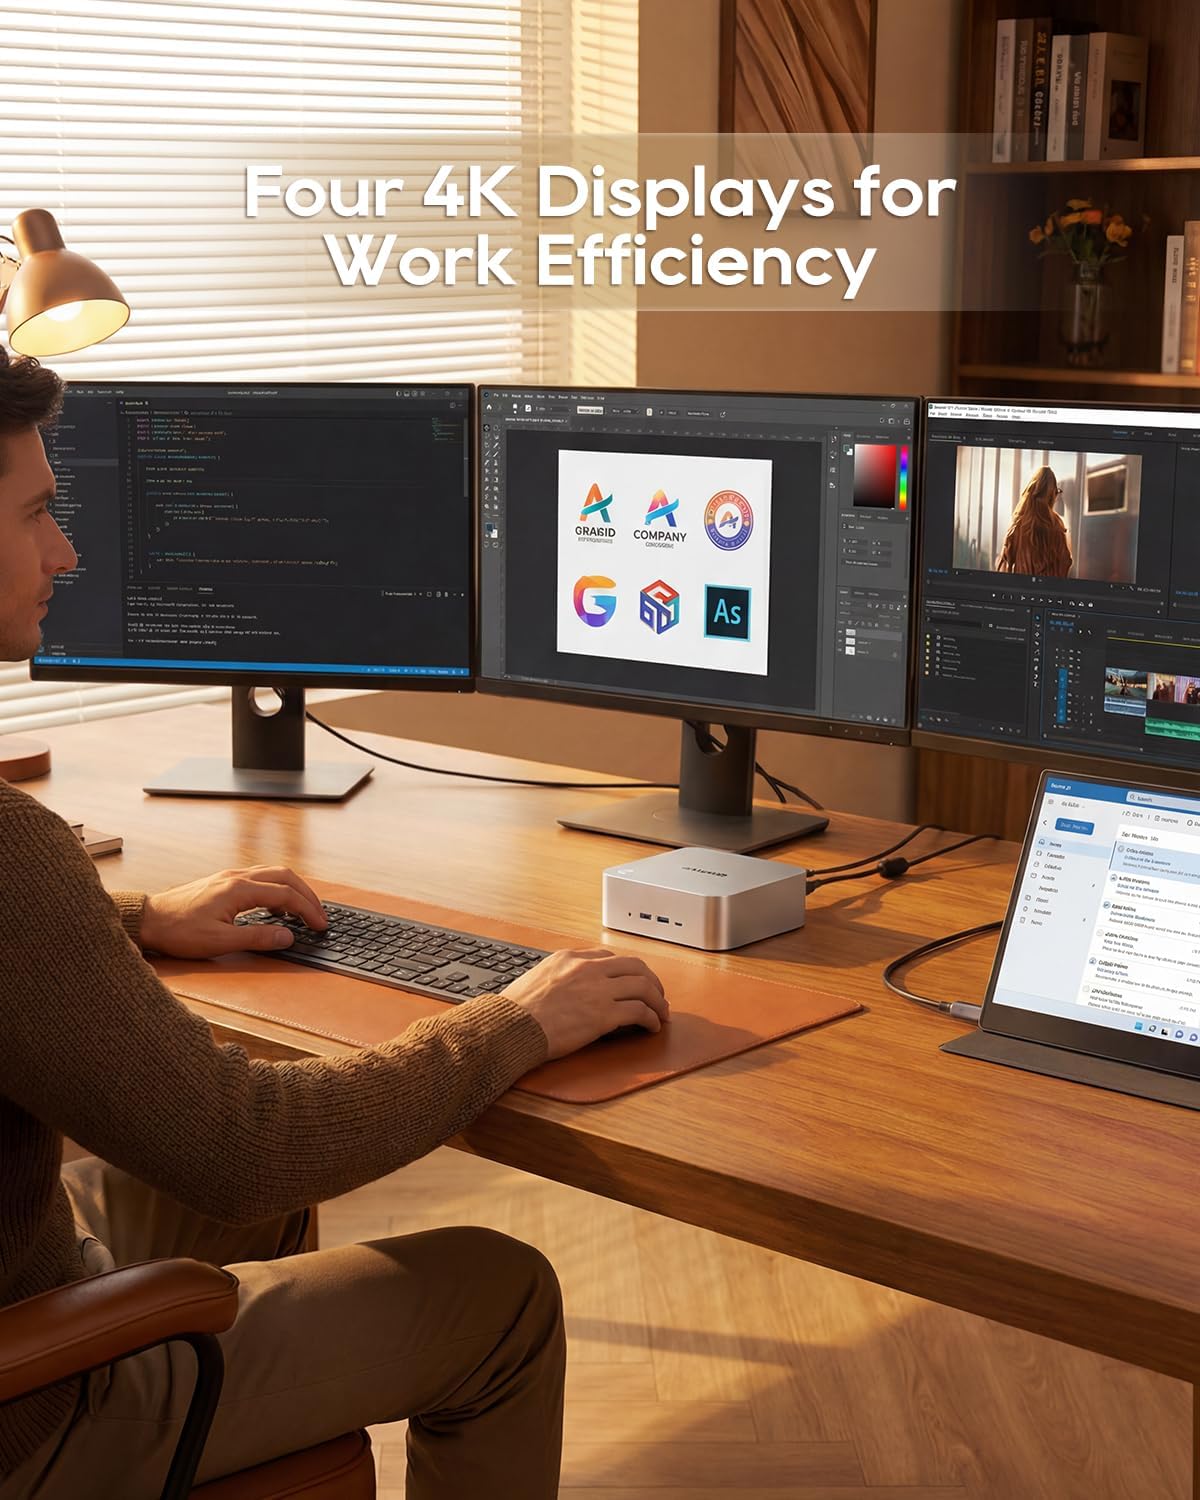
Image: A user utilizing the AOOSTAR MACO Mini PC to power a four-monitor setup, demonstrating its multi-display capability.
3. OCuLink Port for External GPU
The OCuLink port (64 Gbps) provides an external GPU solution with high bandwidth and minimal transfer bottlenecks, offering a performance boost for graphics-intensive tasks or gaming. Note that OCuLink is not hot-swappable and does not occupy an M.2 2280 PCIe4.0 SSD slot.
- Connect a compatible external GPU enclosure to the OCuLink port.
- Ensure the external GPU and its drivers are properly installed according to the eGPU enclosure manufacturer's instructions.

Image: The AOOSTAR MACO Mini PC connected to an external graphics card enclosure using the OCuLink port, illustrating its expandability for enhanced graphics performance.
4. USB4 Ports for High-Speed Data Transfer
The dual USB4 ports deliver speeds up to 40Gbps, enabling rapid transfer of large files, connecting external graphics card docks, or NVMe SSD arrays. They also support 8K display output and 100W power delivery.
- Connect compatible USB4 devices for high-speed data operations.
- Utilize USB4 for connecting high-resolution external displays or charging compatible devices.

Image: A diagram emphasizing the dual USB4 ports on the AOOSTAR MACO Mini PC, detailing their high-speed data transfer capabilities.
5. נעץ קאַנעקטיוויטי
The Mini PC offers versatile network options for fast and reliable internet access.
- ווייערד: Connect to your network using one of the two 2.5G Ethernet ports for stable, high-speed wired connections.
- ווירעלעסס: Utilize the integrated WiFi 6 for fast wireless internet access. Ensure your router supports WiFi 6 for optimal performance.

Image: The AOOSTAR MACO Mini PC connected to a network router, illustrating its dual 2.5G Ethernet ports and WiFi 6 capabilities for high-speed internet.
וישאַלט
1. רייניקונג
Regular cleaning helps maintain optimal performance and extends the lifespan of your Mini PC.
- עקסטעריע: Use a soft, dry cloth to wipe the exterior surfaces. Avoid abrasive cleaners or solvents.
- ווענטילאַטיאָן: Periodically clean the ventilation grilles with a soft brush or compressed air to prevent dust buildup, which can impede airflow and cooling.
2. קאָאָלינג סיסטעם
The AOOSTAR MACO Mini PC features an innovative airflow design with a vapor chamber for efficient cooling. Ensure proper ventilation around the device.

בילד: אן עקספלאדירטע view diagram illustrating the vapor chamber cooling system and internal airflow of the AOOSTAR MACO Mini PC.
3. Upgrades
The Mini PC supports upgrades for RAM and SSD storage. When performing upgrades, ensure the device is powered off and unplugged. Use compatible components (DDR5 SODIMM RAM and M.2 2280 NVMe PCIe4.0x4 SSDs).
טראָובלעשאָאָטינג
פּראָסט ישוז און סאַלושאַנז
- קיין מאַכט:
- זיכער מאַכן אַז דער מאַכט אַדאַפּטער איז זיכער פארבונדן צו ביידע די מיני פּיסי און אַ אַרבעטנדיק מאַכט ווענטיל.
- באַשטעטיקן אַז די מאַכט ווענטיל איז פאַנגקשאַנאַל.
- קיין ווייַז:
- Check HDMI/DisplayPort cable connections to both the Mini PC and the monitor.
- זייט זיכער אז דער מאָניטאָר איז אנגעצונדן און איינגעשטעלט צו דער ריכטיקער אינפוט מקור.
- If using multiple displays, try connecting only one display to isolate the issue.
- Missing Drivers / Unknown Devices:
- After OS installation, manually download and install drivers for the chipset, GPU (AMD.com), Wi-Fi/Bluetooth (Intel.com), and Ethernet (AOOSTAR support page or Intel.com for Intel 226V).
- Access BIOS (typically by pressing F7 during startup) to ensure RAM is running at full speed if experiencing performance issues.
- פאָרשטעלונג פּראָבלעמען:
- Ensure sufficient RAM and SSD storage are installed and properly configured.
- Check for overheating; ensure ventilation is clear and the cooling system is functioning.
- Update all drivers and the operating system.
ספּעסאַפאַקיישאַנז
| סאָרט | AOOSTAR |
| מאָדעל נאָמען | MACO AMD Ryzen 7 H255 |
| קפּו מאָדעל | AMD Ryzen 7 H255 (8 Cores/16 Threads, up to 4.9GHz) |
| גראַפיקס קאָופּראַסעסער | Radeon 780M (RDNA 3 architecture) |
| ראַם זכּרון טעכנאָלאָגיע | DDR5 (5600 MHz) |
| Max RAM Memory Size | 128 גיגאבייט |
| שווער דיסק צובינד | PCIe 4.0 x4 (M.2 2280 NVMe) |
| Max Hard Disk Size | 8 טב |
| ווידעא רעזולטאַט | HDMI, DisplayPort (Supports 4K, up to 4 displays) |
| קאַנעקטיוויטי טעכנאָלאָגיע | HDMI, USB, Ethernet, WiFi 6 |
| פּאָרץ | OcuLink*1, USB4*2, USB3.2 Gen2*2, USB3.0*1, HD*1, DC*1, DP*1, Jack*1, 2.5G*2 |
| נומער דימענשאַנז (L X W X H) | 5.12 X 5.12 X 2.36 אינטשעס (13 X 13 X 6 סענטימעטער) |
| פּונקט וואָג | 660 גראַמז |
| אָפּערייטינג סיסטעם | OS (User-installed) |
וואָראַנטי און שטיצן
AOOSTAR provides a 12-month worry-free warranty and lifetime technical support for the MACO AMD Ryzen 7 H255 Mini PC.
- וואָראַנטי פּעריאָד: 12 חדשים פון די טאָג פון קויפן.
- טעכניש שטיצן: לעבנסלענג טעכנישע שטיצע איז בנימצא.
- קאָנטאַקט: For warranty claims or technical assistance, please contact AOOSTAR customer service. (Specific contact details are usually provided on the product packaging or official webפּלאַץ.)
- OS Key: If you purchased a barebones unit, a free Windows 11 Pro key may be available upon contacting customer service.