
1. הקדמה
א דאנק פארן קויפןasing the FASDUNT 9.8" Panel Bathroom Exhaust Fan with LED Light, Model EF2W. This manual provides detailed instructions for the safe installation, operation, and maintenance of your new exhaust fan. Please read this manual thoroughly before installation and keep it for future reference.

Image 1: FASDUNT Bathroom Exhaust Fan with LED Light, showing airflow.
This image displays the FASDUNT bathroom exhaust fan from a slightly elevated angle, highlighting its sleek white panel design and the integrated LED light. Gentle blue air currents and green leaves are depicted flowing downwards from the fan, illustrating its ventilation function. The fan features a square grille with the "FASDUNT" brand name visible on the front edge.
2. וויכטיק סאַפעטי אינפֿאָרמאַציע
צו רעדוצירן די ריזיקירן פון פייַער, עלעקטריש קלאַפּ אָדער שאָדן צו מענטשן, אָבסערווירן די פאלגענדע:
- לייענט אַלע אינסטרוקציעס איידער איר אינסטאַלירט אָדער סערוויסט דעם ווענטילאַטאָר.
- ייַנמאָנטירונג אַרבעט און עלעקטריקאַל וויירינג מוזן זיין דורכגעקאָכט דורך קוואַלאַפייד מענטש (s) אין לויט מיט אַלע אָנווענדלעך קאָודז און סטאַנדאַרדס, אַרייַנגערעכנט פייַער-רייטאַד קאַנסטראַקשאַן קאָודז און סטאַנדאַרדס.
- ניצן דעם אַפּאַראַט בלויז אין די שטייגער בדעה דורך דער פאַבריקאַנט. אויב איר האָט פֿראגן, קאָנטאַקט דער פאַבריקאַנט.
- איידער סערוויסינג אָדער רייניקונג די אַפּאַראַט, באַשטימען די מאַכט טאַפליע אויף די סערוויס טאַפליע און שלאָס די סערוויס דיסקאַנעקטינג מיטל צו פאַרמיידן אַקסאַדענאַלי באַשטימען מאַכט. אויב די מיטל דיסקאַנעקטינג מיטל קענען ניט זיין לאַקט, סיקיורלי פאַסטען אַ באַוווסט ווארענונג מיטל, אַזאַ ווי אַ tag, צו די סערוויס טאַפליע.
- Do not use this fan with any solid-state speed control device unless specifically approved by the manufacturer.
- This fan is intended for general ventilating use only. Do not use to exhaust hazardous or explosive materials and vapors.
- כדי צו פארמיידן שאדן פון מאטאר לאגערן און גערוישפולע און/אדער אומבאלאנסירטע אימפעלערס, האלט דרייוואל שפריי, קאנסטרוקציע שטויב, אא"וו, אוועק פון די מאכט איינהייט.
- שטענדיק טראָגן זיכערהייט ברילן און הענטשקעס בעת ינסטאַלירונג.
- פאַרזיכערן די מאַכט צושטעלן וואָלtage matches the fan's requirements (110-120V).
3. פּעקל אינהאַלט
באַשטעטיקן אַז אַלע קאָמפּאָנענטן זענען פאַראַן און נישט געשעדיגט איידער איר הייבט אָן די אינסטאַלאַציע.

Image 2: Diagram of included components.
This diagram illustrates the items included in the product package. It shows an integrated fan housing, a grille with light, a set of 12 screws, a check valve, and an installation manual. Each item is represented by a simple line drawing.
- Integrated Fan Housing x 1
- Grille and Light Assembly x 1
- סקרוז X 12
- Check Valve x 1
- ינסטאַללאַטיאָן מאַנואַל x 1
4. ספּעסאַפאַקיישאַנז
| סאָרט | FASDUNT |
| מאָדעל נומער | EF2W |
| לופט פלאָו קאַפּאַסיטי | 120 CFM (קוביק פֿיס פּער מינוט) |
| ראַש מדרגה | 1.0 סאָנס |
| געפירט ליכט וואַטtage | 12 וו |
| געפירט קאָליר טעמפּעראַטור | 5000K |
| פאַן וואַטtage | 26 וו |
| גאַנץ וואַטtage | 38W (Fan + Light) |
| Voltage | 110-120 וואלטס |
| דאַקט גרייס | 4 אינטשעס |
| Ceiling Opening Size | 8.07" x 8.07" (20.5 ס״מ x 20.5 ס״מ) |
| פּראָדוקט דימענשאַנז (אַלגעמיין) | 9.45"ד רענטגענ 5.93"וו רענטגענ 9.45"ה |
| Grille Cover Size | 9.65" x 9.65" |
| פּונקט וואָג | 4.31 פונט |
| מאַטעריאַל | אַבס פּלאַסטיק, מעטאַל |
| אָרט טיפּ | קלאָזעט |
| קאָנטראָל מעטאָד | Touch (Typically wired to a wall switch) |

Image 3: Detailed product dimensions and key specifications.
This image provides a visual representation of the fan's dimensions and lists its core specifications. It shows the fan housing with measurements for height, width, and duct size, alongside a table detailing material, voltage, power consumption for fan and light, color temperature, and exhaust volume.
5. סעטאַפּ און ייַנמאָנטירונג
איידער איר אָנהייבן: Ensure power is OFF at the circuit breaker. This installation requires electrical wiring and should be performed by a qualified electrician if you are not comfortable with electrical work.
5.1 Tools and Materials Required (Not Included)
- בויער
- שרויפנ - ציער (פיליפּס קאָפּ)
- ווירע סטריפּערז
- צוואַנג
- Utility knife or drywall saw
- מעסטן טייפּ
- Caulking gun and sealant
- דאַקט טייפּ אָדער קלamps for duct connection
- זיכערקייַט ברילן און גלאַווז
5.2 ינסטאַללאַטיאָן סטעפּס
- צוגרייטן די עפן:
Locate the desired installation area in the ceiling. The required ceiling opening size is 8.07" x 8.07" (20.5 ס״מ x 20.5 ס״מ). Use a template or measure carefully to cut the opening. Ensure there is sufficient space above the ceiling for the fan housing and ductwork (minimum 5.93 inches depth).

Image 4: Diagram showing fan dimensions and required ceiling opening size.
This image provides critical dimensions for installation, including the overall product dimensions (9.45 inches depth, 5.95 inches height, 9.45 inches width) and the precise ceiling opening size required (8.07 inches by 8.07 inches). A 4-inch duct connection is also indicated.
- פֿאַרבינדן דאַקטוואָרק:
Connect a 4-inch diameter duct to the fan's exhaust port. Secure the duct with duct tape or a clamp to ensure an airtight seal. Route the duct to an exterior vent cap.
- מאָנטירן די ווענטילאַטאָר הויזינג:
Insert the integrated fan housing into the ceiling opening. Secure the housing to the ceiling joists or framing using the provided screws. Ensure the fan is level and securely fastened.
- עלעקטריקאַל וויירינג:
Connect the fan's electrical wires to your household wiring. This fan supports two connection modes:
- גלייכצייטיגע אפעראציע: Fan and light turn on/off together with a single switch.
- Separate Operation: Fan and light can be controlled independently with separate switches. This is recommended to prolong the service life of the light.
Follow local electrical codes. Typically, connect the fan's black wire to the hot wire, white wire to neutral, and green/bare wire to ground. For separate operation, you will need two hot wires from your switch box.
- Install Grille and Light Assembly:
Plug the LED light connector into the receptacle on the fan housing. Carefully align the grille and light assembly with the fan housing and secure it using the spring clips or screws as per the design. Ensure it sits flush against the ceiling.
- ומקערן מאַכט:
Once installation is complete and all connections are secure, restore power at the circuit breaker and test the fan and light functions.
6. אָפּעראַציע
The FASDUNT Bathroom Exhaust Fan with LED Light is designed for simple operation via a wall switch (or switches, depending on your wiring configuration).
6.1 טורנינג אויף / אַוועק
- If wired for simultaneous operation, flip the wall switch to turn both the fan and light ON or OFF.
- If wired for separate operation, use the designated switch for the fan and the other for the LED light.
6.2 אָפּטימאַלע נוצן
- For effective moisture removal, turn on the fan before showering or bathing and leave it running for at least 15-20 minutes after to clear humidity.
- The 1.0 Sones quiet operation ensures minimal noise disruption during use.
- The 12W 5000K LED light provides bright, natural illumination for your bathroom.
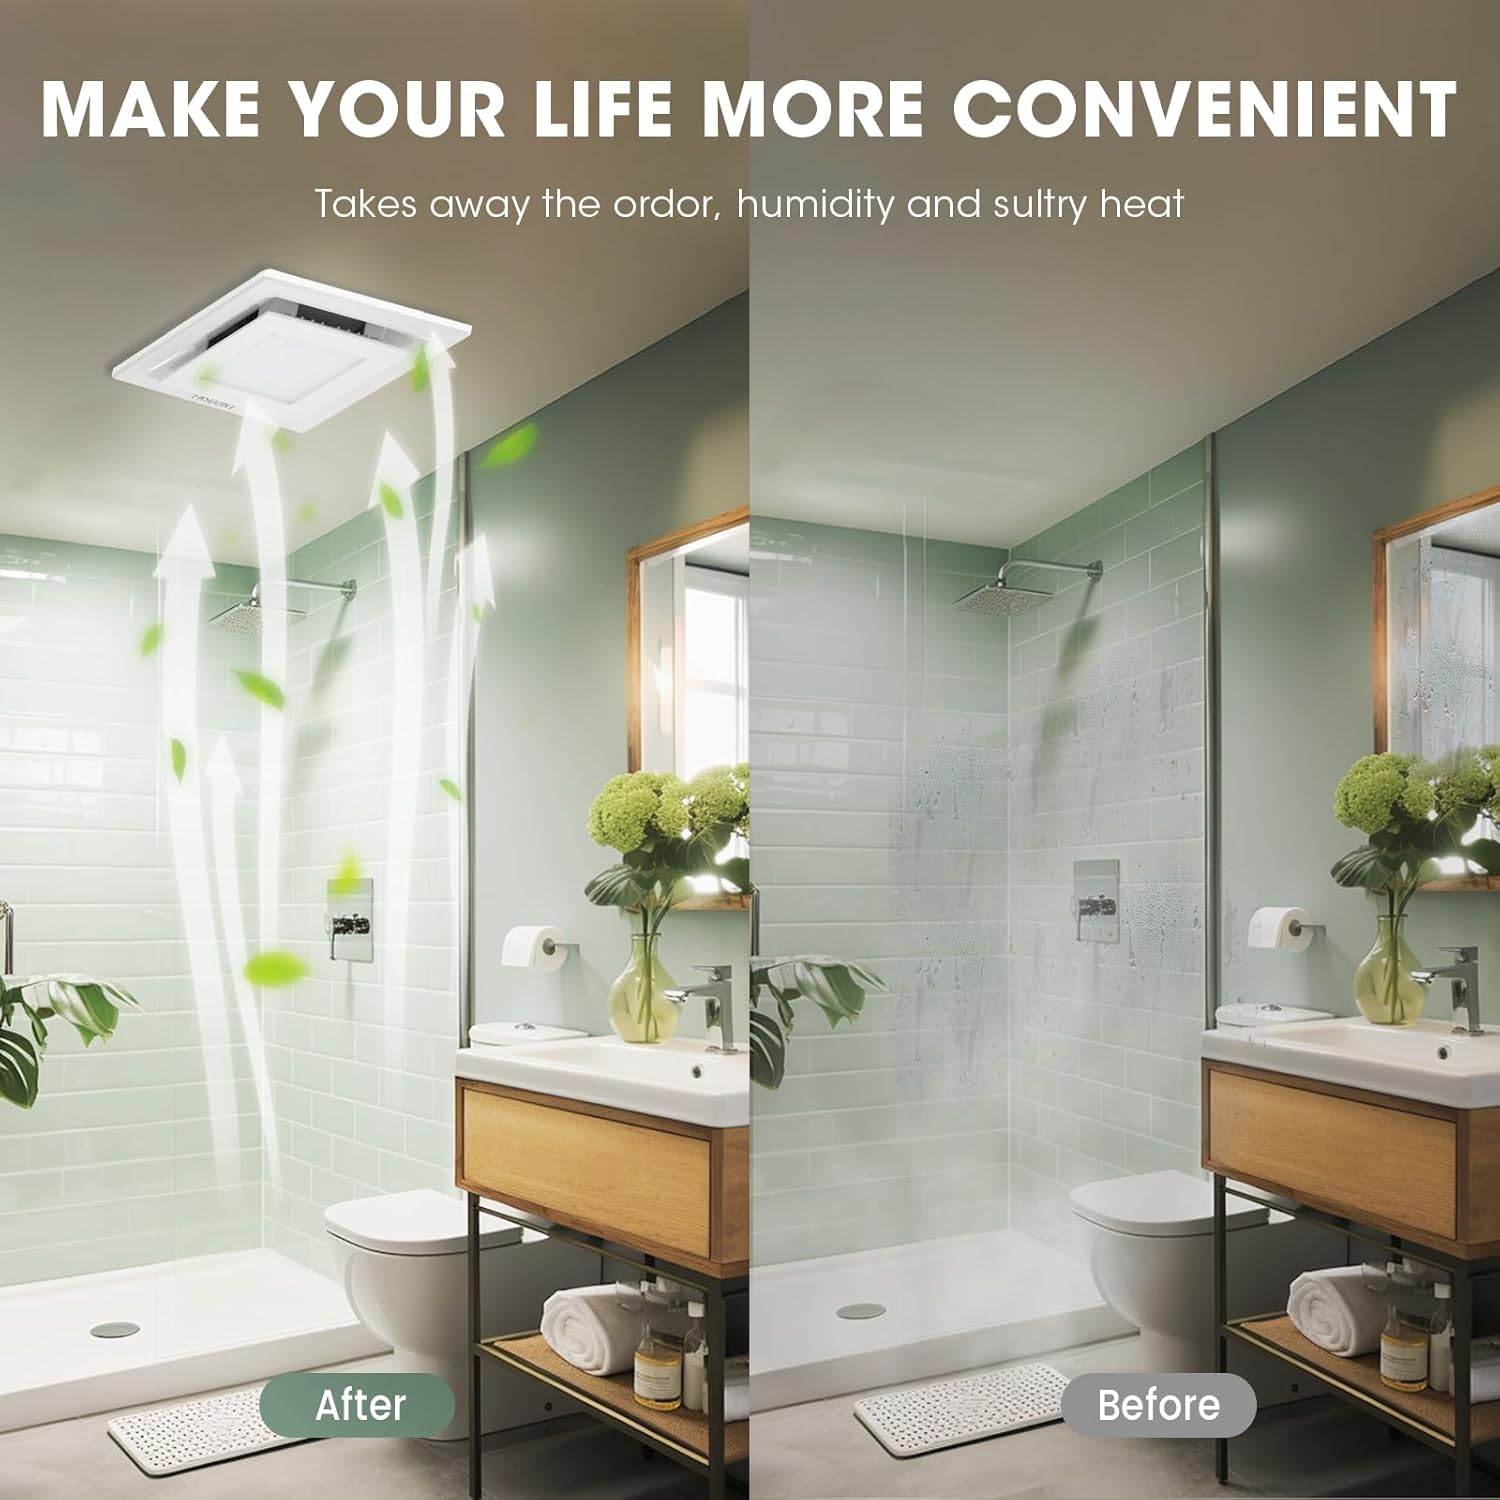
Image 5: Comparison of a bathroom before and after using the exhaust fan, showing reduced humidity.
This image presents a side-by-side comparison of a bathroom environment. The "Before" panel shows a shower area with significant steam and condensation on the glass and walls, indicating high humidity. The "After" panel shows the same area clear of steam and condensation, with arrows illustrating the fan's effective air extraction, demonstrating its ability to remove humidity and odors.
7. וישאַלט
Regular cleaning and maintenance will ensure optimal performance and extend the lifespan of your exhaust fan.
7.1 Cleaning the Grille and Light
- קער אַוועק מאַכט: Always disconnect power at the circuit breaker before cleaning.
- אַראָפּנעמען גרילל: Gently pull down the grille assembly. It is typically held by spring clips. Disconnect the LED light connector if necessary.
- ריין: Wash the grille with a mild detergent and warm water. Wipe the LED light panel with a damp cloth. Do not immerse the light panel in water.
- טריקענען און ווידער אינסטאלירן: Allow all parts to dry completely before reattaching the LED light connector and reinstalling the grille assembly.
7.2 רייניקן דעם פען-געhäuse און מאָטאָר
This should be done periodically, or if you notice reduced airflow or increased noise.
- קער אַוועק מאַכט: דיסקאַנעקט מאַכט בייַ די קרייַז צוימען.
- אַראָפּנעמען גרילל: Follow steps in 7.1 to remove the grille.
- Access Fan: Depending on the model, you may need to unclip or unscrew the fan motor assembly from the housing.
- רייניקן די פען בליידז: Use a soft brush or vacuum cleaner with a brush attachment to remove dust and debris from the fan blades and interior of the housing. Do not bend the fan blades.
- ריאַסעמבאַל: Reinstall the fan motor assembly (if removed), reconnect the LED light, and reattach the grille.
- ומקערן מאַכט: Restore power and test operation.
8. טראָובלעשאָאָטינג
Before performing any troubleshooting, ensure the power is OFF at the circuit breaker.
| פּראָבלעם | מעגלעך סיבה | לייזונג |
|---|---|---|
| פאָכער טוט נישט אַרבעטן. | קיין מאַכט צושטעלן. פרייַ וויירינג קשר. מאָטאָר מאַלפאַנגקשאַן. | קאָנטראָלירט דעם קרייז ברעיקער און וואַנט סוויטש. Verify all wire connections are secure (consult an electrician). קאָנטאַקטירט קונה שטיצע אויב דער מאָטאָר איז דעפעקטיוו. |
| ליכט טוט נישט קער אויף. | קיין מאַכט צו ליכט. Loose LED connector. געפירט ליכט דורכפאַל. | Check light switch and wiring. Ensure LED connector is fully seated. Contact customer support for replacement light assembly. |
| Reduced airflow or poor ventilation. | Blocked ductwork. שמוציקע ווענטילאַטאָר בליידז. Improperly sealed duct. | Check duct for obstructions. Clean fan blades and housing (see Maintenance section). Ensure duct connections are airtight. |
| יבעריק ראַש בעשאַס אָפּעראַציע. | פרייַ מאַונטינג. דעבריס אין פאָכער בליידז. Damaged motor/impeller. | זיכער מאַכן אַז די ווענטילאַטאָר איז זיכער אינסטאַלירט. Clean fan blades (see Maintenance section). קאָנטאַקטירט קונה שטיצע אויב דער ראַש בלייבט נאָך רייניקונג. |
9. גאַראַנטיע און קונה שטיצע
FASDUNT products are manufactured to high-quality standards. For specific warranty details, please refer to the warranty card included with your purchase or contact FASDUNT customer support.
If you encounter any issues or have questions regarding your FASDUNT Bathroom Exhaust Fan, please contact our customer support team for assistance. Please have your model number (EF2W) and purchase information ready.
קאָנטאַקט אינפֿאָרמאַציע: Please refer to the contact details provided on the product packaging or the official FASDUNT webפּלאַץ.