
1. הקדמה
This manual provides detailed instructions for the installation, operation, and maintenance of your Cenmate 5-Bay Hybrid Hard Drive Enclosure. This enclosure is designed to expand your storage capacity by combining 2.5/3.5 inch SATA HDDs/SSDs and M.2 NVMe SSDs, offering versatile storage solutions with high-speed data transfer.

Image 1.1: Cenmate 5-Bay Hybrid Enclosure
2. פּראָדוקט פֿעיִקייטן
- Hybrid Storage Design: Supports 2 x 2.5/3.5 inch SATA HDDs/SSDs and 3 x M.2 NVMe SSDs (2230/42/60/80/110).
- הויך קאַפּאַציטעט: Maximum total capacity of 68TB (2x22TB HDDs + 3x8TB M.2 SSDs).
- RAID Modes: Supports RAID 0, RAID 1, JBOD, and Normal modes for SATA drives. באַמערקונג: RAID configuration may result in data loss. Always back up data before configuring RAID.
- הויך-גיכקייַט קאַנעקטיוויטי: USB 3.2 Gen 2 interface provides data transfer rates up to 10Gbps.
- עפעקטיוו קאָאָלינג: Built-in aluminum alloy housing and a 2.7-inch silent fan ensure optimal heat dissipation.
- מכשירים-פריי ינסטאַלירונג: Features a tool-free hard drive tray design for easy installation and removal of 3.5-inch SATA drives.
- ברייט קאַמפּאַטאַבילאַטי: Compatible with Windows 7 and above, Mac OS 9.1 and above, and Linux. USB Type-C interface supports USB 3.0, USB 3.1, USB 3.2, Thunderbolt 3, and Thunderbolt 4.

Image 2.1: Product Features Overview
3. פּעקל אינהאַלט
ביטע באַשטעטיקן אַז אַלע זאכן זענען פאַראַן אין דעם פּעקל:
- Cenmate Hybrid Hard Drive RAID Enclosure
- USB A/C 3.2 Cable
- מאַכט אַדאַפּטער
- באַניצער מאַנואַל (דעם דאָקומענט)
4. סעטאַפּ און ייַנמאָנטירונג
4.1 מ.2 ססד ינסטאַלירונג
- Insert the M.2 SSD into the slot until it clicks into place.
- קניפּ דעם גומענע פּלאָג אַרײַן אין דעם מעטאַל האַלב-קרייַז פֿון דעם M.2 SSD.
- Press the rubber plug with the M.2 SSD down into the bayonet until it is secure.

Image 4.1: M.2 SSD Installation Steps
4.2 3.5 inch HDD Installation
- Pull up the blue clasps on both sides of the bracket.
- Put the hard drive gently into the tray, then snap the carabiner pins into the 3.5 inch HDD side screw holes.

Image 4.2: 3.5 inch HDD Installation Steps
4.3 2.5 inch HDD/SSD Installation
- אַראָפּנעמען דעם בלויען קלאַמער אויף דער זײַט מיט אַ שרויפנציהער.
- Use screws to secure the 2.5 inch HDD/SSD in the corresponding holes on the tray.

Image 4.3: 2.5 inch HDD/SSD Installation Steps
5. אָנפאַל קאָנפיגוראַטיאָן
The Cenmate enclosure supports four RAID modes for SATA drives: Normal, RAID 1, RAID 0, and JBOD. M.2 NVMe SSDs are always treated as independent drives.
Important Note: Press and hold the "Reset" button for 5 seconds after resetting the RAID array. Designing or changing RAID modes may result in data loss. Always back up your data before performing RAID configuration.

Image 5.1: RAID Mode Configuration
- נאָרמאַל: Each drive operates independently. (Switch 1 & 2 are down)
- RAID 1 (שפּיגל): Data is duplicated across two drives for redundancy. Requires two drives. Capacity equals the smallest drive. (Switch 1 & 2 are up)
- RAID 0 (סטרייפּינג): Data is split across two drives for increased speed. Requires two drives. Total capacity is the sum of both drives. (Switch 1 up & Switch 2 down)
- JBOD (נאָר אַ הויפן דיסקס): Drives are concatenated to form a single large volume. Requires two drives. Total capacity is the sum of both drives. (Switch 1 down & Switch 2 up)
6. אַפּערייטינג ינסטרוקטיאָנס
After installing your drives and configuring RAID (if desired), connect the enclosure to your computer using the provided USB A/C 3.2 Gen 2 cable and power adapter. Power on the device using the switch on the rear panel. Your operating system should detect the drives. For new drives, you may need to initialize and format them through Disk Management (Windows) or Disk Utility (macOS) before use.
6.1 דאַטאַ אַריבערפירן
The enclosure supports up to 10Gbps data transfer speeds. Actual speeds may vary based on your drives, computer's USB port, and operating system.
ווידעא 6.1: איבערview of the Cenmate Hybrid Storage Enclosure and its features.
7. געפֿירט ינדיקאַטאָרס
The enclosure features LED indicators for each drive bay to provide status information:

Image 7.1: LED Indicator Guide
- M.2-1 (Purple LED): Always blue when connected, flashes when reading/writing.
- M.2-2 (Red LED): Always red when connected, flashes when reading/writing.
- M.2-3 (Red LED): Always red when connected, flashes when reading/writing.
- HDD1 (Blue LED): Always blue when connected. If incompatibility or damage occurs, the blue light will show red. Flashes red when reading/writing.
- HDD2 (Blue LED): Always blue when connected. If incompatibility or damage occurs, the blue light will show red. Flashes red when reading/writing.
8. קאַמפּאַטאַבילאַטי
The Cenmate 5-Bay Hybrid Enclosure offers broad compatibility with various operating systems and devices.
8.1 Supported M.2 NVMe SSDs
The enclosure supports M.2 NVMe SSDs with M Key and M&B Key (NVMe/PCIe) in sizes 2230, 2242, 2260, 2280, and 22110.

Image 8.1: M.2 NVMe SSD Compatibility
8.2 Supported Operating Systems and Devices
The enclosure is compatible with:
- אַפּערייטינג סיסטעמס: Windows 7 and above, macOS 9.1 and above, Linux, Chrome OS.
- מכשירים: Desktops, Laptops.
- USB צובינד: USB 3.0, USB 3.1, USB 3.2, Thunderbolt 3, Thunderbolt 4.

Image 8.2: System and Device Compatibility
9. טראָובלעשאָאָטינג
באַציט זיך צו די פאלגענדע געוויינטלעכע פּראָבלעמען און זייערע לייזונגען:
9.1 Hard Drive Not Found / RAW Format

Image 9.1: Troubleshooting Q1 & Q2
- Q1: After connecting a new hard drive, why can't I find it or see its disc letter?
A1: New hard drives must be formatted before use. Right-click 'Computer' (or 'This PC'), then 'Manage', open 'Disk Management'. Find the new hard drive, right-click 'Initialize Disk' (select 'MBR' for drives ≤ 2TB, 'GPT' for drives > 2TB). Then, 'New Simple Volume' and follow the prompts to format the partition. - פראגע 2: די הארט דרייוו דערשיינט אין RAW פֿאָרמאַט אין דיסק מאַנאַגעמענט צוליב נישט ריכטיקער עקסטראַקציע אָדער שטראָם אויספאַל. וואָס זאָל איך טאָן?
A2: You can attempt recovery using thechkdskcommand. Run Command Prompt as administrator, then inputchkdsk D:/f(replace 'D' with the actual drive letter). Scanning and repair will complete, and a reboot may be required.
9.2 אַנדערע געוויינטלעכע פּראָבלעמען
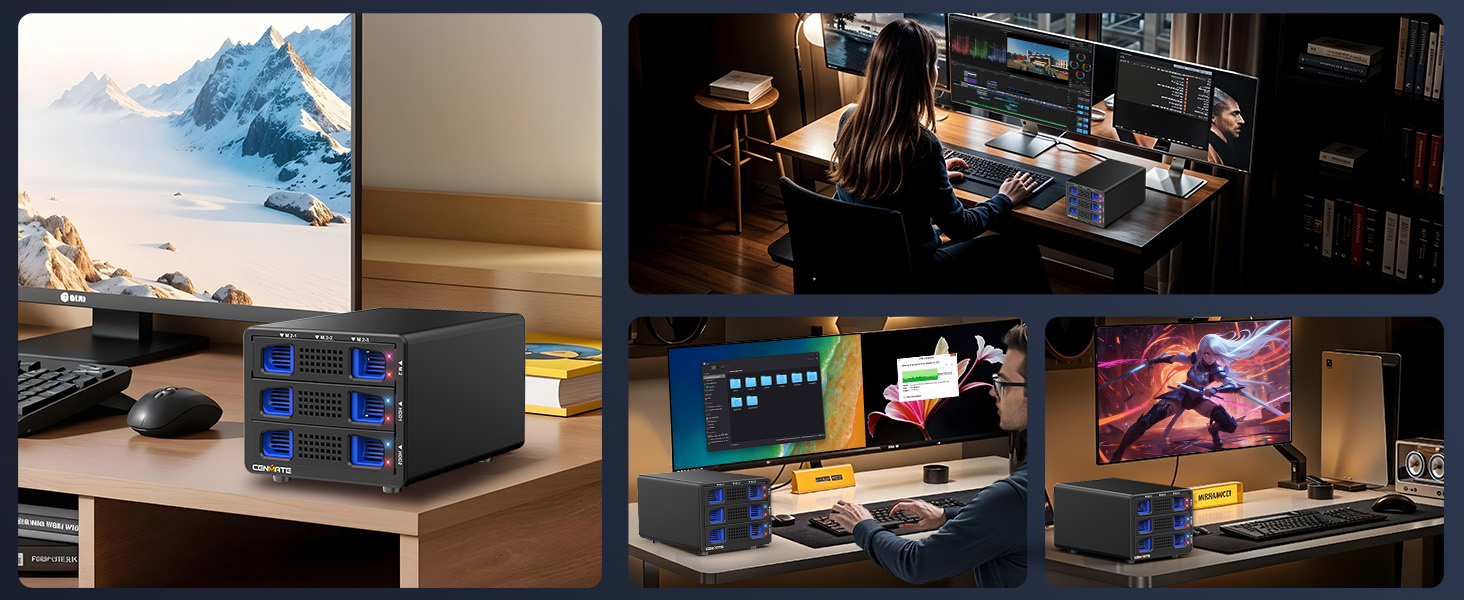
Image 9.2: Troubleshooting Q3-Q5
- Q3: The hard drive is dynamically invalid in Disk Management because it was previously removed from an old computer.
A3: This is a system-related issue. Reinstall the hard drive into the original computer motherboard and back up the data. If the old computer is unavailable, you can use dynamic disk conversion software to convert it to a basic disk. - Q4: Hard drive shows up but has no disc letter.
A4: In Disk Management, right-click on the Disk Partition section and select 'Change Drive Letter and Paths' to add a drive letter for use. - Q5: The enclosure automatically disconnects during transmission and then reconnects after a while.
A5: This could indicate issues with the computer's USB interface, the USB cable, computer USB drivers, the hard drive itself, or the hard drive enclosure. Contact technical support for assistance in diagnosing the problem.
10. ספּעסאַפאַקיישאַנז
| באַשרייַבונג | דעטאַל |
|---|---|
| סאָרט | cenmate |
| מאָדעל נומער | 5 בוכטע |
| פּונקט וואָג | 2.49 פונט (1.13 קילאָגראַמס) |
| פּראָדוקט דימענשאַנז | 7.95 X 5.2 X 4.41 אינטשעס |
| זכּרון סטאָרידזש קאַפּאַסיטי | 68 TB (Maximum) |
| קאַמפּאַטאַבאַל דעוויסעס | דעסקטאָפּ, לאַפּטאָפּ |
| שווער דיסק פאָרם פאַקטאָר | 2.5 אינטשעס, 3.5 אינטשעס |
| מאַקס נומער פון שטיצט דעוויסעס | 5 (2 SATA, 3 M.2 NVMe) |
| דאַטאַ אַריבערפירן קורס | 10 Gigabits Per Second (USB 3.2 Gen 2) |
| ייַזנוואַרג צובינד | וסב 3.2 גענ 2 |
| ייַזנוואַרג פּלאַטפאָרמע | ווינדאָוס, מעק, לינוקס |
| מאַטעריאַל | אַלומינום |
11. וואָראַנטי און שטיצן
Cenmate provides lifetime technical support for this product. If you have any questions or encounter issues, please do not hesitate to contact us. We aim to reply and resolve your problem within 24 hours.