
1. הקדמה
Thank you for choosing the Andonstar AD115 Portable Digital Microscope. This manual provides essential information for the safe and effective use of your device. Please read it thoroughly before operation and retain it for future reference.
2. פּעקל אינהאַלט
Before proceeding with setup, verify that all components are present in your package:
- מיקראָסקאָפּ מאָניטאָר
- Microscope Stand (Base, Vertical Rod, Holder)
- וסב- C קאַבלע
- באַניצער מאַנואַל

Image: The complete contents of the Andonstar AD115 package, showing the microscope monitor, the disassembled metal stand, a USB-C charging cable, and the printed user manual.
3. סעטאַפּ
3.1 שטאַנד פֿאַרזאַמלונג
- Attach the vertical rod to the metal base using the provided screw.
- Slide the microscope holder onto the vertical rod.
- Secure the holder at the desired height using the adjustment knob.
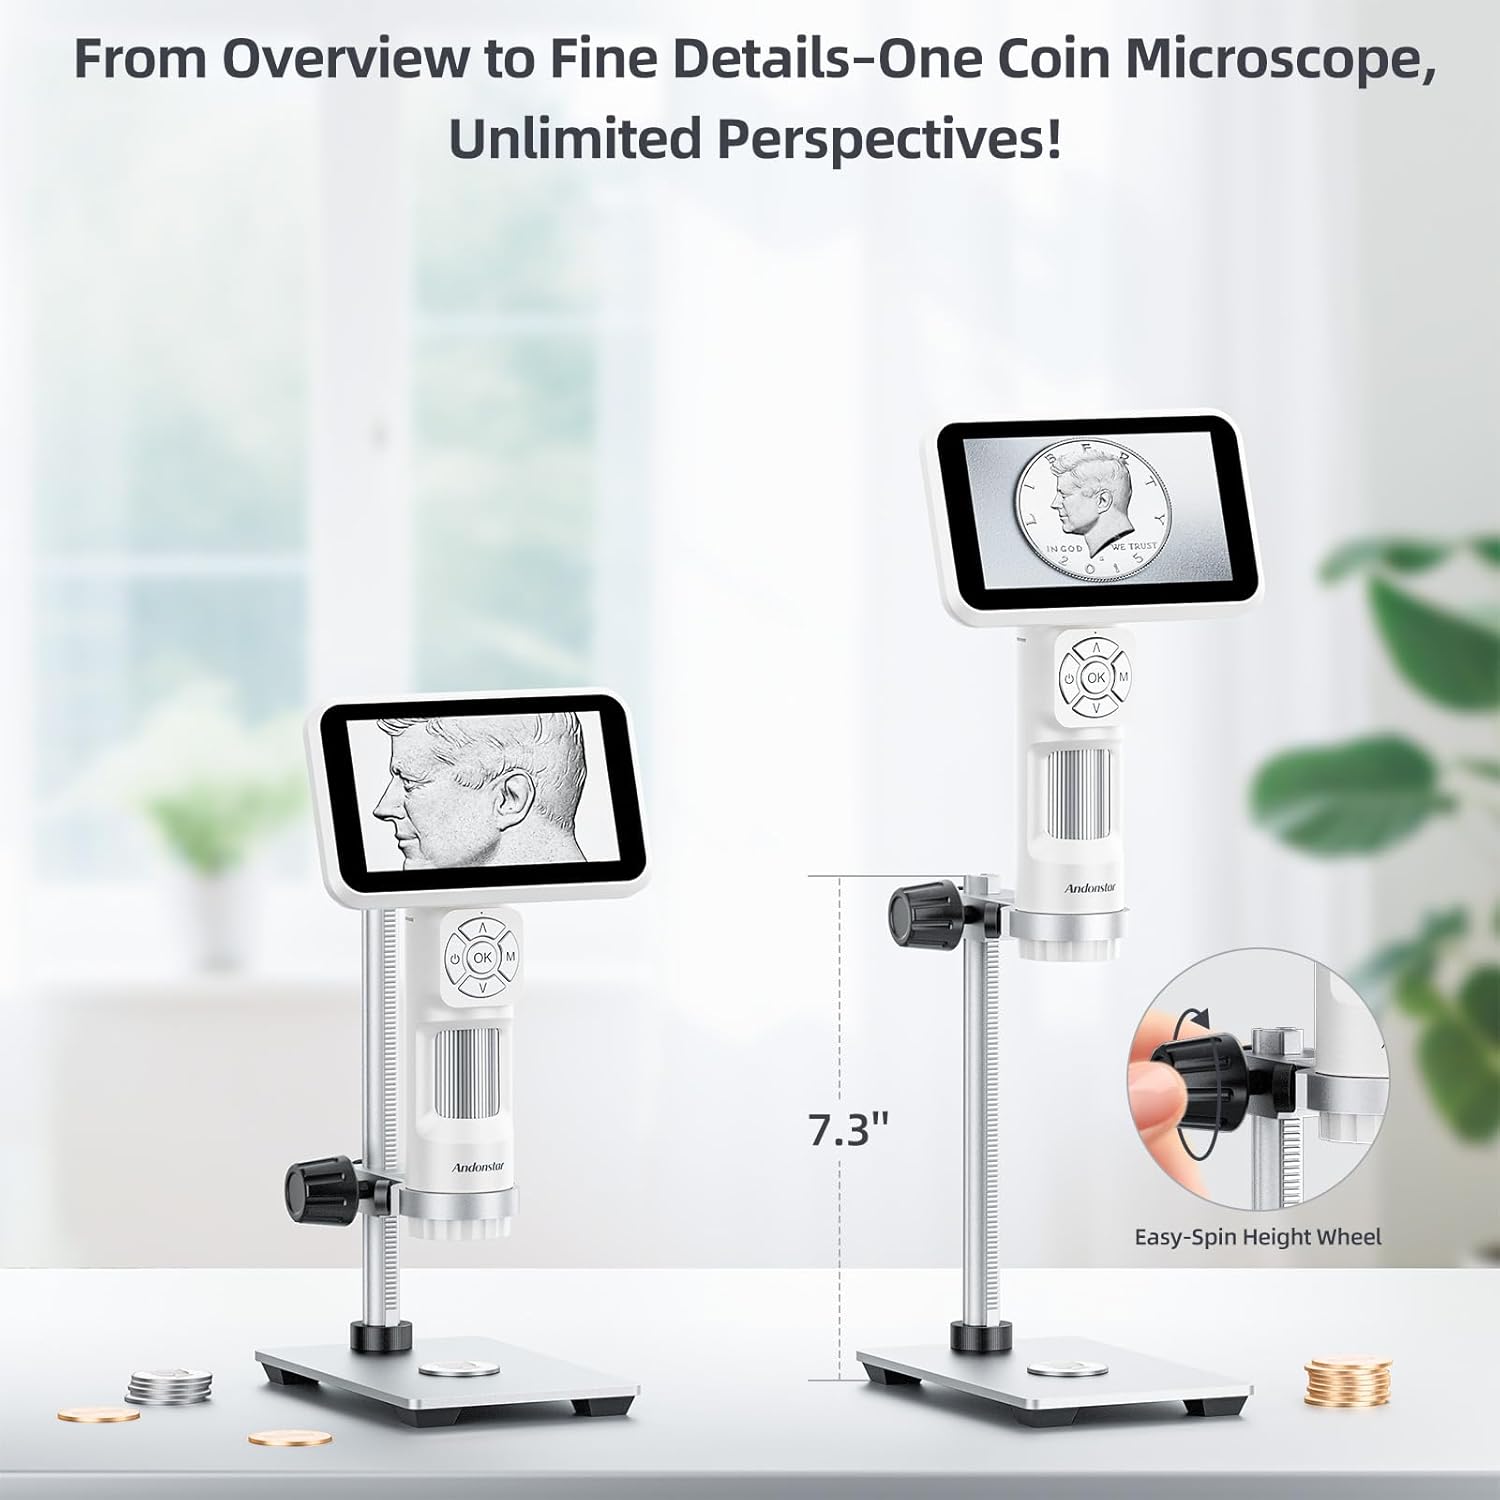
Image: Two Andonstar AD115 microscopes on their metal stands, illustrating different height settings and the easy-spin height adjustment wheel for precise positioning.
3.2 ערשט טשאַרדזשינג
Before first use, fully charge the microscope's internal battery using the supplied USB-C cable and a compatible 5V USB power adapter (not included). The charging indicator will show the charging status.
4. אַפּערייטינג ינסטרוקטיאָנס
4.1 יקערדיק קאָנטראָלס
The microscope features intuitive controls for easy operation:
- מאַכט קנעפּל: דריקן און האַלטן צו קער די מיטל אויף / אַוועק.
- LED ליכט אַדזשאַסטמאַנט: Use the dedicated switch to control the brightness of the integrated LED lights.
- OK/M Button: Press to confirm selections or switch between modes (e.g., photo, video).
- אַרויף/אַראָפּ קנעפּלעך: נאַוויגירן מעניוז אָדער סטרויערן סעטטינגס.
- פאָקוס ראָד: Rotate to achieve a clear image.

Image: A user holding the Andonstar AD115 microscope in handheld mode, highlighting the LED light control, the OK/M button for taking pictures/videos, and the focus adjustment ring.
4.2 פֿאַרגרעסערונג און פֿאָקוס
The AD115 offers a maximum magnification of 60x. Adjust the distance between the lens and the object, then fine-tune the focus using the focus wheel for optimal clarity.

בילד: א דעטאַלירטע view of the shake-free distance adjustment ring on the Andonstar AD115, demonstrating how to set the working distance (0.5cm, 1.0cm, 1.5cm) for micro-focus adjustment and to achieve a steady image.
4.3 Viewאין מאָדעס
The AD115 can be used in various configurations to suit your inspection needs:
- כאַנדכעלד: For quick inspections or objects that cannot be placed on the stand.
- Close-Up: Using the stand for detailed examination of smaller areas.
- פול View: Adjusting the stand height to capture a broader field of view.
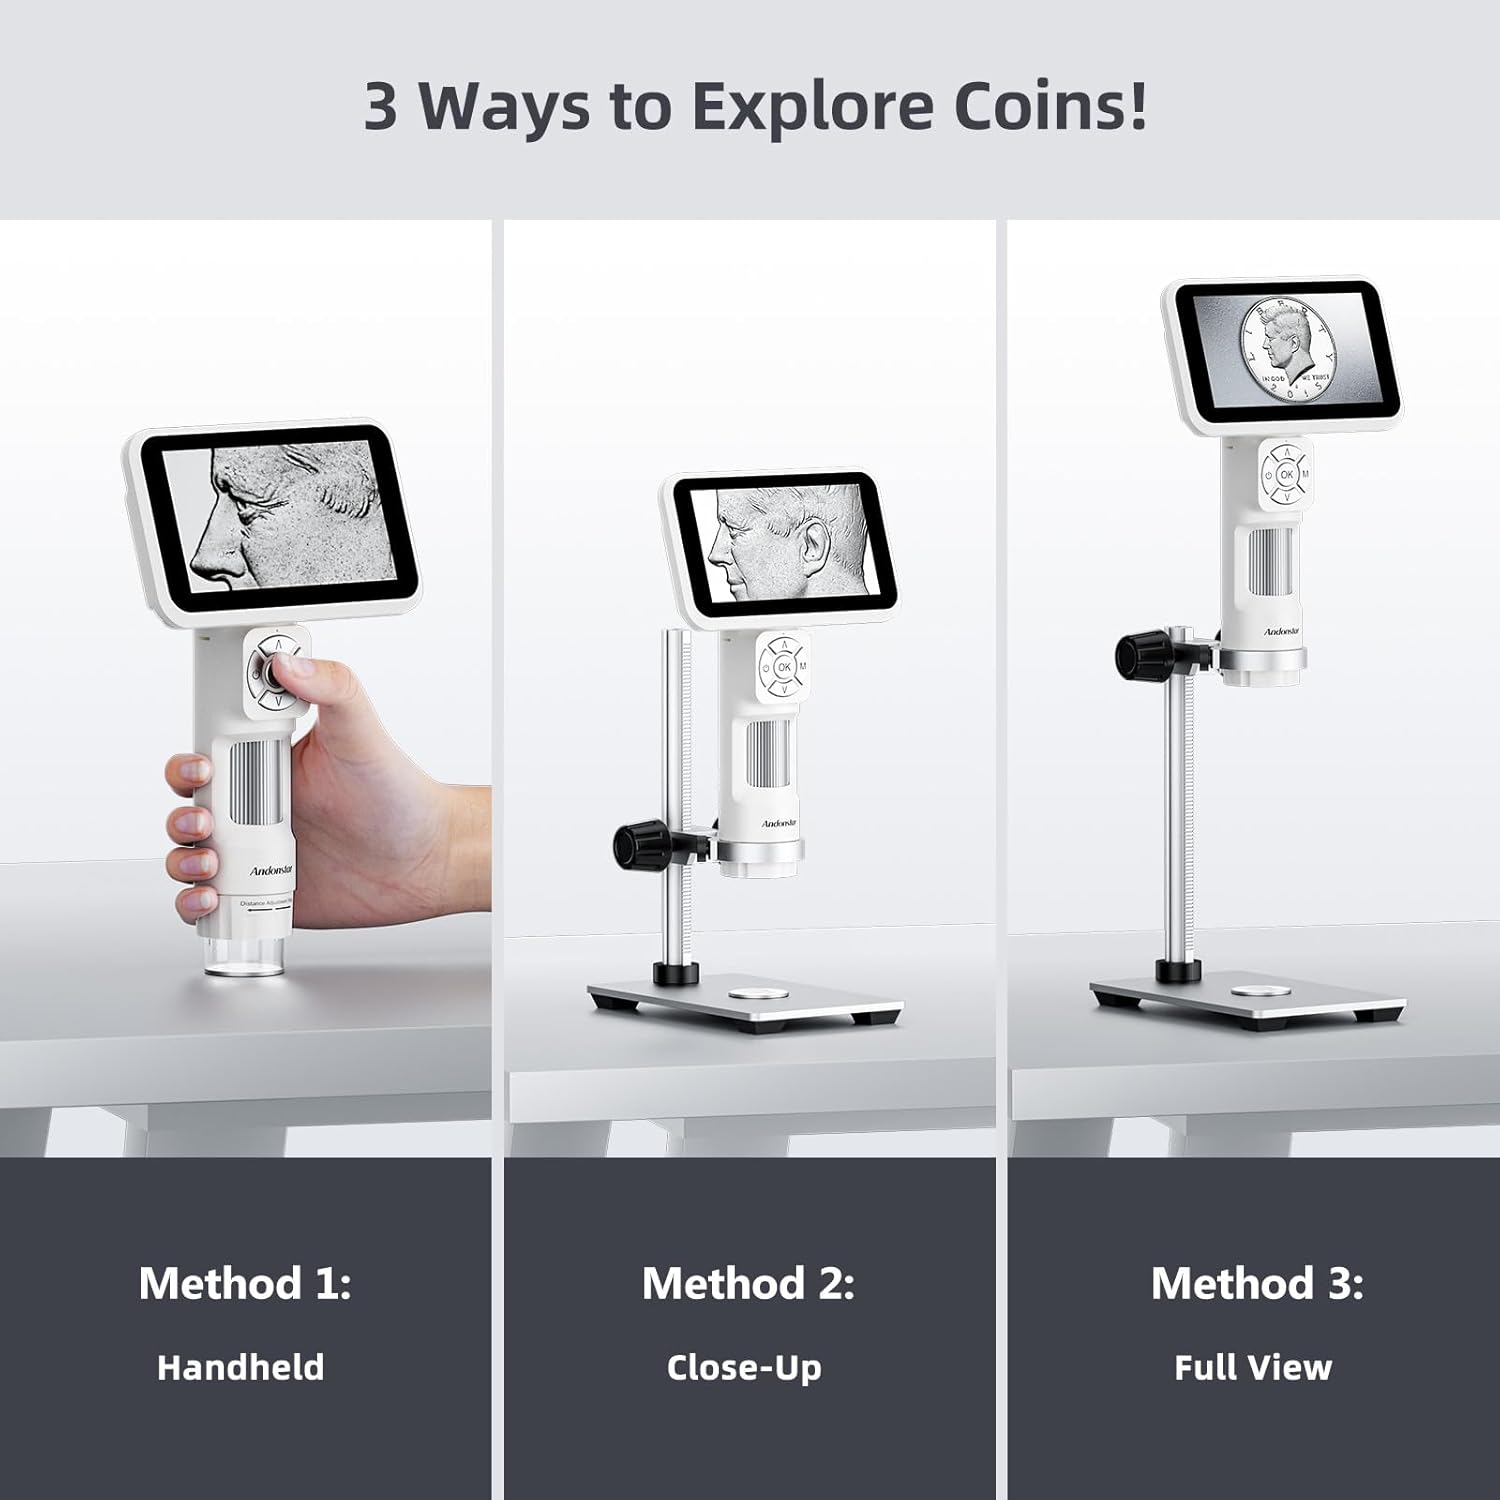
Image: A visual guide demonstrating three ways to explore objects with the Andonstar AD115: Method 1 (Handheld), Method 2 (Close-Up on stand), and Method 3 (Full View on stand).
4.4 בילד און ווידעא כאַפּן
The microscope supports capturing 12MP images and 1080P Full HD videos directly to a microSD card (not included).
- Insert a formatted microSD card into the designated slot.
- Press the 'OK' button to take a photo or the 'M' button to switch to video mode and then 'OK' to start/stop recording.

Image: The 5-inch 1080P IPS screen of the Andonstar AD115 microscope camera, showing a magnified coin. Below are examples of a 12M picture of a poppy and a 1080FHD video frame of a parrot, illustrating its capture capabilities.
4.5 פּיסי קאַנעקשאַן
Connect the AD115 to a Mac or Windows PC via the USB-C cable to use it as a PC camera for larger display and data transfer.
- Connect the microscope to your computer using the USB-C cable.
- Select 'PC Camera' mode on the microscope screen.
- Open a compatible camera application on your computer to view די לעבן קאָרמען.
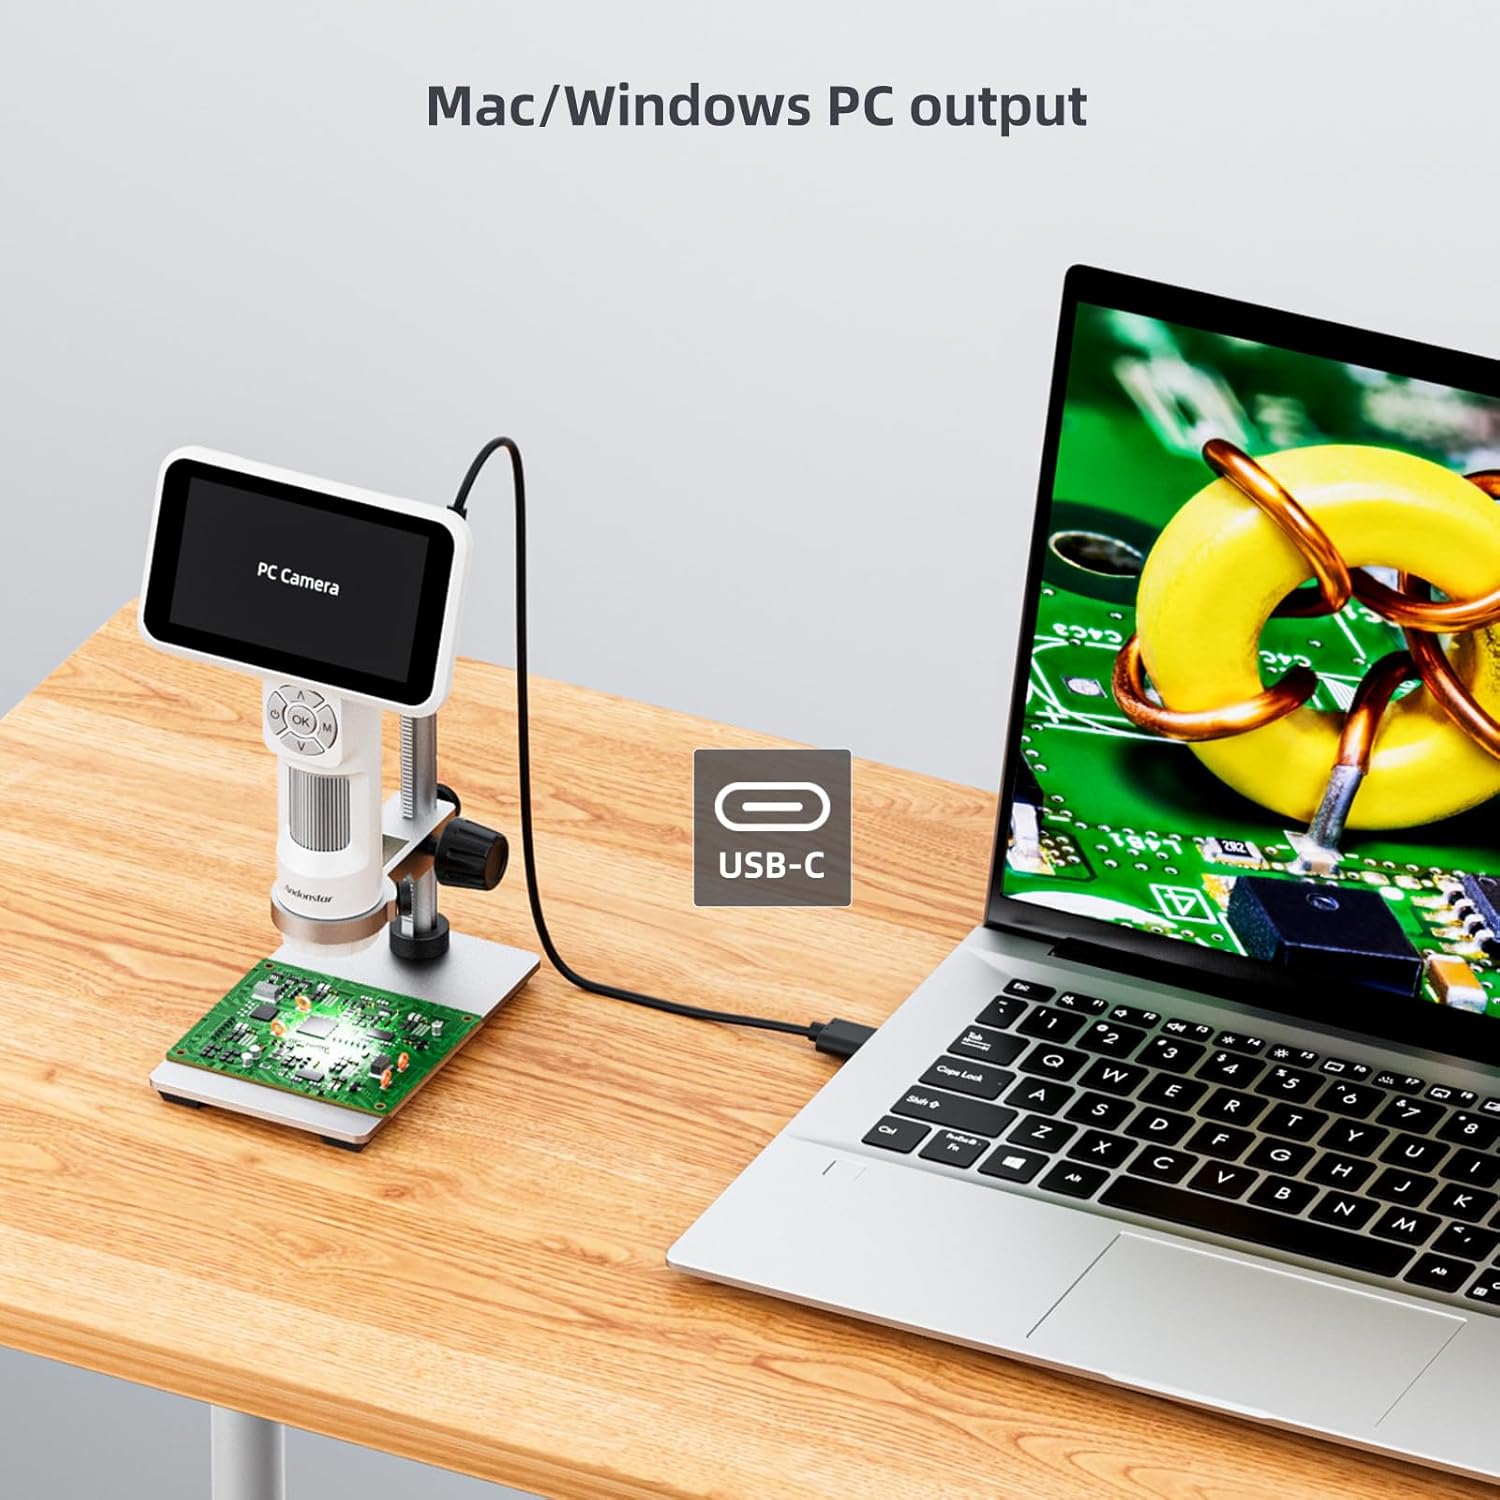
Image: The Andonstar AD115 microscope connected to a laptop via a USB-C cable, demonstrating its capability for Mac/Windows PC output, with the microscope viewing a circuit board.
5. וישאַלט
5.1 רייניקונג
To maintain optimal performance, keep the lens and screen clean. Use a soft, lint-free cloth for the screen and a lens cleaning solution with a microfiber cloth for the objective lens. Avoid abrasive materials or harsh chemicals.
5.2 באַטערי קער
The AD115 is equipped with a 900mAh battery, providing approximately 2.5 hours of usage time. To prolong battery life:
- Charge the device fully before extended storage.
- Avoid completely draining the battery regularly.
- קראָם אין אַ קיל, טרוקן אָרט.

Image: An illustration of the Andonstar AD115's 900mAh battery, highlighting its 2.5-hour usage time, with a scene depicting the microscope being used outdoors by a child, emphasizing its portability and long-lasting battery for exploration.
6. טראָובלעשאָאָטינג
If you encounter issues with your Andonstar AD115, refer to the following common problems and solutions:
| פּראָבלעם | מעגלעך סיבה | לייזונג |
|---|---|---|
| קיין מאַכט | נידעריגע באַטעריע; מאַכט קנעפּל נישט ריכטיק געדריקט | לאָדנט דעם אַפּאַראַט; דריק און האַלט דעם מאַכט קנעפּל פֿאַר 3 סעקונדעס |
| בלערי בילד | Incorrect focus; Object too far/close; Dirty lens | Adjust the focus wheel; Adjust working distance; Clean the lens |
| קען נישט כאַפּן בילדער/ווידעאָס | No microSD card; microSD card full or unformatted | Insert a formatted microSD card; Delete files or replace card |
| PC connection not working | Incorrect mode selected; Faulty USB-C cable; Driver issue | Ensure 'PC Camera' mode is selected; Try a different USB-C cable; Check PC device manager for drivers |
7. ספּעסאַפאַקיישאַנז
| שטריך | באַשרייַבונג |
|---|---|
| מאָדעל נומער | AD115-Stand |
| סאָרט | Andonstar |
| מאַקסימום מאַגניפיקאַטיאָן | 60x |
| Digital Magnification (Digital Zoom) | 60x |
| אָביעקטיוו לינז באַשרייַבונג | אַקראָמאַטיק |
| ליכט מקור טיפּ | געפירט |
| Voltage | 5 וואלטס |
| פאַקטיש View ווינקל | 178 דיגריז |
| פאַבריקאַנט | ShenZhen Andonstar Technology Co., Ltd |
| UPC | 616361263949 |
| ASIN | B0DS218R69 |
| GTIN | 616361263949 |
8. וואָראַנטי און שטיצן
8.1 וואָראַנטי אינפֿאָרמאַציע
The Andonstar AD115 Portable Digital Microscope comes with a standard manufacturer's warranty. Please refer to the warranty card included in your package or visit the official Andonstar webזייטל פֿאַר דעטאַלירטע תּנאים און באַדינגונגען וועגן קאַווערידזש און געדויער.
8.2 קונה שטיצן
For technical assistance, troubleshooting not covered in this manual, or warranty claims, please contact Andonstar customer support through their official website or the contact information provided with your purchase. When contacting support, please have your model number (AD115) and purchase details ready.