
Yard Force YF60VRX21-SP
Yard Force 60V Cordless Self-Propelled Electric Lawn Mower Instruction Manual
Model: YF60VRX21-SP
1. הקדמה
Thank you for choosing the Yard Force 60V Cordless Self-Propelled Electric Lawn Mower. This manual provides essential information for the safe and efficient operation, maintenance, and troubleshooting of your new lawn mower. Please read this manual thoroughly before initial use and keep it for future reference.
2. זיכערקייַט אינפֿאָרמאַציע
שטענדיק געבן זיכערהייט א פריאריטעט ווען איר אפערירט עלעקטרישע עקוויפמענט. נישט נאכפאלגן זיכערהייט אינסטרוקציעס קען רעזולטירן אין ערנסטע שאדן אדער שאדן פאר אייגנטום.
אַלגעמיינע זיכערקייַט כּללים:
- Read all instructions carefully before operating the mower.
- טראָגט פּאַסיקע פּערזענלעכע שוץ-עקוויפּמענט (PPE), אַרייַנגערעכנט אויג-שוץ, הערן-שוץ און שטאַרקע שיך.
- האַלטן קינדער און בייסטאַנדערז אַוועק פון די אַפּערייטינג געגנט.
- ניצט נישט דעם גראז-שניידער אין נאַסע באדינגונגען אדער אויף צו שטיילע אַראָפּגאַנגען.
- זיכער מאַכן אַז די באַטאַרייע איז גאָר אויפגעלאָדן איידער נוצן און אַרויסגענומען ווען נישט אין אָפּעראַציע אָדער בעת וישאַלט.
- קאָנטראָלירט דעם גראָז־שניידער פֿאַר יעדן באַנוץ. ניצט עס נישט אויב עס איז געשעדיגט.
- ניצט נאָר פאַבריקאַנט-באשטעטיקטע פאַרבייַט טיילן און אַקסעסאָריעס.
3. קאַמפּאָונאַנץ איבערview
Familiarize yourself with the main components of your Yard Force 60V Cordless Self-Propelled Electric Lawn Mower.

Figure 3.1: Complete Lawn Mower Assembly with Battery and Charger.
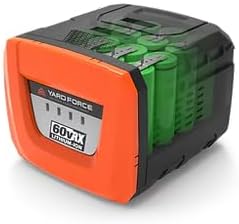
Figure 3.2: Yard Force 60V Lithium-Ion Battery.
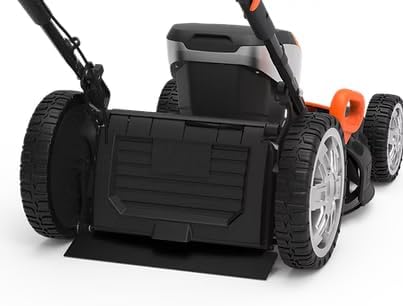
Figure 3.3: Battery Compartment on the Mower Deck.

Figure 3.4: Mower Wheel and Height Adjustment Mechanism.
4. סעטאַפּ
4.1. פֿאַרזאַמלונג
Your lawn mower may require minor assembly upon unboxing. This typically involves unfolding and securing the handle, and attaching the grass collection bag if applicable. Refer to the quick start guide included in the packaging for detailed visual instructions.
4.2. באַטערי טשאַרדזשינג
Before first use, fully charge the 60V 4Ah Lithium-Ion battery. Connect the charger to a standard power outlet and insert the battery. The charger's indicator lights will show the charging status. A full charge typically takes approximately 60 minutes with the 4A rapid charger.
4.3. באַטאַרייע ייַנמאָנטירונג
Open the battery compartment cover on the mower deck (refer to Figure 3.3). Slide the fully charged battery into the compartment until it clicks securely into place. Close the cover firmly.
5. אַפּערייטינג ינסטרוקטיאָנס
5.1. אַדזשאַסטירן שנייד הייך
The mower features a 7-position one-touch height adjustment. Locate the height adjustment lever near the wheels (refer to Figure 3.4). Pull the lever outwards and move it to the desired cutting height, ranging from 1 1/4" to 3 3/4". Ensure all wheels are set to the same height for an even cut.
5.2. סטאַרטינג די מאָוער
To start the mower, ensure the battery is installed. Press and hold the safety button, then pull the bail lever towards the handle. The motor will start. Release the safety button once the motor is running.
5.3. Self-Propelled Function
This model is equipped with self-propelled technology and variable speed control. To engage the self-propelled function, activate the separate self-propel lever (if present, consult your quick start guide for exact location). Adjust the speed as needed for comfortable operation.
5.4. מאָוינג טעקניקס
For optimal results, mow when the grass is dry. Overlap cutting swaths slightly to ensure complete coverage. Avoid cutting more than one-third of the grass blade length at a time. The 3-in-1 functionality allows for mulching, bagging, or side discharge. Attach the grass bag for collection or the side discharge chute for dispersal.
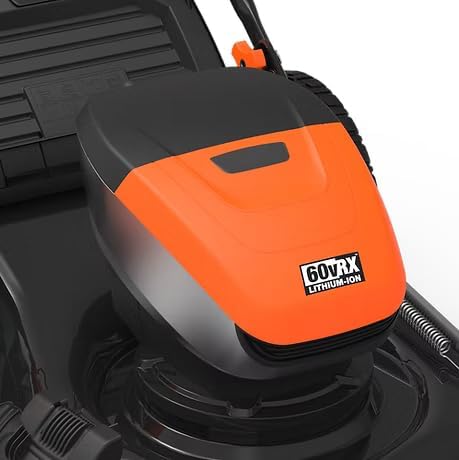
Figure 5.1: Operating the Lawn Mower.

Figure 5.2: Mowing a Residential Lawn.
6. וישאַלט
רעגולערע אויפהאלטונג גאראנטירט די לאנגעוויטי און אפטימאלע פאָרשטעלונג פון אייער גראָז שניידער.
6.1. רייניקונג
After each use, disconnect the battery and clean the mower deck, blades, and grass bag. Use a damp cloth to wipe down exterior surfaces. Do not use water jets or immerse the mower in water.
6.2. בלייד קער
Periodically inspect the cutting blade for sharpness and damage. A dull or damaged blade can lead to poor cutting performance and strain the motor. If necessary, have the blade sharpened or replaced by a qualified service technician. Always wear heavy-duty gloves when handling the blade.
6.3. סטאָרידזש
Store the mower in a dry, secure location, away from direct sunlight and extreme temperatures. The foldable handle allows for compact storage. Remove the battery before storing for extended periods.
7. טראָובלעשאָאָטינג
די סעקציע באהאנדלט אלגעמיינע פראבלעמען וואס איר קענט באגעגענען מיט אייער גראז שניידער.
Mower Does Not Start:
- פאַרזיכערן די באַטאַרייע איז גאָר באפוילן און רעכט ינסערטאַד.
- Check that the safety button is pressed before pulling the bail lever.
- Verify that the bail lever is fully engaged.
- Inspect the battery terminals and mower contacts for debris or corrosion.
נעבעך קאַטינג פאָרשטעלונג:
- The cutting blade may be dull or damaged. Refer to Section 6.2 for blade care.
- Grass may be too wet or too long. Mow when grass is dry and consider raising the cutting height.
- The mower deck may be clogged with grass clippings. Disconnect battery and clean thoroughly.
יבעריק ווייבריישאַן:
- The cutting blade may be unbalanced or bent. Have it inspected and replaced if necessary.
- Check for loose fasteners on the mower deck or handle.
8. ספּעסאַפאַקיישאַנז
| שטריך | באַשרייַבונג |
|---|---|
| סאָרט | יאַרד קראַפט |
| מאָדעל נומער | YF60VRX21-SP |
| מאַכט מקור | DC 60V (באַטערי) |
| מאָטאָר טיפּ | ברושלעסס |
| קאַטינג ברייט | 20 אינטשעס |
| דעק גרייס | 21 אינטשעס |
| קאַטינג הייך אַדזשאַסטמאַנט | 7-Position (1 1/4" to 3 3/4") |
| באַטאַרייע קאַפּאַציטעט | 1 X 4 אַה |
| טשאַרדזשער | 4A Rapid Charger |
| קיין-לאָד לויף צייט | אַרויף צו 60 מינוט |
| קאַפּאַציטעט פון גראָז באַג | 2 bushel / 65L |
| פראָנט ראָד גרייס | 8 אינטשעס |
| דערציען וויל גרייס | 12 אינטשעס |
| פּונקט וואָג | 86 פונט |
| פּראָדוקט דימענשאַנז | 36"ד רענטגענ 17"וו רענטגענ 24"ה |
| UPC | 846325004084 |
9. וואָראַנטי און שטיצן
Yard Force products are designed for durability and performance. For warranty information, product registration, or technical support, please refer to the warranty card included with your product or visit the official Yard Force webזייטל. האַלט דיין קויפן באַווייַז פֿאַר קיין וואָראַנטי קליימז.
Ask a question about this manual
Ask about setup, troubleshooting, compatibility, parts, safety, or missing instructions. Manuals+ will review the question and use this page’s manual context to help answer it.