
הקדמה
This user manual provides detailed instructions for the setup, operation, maintenance, and troubleshooting of your Victrix Pro KO Leverless All Button Fight Stick. Designed for competitive esports gamers, this officially licensed controller offers unparalleled speed, accuracy, and customization for PlayStation 5, PlayStation 4, and Windows PC.
פּעקל אינהאַלט
- Victrix Pro KO לעווערלעסס קאַמף שטעקן
- 3 ם בריידיד וסב-C קאַבלע
- באַשטימען פּולער טול
- פּראַטעקטיוו סליוו
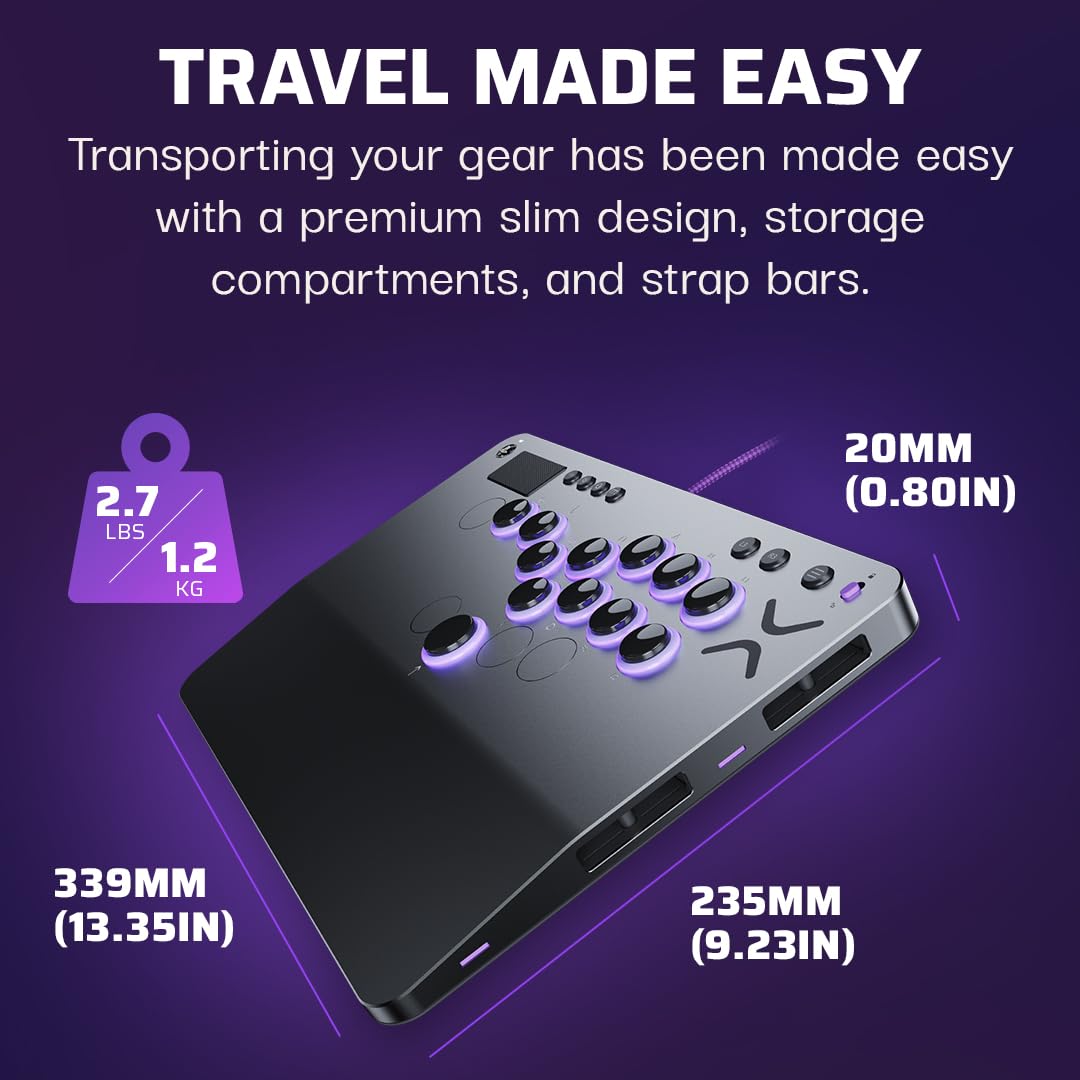
Image: The Victrix Pro KO Leverless Fight Stick, a 3m braided USB-C cable, a switch puller tool, and a protective sleeve are shown together, representing the complete package contents.
סעטאַפּ
Connecting to Console/PC
- Locate the 3m Braided USB-C Cable included in the package.
- Connect the USB-C end of the cable to the port on the Victrix Pro KO Fight Stick.
- Connect the USB-A end of the cable to an available USB port on your PlayStation 5, PlayStation 4, or Windows PC.
- The fight stick will automatically be recognized by your system.

בילד: א נאָענטע בילד view of the Victrix Pro KO Leverless Fight Stick showing the USB-C cable connected to its port, illustrating the connection process.
פּלאַטפאָרמע אויסוואַל
The Victrix Pro KO features a console switch mode to easily transition between PlayStation 5, PlayStation 4, and PC.
- Locate the console switch on the side of the fight stick.
- Slide the switch to the desired platform: PS5, PS4, or PC.

בילד: א דעטאַלירטע view of the Victrix Pro KO Leverless Fight Stick highlighting the console switch with labels for PS5, PS4, and PC, indicating its function.
אַפּערייטינג ינסטראַקשאַנז
Basic Button Layout
The Victrix Pro KO features a leverless design with 16 customizable and mappable buttons. The standard layout is optimized for fighting games.

בילד: אן איבערקאפ view of the Victrix Pro KO Leverless Fight Stick, showcasing its full button array and overall design.
Customizing Button Layout and RGB Lighting
The Victrix Pro KO allows extensive customization of button mapping and RGB lighting through the Victrix Control Hub app.
- קנעפּל מאַפּינג: Up to 16 buttons can be moved and remapped to suit your play style.
- RGB לייטינג: Customize the RGB light rings around each button. Millions of color combinations are available directly on the stick or via the Victrix Control Hub app.

Image: The Victrix Pro KO Leverless Fight Stick displaying its customizable RGB lighting around the buttons, illustrating the visual customization options.
Tournament Mode Lock Switch
To prevent accidental disqualifications during competitive play, utilize the Tournament Mode Lock Switch.
- Locate the Tournament Lock Switch on the fight stick.
- Engage the switch to disable system buttons (e.g., PS button, Share button) during tournament play.

Image: A close-up of the Victrix Pro KO Leverless Fight Stick showing the Tournament Lock Switch, designed to prevent accidental button presses during competitive play.
אַודיאָ קאַנעקטיוויטי
The fight stick includes a 3.5mm audio port for stereo audio output and microphone input.
- Connect your headset or headphones to the 3.5mm audio port on the fight stick.
- Ensure your system's audio settings are configured to use the Victrix Pro KO as the audio output/input device.
וישאַלט
רייניקונג
- Use a soft, dry cloth to wipe down the surface of the fight stick regularly.
- פֿאַר שווערע מאַרקן, אַ ביסל דamp מען קען ניצן אַ שטאָף מיט מילדן זייף, און עס זאָל גלייך טריקענען.
- ויסמיידן ניצן האַרב קעמיקאַלז אָדער אַברייסיוו קלינערז.
Hot Swappable Switches
The Victrix Pro KO features hot swappable Cherry MX Speed Silver RGB switches, allowing for easy replacement or customization.
- Removing the Top Plate: The removable aluminum top plate allows access to the switches. Carefully lift the top plate to expose the internal components.
- באַשטימען באַזייַטיקונג: Use the included switch puller tool to gently grasp and pull out the desired switch.
- באַשטימען ינסטאַללאַטיאָן: Align the pins of the new switch with the sockets on the PCB and gently press down until it clicks into place.
- ריאַסעמבאַל: Once all desired switches are replaced, reattach the aluminum top plate.
בילד: אן עקספלאדירטע view of the Victrix Pro KO Leverless Fight Stick, showing the removable top plate and the hot swappable Cherry MX Speed Silver RGB switches, illustrating the ease of component replacement.
סטאָרידזש און טראַנספּאָרט
The slim design and built-in storage compartments make the Victrix Pro KO ideal for travel.
- Utilize the built-in storage for switches, button caps, light rings, and button covers.
- The mounting posts allow for attaching a shoulder strap (not included) for easy carrying.
- Store the fight stick in the provided protective sleeve when not in use or during transport.

Image: The Victrix Pro KO Leverless Fight Stick shown with its dimensions (13.35" x 9.23" x 0.80") and weight (2.7 lbs), emphasizing its compact and portable design for travel.
טראָובלעשאָאָטינג
| פּראָבלעם | מעגלעך סיבה | לייזונג |
|---|---|---|
| Fight stick not recognized by console/PC. | Incorrect platform switch setting, loose cable connection, driver issue (PC). |
|
| Buttons are unresponsive or have incorrect inputs. | Loose or faulty switch, incorrect button mapping, firmware issue. |
|
| די RGB לייטינג ארבעט נישט אדער איז נישט ריכטיג. | Software setting, connection issue. |
|
| פּראָבלעמען מיט אַודיאָ (קיין געזונט/מיקראָפאָן אַרבעט נישט). | Headset not fully plugged in, system audio settings. |
|
ספּעסאַפאַקיישאַנז
- קשר: 3 ם בריידיד וסב-C קאַבלע
- פּראָדוקט וואָג: 2.7 ג
- פּראָדוקט דימענשאַנז: 13.35 "רענטגענ 9.23" רענטגענ 0.80 " / 339 מם רענטגענ 235 מם רענטגענ 20 מם
- קנעפּלעך: 16 moveable and mappable buttons
- סוויטשיז: Hot swappable Cherry MX Speed Silver RGB switches
- שאַסי: Ergonomic 6.28° wrist slope, Removable aluminum top plate
- ווייכווארג: Victrix קאָנטראָל הוב
- אַודיאָ: 3.5mm audio port for stereo audio output & microphone input
- קאַמפּאַטאַבילאַטי: PlayStation 5, PlayStation 4, Windows 10/11 PC
אפיציעלע פּראָדוקט ווידיאס
Victrix Pro KO Overview
ווידעא: אן איבערview of the Victrix Pro KO Leverless Fight Stick, demonstrating its features and design. This video highlights the product's key functionalities and aesthetic.
Victrix Pro KO Portability
Video: A demonstration of the Victrix Pro KO Leverless Fight Stick's portability and compact form factor, showcasing its ease of transport for gamers on the go.
שטיצן
For further assistance, technical support, or warranty information, please visit the official Turtle Beach support website or refer to the user guide PDF.