
1. הקדמה
This manual provides essential instructions for setting up, operating, and maintaining your CyberGeek Mini PC T1. Please read this manual thoroughly before using the device to ensure proper function and longevity.
The CyberGeek Mini PC T1 is a compact and powerful computer featuring an 11th Gen Intel Core i9-11900H processor, 64GB DDR4 RAM, and a 2TB PCIe SSD, designed for various computing tasks including multitasking, gaming, and demanding software applications. It comes pre-installed with Ubuntu Linux.
2. פּעקל אינהאַלט
באַשטעטיקן אַז אַלע זאכן זענען פאַראַן אין פּעקל:
- CyberGeek Mini PC T1
- מאַכט אַדאַפּטער
- מאַכט שנור
- HDMI קאַבלע
- באַניצער מאַנואַל (דעם דאָקומענט)
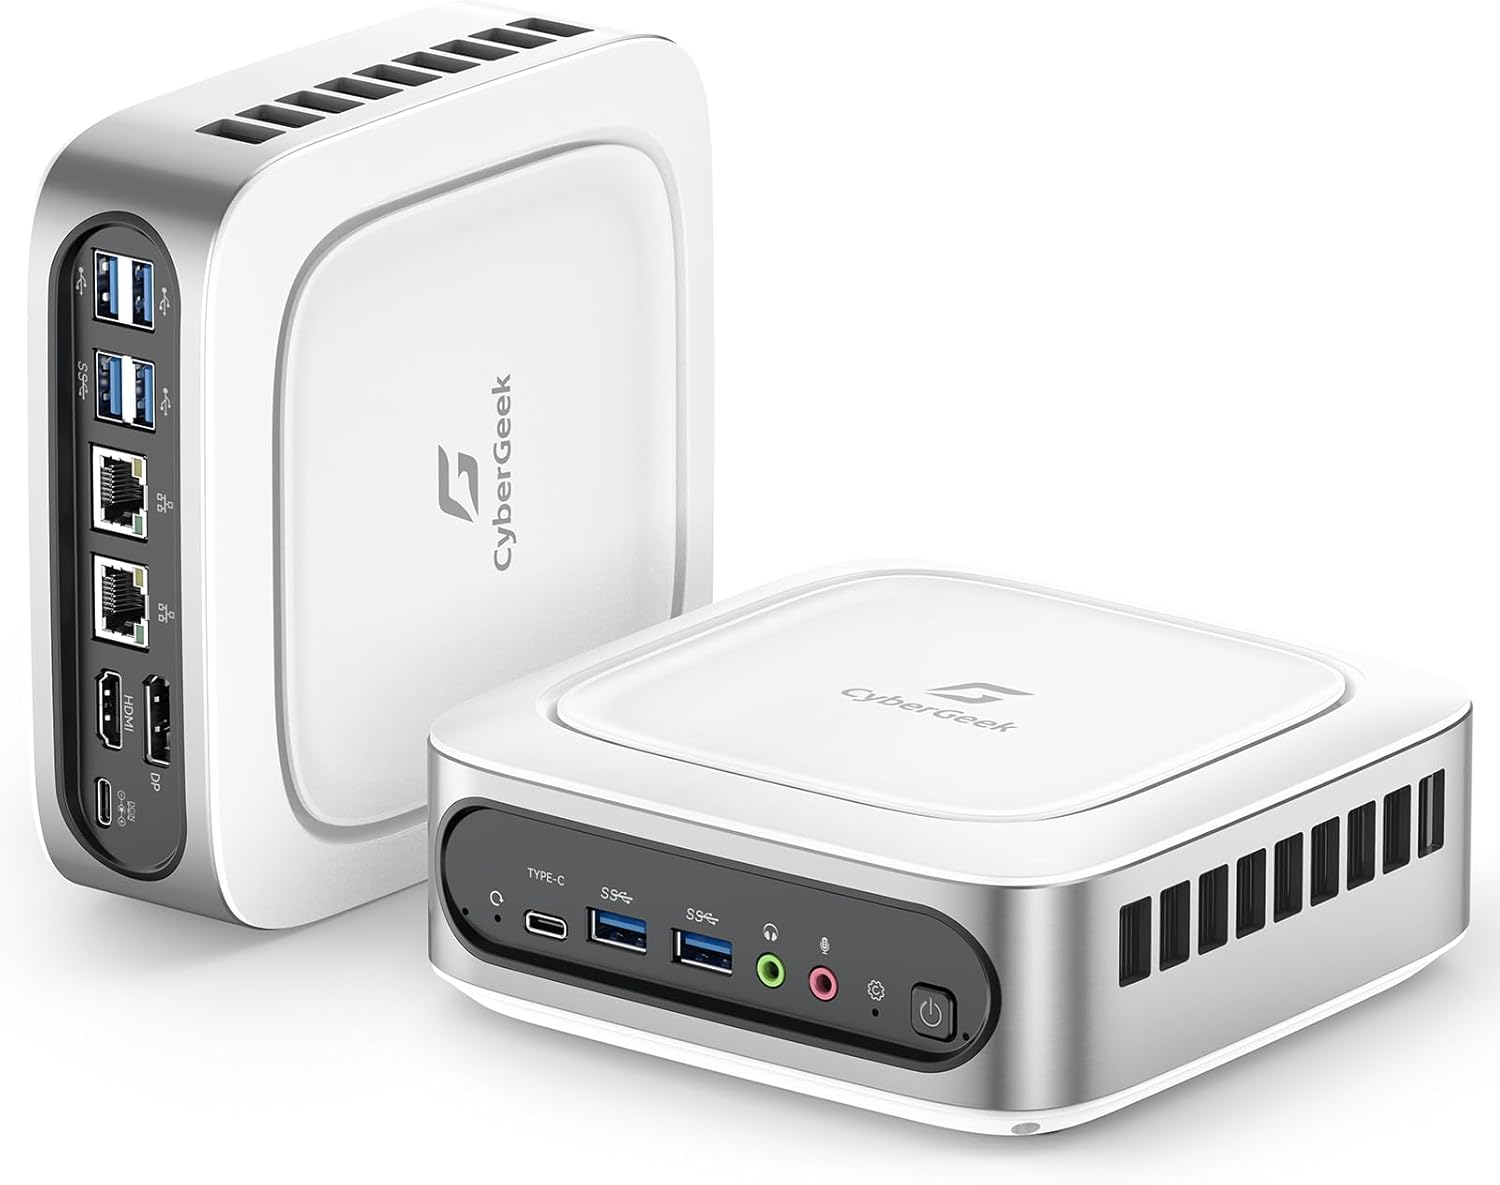
Image: CyberGeek Mini PC T1 with included accessories, including the power adapter, power cord, and HDMI cable.
3. סעטאַפּ אינסטרוקציעס
3.1 קאַנעקטינג פּעריפעראַלס
- פֿאַרבינדן דיספּליי: Use an HDMI, DisplayPort (DP), or USB-C cable to connect your monitor(s) to the corresponding ports on the Mini PC. The device supports up to three 4K displays simultaneously.
- פֿאַרבינדן קלאַוויאַטור און מויז: Plug your USB keyboard and mouse into any of the available USB ports (USB 2.0 or USB 3.0).
- פֿאַרבינדן נעץ (אָפּציאָנאַל): For a wired internet connection, connect an Ethernet cable from your router or modem to one of the dual LAN ports on the Mini PC.
- פאַרבינדן מאַכט: Plug the power adapter into the DC-in port on the Mini PC, then connect the power cord to an electrical outlet.

בילד: דעטאַלירט view of the CyberGeek Mini PC T1's front and rear ports, including USB, LAN, HDMI, DisplayPort, and USB-C.
3.2 מאַכט אויף
Press the power button located on the front of the Mini PC. The power indicator light will illuminate. The system will boot into the pre-installed Ubuntu Linux operating system.
3.3 Initial Ubuntu Setup
Follow the on-screen prompts to complete the initial setup of Ubuntu Linux, which typically includes:
- שפּראַך סעלעקציע
- קלאַוויאַטור אויסלייג
- צייט זאָנע
- Creating a user account and password
- Connecting to Wi-Fi (if not using a wired connection)
4. אַפּערייטינג ינסטרוקטיאָנס
4.1 יקערדיק אָפּעראַציע
Your CyberGeek Mini PC T1 runs on Ubuntu Linux, a user-friendly operating system. Familiarize yourself with the desktop environment, applications, and system settings.
4.2 נעץ קאָנעקטיוויטי
- ווי-פי: To connect to a wireless network, click the network icon in the top right corner of the screen, select your desired network, and enter the password if prompted. The Mini PC supports Wi-Fi 6 for faster speeds.
- בלועטאָאָטה: To pair Bluetooth devices (e.g., headphones, speakers), go to System Settings > Bluetooth, ensure Bluetooth is enabled, and select your device from the list to pair. The Mini PC supports Bluetooth 5.2.
- ווייערד לאַן: If an Ethernet cable is connected, the system should automatically establish a wired network connection.

Image: Visual representation of the CyberGeek Mini PC T1's Wi-Fi 6 and Bluetooth 5.2 capabilities, showing improved network performance.
4.3 Multiple Display Setup
The Mini PC supports up to three 4K displays. After connecting your monitors, navigate to System Settings > Displays to configure their arrangement, resolution, and orientation.

Image: A CyberGeek Mini PC T1 powering a triple 4K monitor setup, demonstrating its multi-display capability for various work scenarios.
5. וישאַלט
5.1 רייניקונג
To maintain optimal performance, regularly clean the exterior of the Mini PC with a soft, dry cloth. Ensure the ventilation openings are free from dust and obstructions. Do not use liquid cleaners directly on the device.
5.2 ווייכווארג דערהייַנטיקונגען
Regularly update your Ubuntu Linux operating system and installed applications to ensure security and access to the latest features. You can typically find update options in the system's Software Updater or through the terminal.
5.3 סטאָרידזש פאַרוואַלטונג
פּיריאַדיקלי שייַעךview and manage your 2TB PCIe SSD storage. Delete unnecessary files, uninstall unused applications, and consider backing up important data to external storage.
6. טראָובלעשאָאָטינג
- קיין מאַכט: Ensure the power adapter is securely connected to both the Mini PC and a working electrical outlet. Try a different outlet if necessary.
- קיין ווייַז: Verify that the monitor is powered on and the display cable (HDMI, DP, or USB-C) is securely connected to both the Mini PC and the monitor. Try a different display cable or port if available. If using DisplayPort with Ubuntu, some users have reported issues; ensure your Ubuntu installation is fully updated or consider using HDMI/USB-C.
- קיין אינטערנעט פֿאַרבינדונג: For wired connections, check the Ethernet cable and your router/modem. For Wi-Fi, ensure the correct network is selected and the password is entered accurately.
- סיסטעם רעאַגירט נישט: If the system becomes unresponsive, press and hold the power button for approximately 5-10 seconds to force a shutdown. Then, power it back on.
- פּאַמעלעך פאָרשטעלונג: Close unnecessary applications, check for background processes, and ensure the system has sufficient free storage space.
7. ספּעסאַפאַקיישאַנז
| שטריך | דעטאַל |
|---|---|
| פּראַסעסער | 11th Gen Intel Core i9-11900H (8 Cores, 16 Threads, up to 4.9 GHz) |
| גראַפיקס | Intel UHD גראַפיקס |
| באַראַן | 64 GB DDR4 SODIMM (Max 64GB) |
| סטאָרידזש | 2 TB PCIe NVMe SSD (M.2, Max 2TB) |
| אָפּערייטינג סיסטעם | ובונטו לינוקס |
| ווייַז רעזולטאַט | HDMI x1, DisplayPort (DP) x1, USB-C x1 (Supports Triple 4K Display @ 60Hz) |
| וסב פּאָרץ | 4x USB 3.0, 2x USB 2.0, 1x USB-C |
| נעץ | Dual LAN (RJ45 x2), Wi-Fi 6 (802.11ax), Bluetooth 5.2 |
| אַודיאָ | Audio Jack x1, Mic Jack x1 |
| דימענשאַנז (LxWxH) | 6.14 X 6.14 X 2.16 אינטשעס |
| וואָג | 3.66 פונט |
| מאַכט מקור | אַק אַדאַפּטער |
8. וואָראַנטי און שטיצן
The CyberGeek Mini PC T1 comes with a manufacturer's warranty. For specific warranty terms and conditions, please refer to the documentation included with your purchase or visit the official CyberGeek webפּלאַץ.
For technical support, troubleshooting assistance, or warranty claims, please contact CyberGeek customer service through their official support channels. Ensure you have your product model (T1) and purchase details available when contacting support.