
הקדמה
This manual provides essential information for the installation, operation, and maintenance of your KICKER CXA400.1 Mono Class D Car Amplifier and CXARC Remote Bass Control. Please read this manual thoroughly to ensure proper use and to achieve optimal performance from your audio system.

בילד: אויבן view of the KICKER CXA400.1 Mono Class D Car Ampליפער.
The KICKER CXA400.1 amplifier is designed for efficient power delivery to subwoofers, featuring a Class-D power plant and a compact design. The KICKER CXARC remote control allows for convenient adjustment of bass levels.
זיכערקייַט אינפֿאָרמאַציע
Always observe the following safety precautions when installing and operating your ampלייבער:
- Disconnect the vehicle's battery negative terminal before making any electrical connections.
- זיכער מאַכן אַז אַלע וויירינג איז ריכטיק ראָוטאַד און סיקיורד צו פאַרמייַדן שאָדן אָדער קורץ קרייזן.
- ניצט צוגעפאסטע מאַכט און גראַונד דראָטן ווי ספּעסיפיצירט אין די ינסטאַלירונג אָפּטייל.
- ויסמיידן מאַונטינג די amplifier in locations exposed to excessive heat, moisture, or vibration.
- דו זאלסט נישט אַרבעטן די amplifier if it is damaged or malfunctioning. Refer to the troubleshooting section or contact KICKER support.
- Prolonged exposure to high sound pressure levels can cause permanent hearing loss. Use caution when adjusting volume levels.
פּעקל אינהאַלט
באַשטעטיקן אַז אַלע זאכן זענען פאַראַן אין דיין פּעקל:
- KICKER CXA400.1 Mono Class D Car Ampליפער
- KICKER CXARC Remote Bass Control
- Mounting Hardware (screws, vertical mounting brackets)
- באַזיצער ס מאַנואַל (דאָס דאָקומענט)
סעטאַפּ און ינסטאַלירונג
Proper installation is crucial for optimal performance and safety. If you are unsure about any part of the installation process, consult a professional installer.
מאַונטינג די Ampליפער
The CXA400.1 amplifier features a compact design and includes vertical mounting hardware for flexible installation options. Choose a location that is dry, well-ventilated, and protected from direct sunlight or excessive heat. Ensure there is sufficient space around the ampליפיער פֿאַר לופט סערקיאַליישאַן.
וויירינג קאַנעקשאַנז
All wiring should be done with the vehicle's battery disconnected. Use high-quality power, ground, and speaker wires of appropriate gauge.

בילד: View of the KICKER CXA400.1 amplifier showing RCA input/output and control panel.
- מאַכט קשר: Connect the main power wire from the battery (with an inline fuse) to the ampלעפיער'ס +12V טערמינאַל.
- ערד קשר: Connect a short, heavy-gauge ground wire from the amplifier's GND terminal to a clean, bare metal point on the vehicle's chassis.
- רימאָוט ווענדן: פאַרבינדן די amplifier's REM terminal to the remote turn-on output of your head unit.
- אַרייַנשרייַב סיגנאַל: The CXA400.1 accepts both low-level (RCA) and high-level (speaker wire) input signals. It can accept up to 40 volts of speaker-level input, eliminating the need for line-out converters in many cases. Connect your head unit's RCA outputs to the amplifier's INPUT terminals for low-level input, or use the high-level input if your head unit does not have RCA outputs.
- רעדנער רעזולטאַט: פֿאַרבינדט אײַער סאַבוואָפֿער(ס) צו די amplifier's speaker output terminals. Ensure correct polarity.

בילד: זייט view of the KICKER CXA400.1 amplifier showing power, ground, remote, and speaker terminals.
ערשט סעטטינגס
After all connections are made, reconnect the vehicle's battery. Before playing audio, set the amplifier's gain control to its minimum position. Adjust other settings like crossover and bass boost as needed for your specific audio setup.
אַפּערייטינג די Ampליפיער און באַס קנעפּל
The KICKER CXA400.1 amplifier offers several adjustable features to fine-tune your audio experience. The CXARC remote bass control provides convenient real-time adjustments.
געווינען קאָנטראָל
די געווינס קאָנטראָל פּאַסט צו די amplifier's input sensitivity to the output level of your head unit. Start with the gain at minimum and slowly increase it until you hear distortion, then back off slightly. This ensures maximum clean signal from your head unit.
קראָסאָוווער סעטטינגס
די amplifier features a variable 12dB low-pass crossover (50Hz–200Hz). This filter allows only frequencies below the set point to pass to the subwoofer, preventing higher frequencies from reaching it and improving overall sound clarity. Adjust this to blend smoothly with your main speakers.
סובסאָניק פֿילטריר
A 24dB/octave subsonic filter set at 25Hz helps protect your subwoofer by removing extremely low, inaudible frequencies that can cause excessive cone excursion and potential damage. It also improves efficiency by preventing the amplifier from wasting power on these frequencies.
KickEQ באַס בוסט
The KickEQ offers a variable 0-6dB bass boost centered at 40Hz. Use this feature to enhance low-frequency response. Adjust carefully to avoid distortion and speaker damage.
CXARC Remote Bass Control
The CXARC remote bass control connects to your CXA400.1 amplifier and allows you to adjust the bass level conveniently from the driver's seat. This provides on-the-fly control over your subwoofer's output without needing to access the ampליפיער גלייַך.
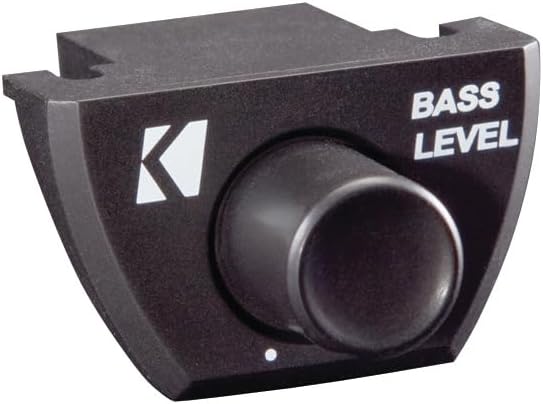
Image: The KICKER CXARC Remote Bass Control knob.
וישאַלט
Your KICKER amplifier and bass knob require minimal maintenance to ensure long-lasting performance.
- רייניקונג: ווישט אויס פון צייט צו צייט די amplifier and remote with a soft, dry cloth to remove dust and dirt. Do not use harsh chemicals or abrasive cleaners.
- פֿאַרבינדונגען: קאָנטראָלירט פון צייט צו צייט אַלע דראָט פֿאַרבינדונגען צו זיכער מאַכן אַז זיי זענען זיכער און פֿרײַ פֿון קעראָוזשאַן. לויזע פֿאַרבינדונגען קענען פֿירן צו שלעכטער פאָרשטעלונג אָדער שאָדן.
- ווענטילאַטיאָן: פאַרזיכערן אַז די amplifier's cooling fins are not obstructed to allow for proper heat dissipation.
טראָובלעשאָאָטינג
If you experience issues with your KICKER ampליפיער, זעט די פאלגענדע אלגעמיינע פראבלעמען און לייזונגען:
- קיין מאַכט: Check the inline fuse on the power wire, ensure the ground connection is solid, and verify the remote turn-on wire is receiving 12V when the head unit is on.
- קיין קול: Check all input and output connections. Ensure the gain is not set to minimum. Verify the head unit is sending an audio signal. Check speaker wires for shorts or open circuits.
- פאַרקרימט סאָונד: Reduce the gain setting. Check for proper crossover and bass boost settings. Ensure the input signal is not overdriven.
- Ampאיבערהיצונג פון ליפיער: ענשור טויגן ווענאַליישאַן אַרום די amplifier. Check the impedance of your speakers; ensure it matches the ampליפערז ס קייפּאַבילאַטיז.
- Remote Bass Knob Not Working: Check the connection cable between the CXARC and the ampליפיער. פאַרזיכערן די ampליפיער איז פּאַוערד אויף.
If problems persist after checking these points, contact KICKER customer support.
ספּעסאַפאַקיישאַנז
| שטריך | באַשרייַבונג |
|---|---|
| מאַכט רעזולטאַט (RMS) | 150x1 watts/ch at 4 Ohms, 300x1 watts/ch at 2 Ohms, 400x1 watts/ch at 1 Ohm |
| אָפטקייַט ענטפער | 25-200 הז |
| אַרייַנשרייַב סענסיטיוויטי | 250mV-10V (Low Level), 1V-40V (High Level) |
| סיגנאַל-צו-נויז ראַטיאָ | > 95 דב |
| אַקטיוו קראָססאָווער | וואַריאַבלע לאָ-פּאַסן 50Hz–200Hz, 12dB/octave |
| סובסאָניק פֿילטריר | 25Hz @24dB/octave |
| KickEQ Boost | Variable 0-6dB @40Hz |
| דימענשאַנז | 8-1/8" x 5.9" x 17" (20.6cm x 15cm x 43cm) |
| פּונקט וואָג | 5.3 פונט |
| מאָדעל נומער | KickerBDL240611-01 (Bundle) |
וואָראַנטי
The KICKER CXA400.1 Amplifier and CXARC Bass Knob are covered by a 1-יאָר מאַנופאַקטורער וואָראַנטי. This warranty covers defects in materials and workmanship under normal use. Please retain your proof of purchase for warranty claims. For specific warranty terms and conditions, refer to the documentation included with your product or visit the official KICKER webפּלאַץ.
שטיצן
For technical assistance, troubleshooting, or warranty inquiries, please contact KICKER customer support. You can find contact information and additional resources on the official KICKER website. When contacting support, please have your product model number (CXA400.1, CXARC) and proof of purchase readily available.
באַזוכן די KICKER Store on Amazon פֿאַר מער פּראָדוקטן און אינפֿאָרמאַציע.