
1. הקדמה
This manual provides detailed instructions for the installation, operation, and maintenance of your ELUSH 100A MPPT Solar Charge Controller. This advanced controller is designed to efficiently manage power from your solar panels to your battery bank, ensuring optimal charging and system protection. It automatically recognizes 12V, 24V, 36V, and 48V systems and features dual USB 5V charging ports.
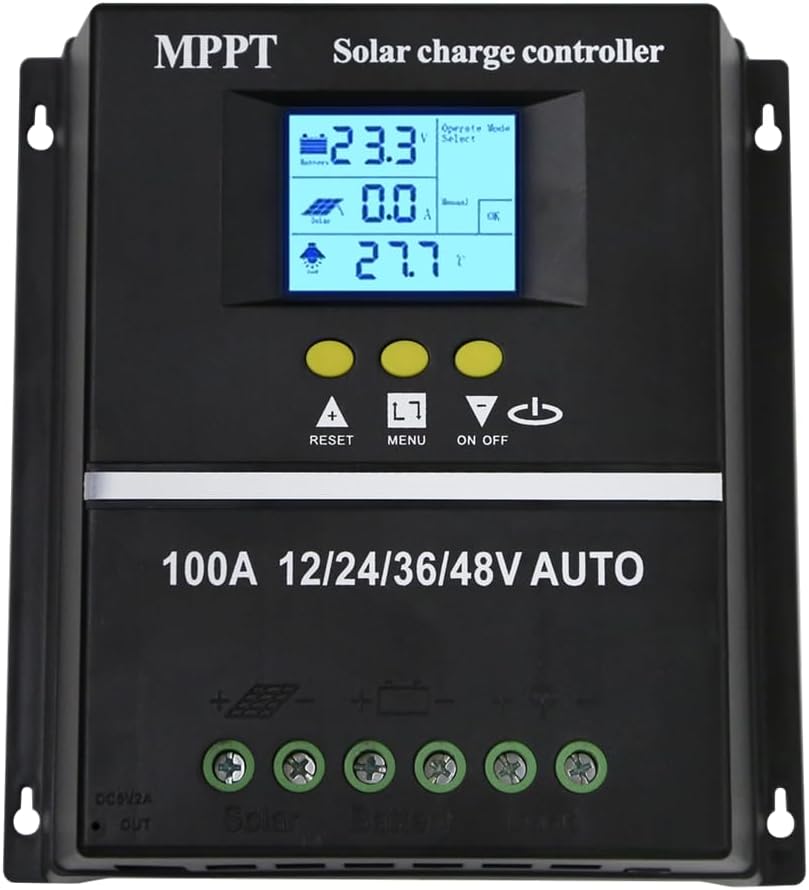
פיגורע 1.1: פראָנט view of the ELUSH 100A MPPT Solar Charge Controller.
2. זיכערקייַט אינסטרוקציעס
Please read all instructions carefully before installation and operation. Failure to follow these instructions may result in damage to the unit, personal injury, or property damage.
- זיכער מאַכן אַז אַלע פֿאַרבינדונגען זענען זיכער און ריכטיק איידער איר צינדט אָן די סיסטעם.
- נעמט נישט אויס דעם קאנטראלער און פרובירט נישט צו פאררעכטן אים אליין. קאנטאקטירט קוואַליפֿיצירטע פּערסאָנעל פֿאַר סערוויס.
- אינסטאַלירט דעם קאָנטראָללער אין אַ גוט-ווענטילירטן אָרט, אַוועק פון ברענענדיקע מאַטעריאַלן און דירעקטער זונשייַן.
- The controller provides comprehensive voltage protection, including safeguards against battery over-voltage, over-current, power failure, overcharge, deep discharge, reverse connection, and overheating.
- Device Startup Reminder: When connecting the equipment, first connect the rechargeable battery and ensure it has power. After successful startup, then connect the solar panel. This sequence ensures proper operation.
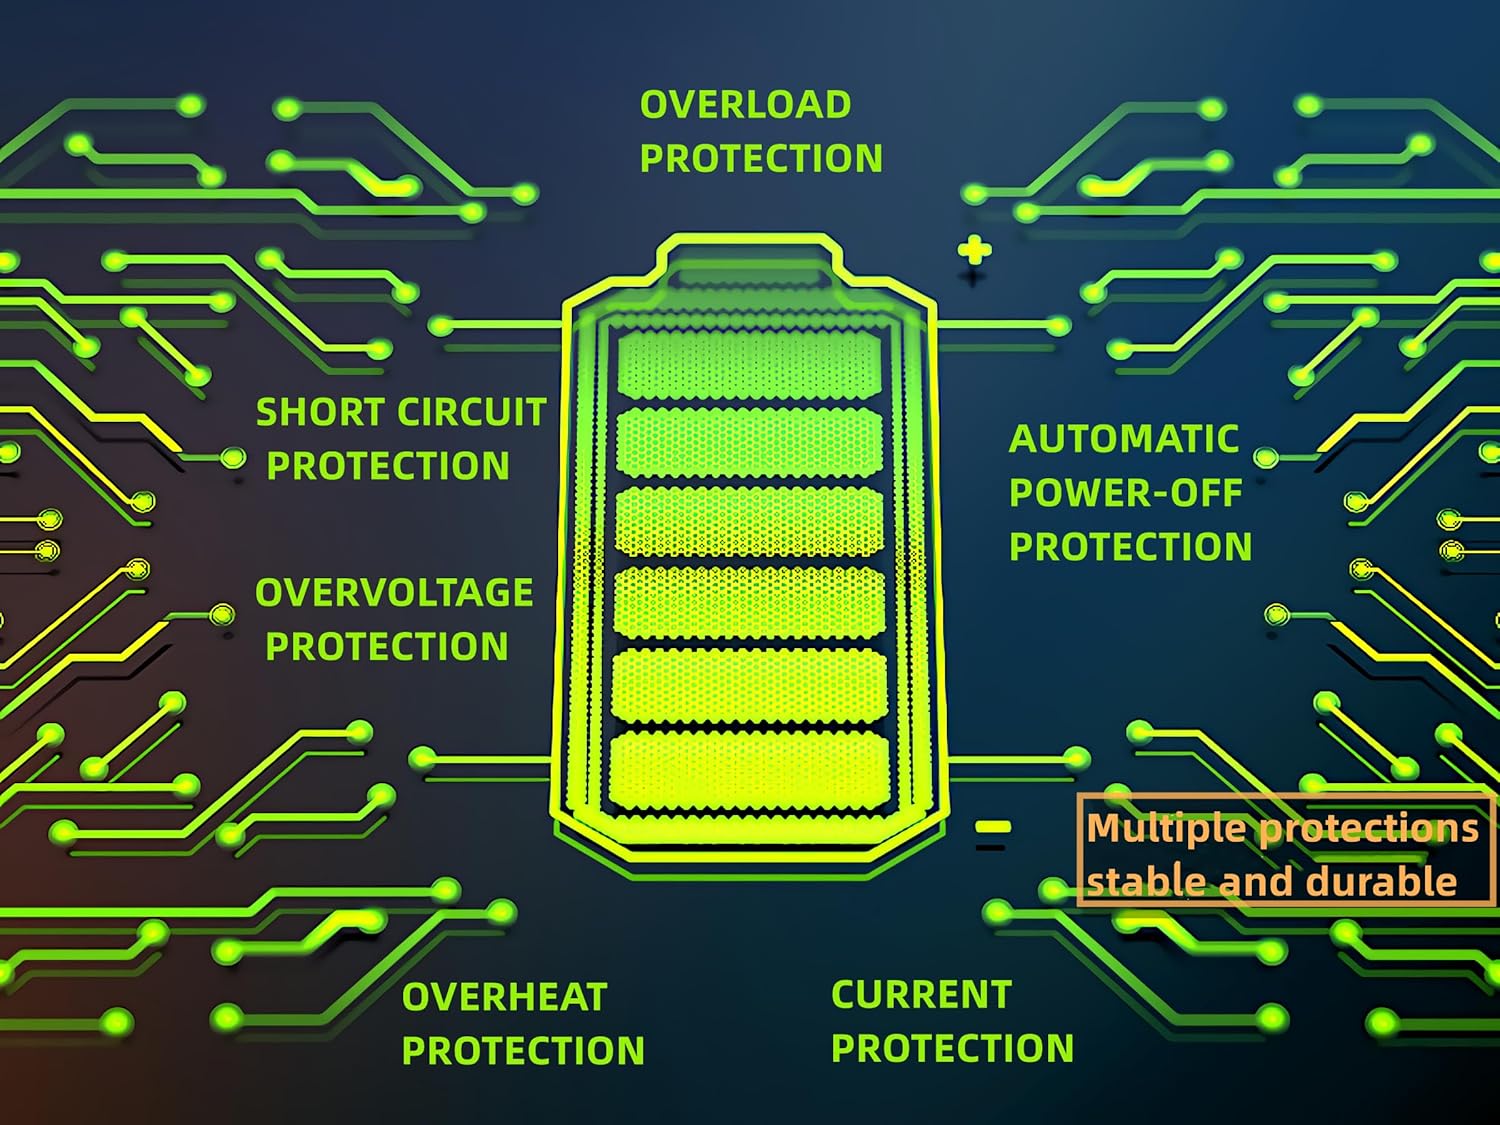
Figure 2.1: Built-in protection features for enhanced safety and durability.
3. פּראָדוקט פֿעיִקייטן
The ELUSH MPPT Solar Charge Controller offers a range of features designed for efficient and reliable solar power management:
- Superior MPPT Technology: Equipped with an advanced Maximum Power Point Tracking algorithm, ensuring tracking efficiency of no less than 99.5% for enhanced energy utilization.
- Automatic System Recognition: Automatically recognizes 12V, 24V, 36V, and 48V battery systems.
- ווערסאַטאַל אַפּערייטינג מאָדעס: Features seven operating modes including charging mode, light control mode, light control + time delay control mode, universal control mode, manual control mode, and timing control mode.
- מולטי-פונקציאָנעל LCD דיספּליי: Dynamically displays operational data such as working mode, battery voltage, PV charging current, battery discharging current, product working temperature, and delay time.
- צווייענדיק וסב פּאָרץ: Includes dual USB 5V charging ports for convenient device charging.
- ברייטע באַטערי קאָמפּאַטאַביליטי: Compatible with various battery types, including Sealed, GEL, Flooded, and LifePO4.
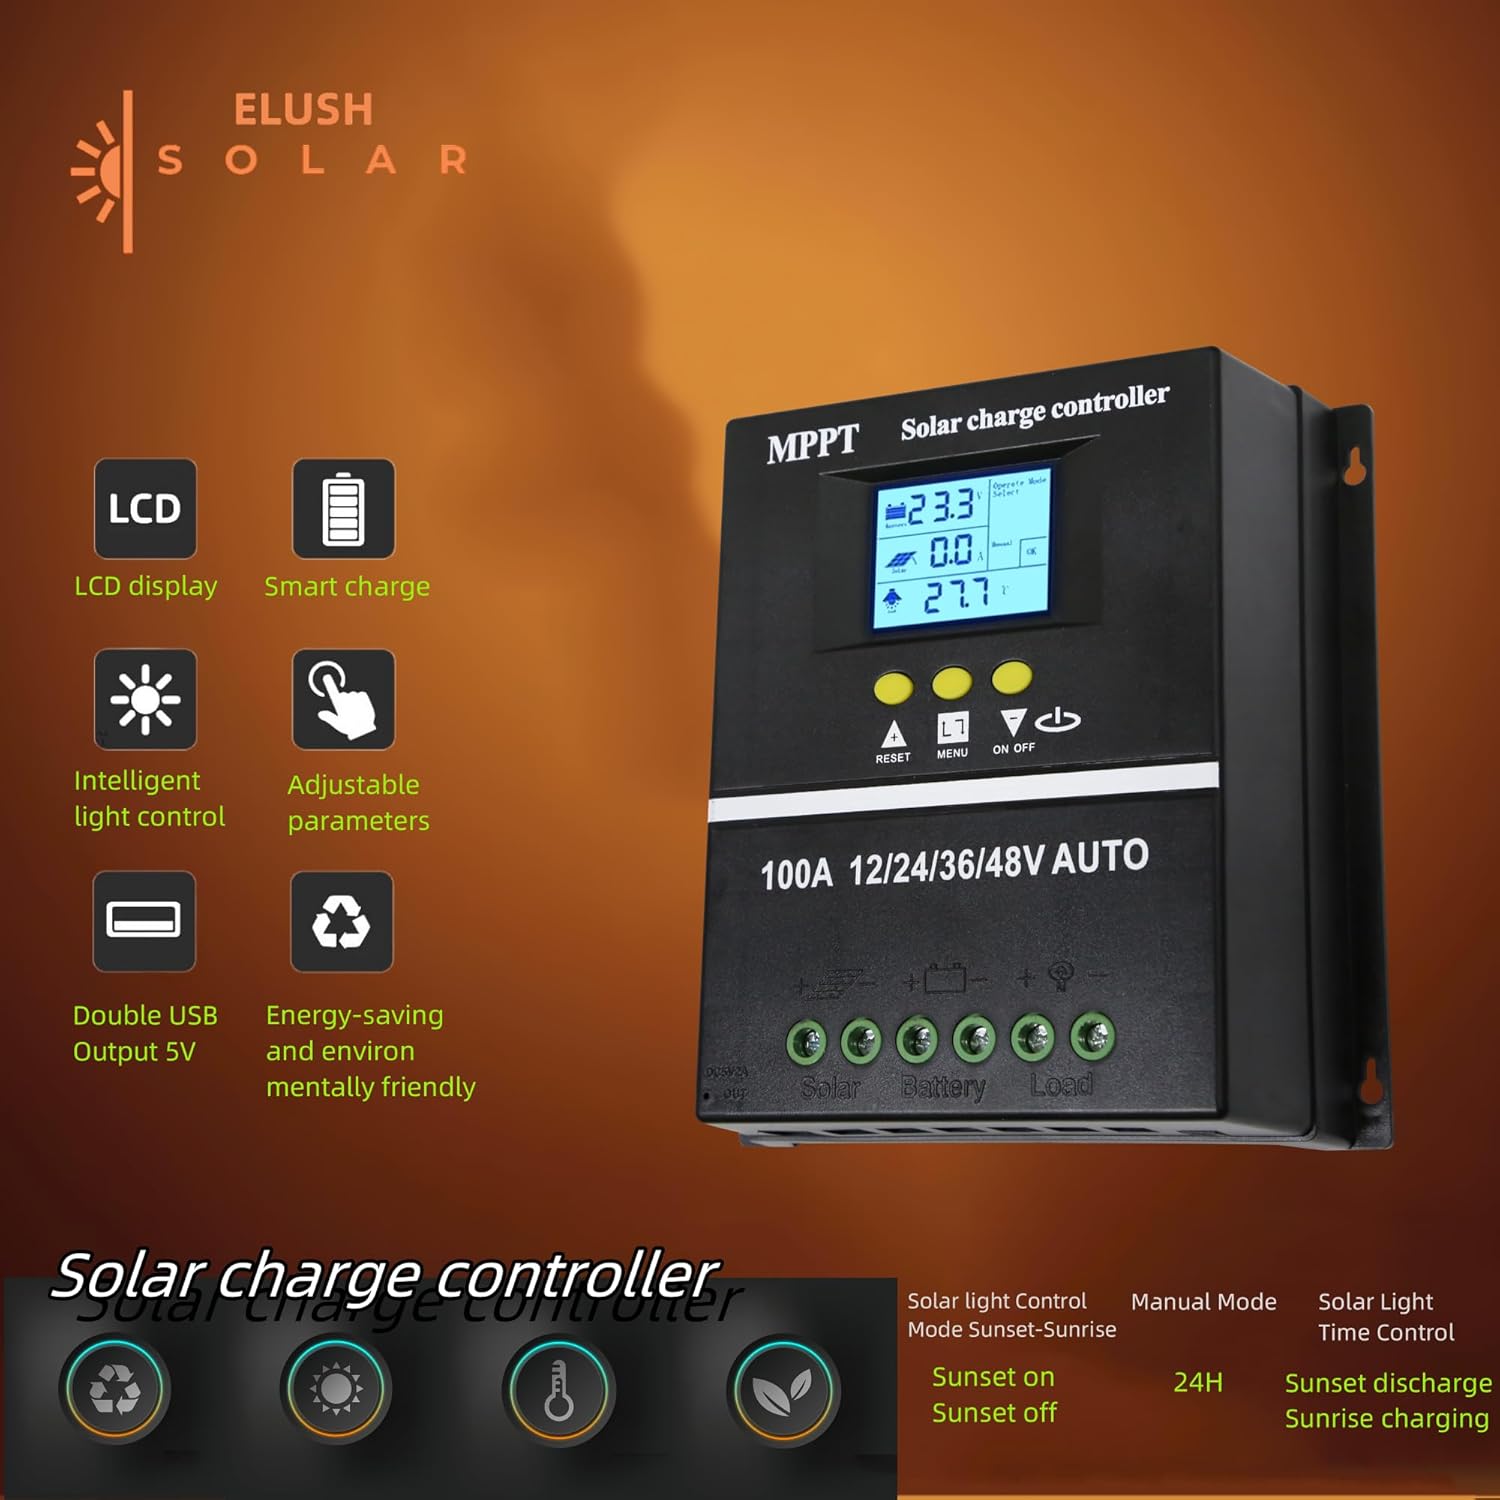
Figure 3.1: Key features of the ELUSH Solar Charge Controller.

פיגורע 3.2: דעטאַילעד view of connection ports and heat dissipation design.
4. סעטאַפּ און ייַנמאָנטירונג
גיי די סטעפּס פֿאַר ריכטיק ינסטאַלירונג פון דיין זונ - אָפּצאָל קאָנטראָללער:
- צוגרייטן די מאַונטינג אָרט: Choose a dry, well-ventilated area, protected from direct sunlight and moisture. Ensure there is enough space around the controller for proper heat dissipation.
- פאַרבינדן די באַטאַרייע: First, connect the positive and negative terminals of your battery to the corresponding battery terminals on the controller. Ensure the battery has sufficient charge to power the controller's display.
- פֿאַרבינדן די זונ פּאַנעלן: Next, connect the positive and negative terminals of your solar panel array to the corresponding solar panel terminals on the controller.
- פֿאַרבינדן די לאַסט (אָפּציאָנעל): If you are connecting a DC load directly to the controller, connect its positive and negative terminals to the load terminals on the controller.
- באַשטעטיקן קאַנעקשאַנז: טשעק נאכאמאל אלע פארבינדונגען צו זיכער מאכן אז זיי זענען זיכער און ריכטיג פאלאריזירט.

Figure 4.1: Typical connection diagram for the solar charge controller.
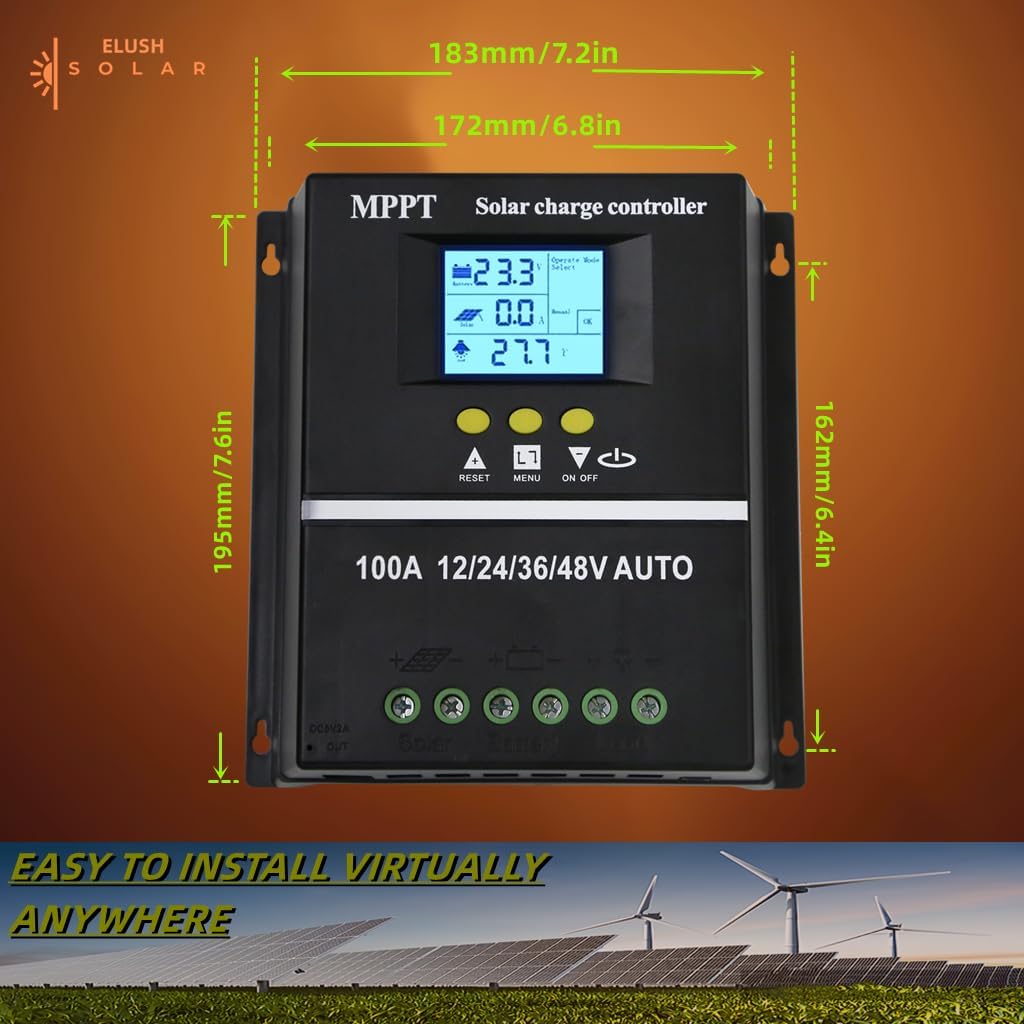
פיגור 4.2: פּראָדוקט דימענסיעס פֿאַר ינסטאַלירונג פּלאַנירונג.
5. אַפּערייטינג ינסטרוקטיאָנס
The controller's LCD display provides real-time information and allows for configuration of various settings.
5.1 LCD דיספּלעי און קנעפּלעך
The LCD dynamically displays operational data. Use the buttons below the screen to navigate menus and adjust settings:
- באַשטעטיק: Resets certain parameters or enters settings mode.
- מעניו: Navigates through different display screens and settings.
- אַרויף/אַראָפּ פײַלן: Adjust values or select options within menus.
- ON/OFF: Controls the DC load output.
5.2 טשאַרדזשינג מאָדעס
The controller supports a rapid, efficient, and safe battery charging algorithm with four stagעס:
- פאַרנעם אָפּצאָל: ערשט זtage where the battery receives maximum current.
- באָאָסט אָפּצאָל: לאָדט די באַטאַרייע צו אַ העכערער וואָלומעןtage צו זיכער מאַכן פולע אָפּצאָל.
- לאָזנ שווימען אָפּצאָל: האַלט די באַטאַרייע אויף אַ קאָנסטאַנטן וואָלומעןtage צו פאַרמייַדן איבערטשאַרדזשינג.
- יקוואַליזיישאַן אָפּצאָל: איבערלאדנט די באַטעריע פּעריִאָדיש צו באַלאַנסירן צעל וואָלומעןtages (for certain battery types).

Figure 5.1: Four-stage battery charging process.
5.3 באַטעריע טיפּ אויסוואַל
The controller is compatible with Sealed, GEL, Flooded, and LifePO4 batteries. Ensure you select the correct battery type in the settings for optimal charging and battery longevity.

פיגור 5.2: קאָמפּאַטיבלע באַטעריע טיפּן.
5.4 אַפּפּליקאַטיאָן סינעריאָוז
The ELUSH MPPT Solar Charge Controller is suitable for various applications, including:
- Residential solar power systems
- RV and marine solar setups
- Off-grid cabins and remote power solutions
- Portable solar power kits
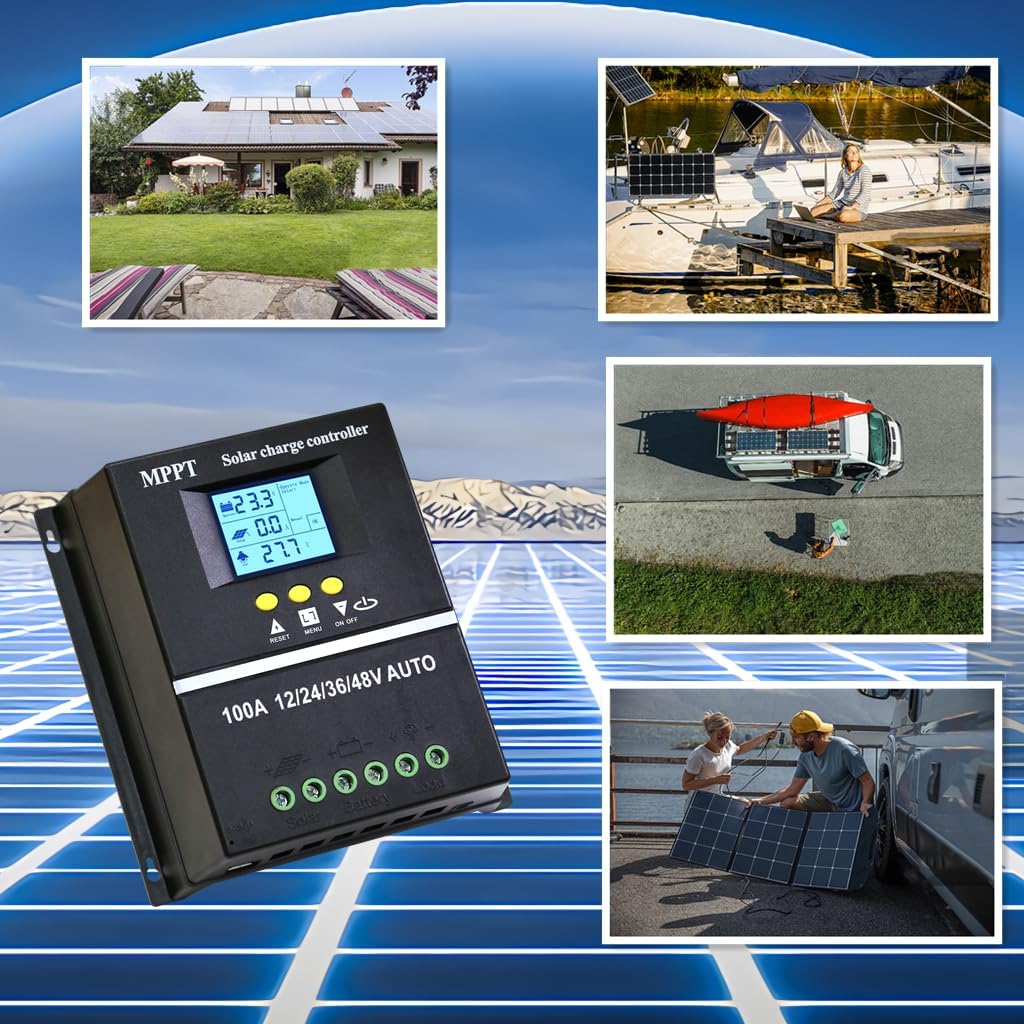
Figure 5.3: Diverse application scenarios for the solar charge controller.
6. וישאַלט
רעגולערע אויפהאלטונג גאראנטירט די לאנגעוויטי און אפטימאלע פערפארמאנס פון אייער זונ - טשאַרדזש קאנטראלער:
- ריינקייַט: Keep the controller clean and free from dust and debris. Use a dry, soft cloth for cleaning.
- פֿאַרבינדונגען: קאָנטראָלירט פּעריִאָדיש אַלע דראָט פֿאַרבינדונגען צו זיכער מאַכן אַז זיי זענען פֿעסט און פֿרײַ פֿון קעראָוזיע. לויזע פֿאַרבינדונגען קענען פֿירן צו מאַכט פֿאַרלוסט אָדער איבערהיצונג.
- ווענטילאַטיאָן: Ensure the installation area remains well-ventilated to prevent overheating, especially during peak operation.
- Firmware דערהייַנטיקונגען: קוק די פאַבריקאַנט ס website for any available firmware updates to ensure your controller has the latest features and bug fixes.
7. טראָובלעשאָאָטינג
If you encounter issues with your solar charge controller, refer to the following common problems and solutions:
| פּראָבלעם | מעגלעך סיבה | לייזונג |
|---|---|---|
| Controller not powering on / No display | Battery not connected or insufficient battery voltage. | Ensure battery is connected first and has adequate charge (minimum 9V for 12V systems). Charge battery externally if completely depleted. |
| No solar charging current | Solar panels not connected, insufficient sunlight, or panel issues. | Check solar panel connections. Ensure panels are receiving direct sunlight. Verify panel voltage. |
| די באַטאַרייע איז נישט גאָר טשאַרדזשינג | Incorrect battery type setting, insufficient solar input, or battery degradation. | Verify battery type setting on the controller. Increase solar panel capacity if needed. Test battery health. |
| לאָדן אַרבעט נישט | Load output disabled, overload, or low battery voltage. | Check load output setting (ON/OFF button). Reduce load if overloaded. Charge battery. |
| אָוווערכיטינג | שלעכטע ווענטילאציע אדער איבערגעטריבענע לאסט/לאדונג-שטראם. | זיכער מאַכן אַז לופט שטראָם איז גענוג אַרום דעם קאָנטראָללער. רעדוצירן די לאַסט אָדער קאָנטראָלירן פֿאַר קורץ קרייזן. |
8. ספּעסאַפאַקיישאַנז
Detailed technical specifications for the ELUSH 100A MPPT Solar Charge Controller:
| פּאַראַמעטער | ווערט |
|---|---|
| באַטערי וואָלtage | 12V/24V/36V/48V אַוטאָ |
| טשאַרדזשינג קראַנט | 100 א |
| Max Solar Input (Voc) | 15-25V (12V Battery); 30-50V (24V Battery); 45-75V (36V Battery); 60-100V (48V Battery) |
| מאַקסימום פּוו ינפּוט מאַכט | 1200W (12V Battery); 2400W (24V Battery); 3600W (36V Battery); 4800W (48V Battery) |
| וסב פּאָרט | DC 5V/1.5A x 2 USB |
| אַפּערייטינג טעמפּעראַטור | -25°C ~ 55°C |
| פאַבריקאַנט | ELUSH |
| פּונקט וואָג | 1.79 פונט |
| פּעקל דימענשאַנז | 8.11 X 8.03 X 2.91 אינטשעס |

Figure 8.1: Detailed specifications of the 100A model.
9. וואָראַנטי און שטיצן
ELUSH offers a 1-year warranty for this product. For technical support or any issues you may encounter, please feel free to contact our team. Our engineers are available to provide advice and solutions.
פֿאַר מער אינפֿאָרמאַציע און פּראָדוקטן, באַזוכט די ELUSH Store.