
1. הקדמה
This manual provides essential information for the safe and efficient operation, setup, and maintenance of your Yard Force NX100i Robotic Mower. Please read this manual thoroughly before using the product and retain it for future reference.
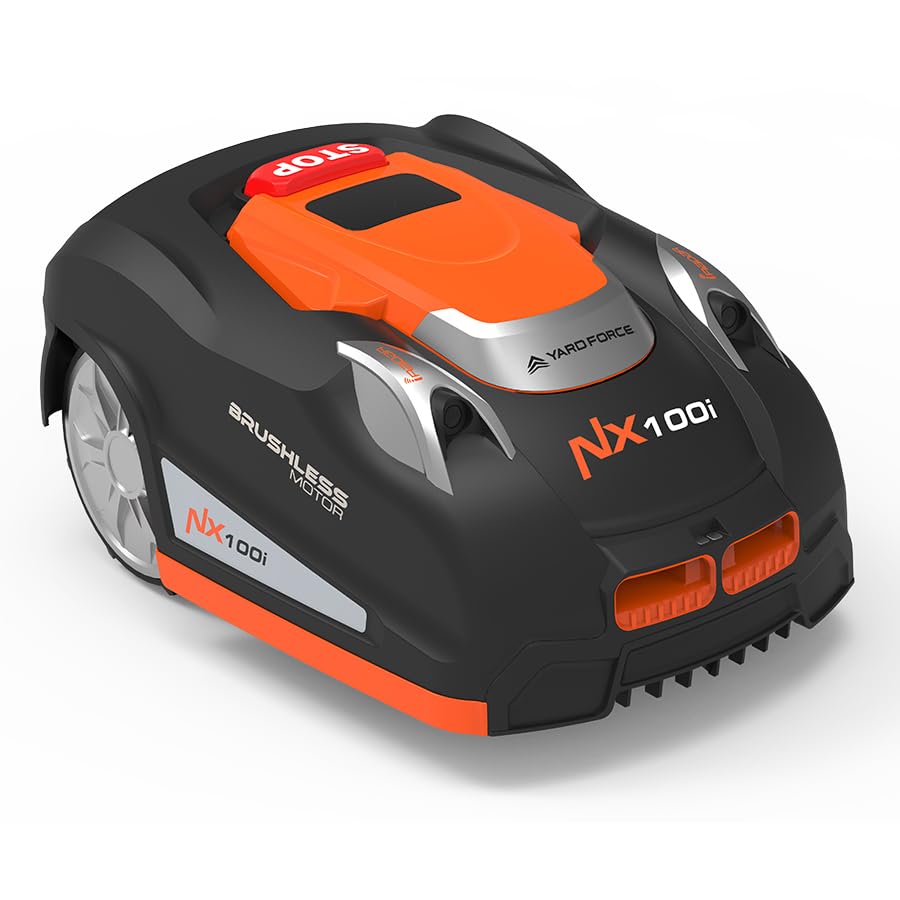
The Yard Force NX100i is an advanced robotic lawnmower designed to automatically maintain your lawn. It features a 28V lithium-ion power system, Wi-Fi and Bluetooth connectivity for app control, and a smart safety suite including iRadar ultrasonic sensors, a rain sensor, and lift/tilt detection.
2. זיכערקייַט אינפֿאָרמאַציע
Always prioritize safety when operating or maintaining the robotic mower. Failure to follow safety instructions may result in injury or damage to the product.
- לייענען אַלע ינסטראַקשאַנז: מאַכט זיך באַקאַנט מיט די קאָנטראָלס און ריכטיקן באַניץ פֿון דעם אַפּאַראַט.
- האַלט קינדער און חיות אַוועק: זיכער מאַכן אַז קינדער און חיות זענען נישט אין דער געגנט וואו מען שניידט די גראָז ווען די גראָז־שניידער אַרבעט.
- דורכקוקן דעם געגנט: Before each use, clear the lawn of any objects such as stones, toys, or wires that could be thrown by the blades.
- בלייד זיכערקייַט: Never attempt to lift or carry the mower while the blades are rotating. Always switch off the mower and wait for the blades to stop completely before handling.
- Emergency Stop: Know the location and function of the emergency stop button.
- ויסמיידן נאַס טנאָים: The mower is equipped with a rain sensor. Avoid manual operation in heavy rain or very wet conditions to prevent damage and ensure safety.
- וישאַלט: Only perform maintenance as described in this manual. For complex repairs, contact qualified service personnel.
3. סעטאַפּ
3.1 אויספּאַקן די קעסטל און ערשטע דורכקוק
Carefully remove all components from the packaging. Inspect for any damage. Ensure all parts listed in the packing contents are present.
3.2 פּלאַצירונג פון די טשאַרדזשינג סטאַנציע
Select a suitable location for the charging station. It should be on a flat surface, away from direct sunlight or irrigation systems, and with access to a power outlet. Ensure enough clear space around the station for the mower to dock easily.
3.3 גרענעץ דראָט ינסטאַלירונג
The NX100i operates within a defined area using a boundary wire. This wire must be laid around the perimeter of your mowing area and any obstacles you wish the mower to avoid.
- פּלאַנירן דיין אויסלייג: Sketch your lawn area, identifying obstacles and areas to exclude.
- Lay the wire: Secure the boundary wire to the ground using the provided pegs. Ensure the wire is taut and laid flat. For permanent installation, the wire can be buried a few inches deep.
- Connect to charging station: Connect both ends of the boundary wire to the designated terminals on the charging station.

3.4 ערשט טשאַרדזשינג
Once the charging station and boundary wire are set up, place the mower on the charging station. The mower will begin charging. Allow for a full charge before the first operation (approximately 90 minutes for a quick recharge).
3.5 App Control and Wi-Fi Connection
Download the CloudHawk app to your smartphone. Follow the in-app instructions to connect your mower to your home Wi-Fi network and pair it with your device via Bluetooth. This enables remote control and scheduling.

3.6 Setting Cutting Height
The cutting height can be adjusted to suit your lawn's needs. The mower offers five cutting heights ranging from 1.3 to 3 inches (3.3 to 7.6 cm).

4. אַפּערייטינג די מאָוער
4.1 סטאַרטינג און סטאָפּפּינג
- צו אָנהייבן: Press the 'Start' button on the mower's control panel or initiate mowing via the CloudHawk app.
- אויף הערן: Press the large red 'STOP' button on the mower. The mower will cease operation immediately.
4.2 Scheduling Mowing Times
Use the CloudHawk app to set a regular mowing schedule. You can define specific days and times for the mower to operate automatically. The mower will return to its charging station when its battery is low or when its scheduled task is complete.
4.3 Smart Safety Features
- iRadar Ultrasonic Sensors: These sensors detect obstacles in the mower's path, allowing it to steer around them and prevent collisions.
- רעגן סענסאָר: The mower will automatically pause its operation and return to the charging station if it detects rain, resuming its schedule once conditions improve.
- Lift/Tilt Detection: If the mower is lifted or tilted during operation, the blades will immediately stop to ensure safety for people and pets.

4.4 שנייד-פאָרשטעלונג
The powerful yet quiet brushless wheel motors enable the mower to handle slopes up to 40% gradient. It cuts a 7-inch (18 cm) swath, providing efficient and consistent lawn coverage with zero emissions.


5. וישאַלט
5.1 בלייד דורכקוק און אויסטויש
Regularly inspect the mower blades for wear or damage. Dull or damaged blades can affect cutting performance. Replace blades as needed, ensuring the mower is powered off and the battery is disconnected before handling the blades.
5.2 רייניקונג
Keep the mower clean to ensure optimal performance. Regularly remove grass clippings and debris from the chassis, wheels, and blade area. Use a soft brush or cloth. Avoid using high-pressure water jets directly on the mower.
5.3 באַטערי קער
The 28V lithium-ion battery is designed for long life. For best results, allow the mower to fully charge and discharge as part of its normal operation. Store the mower in a dry, protected area during off-season periods, ensuring the battery is partially charged.
6. טראָובלעשאָאָטינג
If you encounter issues with your Yard Force NX100i Robotic Mower, refer to the following common troubleshooting steps:
- גראז שניידער הייבט זיך נישט אן: Check if the battery is charged and properly seated. Ensure the emergency stop button is disengaged. Verify the boundary wire is correctly installed and connected.
- Mower getting stuck: Inspect the mowing area for obstacles. Ensure the boundary wire is laid correctly around complex areas. The iRadar sensors should help avoid most obstacles.
- שלעכטע שנייד פאָרשטעלונג: Check the blades for sharpness and damage. Adjust the cutting height if the grass is too long.
- Mower not returning to charging station: Verify the charging station is powered on and the boundary wire is intact. Ensure no obstacles block the path to the station.
- אַפּ קאַנעקטיוויטי פּראָבלעמען: Check your Wi-Fi and Bluetooth connections. Ensure the mower is within range of your Wi-Fi network. Restart the app and the mower if necessary.
For persistent issues, consult the full troubleshooting guide available on the Yard Force webפּלאַץ אָדער קאָנטאַקט קונה שטיצן.
7. ספּעסאַפאַקיישאַנז
| שטריך | באַשרייַבונג |
|---|---|
| סאָרט | יאַרד קראַפט |
| מאָדעל נומער | NX100i |
| מאַכט מקור | Battery Powered (28V Lithium-ion) |
| מאַטעריאַל | פּלאַסטיק |
| קאָליר | מאַראַנץ |
| פּונקט וואָג | 29.3 פונט (13.3 קג) |
| קאַטינג ברייט | 7 אינטשעס (18 סענטימעטער) |
| אָפּעראַציע מאָדע | אָטאַמאַטיק |
| פּראָדוקט דימענשאַנז (ד רענטגענ וו רענטגענ ה) | 34" x 22" x 15" (86.4 ס״מ x 55.9 ס״מ x 38.1 ס״מ) |
| אַדזשאַסטאַבאַל קאַטינג הייך | 1.3 - 3 inches (5 positions) |
| Max Slope Capability | 40% |
| Mowing Time per Charge | 80-90 מינוט |
| ריטשאַרדזש צייט | קסנומקס מינוט |
8. וואָראַנטי און שטיצן
8.1 וואָראַנטי אינפֿאָרמאַציע
The Yard Force NX100i Robotic Mower comes with a two-year residential warranty. Please retain your proof of purchase for warranty claims. The warranty covers defects in materials and workmanship under normal use.
8.2 קונה שטיצן
For technical assistance, warranty claims, or spare parts, please contact Yard Force customer support. Contact details can typically be found on the official Yard Force webוועבזייטל אדער אויף דער פּראָדוקט פּאַקאַדזשינג.
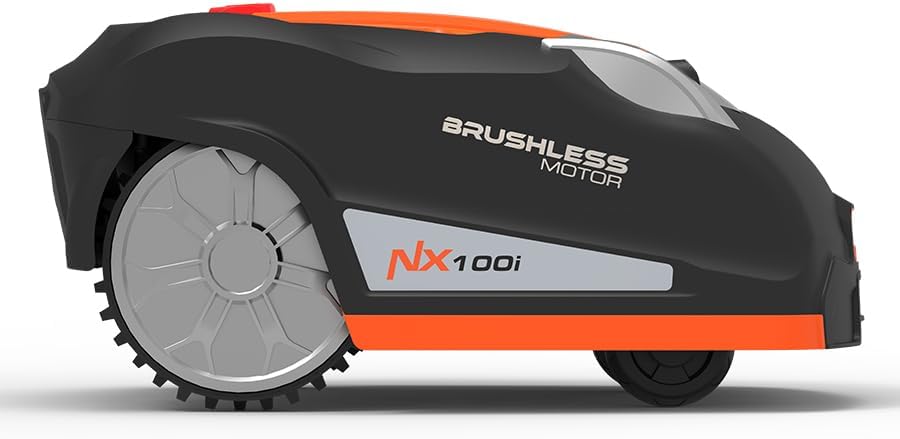
9. פּראָדוקט איבערview
Here are additional views of the Yard Force NX100i Robotic Mower:

10. לערנ־ווידעא
קוקט דעם ווידעא פאר א דעטאלירטע איבערזיכטview of the Yard Force NX100i Robotic Mower, including unboxing, setup, and initial operation.