
1. הקדמה
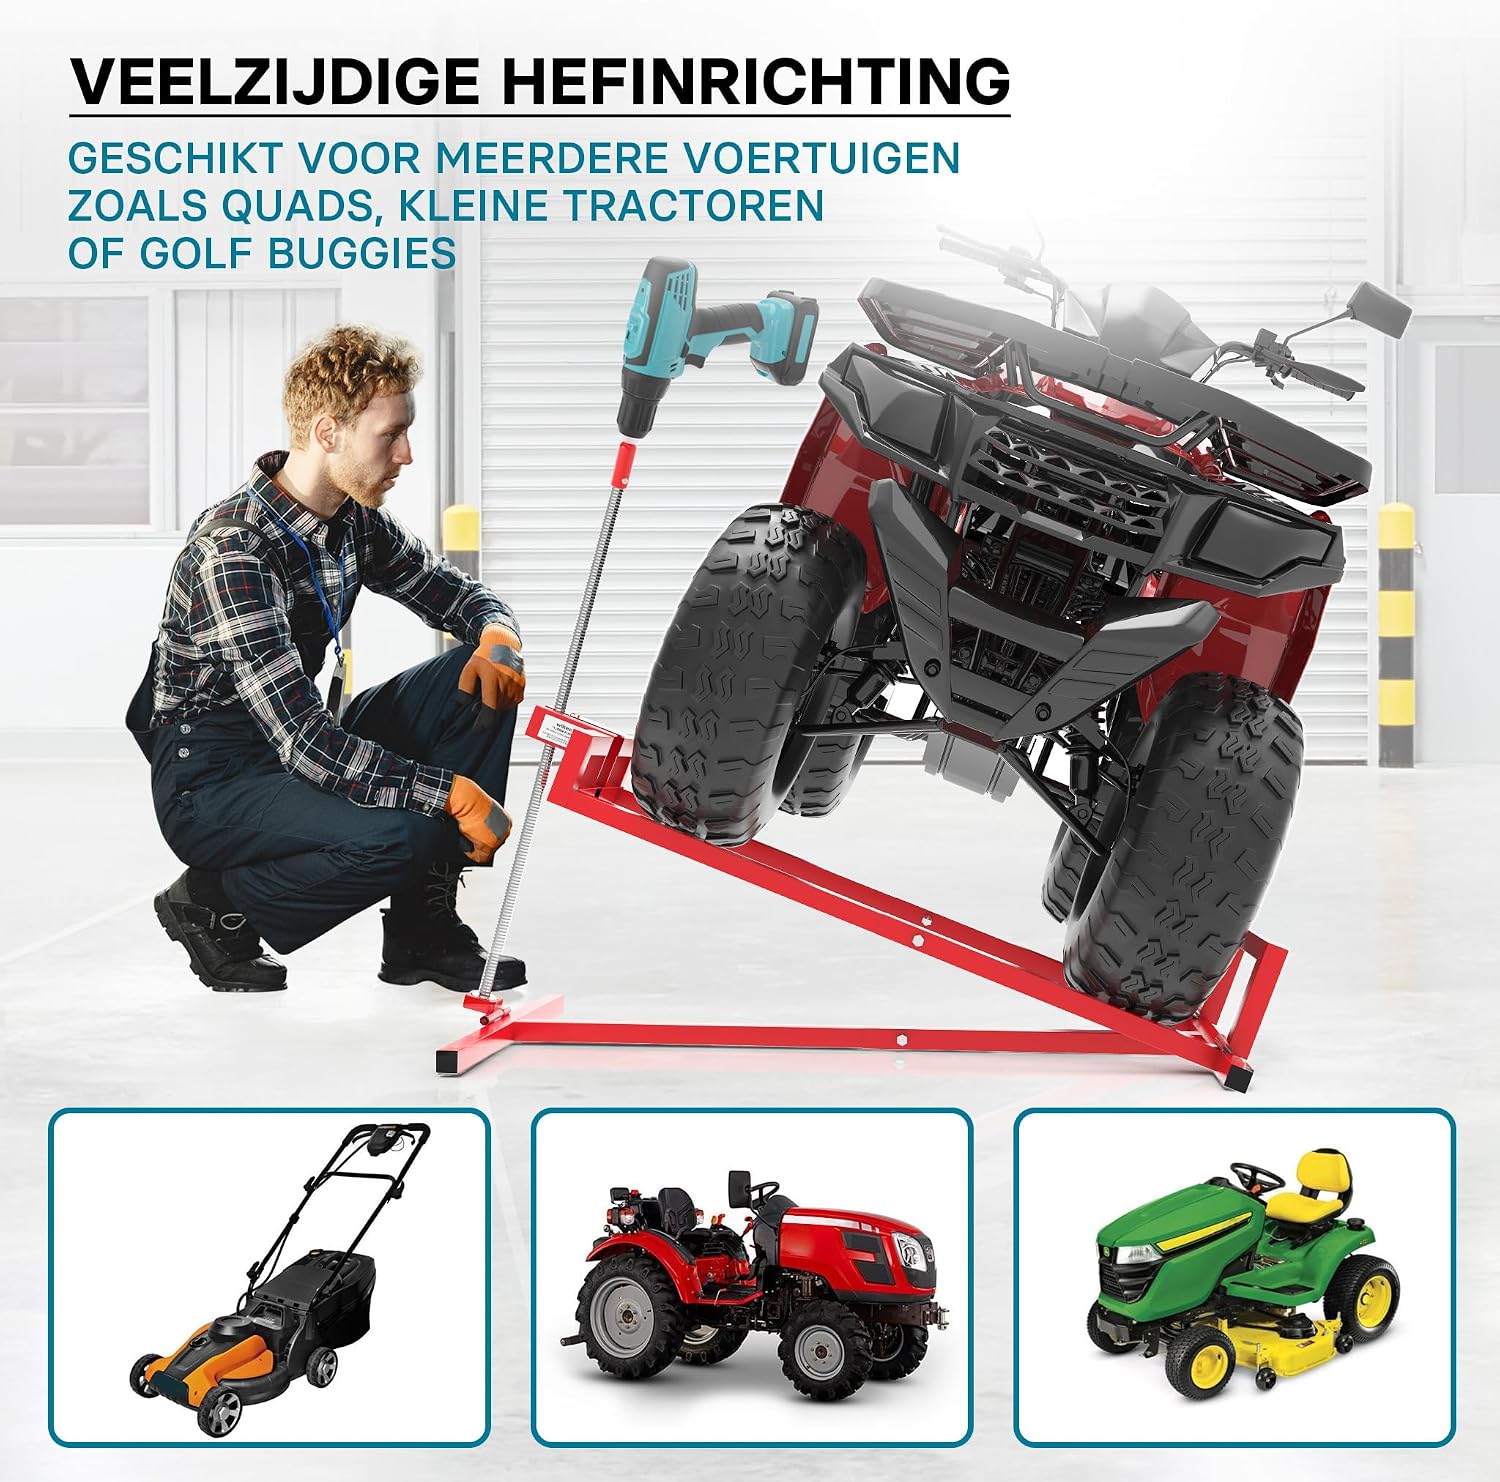
This manual provides essential information for the safe and efficient use of your WilTec Lawn Mower Lift, Model 64980. Please read these instructions carefully before assembly, operation, or maintenance. Proper use ensures optimal performance and safety. This lift is designed for raising garden and lawn mowers, ATVs, small tractors, and similar equipment up to a maximum weight of 400 kg for cleaning, maintenance, and repair tasks.
2. זיכערקייַט אינסטרוקציעס
Always prioritize safety when operating the lift. Failure to follow these instructions can result in serious injury or damage to property.
- מאַקסימום מאַסע קאַפּאַציטעט: Do not exceed the maximum load capacity of 400 kg. Overloading can cause structural failure and severe accidents.
- סטאַביל ייבערפלאַך: Always operate the lift on a firm, level, and non-slip surface. Uneven ground can cause the lift or the supported vehicle to tip over.
- זיכער אָרט: Ensure the vehicle is properly positioned and secured on the lift before raising. Use wheel chocks if necessary.
- זיכערהייט שטיפט: Always insert the safety pin into the designated hole once the desired height or tilt angle is reached. This prevents accidental lowering.
- פערזענלעכע פּראַטעקטיוו עקוויפּמענט: Wear appropriate safety gear, such as gloves and safety shoes, during assembly and operation.
- קלאָר שטח: Keep hands, feet, and other body parts clear of moving parts and pinch points during operation. Ensure no one is under the lifted vehicle.
- קינדער און פּעץ: האַלטן קינדער און פּעץ אַוועק פון די אַרבעט געגנט.
- דורכקוק: Before each use, inspect the lift for any signs of damage, wear, or loose components. Do not use if damaged.
- וישאַלט: Perform maintenance and repairs only on a securely supported vehicle.

3. פּעקל אינהאַלט
באַשטעטיקן אַז אַלע קאָמפּאָנענטן זענען פאַראַן און נישט געשעדיגט ביים אויספּאַקן.
- WilTec Lawn Mower Lift frame
- Lifting spindle with handle
- Hex bit adapter for drill/cordless screwdriver
- זיכערקייַט שטיפט
- ינסטרוקטיאָן מאַנואַל (דעם דאָקומענט)

4. סעטאַפּ
Follow these steps to set up your WilTec Lawn Mower Lift.
- Unfold the Lift: Carefully unfold the lift frame on a flat, stable surface. Ensure all hinges and joints are fully extended and locked into position.
- Insert Lifting Spindle: Place the lifting spindle into its designated slot on the lift frame.
- Attach Adapter (Optional): If using a drill or cordless screwdriver for faster operation, attach the provided hex bit adapter to the top of the spindle and secure it to your power tool.
- פאזיציע אויטא: Drive or push the vehicle onto the lift. Ensure the wheels are securely seated in the lift's cradles. The center of gravity of the vehicle should be balanced over the lift for stability.
- טשעק סטאַביליטי: Before lifting, gently rock the vehicle to confirm it is stable and properly positioned on the lift.
5. אַפּערייטינג ינסטרוקטיאָנס
Operating the WilTec Lawn Mower Lift is straightforward, but always adhere to safety guidelines.
- הייבן דאָס פאָרמיטל:
- מאַנואַל אָפּעראַציע: Turn the handle of the lifting spindle clockwise to raise the vehicle.
- מאַכט מכשירים אָפּעראַציע: Use a drill or cordless screwdriver with the hex bit adapter to turn the spindle clockwise for faster lifting.
- אַדזשאַסטינג טילט ווינקל: The lift allows for a continuously adjustable tilt angle up to 35 degrees. Raise the vehicle gradually, observing its stability.
- Securing the Lift: Once the desired height and tilt angle are achieved, immediately insert the safety pin through the corresponding holes in the lifting mechanism. This locks the lift in position and prevents accidental lowering.
- לאָוערינג די פאָרמיטל:
- Remove Safety Pin: Before lowering, ensure the area around the lift is clear, then remove the safety pin.
- מאַנואַל אָפּעראַציע: Turn the handle of the lifting spindle counter-clockwise to slowly lower the vehicle.
- מאַכט מכשירים אָפּעראַציע: Use a drill or cordless screwdriver with the hex bit adapter to turn the spindle counter-clockwise for faster lowering.
- Remove Vehicle: Once the vehicle is fully lowered and stable on the ground, carefully remove it from the lift.


6. וישאַלט
Regular maintenance ensures the longevity and safe operation of your lift.
- רייניקונג: Clean the lift after each use, especially if exposed to dirt, grass, or fluids. Use a damp שטאָף און מילד וואַשפּולווער.
- שמירן: Periodically lubricate the lifting spindle and moving parts with appropriate grease or oil to ensure smooth operation and prevent rust.
- דורכקוק: Regularly check all bolts, nuts, and connections for tightness. Inspect the steel frame for any signs of bending, cracks, or corrosion.
- סטאָרידזש: When not in use, store the lift in a dry, clean place. The foldable design allows for compact storage.
7. טראָובלעשאָאָטינג
If you encounter issues with your WilTec Lawn Mower Lift, refer to the following common problems and solutions.
| פּראָבלעם | מעגלעך סיבה | לייזונג |
|---|---|---|
| Lift is difficult to raise/lower | Lack of lubrication on spindle; excessive load; bent spindle. | Lubricate the spindle. Reduce the load if it exceeds 400 kg. Inspect for damage; replace if bent. |
| Lift feels unstable | Uneven ground; vehicle not centered; loose connections. | Move to a level surface. Reposition the vehicle. Tighten all bolts and nuts. |
| Safety pin does not fit | Lift not at correct height/angle; pin bent. | Adjust lift slightly until holes align. Inspect pin for damage; replace if bent. |
8. ספּעסאַפאַקיישאַנז
Detailed technical specifications for the WilTec Lawn Mower Lift 64980.
- מאָדעל נומער: 64980
- סאָרט: ווילטעק
- מאַטעריאַל: אַללוי סטיל
- קאָליר: רויט
- מאַסע קאַפּאַציטעט: 400 קג
- מינימום הייך: 110 מם
- מאַקסימום טילט ווינקל: 35 degrees (continuously adjustable)
- נומער דימענשאַנז (L x W x H): 114 X 49.5 X 103 סענטימעטער
- פּראָדוקט דימענשאַנז (פאָולדיד): Approximately 98 x 49.5 x 11 cm (based on diagram)
- נומער וואָג: 8.2 קג
- Compatible Vehicle Types: ATV, Tractor, Lawn Mowers, Garden Tractors (Universal Fit)
- לאַנד פון אָריגין: כינע


9. וואָראַנטי און שטיצן
For warranty information, technical support, or spare parts, please contact WilTec customer service. Refer to your purchase documentation for specific warranty terms and contact details.
נאָך רעסורסן: