
1. הקדמה
This manual provides detailed instructions for the installation, operation, and maintenance of your EVTSCAN Digital Thermoregulator. This device is designed to precisely control heating equipment, such as wall-mounted boilers and gas boilers, ensuring a stable and energy-efficient temperature environment. Please read this manual thoroughly before installation and use to ensure proper function and safety.
2. זיכערקייַט אינפֿאָרמאַציע
Always observe the following safety precautions to prevent damage to the device or personal injury:
- פאַרזיכערן די מאַכט צושטעלן איז דיסקאַנעקטיד איידער ינסטאַלירונג אָדער וישאַלט.
- די אינסטאַלאַציע זאָל דורכגעפירט ווערן דורך אַ קוואַליפֿיצירטן פאַכמאַן אויב איר זענט נישט זיכער וועגן עלעקטרישע וויירינג.
- שטעלט נישט אויס דעם אפאראט צו וואסער אדער איבעריגע הומידיטי.
- Use only the specified battery type (2 AA batteries) and ensure correct polarity.
- האַלטן די מיטל אַוועק פון ברענעוודיק מאַטעריאַלס.
3. פּראָדוקט איבערview
The EVTSCAN Digital Thermoregulator features a clear LCD display for easy monitoring and a simple interface for temperature control. Its compact design allows for discreet integration into your living space.

פיגורע 3.1: פראָנט view of the Digital Thermoregulator. The LCD screen displays current settings and room temperature, with a rotary knob below for adjustments.
שליסל קאַמפּאָונאַנץ:
- LCD ווייַז: Shows set temperature, room temperature, time, and operational icons.
- Control Knob/Button: געניצט פֿאַר נאַוויגירן מעניוז און אַדזשאַסטירן סעטטינגס.
- באַטערי אָפּטייל: Located on the rear or side for 2 AA batteries.
- וויירינג טערמינאַלס: For connection to the heating system.
4. ספּעסאַפאַקיישאַנז
| שטריך | באַשרייַבונג |
|---|---|
| מאָדעל | EVTSCANok0g9ct2zq |
| מאַכט מאָדע | 2 אַאַ באַטעריז (ניט אַרייַנגערעכנט) |
| Screen Accuracy | 0.5 ℃ |
| זאָנד סענסאָר | נטק (10 ק) 1% |
| קאָנטאַקט קאַפּאַציטעט | Greater than 30-230 V DC working voltage, lower current. Reference: 5 A 30 V (HF relay) or 2 A 30 V (NEC relay) |
| טעמפּעראַטור ווייַז ראַנגע | 1 צו 40 ℃ |
| Default Temperature Adjustment Range | 5 צו 35 ℃ |
| אַפּערייטינג טעמפּעראַטור ראַנגע | 0 צו 50 ℃ |
| פליסנדיק פּראָגראַם | Set once a week |
| רעזולטאַט | באַשטימען רעלע |
| מאַטעריאַל | פלאַם-ריטאַרדאַנט פּאָליקאַרבאָנאַטע |
| וואָג | 170 ג |
5. סעטאַפּ און ייַנמאָנטירונג
The EVTSCAN Digital Thermoregulator is designed for simple installation. Follow these steps carefully:
5.1. אַנפּאַקינג און דורכקוק
נעמט פֿאָרזיכטיק אַרויס אַלע קאָמפּאָנענטן פֿון דער פּאַקעט. באַשטעטיקט אַז אַלע זאַכן וואָס זענען אויסגערעכנט אין דעם פּאַקעט זענען פֿאַראַן און נישט געשעדיגט.
- 1 Digital Temperature Controller
- 2 סקרוז
5.2. באַטאַרייע ייַנמאָנטירונג
The device requires 2 AA batteries for operation. These are not included in the package.
- Locate the battery compartment on the back of the thermoregulator.
- עפענען די באַטאַרייע אָפּטייל דעקן.
- אַרייַנלייגן 2 אַאַ באַטעריז, ינשורינג די ריכטיק פּאָולעראַטי (+/-).
- פאַרמאַכן די באַטאַרייע אָפּטייל דעקן סיקיורלי.

פיגור 5.1: ווינקלדיק view of the thermoregulator, illustrating its compact size and potential location for battery access or mounting points.
5.3. מאַונטינג און וויירינג
The thermoregulator is designed for wall mounting. Ensure the power to your heating system is turned off before proceeding with wiring.
- קלייבט אויס א פאסיגע לאקאציע אויף אן אינעווייניגסטער וואנט, ווייט פון דירעקטער זונשייַן, דראַפט, אדער היץ-קוועלער וואָס קענען אַפעקטירן טעמפּעראַטור מעסטונגען.
- Mount the backplate (if detachable) to the wall using the provided screws.
- Connect the thermoregulator to your boiler or heating system according to the wiring diagram provided with your boiler and the thermoregulator's terminal markings. This typically involves connecting the switching relay output to the boiler's control input.
- Secure the thermoregulator onto the mounted backplate.
באַמערקונג: For wiring, consult a qualified electrician if you are unfamiliar with electrical installations.
6. אַפּערייטינג ינסטרוקטיאָנס
The EVTSCAN Digital Thermoregulator uses a microcomputer control technology to maintain your desired temperature efficiently.
6.1. Powering On and Initial Display
Once batteries are installed, the LCD display will illuminate, showing the current room temperature, set temperature, and time.
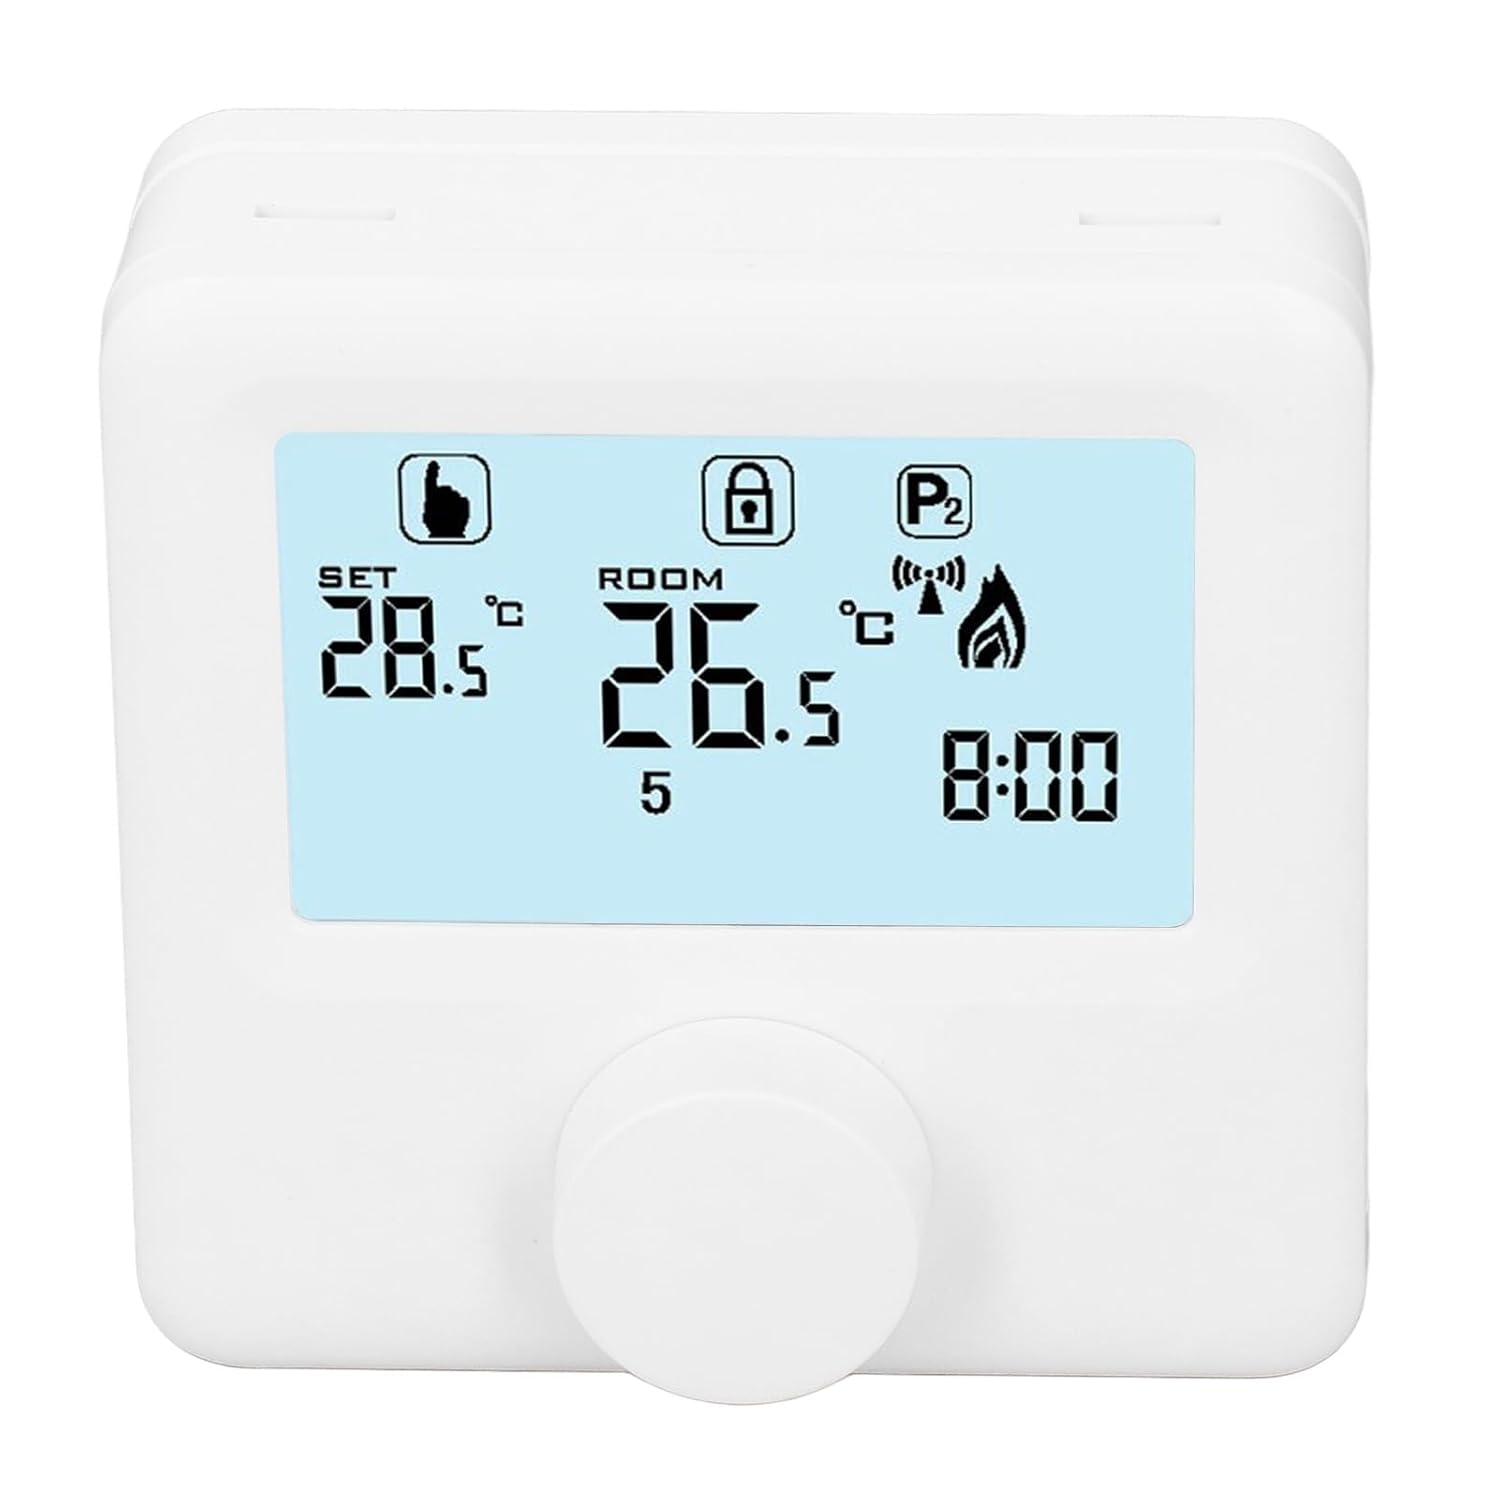
פיגורע 6.1: דעטאַילעד view of the LCD display. It shows the set temperature (SET), room temperature (ROOM), a lock icon, a program icon (P2), a signal icon, a flame icon indicating heating, and the current time.
6.2. באַשטעטיקן די טעמפּעראַטור
צו סטרויערן די געבעטן טעמפּעראַטור:
- Rotate the control knob to increase or decrease the set temperature. The "SET" value on the display will change accordingly.
- The device will automatically activate or deactivate the heating system to maintain the set temperature within the range of 1 to 40 ℃. The default adjustment range is 5 to 35 ℃.
6.3. Programming Weekly Schedule
The thermoregulator supports a weekly programming schedule. This allows you to set different temperatures for various times of the day across the week.
- Press and hold the control knob (or a designated button, if available) to enter programming mode.
- Use the control knob to navigate through days of the week and time slots.
- Adjust the desired temperature for each programmed period.
- Confirm your settings to save the weekly program. The device will then operate according to this schedule.
6.4. Understanding Display Icons
- שטעלן: Indicates the target temperature you have set.
- צימער: Displays the current ambient room temperature.
- Flame Icon: צינדט זיך אָן ווען די הייצונג סיסטעם איז אַקטיוו.
- שלאָס ייקאַן: May indicate a keypad lock feature to prevent accidental changes.
- P1/P2 Icon: Indicates the current program mode (e.g., P1 for comfort, P2 for economy, or specific weekly program segments).
- סיגנאַל ייקאַן: May indicate wireless communication status if applicable.
7. וישאַלט
Regular maintenance ensures the longevity and optimal performance of your thermoregulator.
- רייניקונג: ווישט אָפּ דאָס אַפּאַראַט מיט אַ ווייכן, טרוקענעם שטאָף. ניצט נישט קיין שרײַבנדיקע רייניגערס אָדער סאָלווענטן.
- באַטערי פאַרבייַט: Replace batteries when the low battery indicator appears on the display. Always replace both batteries simultaneously with new AA batteries.
- סענסאָר געגנט: Ensure the temperature sensor area (usually a small vent on the device) is free from dust and obstructions for accurate readings.
8. טראָובלעשאָאָטינג
If you encounter issues with your EVTSCAN Digital Thermoregulator, refer to the following common problems and solutions:
- די אַרויסווייַזן איז ליידיק:
- Check if batteries are correctly installed.
- פאַרבייַטן אַלט באַטעריז מיט נייַע.
- הייצונג סיסטעם רעאגירט נישט:
- Ensure the thermoregulator is powered on and the flame icon is displayed when heating is expected.
- Verify wiring connections to the boiler are secure and correct.
- Check the boiler's power supply and status.
- זיכער מאַכן אַז די איינגעשטעלטע טעמפּעראַטור איז העכער ווי די איצטיקע צימער טעמפּעראַטור.
- נישט פּינקטלעכע טעמפּעראַטור מעסטונגען:
- Ensure the device is not exposed to direct sunlight, drafts, or heat sources.
- Clean any dust or debris from the sensor area.
- קען נישט ענדערן סעטטינגס:
- Check if the lock icon is displayed. If so, refer to the operating instructions to unlock the keypad.
אויב די פּראָבלעם בלייַבט, קאָנטאַקט קונה שטיצן.
9. וואָראַנטי און שטיצן
Specific warranty information for this product is not provided in the available data. Please refer to the product packaging or the retailer's webפּלאַץ פֿאַר וואָראַנטי דעטאַילס.
For technical support or further assistance, please contact EVTSCAN customer service through their official channels or the retailer from whom you purchased the product.
You can visit the EVTSCAN store on Amazon for more information: EVTSCAN Store