
Labelife Omega S Embossing Label Maker
Labelife Omega S Embossing Label Maker Instruction Manual
Model: Omega S
הקדמה
This manual provides detailed instructions for the safe and effective use of your Labelife Omega S Embossing Label Maker. Please read this manual thoroughly before operating the device to ensure proper function and longevity. This label maker is designed for creating embossed labels for various organizational and crafting needs without the use of batteries or ink.
פּעקל אינהאַלט
באַשטעטיקט אַז אַלע זאכן וואָס זענען אויסגערעכנט אונטן זענען אַרייַנגערעכנט אין אייער פּעקל:
- 1 x Labelife Omega S Embossing Label Maker
- 10 x 9mm Embossing Label Tapes (various colors including Champagne Gold, Gold, Clear, Silver, Black)
- 1 x באַניצער מאַנואַל
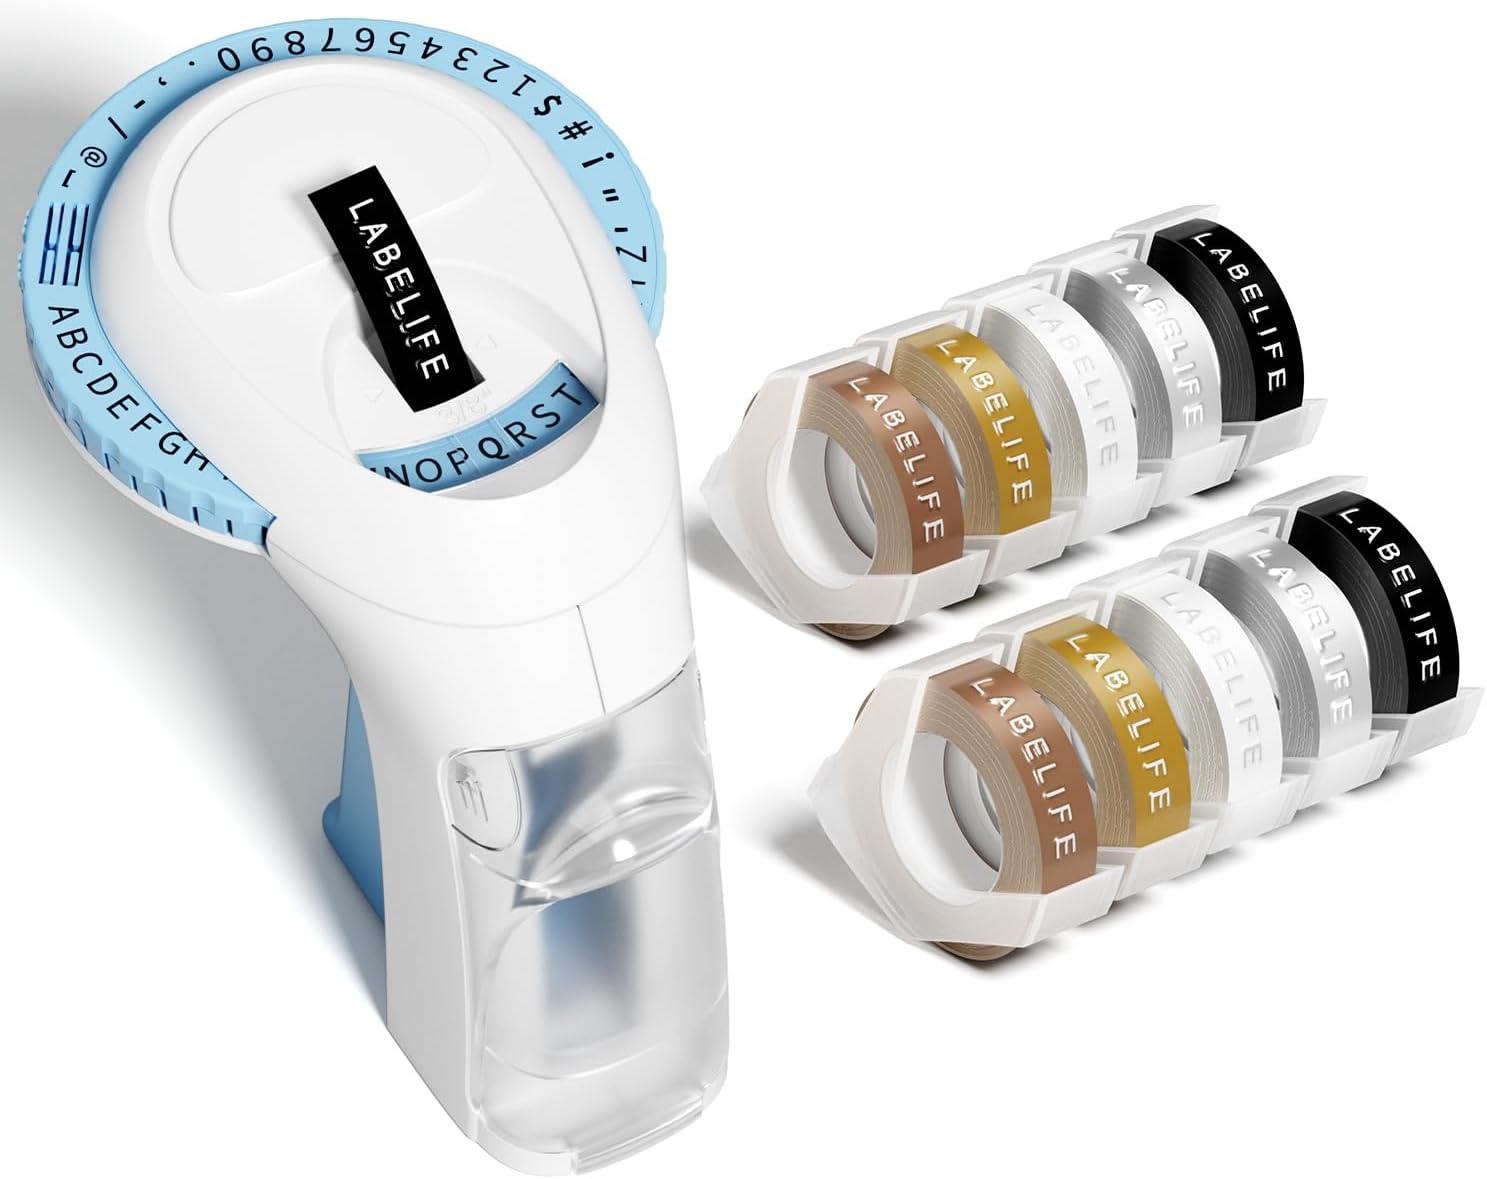
Image: The package contents, including the blue label maker, ten rolls of 9mm embossing tape in various colors, and a user manual.
פּראָדוקט פֿעיִקייטן
- מאַנואַל אָפּעראַציע: Operates without batteries or ink, offering an eco-friendly and convenient labeling solution.
- 48-Character Dial: Features a sturdy POM material character wheel for clear printing, including capital letters (A-Z), numbers (0-9), and useful symbols (.,!;:"@$-/#').
- ערגאָנאָמיק פּלאַן: Handheld and portable with an anti-slip grip for comfortable and labor-saving operation.
- Transparent Frosted Cover: Allows easy monitoring of tape usage.
- 3D Embossing Effect: Creates labels with a distinct 3D effect for enhanced readability.
- Durable Tapes: Compatible with 9mm plastic embossing tapes that are water-resistant, abrasion-resistant, temperature-resistant, grease-resistant, and fade-resistant.
- Clean Cuts: Designed with pre-cut dividers for easy tear-off and no sticky residue upon removal.

Image: The label maker's character dial, highlighting the 48 available characters (A-Z, 0-9, and symbols) and the "Turn-and-Click" system.
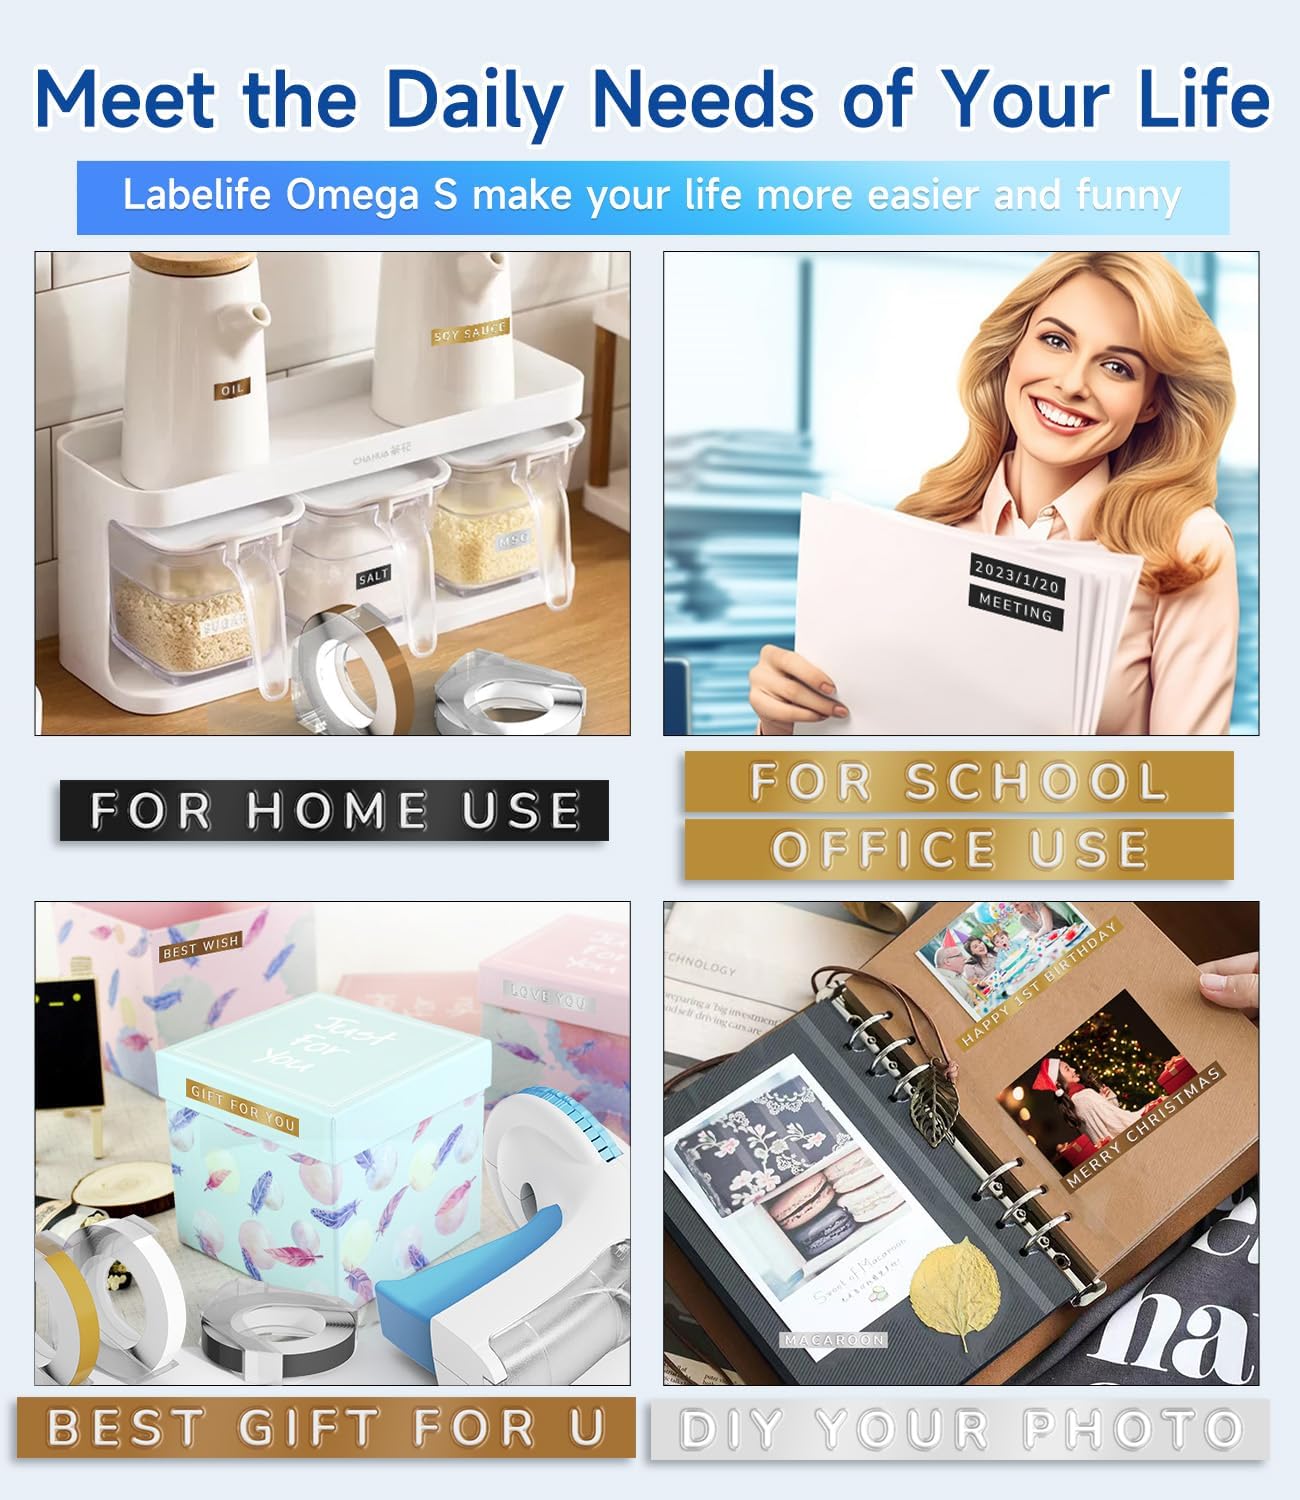
Image: Visual representation of the label tapes' properties, including easy peeling, 3D effect, water resistance, abrasion resistance, and strong adhesive.
ספּעסאַפאַקיישאַנז
| סאָרט | לאַבעליף |
| מאָדעל נאָמען | Omega S Embossing Label Maker |
| דרוק טעכנאָלאָגיע | עמבאָססינג |
| קאַנעקטיוויטי טעכנאָלאָגיע | מאַנואַל |
| מאַקסימום מעדיע גרייס | 9mm (3/8" Inches) |
| דרוקער טינט טיפּ | קיין טינט נישט נויטיק |
| פּראָדוקט דימענשאַנז | 4.96 x 3.62 x 4.64 אינטשעס (ד x ב x ה) |
| פּונקט וואָג | 11.3 אונסעס |
סעטאַפּ
1. Loading the Label Tape
- צוגרייטן די מיטל: Move the character dial to the blank space symbol ("--") to ensure the mechanism is ready for tape insertion.
- עפֿנט דעם הינטערשטן דעקל: Gently open the back cover of the label maker.
- אַרייַנלייגן טייפּ: Insert a 9mm embossing label tape roll into the card slot, ensuring the tape feeds correctly.
- Advance Tape: Close the back cover. Press the handle continuously several times until the tape fully advances into the printer and a small portion appears at the front. This confirms successful tape installation.
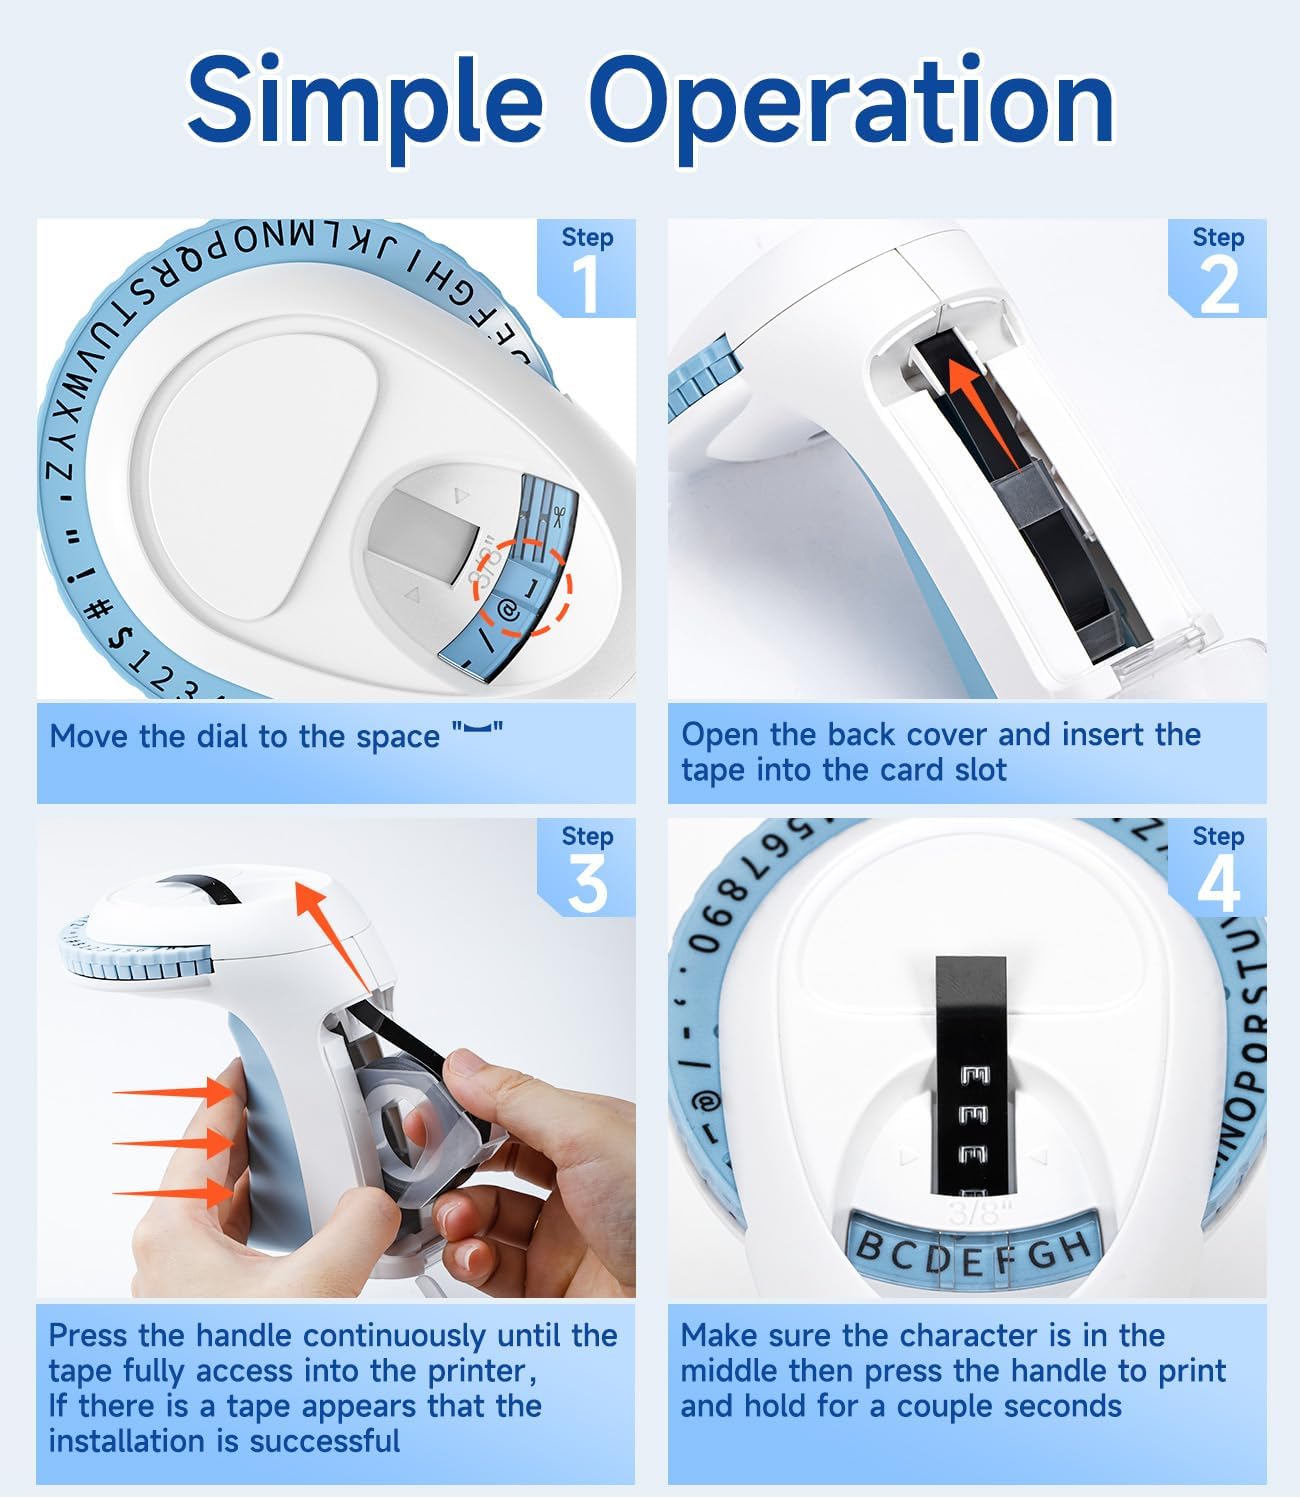
Image: Visual steps for loading the label tape, showing how to open the cover, insert the tape, and advance it by pressing the handle.
אַפּערייטינג ינסטראַקשאַנז
שאַפֿן אַ פירמע
- Align Character Dial: Before printing, ensure the alignment marks (two vertical lines) on the dial are perfectly aligned with the indicator on the label maker. This ensures characters are centered and clear.
- Select Character: Rotate the character dial to select the desired letter, number, or symbol. Make sure the chosen character is centered in the viewאין פֿענצטער.
- Emboss Character: Press the handle firmly and hold for a couple of seconds. The harder and longer you press, the clearer the embossed character will be. Release the handle.
- Repeat for Each Character: Repeat steps 2 and 3 for each character you wish to emboss on your label.
- שנייַדן די פירמע: Once your label is complete, rotate the dial to the scissor symbol. Press the handle firmly to cut the tape.
עצות פֿאַר בעסטער רעזולטאַטן
- For optimal clarity, press the handle with consistent force and hold for a brief moment for each character.
- To create a space between words, select the blank space symbol on the dial and press the handle.
- When installing a new roll of tape, move the dial to the blank space symbol and press the handle once before printing your first character. This helps to save tape and ensure the integrity of the first character.
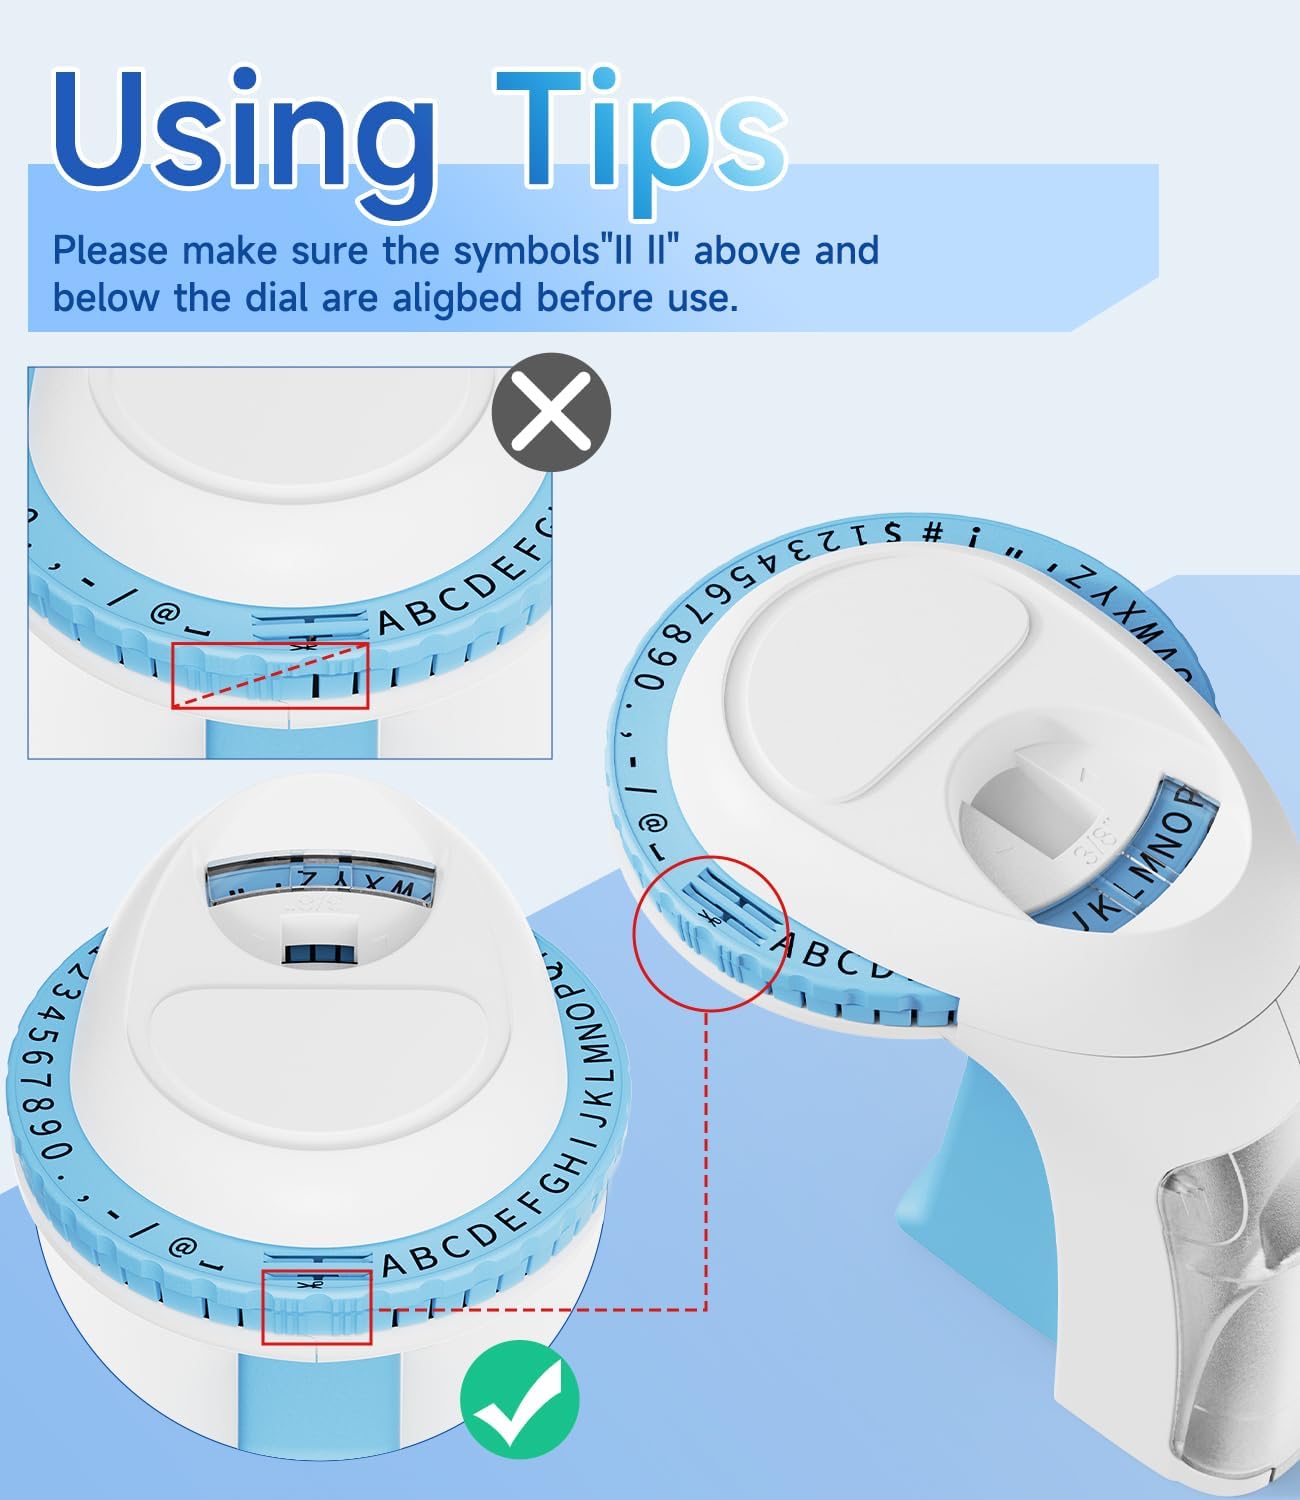
בילד: דעטאַלירט view of the character dial, illustrating the importance of aligning the indicator marks for accurate character embossing.
וישאַלט
The Labelife Omega S Embossing Label Maker requires minimal maintenance. Follow these guidelines to ensure its longevity:
- רייניקונג: Wipe the exterior of the label maker with a soft, dry cloth. Avoid using abrasive cleaners or solvents.
- טייפּ סטאָרידזש: Store unused label tapes in a cool, dry place away from direct sunlight to preserve their adhesive properties and prevent damage.
- מעכאניזם טשעק: Periodically check the tape path for any debris or tape remnants that might obstruct the embossing or cutting mechanism.
טראָובלעשאָאָטינג
| פּראָבלעם | מעגלעך סיבה | לייזונג |
|---|---|---|
| Characters are unclear or faint. | Insufficient pressure applied to the handle. | Press the handle more firmly and hold for a couple of seconds for each character. |
| Letters are not aligned or appear crooked. | Character dial not perfectly aligned before pressing. | Ensure the alignment marks on the dial are precisely matched with the indicator before pressing the handle for each character. |
| די טייפּ גייט נישט צו אָדער שטעקט זיך אָן. | Tape incorrectly loaded or debris in the tape path. | Open the back cover, remove the tape, and check for any obstructions. Re-insert the tape carefully, ensuring it is seated correctly. |
| Label does not cut cleanly. | Insufficient pressure when cutting or cutter blade is dull. | Ensure the dial is set to the scissor symbol and press the handle firmly to cut. If the issue persists, contact customer support. |
| Difficulty peeling off the tape backing. | The pre-cut divider may not have been fully created. | The tapes are designed with pre-cut dividers for easier peeling. If difficulty occurs, try gently bending the label to separate the backing or use a sharp, thin object to start the peel from a corner. |
וואָראַנטי און שטיצן
For warranty information or technical support, please refer to the documentation included with your purchase or contact Labelife customer service directly. Keep your purchase receipt as proof of purchase.
You can visit the official Labelife store for more information: Labelife Store
זיכערקייַט אינפֿאָרמאַציע
- Keep the label maker out of reach of small children to prevent accidental injury.
- פּרוּווט נישט צו צענעמען אָדער מאָדיפֿיצירן דעם אַפּאַראַט, ווײַל דאָס קען בטל מאַכן די וואָראַנטי און פאַראורזאַכן שאָדן.
- Use only genuine Labelife 9mm embossing tapes to ensure proper function and prevent damage to the label maker.
- ויסמיידן יקספּאָוזינג די מיטל צו עקסטרעם טעמפּעראַטורעס אָדער דירעקט זונשייַן.
- Exercise caution when using the cutting mechanism to avoid injury.
Ask a question about this manual
Ask about setup, troubleshooting, compatibility, parts, safety, or missing instructions. Manuals+ will review the question and use this page’s manual context to help answer it.