
הקדמה
Thank you for choosing the GEARSTONE Foldable Magnetic Exercise Bike. This manual provides essential information for the safe assembly, operation, and maintenance of your exercise bike. Please read this manual thoroughly before use and keep it for future reference.
וויכטיק סאַפעטי אינפֿאָרמאַציע
- באַראַטנ זיך דיין דאָקטער איידער איר אָנהייבן קיין געניטונג פּראָגראַם.
- Always warm up before exercising and cool down afterwards.
- זיכער מאַכן אַז אַלע באָלץ און ניסלעך זענען זיכער צוגעצויגן איידער יעדן באַנוץ.
- שטעלט דעם געניטונג-בייק אויף א גלייכער, סטאַבילער ייבערפלאַך.
- האַלטן קינדער און פּעץ אַוועק פון די ויסריכט בעשאַס נוצן.
- די מאַקסימום באַניצער וואָג קאַפּאַציטעט פֿאַר דעם בייק איז 120 ק"ג (264 לבס).
- הער אויף צו טאָן געניטונגען גלייך אויב איר פילט זיך שוואַך, שווינדלדיק, אָדער דערפאַרט ווייטיק.
- טראָגט פּאַסיקע ספּאָרט קליידער און שיך.
פּעקל אינהאַלט
Carefully unpack the box and ensure all parts are present. Refer to the diagram below for a visual representation of the components.

פיגורע 1: Package Contents. This image displays the various components and tools included with your exercise bike, such as the main frame, pedals, seat, backrest, and assembly tools.
דער פּעקל זאָל אַרייַננעמען:
- הויפּט פריים אַסעמבלי
- לינקס און רעכט פּעדאַלז
- זיץ און רוקן-שטיצע
- האַנטלבאַר מיט על-סי-די מאָניטאָר
- Stabilizer Bars (Front and Rear)
- Hardware Kit (bolts, nuts, washers)
- פֿאַרזאַמלונג מכשירים (שרענקל, אַלען שליסל)
- באַניצער מאַנואַל
סעטאַפּ און אַסעמבלי
Follow these steps to assemble your GEARSTONE Foldable Magnetic Exercise Bike. It is recommended to have two people for assembly.
- צוטשעפּען סטאַביליזאַטאָר באַרס: Secure the front and rear stabilizer bars to the main frame using the provided bolts and nuts. Ensure they are firmly tightened for stability.
- ינסטאַלירן פּעדאַלז: אידענטיפיצירט די לינקע (L) און רעכטע (R) פּעדאַלן. די לינקע פּעדאַל שרויפן קעגן זייגער, און די רעכטע פּעדאַל שרויפן זייגער. דריקט זיי אין די קראַנק אָרעמס און פֿעסט אָנצינדן.
- מאָנטירן זיץ און רוקן: Insert the seat post into the main frame and adjust to your desired height. Secure it with the locking pin. Attach the backrest to the seat support.
- Attach Handlebar and Monitor: Connect the handlebar assembly to the main frame. Ensure all cables for the LCD monitor and pulse sensors are properly connected. Secure the handlebar with the designated bolts.
- לעצט טשעק: Before first use, double-check all connections and ensure all bolts and nuts are tightened.

פיגורע 2: Assembly Steps. This diagram illustrates the key stages of assembling the exercise bike, from attaching the base supports to installing the seat and pedals.
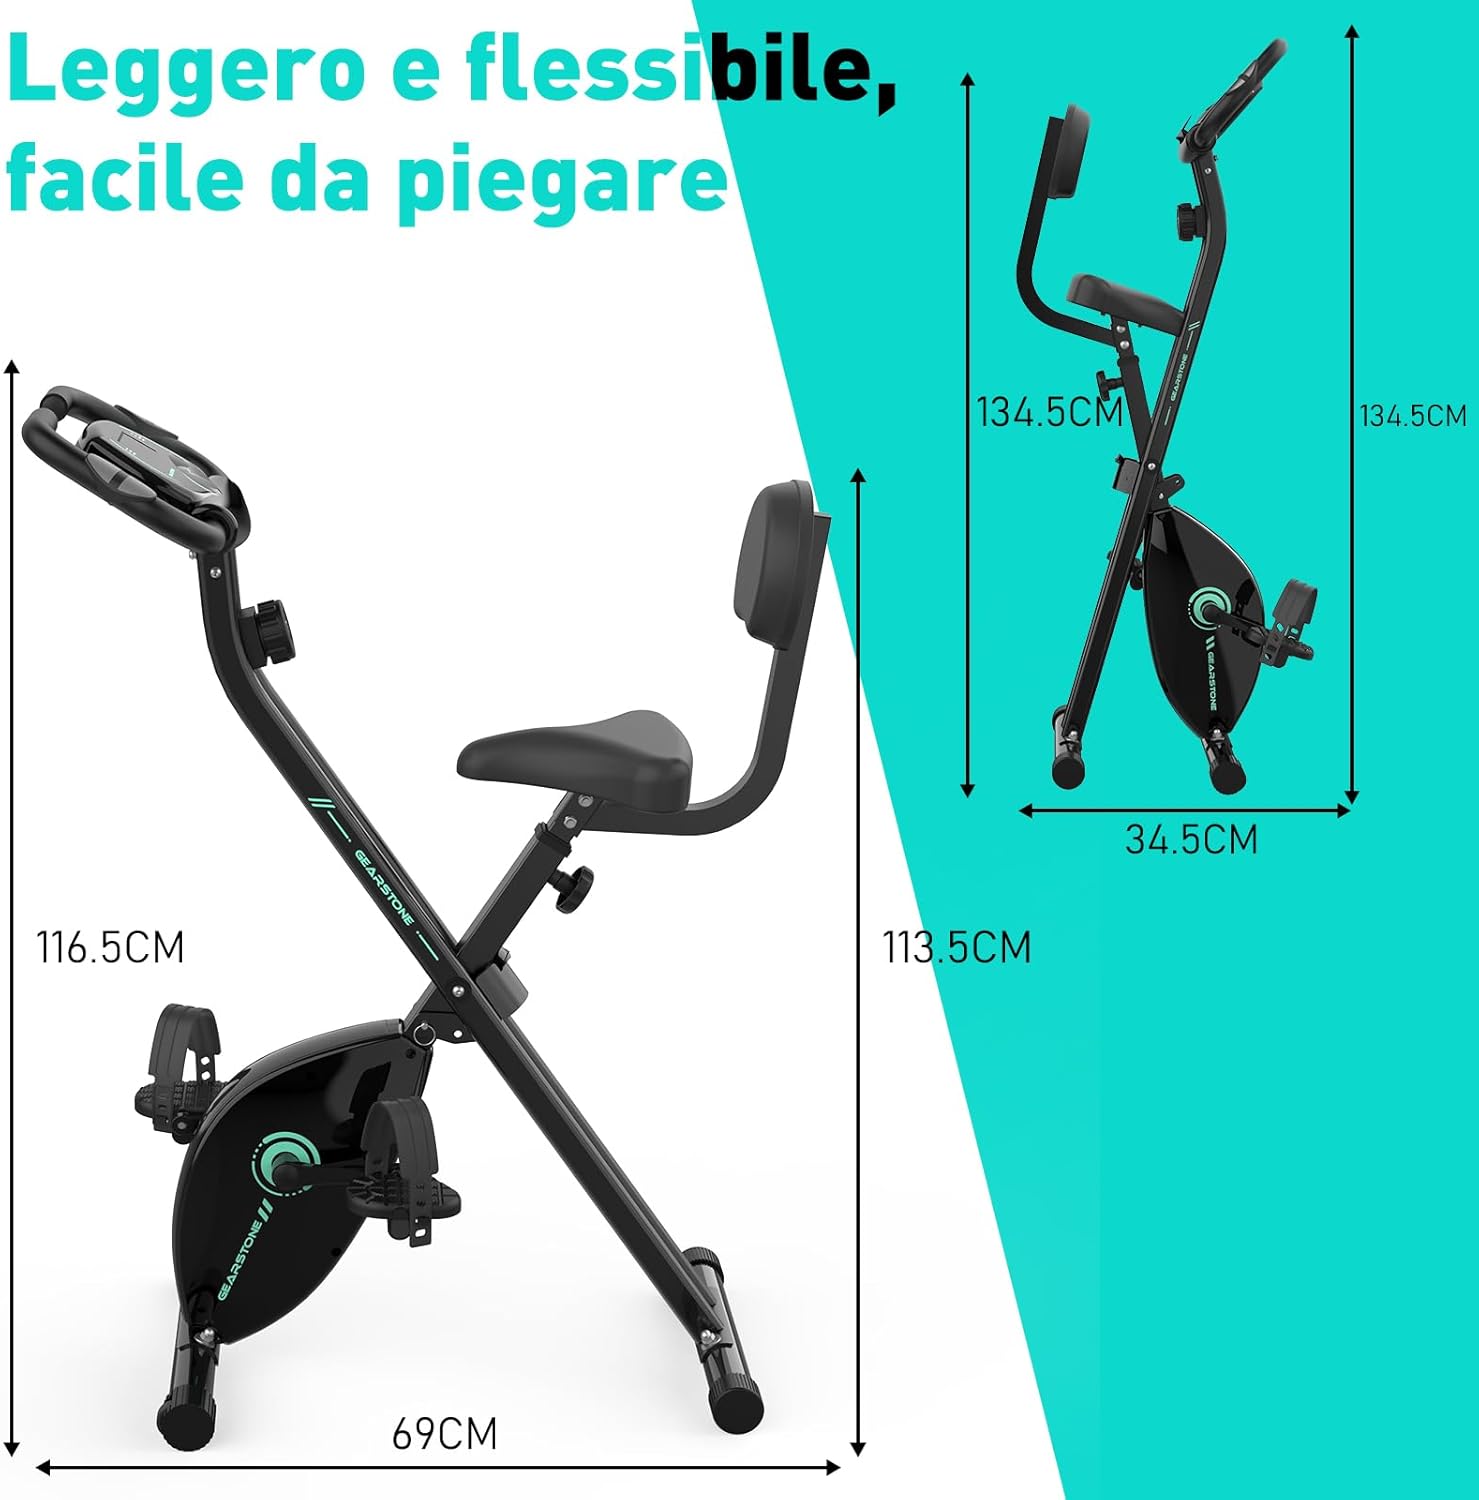
פיגורע 3: Assembled Bike Dimensions. This image shows the fully assembled exercise bike with its dimensions, highlighting its compact and foldable nature.
אַפּערייטינג ינסטראַקשאַנז
אַדזשאַסטינג אַוועקזעצן הייך
The seat height can be adjusted to five different levels to accommodate various user heights. Loosen the adjustment knob located on the seat post, slide the seat to the desired height, and then tighten the knob securely. Ensure your knees have a slight bend at the bottom of the pedal stroke.

פיגורע 4: Seat and Resistance Adjustment. This image highlights the knob for adjusting magnetic resistance and the mechanism for adjusting seat height.
אַדזשאַסטינג קעגנשטעל
The bike features 8 levels of magnetic resistance. Turn the resistance knob, located below the LCD monitor, clockwise to increase resistance and counter-clockwise to decrease it. Start with a lower resistance and gradually increase as your fitness improves.
ניצן די לקד מאָניטאָר
The LCD monitor displays key workout data. It is battery-powered. The monitor automatically turns on when you start pedaling or press a button.
- יבערקוקן: גייט אויטאָמאַטיש דורך אַלע דיספּליי פונקציעס יעדע עטלעכע סעקונדעס.
- צייט: ווײַזט די געדויער פון אײַער טרענירונג.
- SPEED: ווײַזט אײַער איצטיקע סייקלינג גיכקייט.
- AFSTAND: Displays the distance covered during your current workout.
- קאַלאָריעס: שאַצט די קאַלאָריעס וואָס זענען פארברענט בעת דיין טריינינג.
- אָדאָמעטער (ODO): דיספּלייז די גאַנץ אַקיומיאַלייטיד ווייַטקייט.
- דויפעק: Shows your heart rate when holding the pulse sensors on the handlebars.
To reset the monitor, press and hold the button for a few seconds, or remove and reinsert the batteries.

פיגורע 5: LCD Monitor Display. This image provides a detailed view of the LCD monitor and its various data display functions.

פיגורע 6: Resistance Control and Monitor Interaction. This image illustrates how to adjust the resistance level and interact with the LCD monitor's buttons.
ניצן די טעלעפאָן האָלדער
A phone holder is integrated into the LCD monitor panel. Place your smartphone or tablet securely in the holder to enjoy videos or music during your workout.
Folding the Bike for Storage
To fold the bike, loosen the main folding knob (usually located near the base of the frame). Carefully fold the frame inwards until it locks into its compact position. This design allows for easy storage and space-saving.
וישאַלט
- רייניקונג: ווישן אַראָפּ די בייק מיט אַדamp טוך נאך יעדן באניץ צו באזייטיגן שווייס און שטויב. ניצט נישט קיין שווארצע רייניגער.
- דורכקוק: קאָנטראָלירט רעגולער אַלע באָלץ, ניסלעך און באַוועגלעכע טיילן פֿאַר פעסטקייט און אָפּנוץ. פֿעסטשטעלט יעדע לויזע פֿעסטשטעלער.
- שמירן: The magnetic resistance system and belt drive are generally maintenance-free. Do not lubricate internal components unless specifically instructed by customer support.
- סטאָרידזש: האַלט דאָס וועלאָסיפּעד אין אַ קיל, טרוקן אָרט אַוועק פון דירעקט זונשייַן און עקסטרעמע טעמפּעראַטורן.
- באַטערי פאַרבייַט: Replace the LCD monitor batteries when the display becomes dim or unresponsive.
טראָובלעשאָאָטינג
| פּראָבלעם | מעגלעך סיבה | לייזונג |
|---|---|---|
| קיין אַרויסווייַזונג אויף LCD מאָניטאָר | באַטעריז זענען טויט אָדער ינקערעקטלי אינסטאַלירן. | טוישט די באַטעריעס אָדער זיכערט זיך אַז זיי זענען אינסטאַלירט מיט דער ריכטיקער פּאָלאַריטעט. |
| אומגענויע פּולס לייענונג | Hands not firmly on sensors; sensors are dirty. | Ensure firm contact with both pulse sensors. Clean sensors with a dry cloth. |
| בייק איז נישט סטאַביל אָדער וואַקלט זיך | לויזע באָלץ; אומגלייכע ייבערפלאַך. | Check and tighten all assembly bolts. Move the bike to a flat, level surface. |
| קעגנשטעל נישט טשאַנגינג | קעגנשטעל קאַבל אפגעטיילט אדער געשעדיגט. | Inspect the resistance cable connection. If damaged, contact customer support. |
| ומגעוויינטלעך ראַש בעשאַס אָפּעראַציע | Loose parts; friction from moving components. | Check all bolts and nuts for tightness. Ensure no foreign objects are caught in moving parts. If noise persists, contact customer support. |
ספּעסאַפאַקיישאַנז
| שטריך | דעטאַל |
|---|---|
| מאָדעל נאָמען | cyclette pieghevole |
| סאָרט | GEARSTONE |
| קעגנשטעל מעקאַניזאַם | מאַגנעטיק |
| קעגנשטעל לעוועלס | 8 אַדזשאַסטאַבאַל לעוועלס |
| דרייוו סיסטעם | גאַרטל |
| הויפּט מאַטעריאַל | Steel, Metal, Foam/Leather |
| מאַקסימום וואָג קאַפּאַציטעט | 120 קילאָגראַמס (264 לבס) |
| פּראָדוקט דימענשאַנז (L x W x H) | 69 X 39 X 116.5 סענטימעטער (27.2 X 15.4 X 45.9 אינטשעס) |
| פּונקט וואָג | 15.6 קילאָגראַמס (34.4 לבס) |
| מאַכט מקור (מאָניטאָר) | באַטעריע געטריבן (באַטעריעס נישט אַרייַנגערעכנט) |
| ספּעציעלע פֿעיִקייטן | Foldable design, LCD monitor, Pulse sensors, Phone holder, Adjustable seat (5 levels) |
וואָראַנטי און שטיצן
GEARSTONE provides a איין יאָר וואָראַנטי for this product from the date of purchase. This warranty covers manufacturing defects and material faults under normal use.
If you encounter any issues with your exercise bike or have questions regarding its operation or maintenance, please do not hesitate to contact our customer support team. Provide your purchase details and a description of the issue for prompt assistance.
קאָנטאַקט שטיצן: ביטע זעט אייערע קויף דאקומענטן אדער דעם פארקויפער'ס website for the most up-to-date contact information (e.g., email address or support portal).
נאָך אינפֿאָרמאַציע
For more information about GEARSTONE products and fitness tips, visit our official webפּלאַץ אָדער געזעלשאַפטלעך מידיאַ טשאַנאַלז.