
1. הקדמה
This manual provides detailed instructions for the installation, operation, and maintenance of your Turing TP-MMD4MV2 Smart Series TwilightVision 4MP IR Zoom Dome IP Camera. This advanced surveillance camera features a 2.7-13.5mm motorized varifocal lens, Smart IR illumination up to 40m (131ft), and TwilightVision technology for optimal image clarity in low-light conditions. It supports up to a 256GB MicroSD card for edge storage and is designed for outdoor use with IP67 weather resistance and IK10 vandal resistance. Please read this manual thoroughly before using the product to ensure proper setup and functionality.
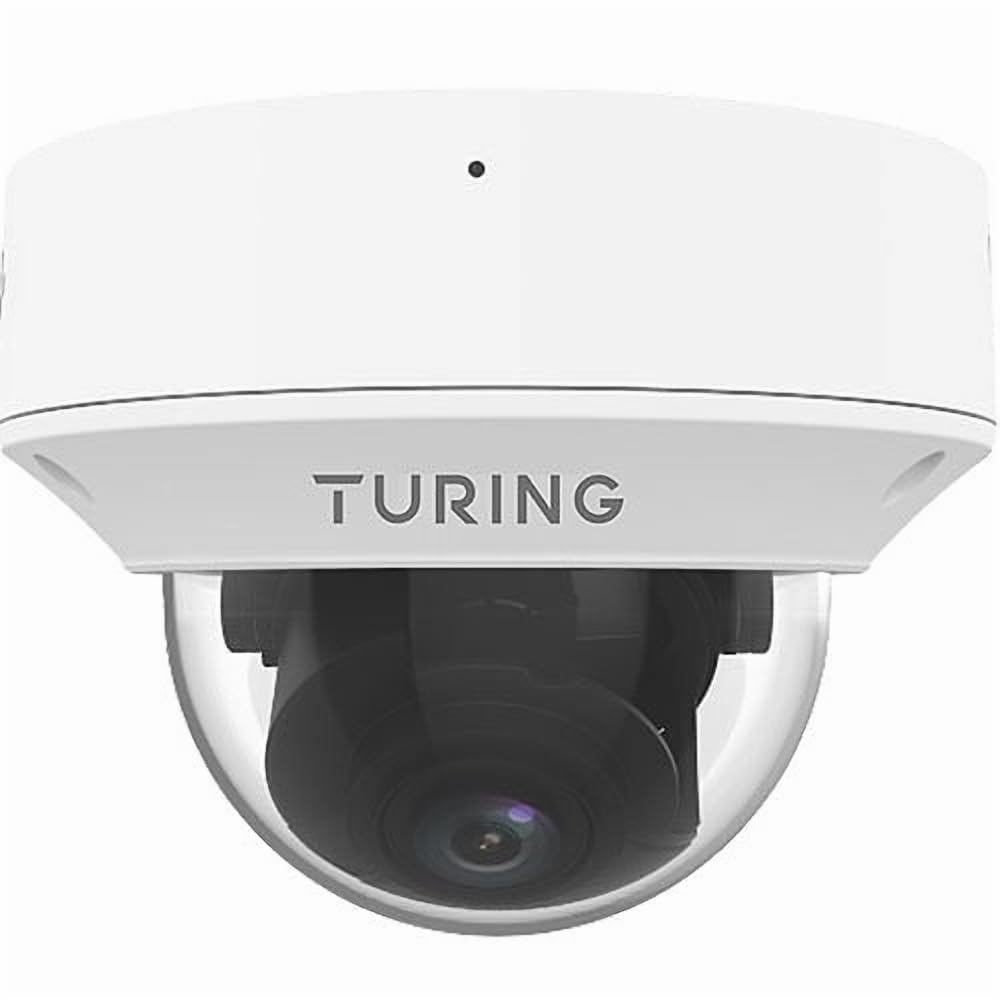
Figure 1: Turing TP-MMD4MV2 Smart Series TwilightVision 4MP IR Zoom Dome IP Camera. This image shows the white dome camera with its protective casing.
2. זיכערקייַט אינפֿאָרמאַציע
ביטע האַלטן די פאלגענדע זיכערהייט מיטלען צו פאַרמייַדן שאָדן אָדער שעדיקן צו דעם פּראָדוקט:
- עלעקטריקאַל זיכערקייַט: Ensure power supply meets the camera's requirements (DC 12V+/-25% or PoE IEEE 802.3af). Do not overload power outlets.
- ייַנמאָנטירונג: Installation should be performed by qualified personnel. Mount the camera securely to prevent it from falling.
- סוויווע: Do not expose the camera to extreme temperatures, humidity, or corrosive environments beyond its specified operating conditions.
- רייניקונג: ניצט אַ ווייכע, טרוקענע שטאָף פֿאַר רייניקונג. ניצט נישט שטאַרקע דיטערדזשאַנץ אָדער שרײַבנדיקע מאַטעריאַלן.
- דיסאַססעמבלי: פרובירט נישט צו צענעמען אדער מאדיפיצירן די קאמערא. דאס וועט בטל מאכן די גאראנטיע און קען שאפן שאדן.
3. פּעקל אינהאַלט
באַשטעטיקן אַז אַלע זאכן זענען פאַראַן אין דיין פּעקל:
- Turing TP-MMD4MV2 IP Dome Camera
- Mounting Screw Kit (screws, wall anchors)
- Waterproof Connector for Ethernet Cable
- בויער מוסטער
- שנעלע אָנהייב גייד / באַניצער מאַנואַל (דאָס דאָקומענט)
Note: A MicroSD card and DC 12V power adapter are not included and must be purchased separately if not using Power over Ethernet (PoE).
4. פּראָדוקט איבערview
The TP-MMD4MV2 camera is designed for robust outdoor surveillance, offering high-resolution imaging and intelligent features.
4.1 שליסל פֿעיִקייטן
- 4 מעגאַפּיקסעל רעזאָלוציע: Captures video at 2688x1520 pixels at 30/25fps.
- מאָטאָריזירטע וואַריפאָקאַל לינז: 2.7-13.5mm lens with auto-focus for flexible viewינג אַנגלעס.
- TwilightVision Technology: Enhances image clarity in extremely low-light conditions (down to 0.002 Lux).
- סמאַרט IR: Infrared illumination up to 40 meters (131 feet) for clear night vision.
- People and Vehicle Search: Advanced analytics when used with Turing SMART series NVRs and Turing Vision Cloud.
- געבויט-אין מיקראָפאָן: For audio monitoring.
- Edge Storage: Supports up to 256GB MicroSD card (not included).
- דוראַבאַל פּלאַן: IP67 weather-rated and IK10 vandal-resistant.
- מאַכט אָפּציעס: Supports Power over Ethernet (PoE) and DC 12V.
4.2 קאַמעראַ קאָמפּאָנענטן
The camera consists of the main dome unit, a mounting base, and various ports. While a specific diagram is not provided, typical components include:
- קופּאָל דעקל: Protective, vandal-resistant casing.
- אַפּאַראַט מאָדולע: Contains the lens, image sensor, and IR LEDs.
- עטהערנעט פּאָרט (RJ45): For network connection and PoE.
- DC מאַכט אַרייַנשרייַב: For optional 12V DC power supply.
- באַשטעטיק קנעפּל: צו צוריקשטעלן די פאַבריק פעליקייַט סעטטינגס.
- מיקראָסד קאָרט שפּעלטל: Located internally, accessible by removing the dome cover.
Figure 2: Illustrative diagram of camera components (image not available). This diagram would typically show the external parts of the dome camera, including the lens, IR LEDs, and the location of the cable connections and reset button.
5. סעטאַפּ און ייַנמאָנטירונג
פֿאָלגט די סטעפּס פֿאַר אַ ריכטיקע אינסטאַלאַציע פֿון אייער קאַמעראַ.
5.1 מאָונטינג די אַפּאַראַט
- קלייַבן אַ אָרט: אויסקלייבן אַ פּאַסיק אָרט אינדרויסן פֿאַר וואַנט-מאָנטירונג, און זיכער מאַכן אַ קלאָרן פֿעלד פֿון view and within range of your network cable. The camera is IP67 and IK10 rated for outdoor use.
- צוגרייטן די ייבערפלאַך: Use the provided drill template to mark the screw holes on the mounting surface. Drill pilot holes as indicated.
- באַוואָרענען די באַזע: Attach the camera's mounting base to the surface using the supplied screws and wall anchors.
- קאַבלע פאַרוואַלטונג: Route the Ethernet cable through the mounting base or side cable entry point. Use the waterproof connector for outdoor installations to protect the RJ45 connection.
Figure 3: Illustrative diagram of camera mounting (image not available). This diagram would show the steps for securing the camera base to a wall or ceiling, including drilling and cable routing.
5.2 אנשטעלן די קאַמעראַ
דער אַפּאַראַט קענען זיין פּאַוערד אין צוויי וועגן:
- מאַכט איבער עטהערנעט (פּאָע): פֿאַרבינדט אַן עטערנעט קאַבל פֿון אַ PoE-ענייבאַלד סוויטש אָדער NVR צו דער קאַמעראַ'ס RJ45 פּאָרט. דאָס גיט ביידע מאַכט און דאַטן.
- DC 12V מאַכט אַדאַפּטער: If PoE is not available, connect a 12V DC power adapter (not included) to the camera's DC power input. Then, connect an Ethernet cable for data transmission.
5.3 נעטוואָרק קאַנעקשאַן
Connect the camera to your network via an Ethernet cable. The camera supports Ethernet connectivity. While 'Wireless Communication Technology: Wi-Fi' is listed in some specifications, the primary and most robust connection method for this model is wired Ethernet, especially for PoE. For initial setup, a wired connection is recommended.
5.4 מיקראָסד קאַרטל אינסטאַלאַציע
To install a MicroSD card for local storage (up to 256GB):
- מאַכט אַוועק: Disconnect power from the camera before proceeding.
- אַראָפּנעמען דעם קופּאָל דעקל: Carefully twist and remove the outer dome cover to access the internal components.
- אַרייַנלייגן מיקראָסד קאָרט: Locate the MicroSD card slot and gently insert the card until it clicks into place.
- Replace Dome Cover: Reattach the dome cover, ensuring it is securely sealed to maintain weather resistance.
Figure 4: Illustrative diagram of MicroSD card slot location (image not available). This diagram would show the internal view of the camera with the dome cover removed, highlighting the MicroSD card slot.
6. אַפּערייטינג די קאַמעראַ
Once installed and powered, the camera can be accessed and configured.
6.1 ערשטע צוטריט און קאָנפיגוראַציע
The camera is designed to integrate with Turing SMART NVRs (TR-MR(P) models) and the Turing Vision Cloud for full functionality, including People and Vehicle Search. Refer to your NVR's manual or Turing Vision Cloud documentation for specific integration steps.
- Network Discovery: Use Turing's network discovery tool to find the camera's IP address on your network.
- Web צובינד: צוטריט צו די קאַמעראַ web צובינד דורך אַ web browser using its IP address. Log in with default credentials (refer to the Quick Start Guide for defaults).
- טוישן שפּריכוואָרט: For security, immediately change the default password upon first login.
- נעץ סעטטינגס: Configure IP address, subnet mask, and gateway if necessary.
6.2 Adjusting the Motorized Lens
The 2.7-13.5mm motorized varifocal lens allows you to remotely adjust the zoom and focus:
- צוטריט צו דער קאַמעראַ'ס לייוו view through the NVR interface or web בלעטערער.
- Locate the zoom and focus controls.
- Adjust the zoom to achieve the desired field of view. The camera will automatically adjust focus (AF).
6.3 Smart IR and TwilightVision
The camera automatically switches between day and night modes. Smart IR adjusts the intensity of the infrared LEDs to prevent overexposure of close-up objects, ensuring balanced illumination up to 40m (131ft). TwilightVision technology provides enhanced color images in extremely low-light conditions before switching to IR mode.
6.4 רעקאָרדינג און סטאָרידזש
- NVR Recording: Configure recording schedules and motion detection settings on your Turing SMART NVR.
- מיקראָסד קאַרטל רעקאָרדינג: If a MicroSD card is installed, configure event-triggered or continuous recording via the camera's web צובינד.
- ווידעא קאָדירונג: The camera supports Ultra 265, H.265, H.264, and MJPEG video encoding formats.
6.5 אַודיאָ מאָניטאָרינג
The built-in microphone captures audio. Ensure audio recording is enabled in the camera's settings if desired. Audio compression uses G.711.
7. וישאַלט
רעגולערע אויפהאלטונג גאראנטירט אפטימאלע פאָרשטעלונג און לאַנגלעבעדיקייט פון אייער קאַמעראַ.
- רייניקונג: Periodically clean the dome cover with a soft, damp cloth to remove dust, dirt, or water spots that may affect image quality. Do not use harsh chemicals.
- Firmware דערהייַנטיקונגען: Check the Turing website for the latest firmware updates. Regularly updating firmware can improve performance, add features, and enhance security. Follow the provided instructions carefully during updates.
- קאַבלע דורכקוק: Periodically inspect all cables and connections for wear, damage, or corrosion, especially for outdoor installations.
- ענווייראָנמענטאַלע טשעקס: Ensure the camera's environment remains within its operating temperature and humidity ranges.
8. טראָובלעשאָאָטינג
זעט די פאלגנדע טאבעלע פאר אלגעמיינע פראבלעמען און זייערע לייזונגען.
| פּראָבלעם | מעגלעך סיבה | לייזונג |
|---|---|---|
| קיין שטראָם צו קאַמעראַ | Incorrect power supply; PoE not active; loose connection | Verify 12V DC power or PoE source. Check all cable connections. |
| קיין ווידעא קאָרמען | Network issue; incorrect IP address; camera not configured | Check network cable. Ensure camera is powered. Verify IP address and network settings. Restart camera. |
| נעבעך בילד קוואַליטעט | Dirty lens/dome; improper focus; low light conditions | Clean the dome cover. Adjust focus via the motorized lens controls. Ensure sufficient lighting or proper IR operation. |
| קען נישט צוקומען צו דער קאַמעראַ דורך נעץ | IP address conflict; firewall blocking; incorrect network settings | Use network discovery tool. Check network configuration. Temporarily disable firewall for testing. Reset camera to factory defaults if necessary. |
| מיקראָסד קאַרטל רעקאָרדירט נישט | Card full; card not formatted; recording schedule not set | Check card status in settings. Format card if needed. Configure recording schedule. Ensure card is properly inserted. |
9. ספּעסאַפאַקיישאַנז
Detailed technical specifications for the Turing TP-MMD4MV2 camera:
| שטריך | באַשרייַבונג |
|---|---|
| מאָדעל נומער | TP-MMD4MV2 |
| בילד סענסאָר | 1/3-inch, 4.0 megapixel, progressive scan, CMOS |
| מאַקס. האַכלאָטע | 4MP (2688x1520) at 30/25fps |
| לענס | 2.7-13.5mm motorized varifocal, AF automatic focusing |
| ווינקל פון View | H: 98.26 - 31.35 degrees; V: 54.76 - 18.55 degrees; D: 127.74 - 36.99 degrees |
| מינימום יללומינאַטיאָן | Color: 0.002 Lux (F1.2, AGC on); 0 Lux with IR on |
| יר ראַנגע | Smart IR up to 40m (131ft) |
| ווידעא קאַמפּרעשאַן | הינטער 265, ה.265, ה.264, מדזשפּעג |
| אַודיאָ קאַמפּרעשאַן | G.711 |
| דיגיטאַל ראַש רעדוקציע | 2D and 3D DNR |
| ברעג סטאָרידזש | מיקראָסד קאָרט, אַרויף צו 256 גיגאבייט (ניט אַרייַנגערעכנט) |
| מאַכט צושטעלן | DC 12V+/-25%, PoE (IEEE 802.3af) |
| מאַכט קאַנסאַמשאַן | מאַקסימום 7.0 וו |
| ינגרעסס פּראַטעקשאַן | IP67 |
| וואַנדאַל קעגנשטעל | IK10 |
| דימענסיעס (ד x ה) | 5.88 X 4.4 אינטשעס (149.35 X 111.76 מם) |
| וואָג | 2.03 לבס (0.92 קג) |
| אַפּערייטינג טעמפּעראַטור | Refer to manufacturer's official specifications for exact range |
| קאַנעקטיוויטי פּראָטאָקאָל | עטהערנעט |
| Supported NVR | Turing SMART NVR: TR-MR(P) מאָדעלס |
10. וואָראַנטי אינפֿאָרמאַציע
Turing products are covered by a limited warranty. For specific warranty terms, conditions, and duration, please refer to the official Turing webוועבזייטל אדער די וואָראַנטי קאַרטל וואָס איז אַרייַנגערעכנט מיט אייער פּראָדוקט. האַלט אייער קויפן באַווייַז פֿאַר וואָראַנטי קליימז.
11. קונה שטיצן
If you encounter any issues or have questions not covered in this manual, please contact Turing customer support:
- Webפּלאַץ: Visit the official Turing webזייטל פֿאַר אָפֿט געשטעלטע פֿראַגעס, שטיצע רעסורסן און קאָנטאַקט אינפֿאָרמאַציע.
- טעכניש שטיצן: Contact details for technical assistance can typically be found on the manufacturer's webזייטל אדער אין אייער פּראָדוקט'ס פּאַקאַדזשינג.
12. פּראָדוקט ווידעאָס
קיין אפיציעלע פּראָדוקט ווידעאָס פֿונעם פֿאַרקויפֿער זענען נישט צוגעשטעלט געוואָרן אין די פּראָדוקט דאַטן פֿאַר עמבעדדינג אין דעם מאַנואַל.