Makeid L1
Makeid L1 לייבל מאכער מאשין באנוצער מאנואל
Model: L1 | Brand: Makeid
הקדמה
This manual provides detailed instructions for the setup, operation, maintenance, and troubleshooting of your Makeid L1 Portable Wireless Sticker Label Maker Machine. Please read this manual thoroughly before using the device to ensure proper function and longevity.
וואָס איז אין די קעסטל
באַשטעטיקן אַז אַלע קאָמפּאָנענטן זענען פאַראַן אין דער פּאַקעט:
- Makeid L1 Label Maker Machine
- 4-meter roll of label tape
- וסב טשאַרדזשינג קאַבלע
- באַניצער מאַנואַל (דעם דאָקומענט)
פּראָדוקט איבערview
Familiarize yourself with the key components of your Makeid L1 Label Maker.

בילד: איבערview of the Makeid L1 Label Maker, highlighting the power button, the lid for tape replacement, and the integrated cutter for crisp labels.
- מאַכט קנעפּל: געפינען זיך אויף דער זייט, גענוצט צו אנצינדן/אויסלעשן דעם אפאראט.
- דעקל: Opens to access the tape compartment for loading and replacing label rolls.
- געבויט-אין קאַטער: Ensures clean and precise cuts of printed labels.
- Label Output Slot: Where printed labels emerge.
- טשאַרדזשינג פּאָרט: USB port for recharging the device.
סעטאַפּ
1. טשאַרדזשינג די מיטל
Before first use, ensure the label maker is fully charged. Connect the provided USB charging cable to the device's charging port and a compatible USB power source (e.g., computer USB port, USB wall adapter). The indicator light will show charging status (refer to device specific light indicators for full/charging status).
2. לאָדן לייבל טייפּ
The Makeid L1 supports various label tape widths (9mm, 12mm, 16mm) and types (continuous, die-cut, transparent, white, colored, pattern). Ensure the tape is correctly oriented.
- Open the lid of the label maker.
- Insert the label roll into the compartment, ensuring the tape feeds out from the bottom and through the output slot.
- פאַרמאַכן די דעקל סיקיורלי.
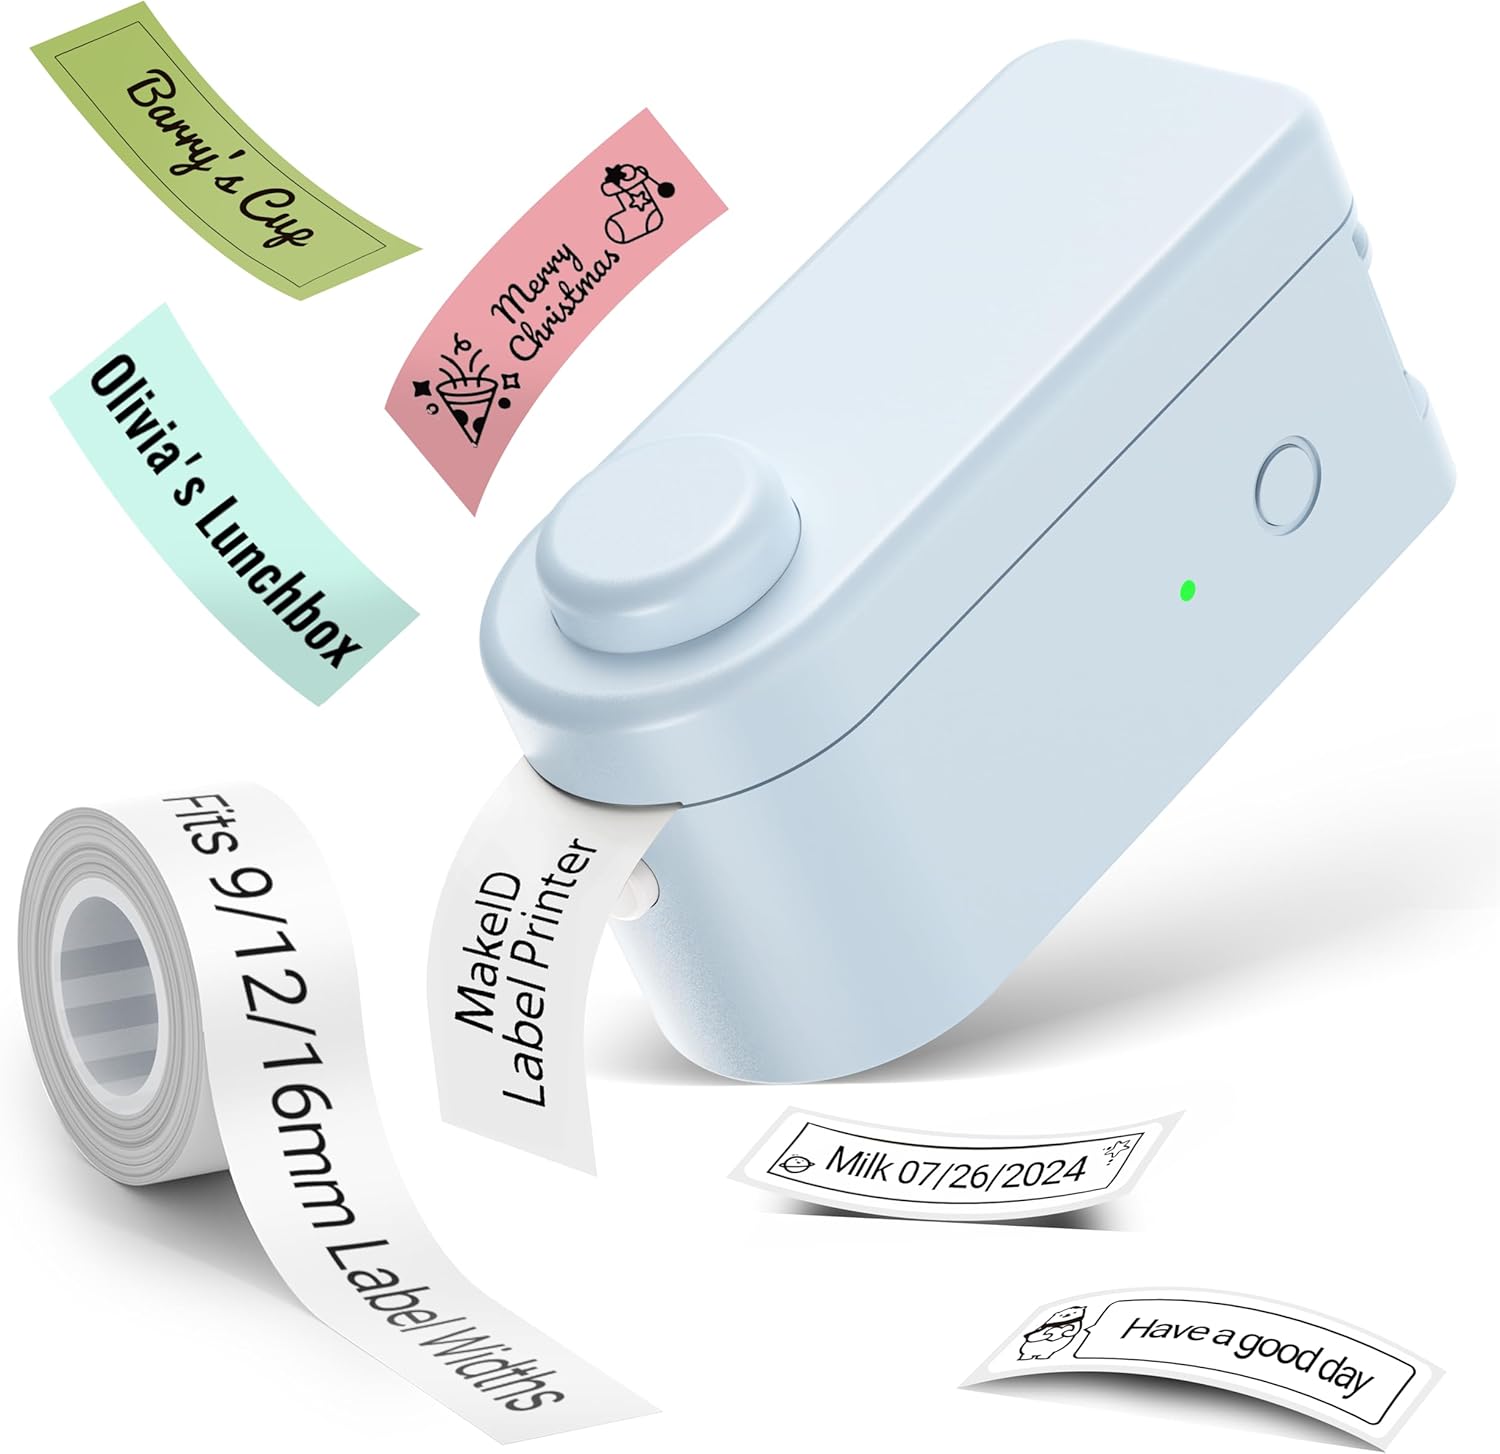
בילד: The Makeid L1 Label Maker demonstrating the label tape roll and examples of printed labels, including continuous and die-cut types.
3. דאַונלאָודינג און אינסטאַלירן די אַפּ
The Makeid L1 operates via a dedicated mobile application. זוכן פֿאַר "MakeID-Life" on your device's app store.

בילד: Screenshots showing the "Get it on Google Play" and "Download on the App Store" buttons, indicating where to find the MakeID-Life application.
4. בלועטאָאָטה פּערינג
The label maker connects to your smartphone via Bluetooth.
- מאַכן זיכער אַז בלועטאָאָטה איז ענייבאַלד אויף דיין סמאַרטפאָנע.
- Turn on the Makeid L1 Label Maker by pressing the power button. The indicator light will flash, indicating it's ready for pairing.
- Open the "MakeID-Life" app. The app will automatically search for nearby devices.
- Select "L1" from the list of available devices to connect. Once connected, the indicator light on the label maker will become solid.

בילד: A visual guide demonstrating the three steps for Bluetooth connection: turning on Bluetooth, selecting the L1 model within the app, and confirming the device connection.
אַפּערייטינג ינסטראַקשאַנז
1. Designing Your Label
The "MakeID-Life" app offers extensive customization options:
- טעקסט אַרייַנשרייַב: Type your desired text.
- פאַנץ: Choose from 88 different font styles.
- ייקאַנז און סימבאָלס: Access over 600 icons and various symbols.
- מוסטערן: Utilize over 400 pre-designed templates for various purposes (e.g., kitchen, office, school).
- Borders & Frames: Add decorative borders.
- אנדערע פאַנגקשאַנז: Create barcodes, QR codes, tables, dates, and patterns.
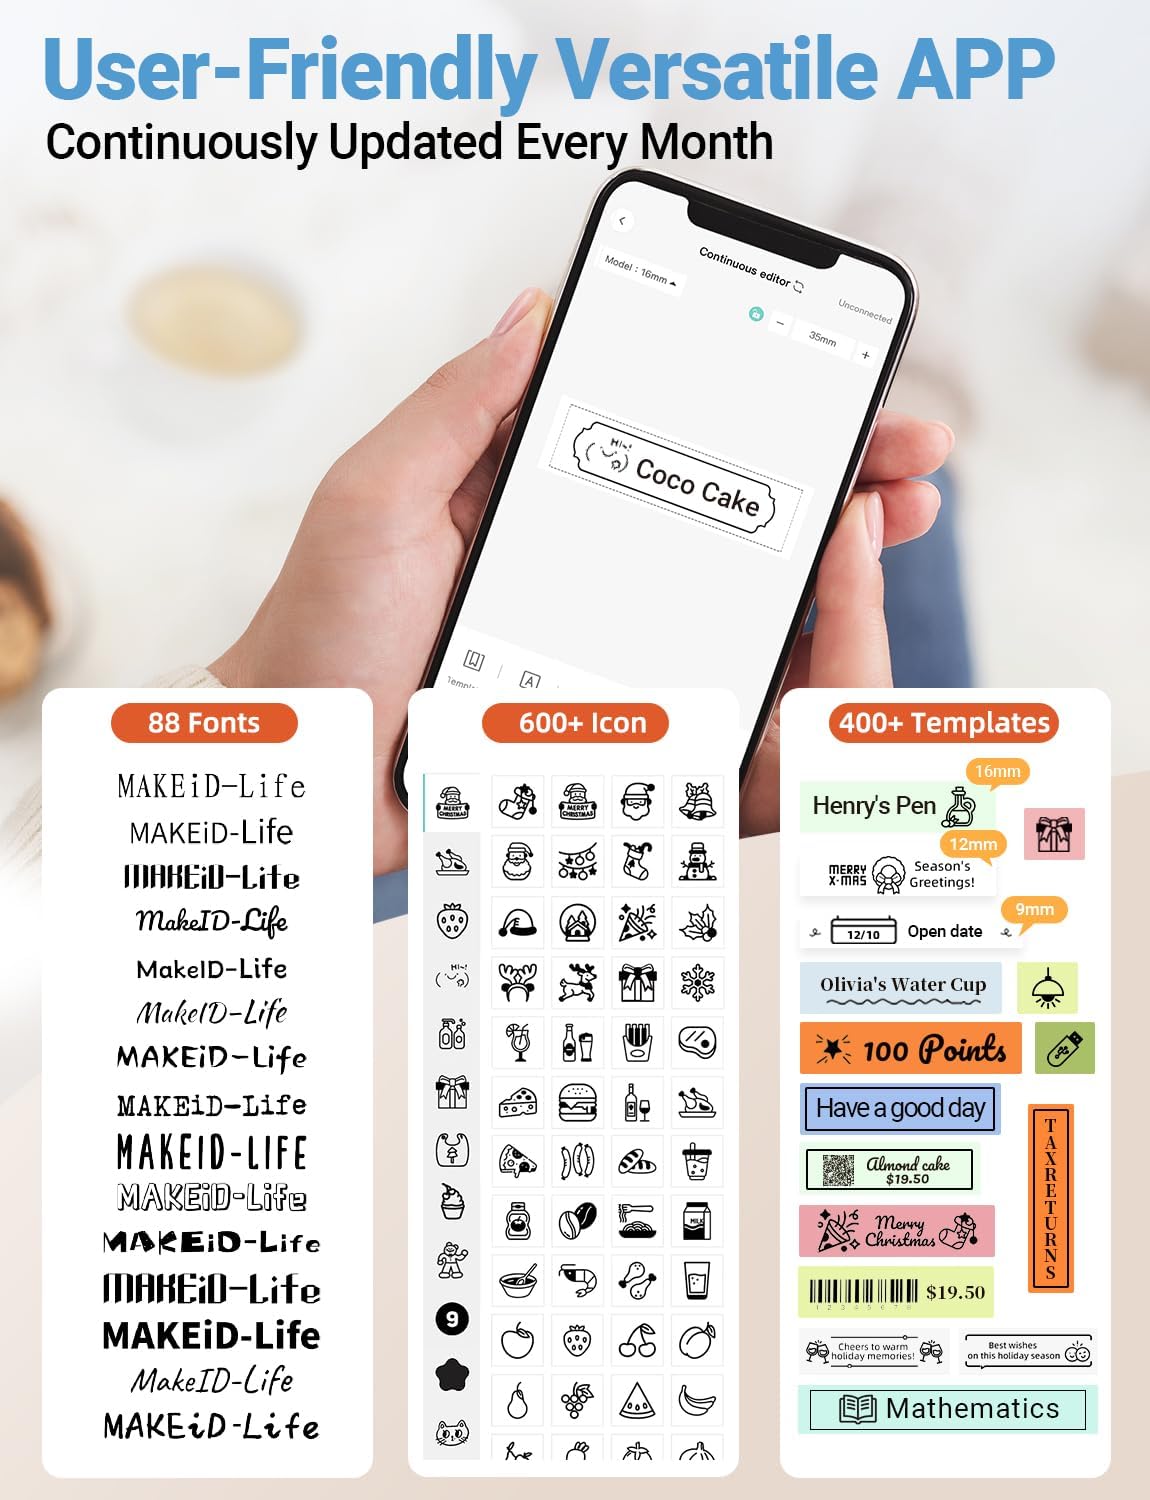
בילד: א דיטיילד view of the MakeID-Life app interface, showcasing the wide selection of 88 fonts, over 600 icons, and more than 400 templates available for label customization.
2. פּרינטינג לאַבעלס
Once your design is complete in the app:
- Review אייער לייבל דיזיין אויף די אַפּ פאַרשטעלן.
- דריקט דעם "דרוק" קנעפל אין דער אפליקאציע.
- The label will be thermally printed and emerge from the output slot.
3. שניידן עטיקעטן
The Makeid L1 features a built-in cutter for clean edges.
- After printing, gently pull the label forward slightly.
- Press the cutting button (refer to the Product Overview image for location) to cleanly cut the label.

בילד: Illustration of the Makeid L1's built-in cutter, demonstrating how it provides professional and safe cutting of labels, eliminating messy torn edges.
4. Types of Label Printing
The L1 supports two primary types of label printing:
- Continuous Labels: Ideal for custom lengths, allowing you to print text of any length and cut it precisely.
- Die-Cut Labels: Pre-sized labels with specific shapes, perfect for consistent labeling of items like jars or files.

בילד: Visual representation of continuous labels, which can be cut to any length, and die-cut labels, which are pre-shaped for specific applications.
וישאַלט
רייניקונג די דרוק קאָפּ
To ensure optimal print quality, periodically clean the thermal print head.
- Turn off the label maker and disconnect it from the power source.
- Open the lid and remove the label tape.
- Gently wipe the print head with a soft, lint-free cloth dampened with isopropyl alcohol. Do not use water or abrasive cleaners.
- Allow the print head to dry completely before reinserting the tape and closing the lid.
סטאָרידזש
Store the label maker in a cool, dry place away from direct sunlight and extreme temperatures. Remove the label tape if storing for extended periods.
טראָובלעשאָאָטינג
זעט די טאבעלע אונטן פאר אלגעמיינע פראבלעמען און זייערע לייזונגען.
| פּראָבלעם | מעגלעך סיבה | לייזונג |
|---|---|---|
| די מיטל איז נישט קער אויף. | נידעריק באַטאַרייע. | טשאַרדזש די מיטל מיט די צוגעשטעלט וסב קאַבלע. |
| קען נישט פאַרבינדן דורך בלוטוט. | בלועטוט איז אויסגעלאשן אויפן טעלעפאן; אפאראט נישט אין פארינג מאָד; עפפ פראבלעם. | Ensure Bluetooth is enabled on your phone. Turn the label maker off and on again to re-enter pairing mode. Restart the "MakeID-Life" app. |
| Poor print quality / Faded prints. | Print head dirty; incorrect label tape; low battery. | Clean the print head. Ensure you are using Makeid compatible thermal label tape. Charge the device. |
| Label tape not feeding. | Tape incorrectly loaded; tape jammed. | Open the lid and re-insert the label tape correctly, ensuring it's not jammed. |
| Labels are not cutting cleanly. | Cutter blade dull or obstructed. | Ensure no debris is obstructing the cutter. If issues persist, contact customer support. |
ספּעסאַפאַקיישאַנז
Detailed technical specifications for the Makeid L1 Label Maker Machine:
| שטריך | דעטאַל |
|---|---|
| סאָרט | מאַקייד |
| מאָדעל נאָמען | L1 |
| קאַנעקטיוויטי טעכנאָלאָגיע | בלועטאָאָטה |
| דרוק טעכנאָלאָגיע | טערמאַל |
| דרוקער רעזולטאַט | מאָנאָטשראָמע |
| האַכלאָטע | 203 x 203 DPI (also 300 x 300 DPI for other variants) |
| מאַקסימום מעדיע גרייס | 0.63 אינטשעס (16 מם) |
| קאַמפּאַטאַבאַל דעוויסעס | Smartphones (Android & iOS) |
| קאָנטראָל מעטאָד | אַפּ |
| ייַזנוואַרג צובינד | וסב |
| מאַכט מקור | 1 ליטהיום יאָן באַטאַרייע (אַרייַנגערעכנט) |
| פּראָדוקט דימענשאַנז | 3.93" ד x 1.6" ב x 1.96" ה (10 x 4.06 x 4.98 ס"מ) |
| פּונקט וואָג | 4.4 אונסעס (126 גראַם) |
| ספּעציעלע פֿעיִקייטן | Continuous & Pre-cut Label Tapes, Waterproof, Oil-proof, Friction Resistant, Light Resistant, No Fading, Rich Font Icon Pattern, Portable, Inkless, Wireless, Rechargeable, Creative Print Functions (Barcode, Text, Picture, QR 2D Code, Table, Date, Border, Icon, Shape, Pattern, Template) |
וואָראַנטי און שטיצן
The Makeid L1 Label Maker comes with a לעבן וואָראַנטי. For technical support, warranty claims, or further assistance, please contact Makeid customer service through the official Makeid webזייטל אדער די קאָנטאַקט אינפֿאָרמאַציע וואָס איז צוגעשטעלט אין אייער פּראָדוקט פּאַקאַדזשינג.
פֿאַר נאָך רעסורסן און אָפֿט געשטעלטע פֿראַגעס, באַזוכט די Makeid Store on Amazon.
זיכערקייַט אינפֿאָרמאַציע
- דו זאלסט נישט דיסאַסעמבאַל אָדער פּרווון צו פאַרריכטן די מיטל זיך.
- האַלטן די מיטל אַוועק פון וואַסער און הויך הומידיטי.
- Use only original or certified compatible label tapes and charging cables.
- האַלטן אויס פון דערגרייכן פון קינדער.
- ויסמיידן יקספּאָוזינג די מיטל צו עקסטרעם טעמפּעראַטורעס אָדער דירעקט זונשייַן.
Ask a question about this manual
Ask about setup, troubleshooting, compatibility, parts, safety, or missing instructions. Manuals+ will review the question and use this page’s manual context to help answer it.