
1. הקדמה
This manual provides essential information for the safe and effective use of your Laserliner 082.262A Inspection Camera. Please read these instructions carefully before operating the device and keep them for future reference. The Laserliner 082.262A is a robust inspection camera designed for visual inspection of inaccessible areas, featuring a 5mm diameter and 1m length probe.
2. זיכערקייַט אינפֿאָרמאַציע
שטענדיק אָבסערווירן די פאלגענדע זיכערהייט מיטלען צו פאַרמייַדן שאָדן און שעדיקן צו די מיטל:
- Do not immerse the main unit in water. The camera probe is water-resistant, but the display unit is not.
- Do not use the device in explosive atmospheres or near flammable gases or liquids.
- האַלטן די מיטל אויס פון דערגרייכן פון קינדער.
- פרובירט נישט צו מאדיפיצירן אדער צענעמען דעם אפאראט. לאָזט איבער אלע סערוויסעס צו קוואַליפֿיצירטע פּערסאָנעל.
- זיכער מאַכן אַז די באַטעריעס זענען אַרײַנגעשטעלט מיט דער ריכטיקער פּאָלאַריטעט. אַרויסנעמען די באַטעריעס אויב דער אַפּאַראַט וועט נישט געניצט ווערן פֿאַר אַ לענגערער צײַט.
- Avoid direct eye exposure to the camera's LED lights.
3. פּעקל אינהאַלט
באַשטעטיקן אַז אַלע זאכן זענען פאַראַן ביים אויספּאַקן:
- Laserliner 082.262A Inspection Camera (main unit with display)
- Flexible camera probe (5mm diameter, 1m length)
- Batteries (Alkaline)
- באַניצער מאַנואַל
4. פּראָדוקט איבערview
Familiarize yourself with the components of your inspection camera.
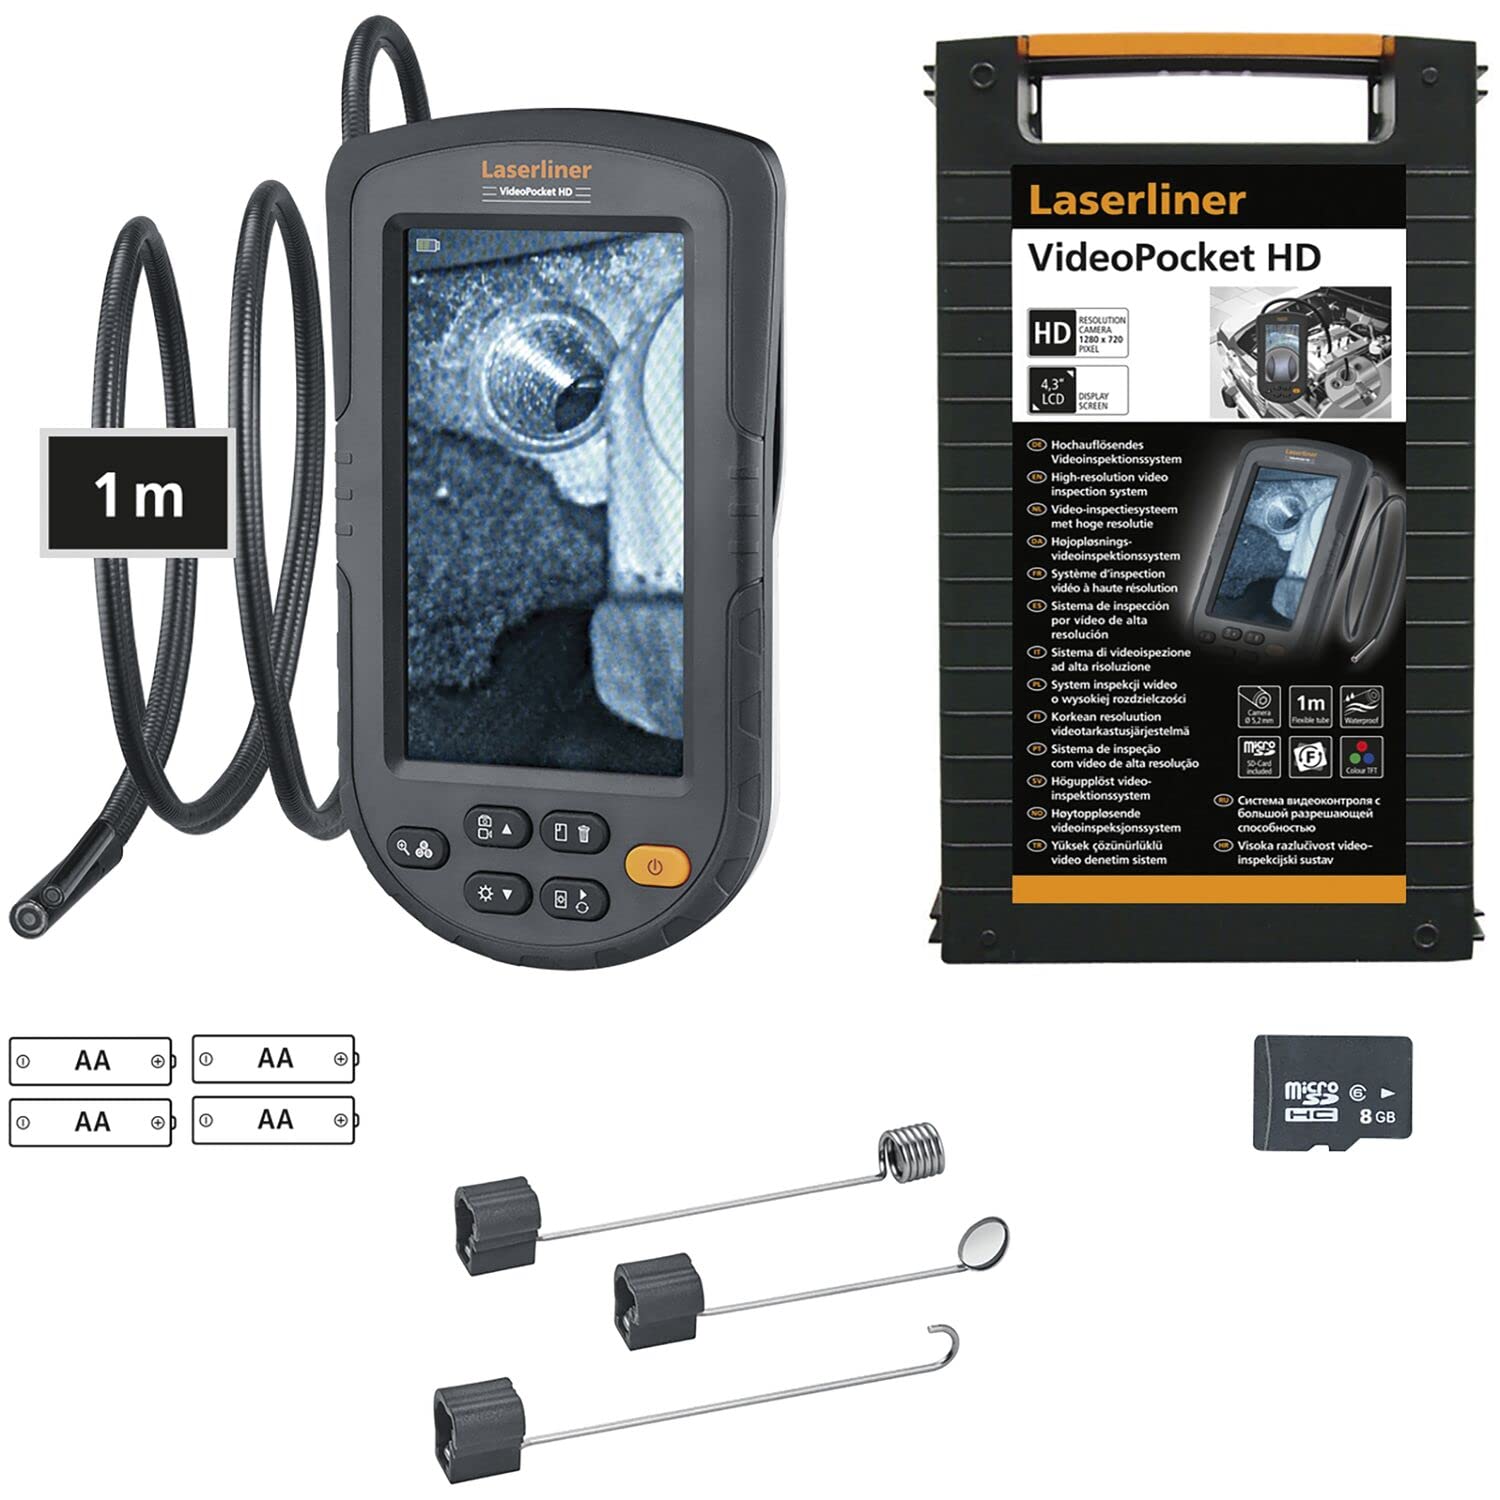
Figure 1: Laserliner 082.262A Inspection Camera. The image shows the handheld display unit connected to the flexible camera probe, ready for use.
The device consists of a main display unit with control buttons and a flexible probe with an integrated camera and LED lighting at its tip. The probe is designed to navigate tight spaces and transmit live video to the display.
5. סעטאַפּ
Follow these steps to prepare your inspection camera for first use:
- ייַנמאָנטירונג פון באַטאַרייע: Open the battery compartment on the rear of the main unit. Insert the provided alkaline batteries, ensuring correct polarity (+/-). Close the compartment securely.
- פּראָבע קשר: Connect the flexible camera probe to the designated port on the main unit. Ensure a firm connection.

פיגורע 2: דערציען view of the inspection camera. This image illustrates the back of the device, including the product label and the area where the flexible probe connects.
6. אַפּערייטינג ינסטרוקטיאָנס
This section details how to operate your Laserliner 082.262A Inspection Camera.
6.1 פּאַוערינג אויף / אַוועק
- To power on: Press and hold the power button (usually orange) until the display illuminates.
- אויסצולאָשן: דריק און האַלט דעם מאַכט קנעפּל ווידער ביז דער עקראַן שליסט זיך אויס.
6.2 יקערדיק קאָנטראָלס
The main unit features several buttons for controlling the camera and display functions:
- LED ברייטנאַס: Adjust the intensity of the camera's LED lights for optimal visibility in dark environments.
- בילד ראָוטיישאַן: Rotate the image on the display for correct orientation, especially when the probe is twisted.

Figure 3: Image Rotation. This diagram illustrates how the image can be rotated on the display, showing 0, 90, 180, and 270-degree orientations.
6.3 Optimal Focus Distance
The camera has a fixed focus. For clear images, position the camera tip within the optimal focus range, typically a few centimeters from the object.
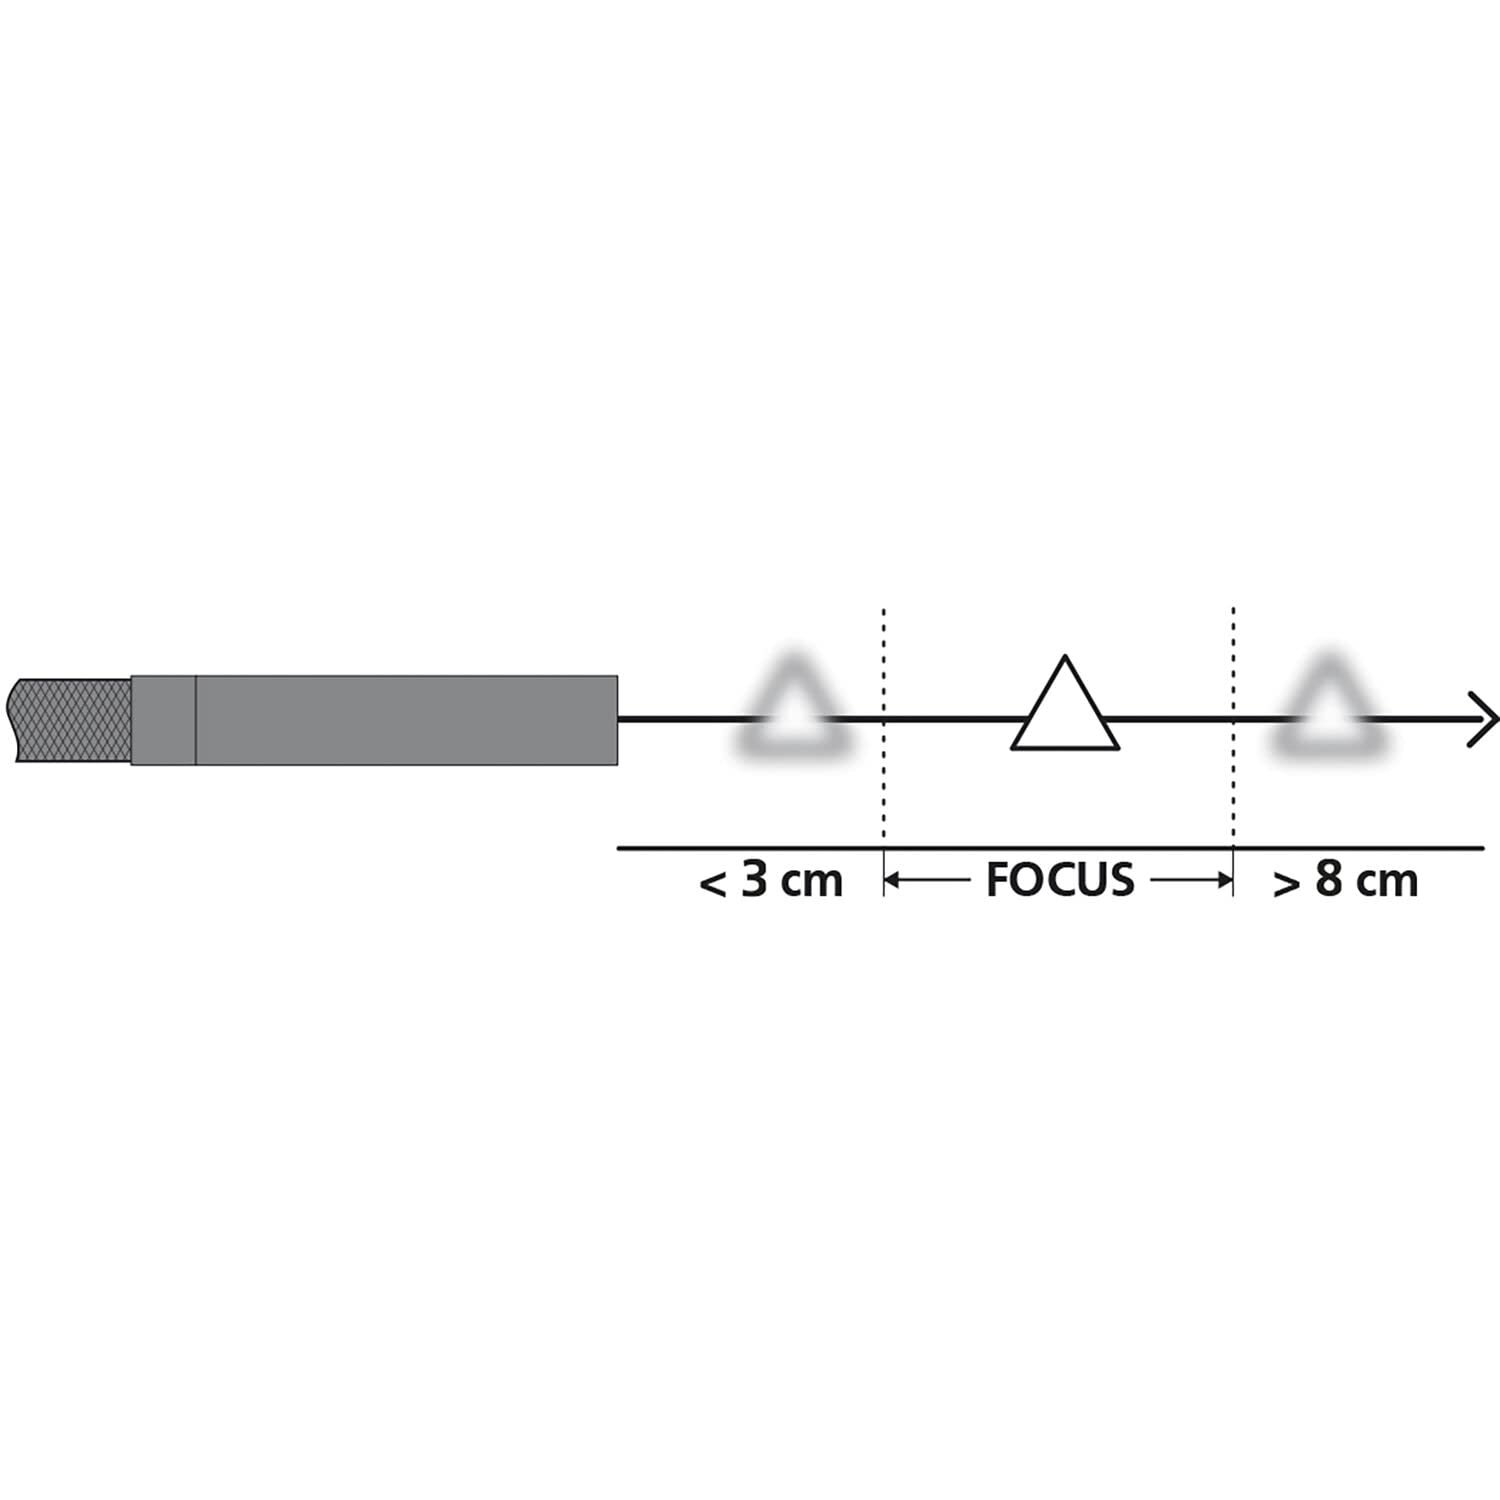
Figure 4: Focus Range. This diagram shows the recommended distance for clear imaging, indicating that objects too close (less than 3 cm) or too far (greater than 8 cm) may appear blurry, with an optimal focus zone in between.
6.4 Practical Applications
The inspection camera is versatile for various tasks:
- אַפּפּליאַנסע דורכקוק: Examine internal components of dishwashers or other household appliances.
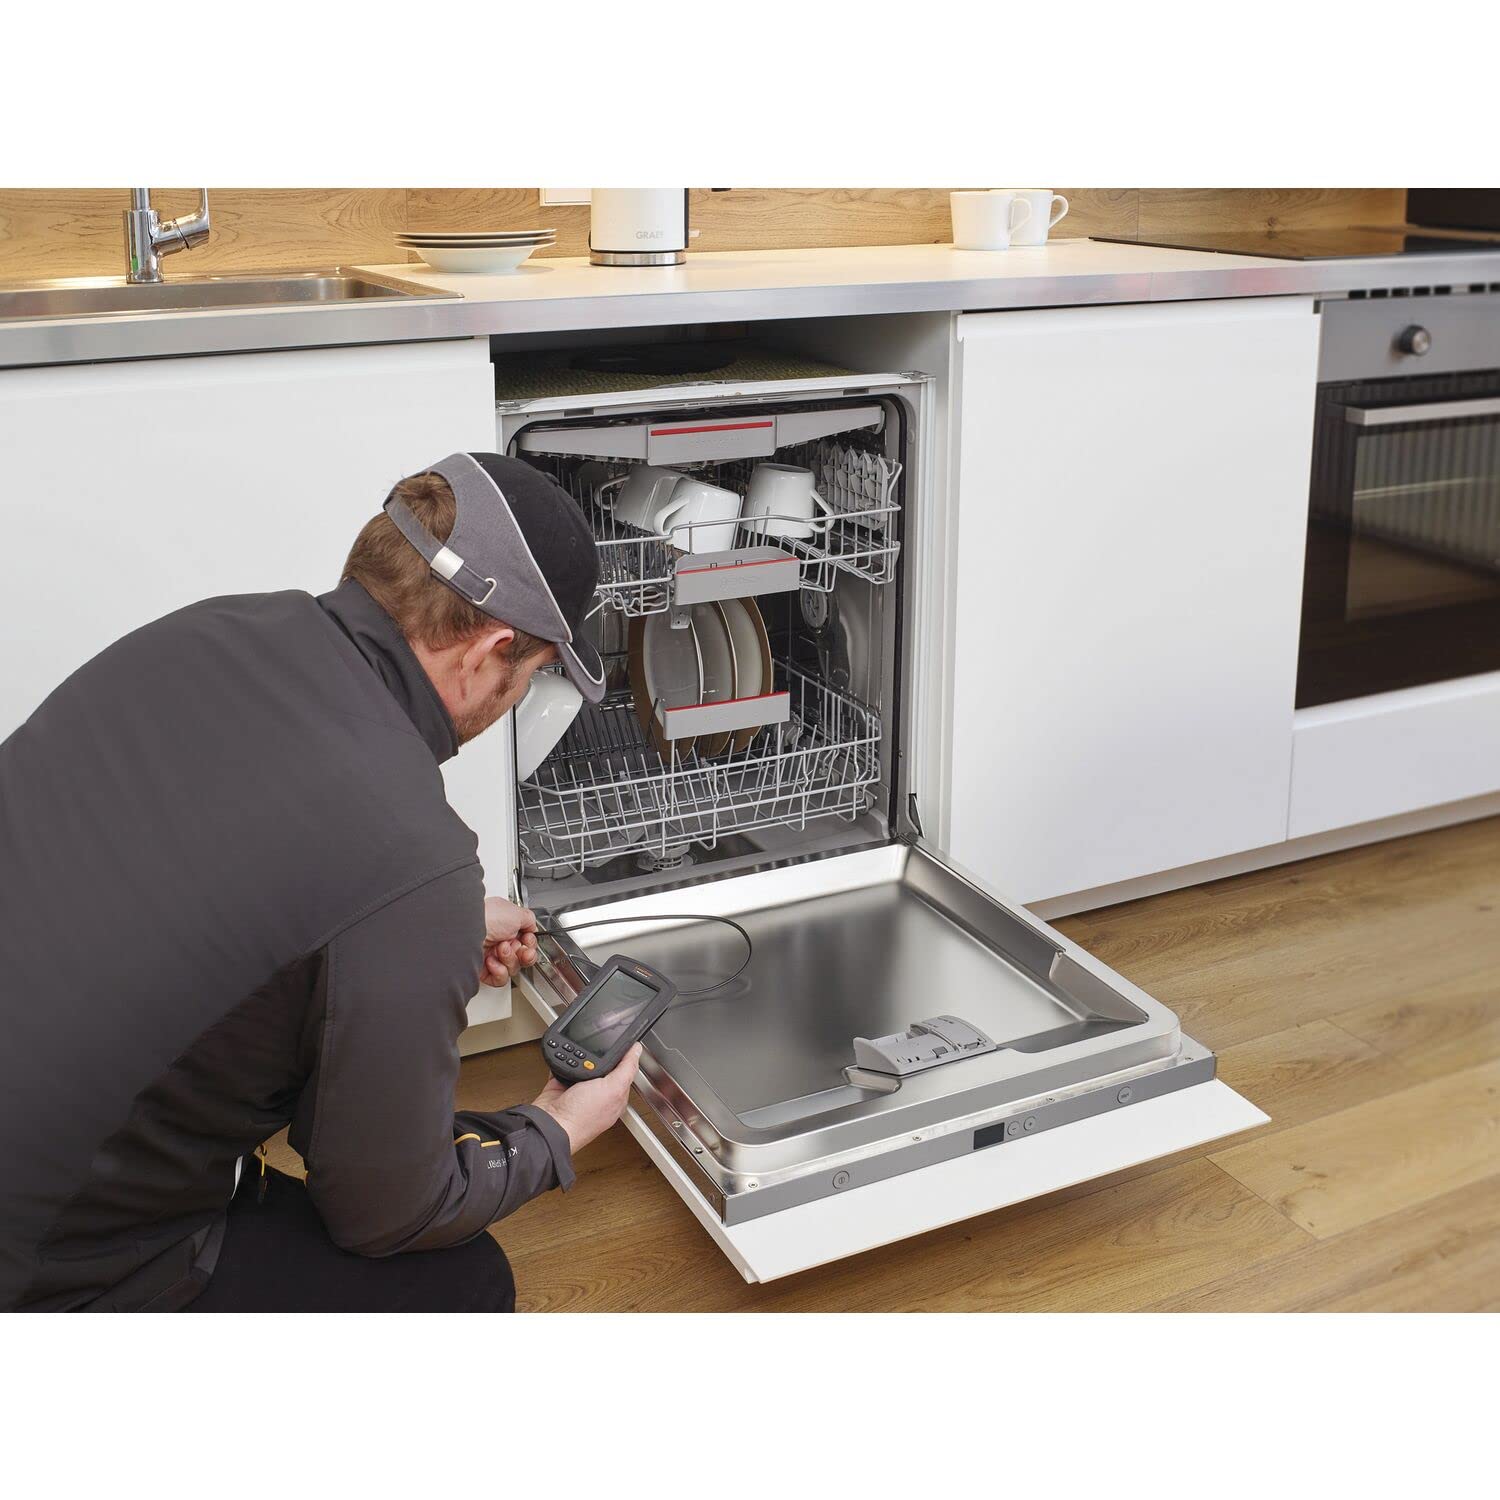
Figure 5: Dishwasher Inspection. A technician uses the inspection camera to view the internal workings of a dishwasher, checking for blockages or damage.
- אַוטאָמאָטיווע דיאַגנאָסטיקס: Inspect engine compartments, cylinders, or other vehicle parts.

Figure 6: Engine Inspection. The camera probe is inserted into an engine bay, allowing for visual inspection of internal components without extensive disassembly.
- Plumbing and Drainage: Check pipes, drains, and sewage systems for clogs or damage.

Figure 7: Drain Inspection. The camera is used to inspect a floor drain, providing a clear view of the pipe's interior.
- Cavity and Wall Inspections: Explore behind walls, ceilings, or other enclosed spaces.

Figure 8: Ceiling Cavity Inspection. The camera probe is inserted into a ceiling opening to inspect the hidden space above.
- Sink and Shower Drains: אַקסעס און view blockages or issues in bathroom plumbing.

Figure 9: Sink Drain Inspection. The camera is positioned to inspect the U-bend of a sink drain, revealing any obstructions.

Figure 10: Shower Drain Inspection. The camera probe is inserted into a shower drain to check for blockages or pipe conditions.
- Gutter and Downspout Inspection: Identify debris or damage in exterior drainage systems.
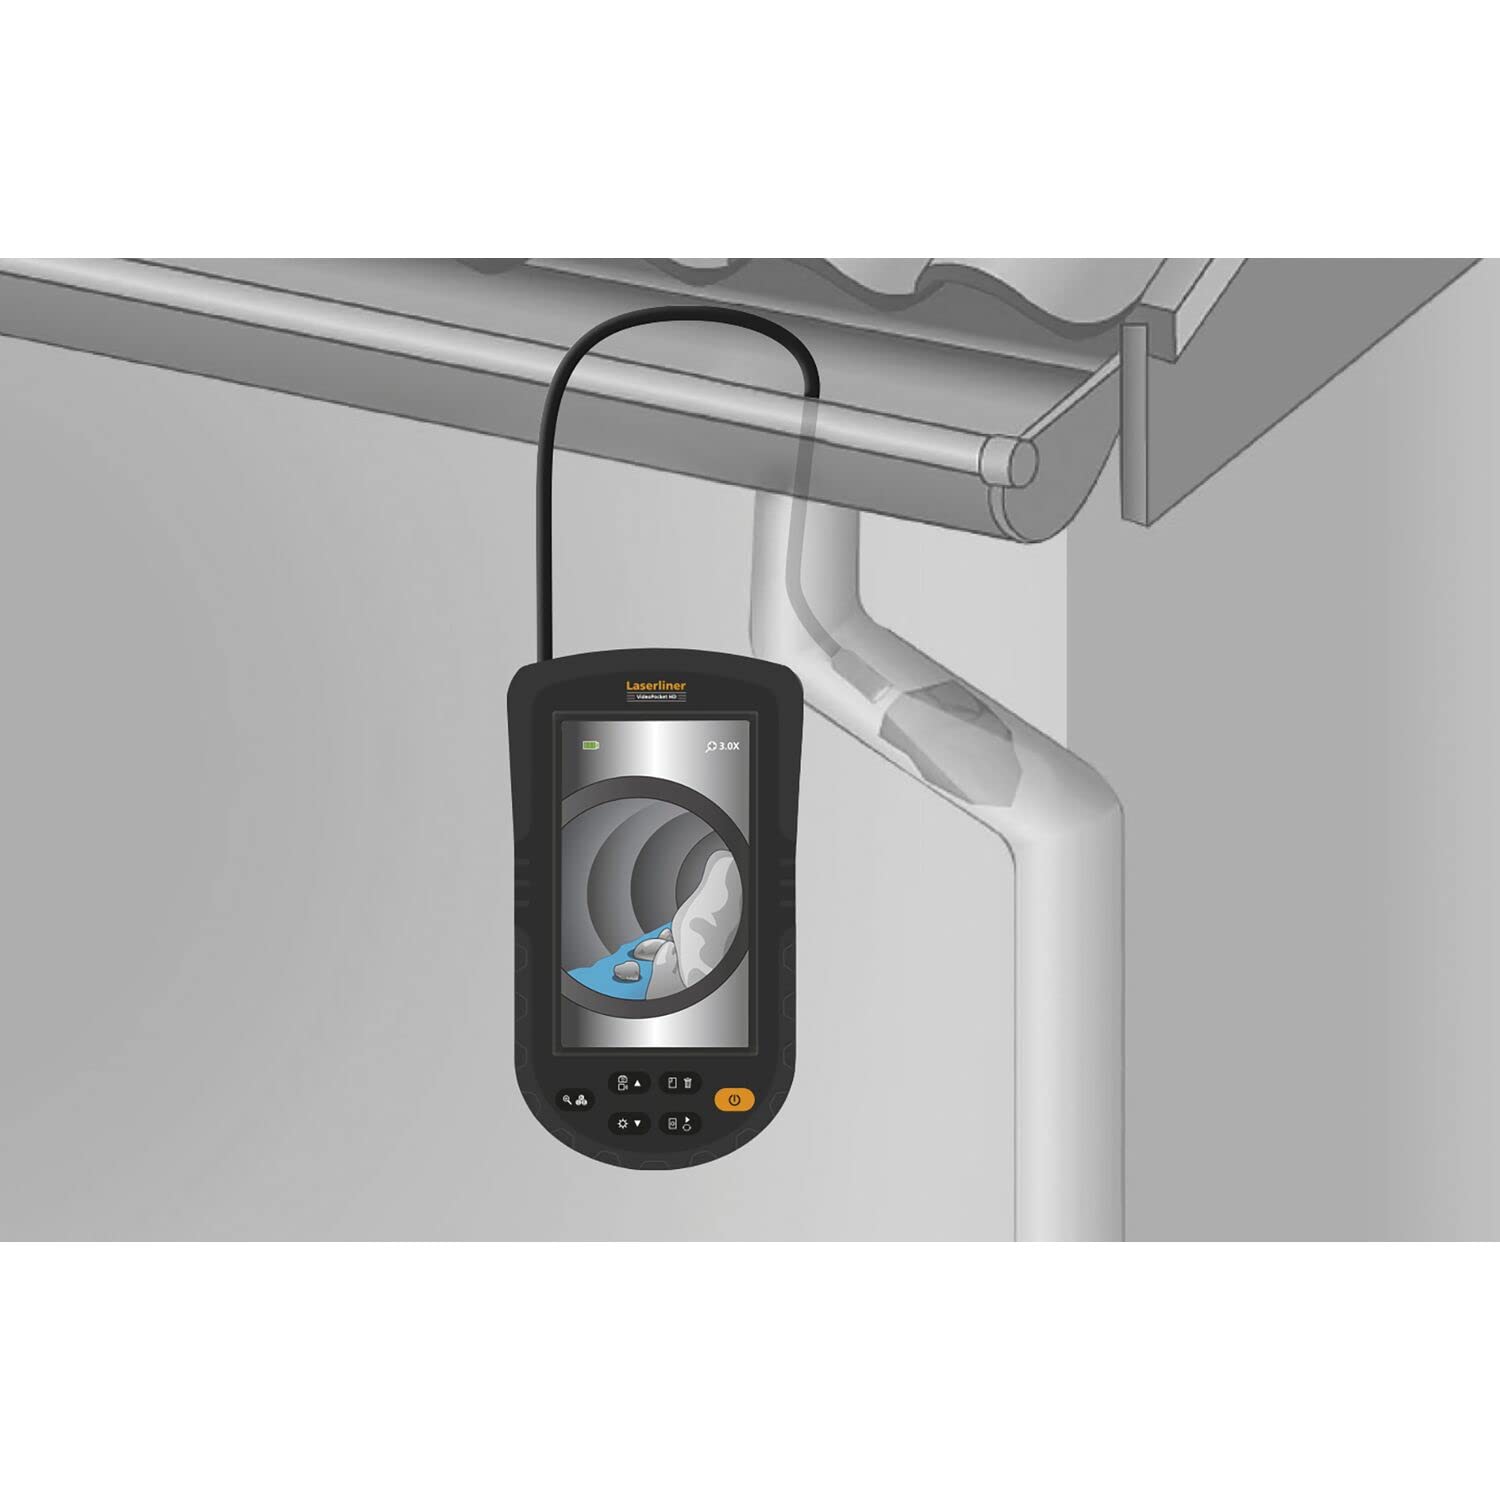
Figure 11: Gutter Inspection. The camera is used to inspect a gutter and downspout, showing the presence of leaves and debris.
7. וישאַלט
Proper maintenance ensures the longevity and performance of your device.
- רייניקונג: ווישט אָפּ די הויפּט איינהייט מיט אַ ווייכן, טרוקענעם שטאָף. די קאַמעראַ פּראָבע קען מען רייניקן מיט אַן אַדווערטייזמענט.amp cloth and mild detergent. Ensure no liquid enters the main unit.
- באַטערי זאָרגן: Replace batteries when the low battery indicator appears. Remove batteries if the device is not used for extended periods to prevent leakage.
- סטאָרידזש: Store the device in a cool, dry place, away from direct sunlight and extreme temperatures. Coil the probe loosely to avoid kinking.
8. טראָובלעשאָאָטינג
אויב איר טרעפט פּראָבלעמען, זעט די פאלגענדע געוויינטלעכע פּראָבלעמען און לייזונגען:
| פּראָבלעם | מעגלעך סיבה | לייזונג |
|---|---|---|
| די מיטל טוט נישט מאַכט אויף | נידעריגע אדער טויטע באַטעריעס; אומרעכטע באַטעריע אינסטאַלאַציע | טוישן באַטעריעס; קאָנטראָלירן די פּאָלאַריטעט פון די באַטעריעס |
| קיין בילד אויף דיספּליי | פּראָבע נישט ריכטיק פֿאַרבונדן; צעבראָכענע פּראָבע | זיכער מאַכן אַז די פּראָבע איז זיכער פֿאַרבונדן; קאָנטאַקטירט שטיצע אויב די פּראָבע איז געשעדיגט |
| די בילד איז בלערי | Object too close or too far from camera; Dirty camera lens | Adjust distance to object (refer to focus diagram); Clean camera lens gently |
| געפירט לייץ נישט ארבעטן | LED brightness set to minimum; Faulty LEDs | Increase LED brightness using controls; Contact support |
If the problem persists after trying these solutions, please contact Laserliner customer support.
9. ספּעסאַפאַקיישאַנז
Detailed technical specifications for the Laserliner 082.262A Inspection Camera:
| שטריך | באַשרייַבונג |
|---|---|
| פאַבריקאַנט | לאַזערלינער |
| פּראָדוקט דימענשאַנז (L x W x H) | 12 X 19 X 14 סענטימעטער |
| נומער מאָדעל נומער | 082.262 א |
| מאַטעריאַל | פּלאַסטיק |
| פאָרעם | קוואַדראַט |
| נומער פון זאכן אין פּעקל | 1 |
| מעאַסורעמענט סיסטעם | גראדן |
| באַטעריז אַרייַנגערעכנט | יא |
| באַטעריז פארלאנגט | יא |
| באַטאַרייע זאַץ | אַלקאַליין |
| פּונקט וואָג | 370 גראַמז |
| לאַנד פון אָריגין | כינע |
| ASIN | B0BYKBV8ZC |
10. וואָראַנטי און שטיצן
For warranty information, please refer to the documentation provided with your purchase or visit the official Laserliner website. For technical support or service inquiries, contact Laserliner customer service directly.
Spare parts availability: Information unavailable.
11. באַזייַטיקונג אינפֿאָרמאַציע
Electronic devices and batteries must not be disposed of with household waste. Please dispose of them according to local regulations at designated collection points for electronic waste and batteries. Proper disposal helps protect the environment and human health.