
1. הקדמה און איבערview
This manual provides essential instructions for setting up, operating, and maintaining your Brinno TLC300 Time Lapse Camera. The TLC300 is designed for capturing time-lapse videos in various environments, including construction sites, outdoor projects, and general-purpose applications. It features Full HD 1080P resolution with HDR, a 118° field of view, and an intuitive user interface.

פיגורע 1: פראָנט און זייַט view of the Brinno TLC300 Time Lapse Camera.
ווידעא 1: אן איבערview of the Brinno TLC300 Time Lapse Camera's features and capabilities.
2. וואָס איז אין דער קעסטל
Upon unboxing your Brinno TLC300, please ensure all the following items are present:
- Brinno Time Lapse Camera TLC300
- אַאַ באַטעריז רענטגענ 4
- אָביעקטיוו קאָווער
- סד קאָרט
- שנעל גייד מאַנואַל
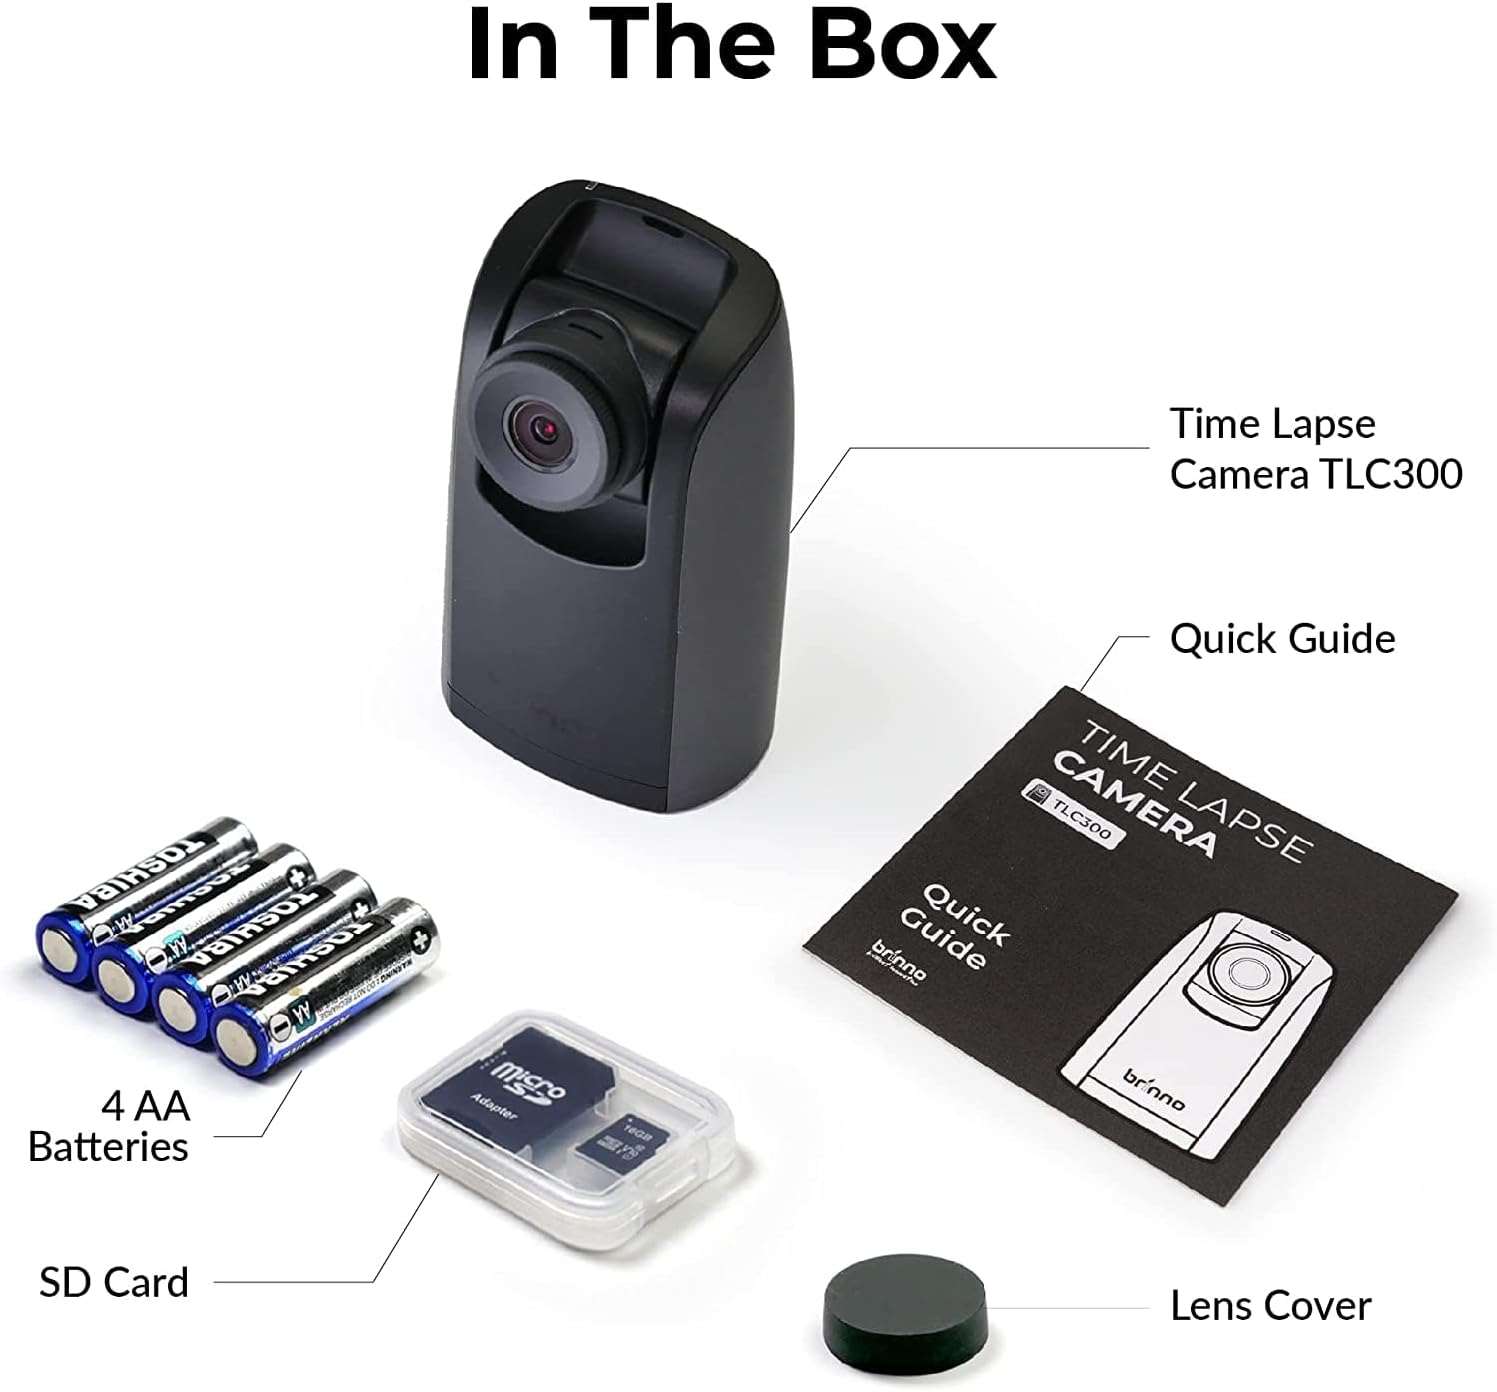
Figure 2: All items included in the Brinno TLC300 package.
3. סעטאַפּ
3.1 Battery and SD Card Installation
- עפֿנט דעם דעקל פֿונעם באַטעריע־אָפּטייל וואָס געפֿינט זיך בײַם דנאָ פֿון דער קאַמעראַ.
- אַרייַנלייגן 4 אַאַ באַטעריז, ינשורינג די ריכטיק פּאָולעראַטי (+/-).
- Insert the provided Micro SD card into the SD card slot until it clicks into place. The camera supports up to 128GB.
- פאַרמאַכן די באַטאַרייע אָפּטייל דעקן סיקיורלי.

Figure 3: Proper installation of AA batteries into the camera.
3.2 ערשטע איינשטראָם און גרונטלעכע סעטטינגס
- דריק און האלט דעם פּאַוער קנעפּל צו אנצינדן די קאַמעראַ.
- The 1.44" IPS LCD screen will display the live view.
- Navigate the menu using the directional buttons and the OK button.
- Set the current date and time for accurate time-lapse recording.
- Select your preferred language from the multilingual user interface.

Figure 4: The camera's menu for adjusting settings.
4. אַפּערייטינג די קאַמעראַ
4.1 Setting Recording Parameters
The TLC300 offers straightforward operation. You primarily need to set the 'interval' and 'schedule' before starting a recording.
- ינטערוואַל: This defines how often the camera captures an image. Adjust this setting based on the duration of your project and the desired speed of the final time-lapse video.
- פּלאַן: Use the schedule function to specify filming days and times. This ensures the camera only records during active periods, conserving battery life and storage.
- רעזאלוציע: The camera records in Full HD 1080P. Ensure HDR is enabled for optimal image quality, especially for day-to-night transitions.

Figure 5: Visual comparison of HDR and Night Mode performance.
4.2 Starting and Stopping Recording
After configuring your settings, press the OK button to begin recording. The camera will automatically start capturing images according to your set interval and schedule. To stop recording, press the Power button again.
5. וישאַלט
- רייניקונג: ניצט אַ ווייכע, טרוקענע שטאָף צו רייניקן די קאַמעראַ און לינז. פֿאַרמייַדט אַברייסיוו מאַטעריאַלן אָדער שטרענגע כעמיקאַלן.
- באַטאַרייע לעבן: The TLC300 offers up to 100 days of battery life with a 5-minute capture interval using 4 AA batteries. Monitor battery levels regularly, especially for long-term projects.
- סטאָרידזש: Periodically transfer your time-lapse videos from the SD card to a computer or external storage device to free up space and prevent data loss. The camera supports Micro SD cards up to 128GB.
- לענס דעקל: Always use the provided lens cover when the camera is not in use to protect the lens from dust and scratches.
6. טראָובלעשאָאָטינג
- די אַפּאַראַט מאַכט נישט אויף: Ensure batteries are correctly inserted and fully charged. Try replacing with new batteries.
- נעבעך בילד קוואַליטעט: Check lens for smudges or dirt. Ensure HDR is enabled for challenging lighting conditions. Verify the lens cover is removed.
- Recording not starting: Confirm that the interval and schedule settings are correctly configured. Ensure the SD card has sufficient free space.
- SD קאַרטל טעות: Reformat the SD card using the camera's menu (this will erase all data). If the issue persists, try a different SD card.
7. ספּעסאַפאַקיישאַנז
| שטריך | באַשרייַבונג |
|---|---|
| מאָדעל נומער | TLC300 |
| דימענשאַנז | 2.05 X 2.52 X 4.21 אינטשעס |
| פּונקט וואָג | 4.9 אונסעס |
| מאַכט מקור | 4 אַאַ באַטעריז |
| ווידעא קאַפּטורע רעסאָלוטיאָן | 1080 פּ גאַנץ הד |
| פאָטאָ סענסאָר טעכנאָלאָגיע | קמאָס |
| מאַקסימום פאָקאַל לענג | 15 מילאַמיטערז |
| מאַקסימום עפענונג | 2 f |
| פלאַש זכּרון טיפּ | מיקראָ סד (אַרויף צו 128 גיגאבייט) |
| ווידעא קאַפּטורע פֿאָרמאַט | MP4, MOV, AVI |
| שטיצט אַודיאָ פֿאָרמאַט | mp3, אַאַק |
| פאַרשטעלן גרייס | 1.44 אינטשעס |
| קאַנעקטיוויטי טעכנאָלאָגיע | בלועטאָאָטה |
8. וואָראַנטי און שטיצן
Brinno products are designed for durability and performance. For any technical assistance, warranty claims, or product inquiries, please refer to the contact information provided in your Quick Guide Manual or visit the official Brinno support webזייטל. האַלט אייער קויף קוויטל ווי אַ באַווייַז פון קויפן פֿאַר וואָראַנטי באַדינונגען.