
1. הקדמה
This manual provides essential information for the proper installation, configuration, and operation of your Teltonika RUT951 4G LTE Router. The RUT951 is a robust industrial cellular router designed for professional applications, offering reliable internet connectivity via 4G LTE, Wi-Fi, and Ethernet. It features dual-SIM support for network redundancy and is powered by RutOS, providing advanced customization and security features.
2. פּראָדוקט איבערview
2.1 שליסל פֿעיִקייטן
- Dual-SIM 4G LTE cellular connectivity for reliable network access.
- Integrated Wi-Fi (802.11b/g/n) for local wireless networking.
- Four Ethernet interfaces (3x LAN, 1x WAN) for wired connections.
- Powered by RutOS for advanced customization, automation, and security.
- Robust design suitable for various IoT and industrial scenarios.
2.2 פּעקל אינהאַלט
The standard package for the Teltonika RUT951 router typically includes:
- Teltonika RUT951 Router Unit
- מאַכט אַדאַפּטער
- 2 x Mobile Antennas (SMA)
- 2 x Wi-Fi Antennas (RP-SMA)
- עטהערנעט קאַבלע
- שנעל אָנהייב גייד
2.3 Router Layout
Familiarize yourself with the router's ports, indicators, and slots.
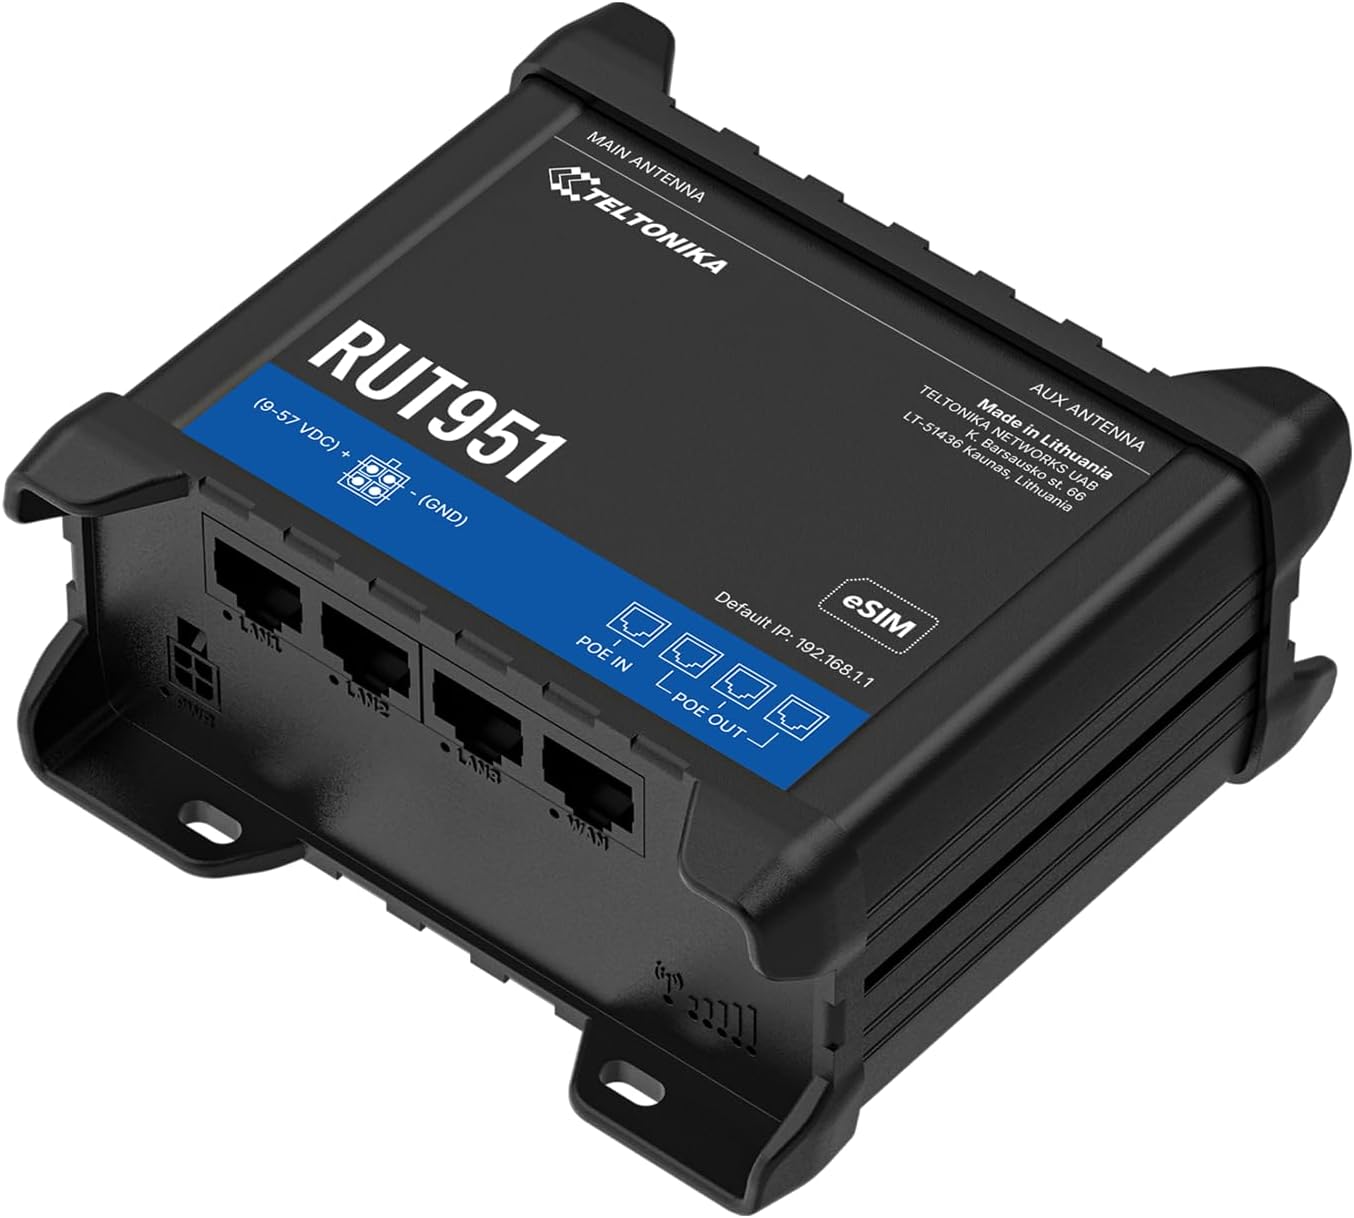
פיגורע 1: פראָנט view of the Teltonika RUT951 router, showing the model name and general design.

פיגורע 2: Detailed diagram illustrating the various ports and indicators on the Teltonika RUT951 router, including mobile and Wi-Fi antenna connectors, SIM slots, Ethernet ports, power socket, and LED indicators.
- Mobile AUX Antenna Connector (SMA female): For secondary mobile antenna.
- Mobile MAIN Antenna Connector (SMA female): For primary mobile antenna.
- SIM1 / SIM2 Slots: For inserting cellular SIM cards.
- RESET קנעפּל: To restore factory settings or reboot.
- Wi-Fi Antenna Connectors (RP-SMA female): For Wi-Fi antennas.
- מאַכט סאָקקעט: פֿאַר קאַנעקטינג די מאַכט אַדאַפּטער.
- לאַן עטהערנעט פּאָרץ: For connecting local network devices.
- WAN Ethernet Port: For connecting to an external network (e.g., fiber modem).
- Mobile Signal Strength LEDs: Indicate cellular signal strength.
- Mobile Connection Status LED: Indicates cellular connection status.
- לאַן לעדס: Indicate activity on LAN ports.
- WANN LED: Indicates activity on the WAN port.
3. סעטאַפּ אינסטרוקציעס
3.1 ינסטאַלירונג פון סים קאַרד
- Locate the SIM card slots (SIM1 and SIM2) on the top panel of the router.
- Using a SIM ejector tool or a paperclip, gently press the small button next to the SIM slot to open it.
- Insert your activated Mini-SIM card(s) into the slot(s) with the gold contacts facing down and the notched corner oriented correctly.
- Push the SIM tray back into the router until it clicks into place.

פיגורע 3: Top view of the RUT951, highlighting the SIM card slots and antenna connectors.
3.2 אַנטענע קאַנעקשאַן
- Screw the two mobile antennas onto the SMA connectors labeled 'MOBILE' (MAIN and AUX) on the top panel.
- Screw the two Wi-Fi antennas onto the RP-SMA connectors labeled 'WIFI' on the top panel.
- Ensure all antennas are securely tightened for optimal signal reception.
3.3 מאַכט קאַנעקשאַן
- Connect the provided power adapter to the power socket on the router.
- צאַפּן די אנדערע סוף פון די מאַכט אַדאַפּטער אין אַ פּאַסיק מאַכט ווענטיל.
- The router will power on automatically. Observe the power LED indicator.

פיגורע 4: דנאָ view of the RUT951, showing the Ethernet ports and power input.
3.4 עטהערנעט קאַנעקשאַן
To connect a device directly to the router:
- Connect one end of an Ethernet cable to any of the LAN ports (LAN1, LAN2, LAN3) on the router.
- Connect the other end of the Ethernet cable to your computer or network device.
- If you are using the router as a WAN gateway, connect your external modem (e.g., fiber modem) to the WAN port.
4. אַפּערייטינג ינסטרוקטיאָנס
4.1 Initial Access to WebUI
- Ensure your computer is connected to the router via Ethernet or Wi-Fi. The default Wi-Fi SSID and password can be found on the router's label.
- עפענען א web בלעטערער און אַרייַן די פעליקייַט IP אַדרעס: 192.168.1.1
- You will be prompted for login credentials. The default username is אַדמין. The default password is also אַדמין (or as specified on the router's label).
- Upon first login, you will be guided through a setup wizard to change the default password and configure basic settings.
4.2 נעטוואָרק קאָנפיגוראַטיאָן
After initial login, you can configure various network settings through the Webוי:
- WAN סעטטינגס: Configure your cellular (4G LTE) connection, including APN settings, or set up the Ethernet WAN port.
- לאַן סעטטינגס: Manage the local network IP address range and DHCP server.
- Wi-Fi סעטטינגס: Change Wi-Fi SSID, password, security protocols, and channel settings.
- צווייענדיק סים: Configure failover or load balancing between the two SIM cards for continuous connectivity.
- VPN: Set up various VPN protocols for secure remote access.
5. וישאַלט
5.1 פירמוואַרע דערהייַנטיקונגען
Regularly updating the router's firmware is crucial for security, performance, and new features. Firmware updates can be performed via the WebUI under the 'System' or 'Firmware' section. Always download firmware from the official Teltonika Networks webפּלאַץ.
5.2 פאַבריק באַשטעטיק
אויב איר טרעפט זיך מיט אנהאלטנדיקע פראבלעמען אדער פארגעסט אייערע לאגין קראדענשעלס, קענט איר דורכפירן א פאבריק ריסעט:
- With the router powered on, locate the RESET button (refer to Figure 2).
- Press and hold the RESET button for approximately 10 seconds until all LEDs flash.
- לאָזט לאָז דעם קנעפּל. דער ראַוטער וועט זיך ריסטאַרטן מיט די פֿאַבריק דיפאָלט סעטטינגס.
6. טראָובלעשאָאָטינג
- קיין אינטערנעט פֿאַרבינדונג:
- Check SIM card insertion and activation.
- באַשטעטיקן APN סעטטינגס אין די Webוי.
- Ensure mobile antennas are securely connected.
- Check cellular signal strength LEDs.
- Wi-Fi Not Working:
- זיכער מאַכן אַז Wi-Fi איז אַקטיווירט אין דער Webוי.
- Check Wi-Fi antenna connections.
- Verify Wi-Fi SSID and password.
- קענען ניט אַקסעס Webוי:
- Ensure your device is connected to the router (Ethernet or Wi-Fi).
- Verify your computer's IP settings (should be set to obtain IP automatically).
- פרובירט אויסצורייניגן אייער בלעטערער'ס קעש אדער ניצן אן אנדערן בלעטערער.
- Perform a factory reset if you suspect incorrect IP configuration or forgotten password.
7. ספּעסאַפאַקיישאַנז
| שטריך | באַשרייַבונג |
|---|---|
| סאָרט | טעלטאָניקאַ |
| מאָדעל נאָמען | 951 RUT |
| קאַנעקטיוויטי טעכנאָלאָגיע | Wi-Fi, 4G LTE, 3G, 2G |
| ווירעלעסס קאָמוניקאַציע סטאַנדאַרד | 802.11 ב, 802.11 ג, 802.11 ן |
| אָפטקייַט באַנד קלאַס | צווייענדיק-באַנד |
| נומער פון פּאָרץ | 4 (3x LAN, 1x WAN) |
| לאַן פּאָרט באַנדווידט | 100 מבפּס |
| דאַטאַ אַריבערפירן קורס | 150 Megabits Per Second (Max Upstream) |
| אָפּערייטינג סיסטעם | RutOS |
| פּונקט וואָג | 287 גראַמז |
| Voltage | 30 וואלטס |
| זיכערהייט פּראָטאָקאָל | WPS (and others via RutOS) |
| קאַווערידזש | Dual SIM network redundancy |
8. זיכערקייַט אינפֿאָרמאַציע
- ניצן בלויז די מאַכט אַדאַפּטער צוגעשטעלט מיט די מיטל.
- שטעלט נישט אויס דעם אפאראט צו וואסער, פייכטקייט, אדער עקסטרעמע טעמפעראטורן.
- ויסמיידן פּלייסינג די מיטל לעבן היץ קוואלן אָדער אין דירעקט זונשייַן.
- פאַרזיכערן געהעריק ווענאַליישאַן צו פאַרמייַדן אָוווערכיטינג.
- פרובירט נישט צו עפענען אדער מאדיפיצירן דעם אפאראט. דאס וועט בטל מאכן די גאראנטיע.
- אַוועקוואַרפן דאָס אַפּאַראַט און זייַנע אַקסעסאָריעס פאַראַנטוואָרטלעך לויט די לאָקאַלע רעגולאַציעס.
9. וואָראַנטי און שטיצן
The Teltonika RUT951 router comes with a standard manufacturer's warranty. For detailed warranty terms and conditions, please refer to the documentation included with your product or visit the official Teltonika Networks website. For technical support, firmware downloads, and additional resources, please visit the Teltonika Networks support portal or contact your vendor.