
Allesin B0BFDRHLT5
Allesin Top Down Bottom Up Cellular Shades User Manual
מאָדעל: B0BFDRHLT5
סאָרט: אלעסין
1. הקדמה
Thank you for choosing Allesin Top Down Bottom Up Cellular Shades. These shades are designed to provide flexible light control, privacy, and energy efficiency for your home or office. Featuring a cordless design, they offer a clean aesthetic and enhanced safety for children and pets. This manual provides detailed instructions for measurement, installation, operation, and maintenance to ensure optimal performance and longevity of your cellular shades.
The unique top-down/bottom-up functionality allows you to adjust the shades from both the top and bottom, giving you precise control over natural light and privacy levels. The honeycomb structure contributes to noise reduction and thermal insulation, helping to maintain comfortable indoor temperatures year-round.
Video: This video explains the benefits and features of Allesin Top Down Bottom Up Shades, highlighting their design and functionality.
2. וואָס איז אַרייַנגערעכנט
Your Allesin Cellular Shades package includes all necessary components for installation and operation:
- Allesin Top Down Bottom Up Cellular Shade Unit
- Mounting Hardware (brackets, screws, anchors)
- ינסטאַללאַטיאָן ינסטרוקטיאָנס מאַנואַל

Image: A complete set of Allesin Cellular Shades and its included accessories, such as the shade unit, mounting brackets, screws, and wall anchors.
Video: This video demonstrates the unboxing of the Allesin Cellular Shades and shows all the included components and accessories.
3. Measurement Instructions
Accurate measurements are crucial for a proper fit. Please follow these guidelines carefully:
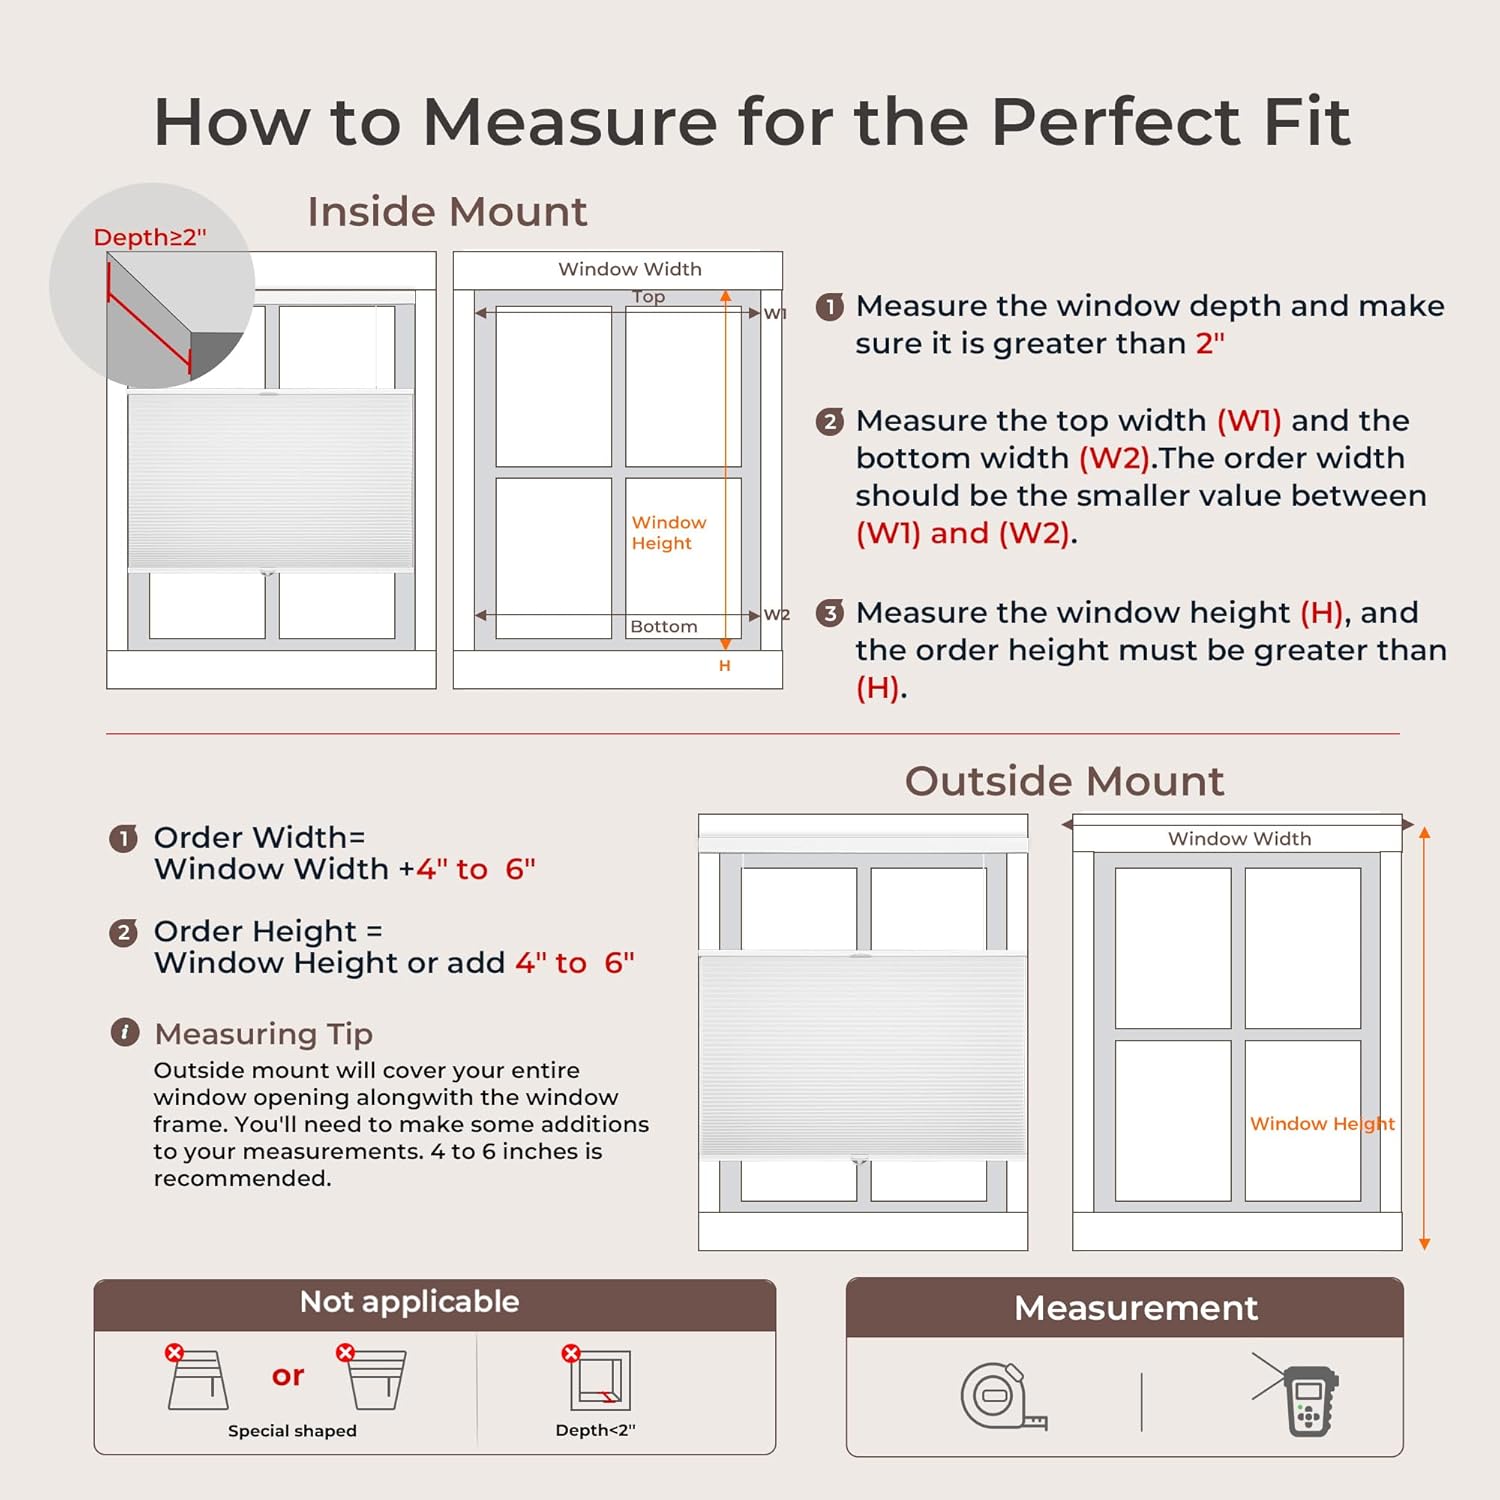
3.1. For Inside Mount:
- Ensure a minimum 2-inch window frame depth.
- Measure the top width (W1) and the bottom width (W2) of the window. The order width should be the smaller value between W1 and W2.
- Measure the window height (H). The order height must be greater than H.
- Order shades 0.25 inches less than the window width.
- Order length should match the window length.
3.2. For Outside Mount:
- Order width and length 4 to 6 inches more than the window dimensions to ensure better coverage and minimize light leakage.
באַמערקונג: Outside Mount is recommended if your window depth is less than 2 inches, or if your priority is to minimize light leakage from the sides for better overall coverage.

Image: A visual guide illustrating the correct method for measuring window dimensions for an inside mount installation, detailing depth, width, and height.

Image: A comprehensive window measuring guide, providing visual and textual instructions for both inside and outside mount installations.

Image: A table detailing recommended order widths for inside mount cellular shades, categorized by window width ranges for easy selection.

Image: A table outlining recommended order widths for outside mount cellular shades, organized by window width ranges to assist with ordering.
4. ינסטאַלירונג אינסטרוקציעס
Follow these steps for a quick and secure installation of your Allesin Cellular Shades:
- Mark Install Location: Use a pencil to mark the precise spots where the mounting brackets will be placed. Ensure these marks are level and spaced correctly according to your shade's width.
- Drill Holes and Mount Brackets: Drill pilot holes at the marked locations. Securely attach the mounting brackets using the provided screws and wall anchors (if necessary).
- Mount Shade in Brackets: Carefully align the headrail of the cellular shade with the installed brackets. Push the shade firmly into the brackets until it clicks securely into place.
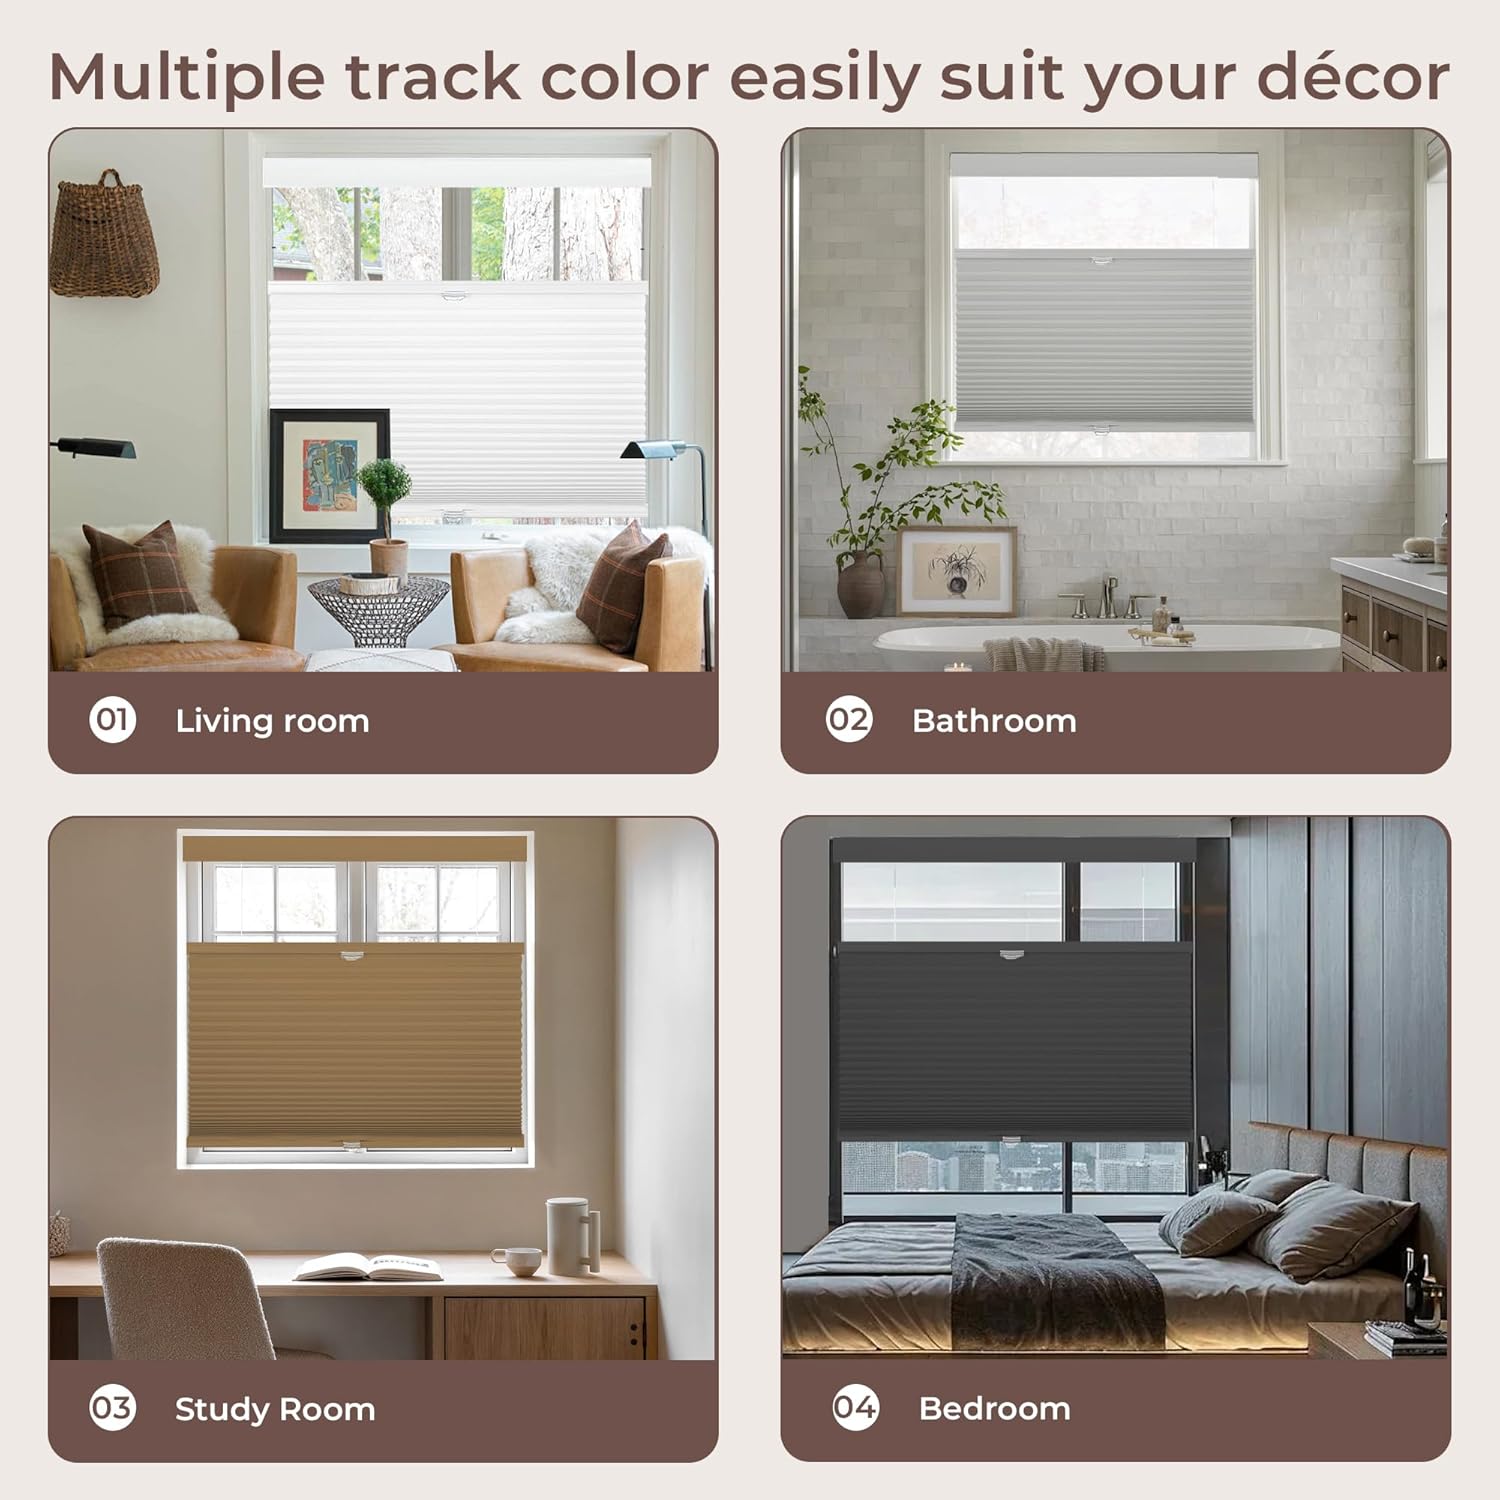
Image: A three-step visual guide for quick installation, showing how to mark the location, drill holes and mount brackets, and finally mount the shade.
Video: This video provides a step-by-step demonstration of how to install the Allesin Cellular Shades, from marking to securing the unit.
5. אַפּערייטינג ינסטרוקטיאָנס
Your Allesin Cellular Shades feature a cordless top-down/bottom-up design for easy and flexible operation:
- Adjusting from the Bottom: To raise the shade, gently push the bottom rail upwards. To lower it, pull the bottom rail downwards. The shade will stay in place once released.
- Adjusting from the Top: To lower the top portion of the shade, gently pull the top movable rail downwards. To raise it, push the top movable rail upwards. This allows light to enter from the top while maintaining privacy below.
- Combined Operation: You can adjust both the top and bottom sections independently to achieve your desired level of light and privacy.

Image: A visual representation of the cellular shade's operational states: fully closed for maximum privacy, half open with the top lowered for light, and fully open.

Image: A comparison highlighting the safety benefits of the cordless design for children and pets, contrasting it with the risks associated with traditional pull cords.
6. וישאַלט
To keep your Allesin Cellular Shades looking their best and functioning smoothly, follow these simple maintenance tips:
- רעגולער שטויב: Use a feather duster, soft cloth, or vacuum cleaner with a brush attachment to gently remove dust from the shades.
- אָרט רייניקונג: For small stains, use a soft cloth or sponge dampened with lukewarm water and a mild detergent. Blot the stained area gently; do not rub vigorously. Allow the shade to air dry completely before raising it.
- ויסמיידן האַרב קעמיקאַלז: Do not use abrasive cleaners, solvents, or strong chemical solutions, as these can damage the fabric and color of the shades.
- שעפּן דזשענטלי: Always operate the shades by grasping the rails firmly and moving them smoothly. Avoid sudden jerks or excessive force.
7. טראָובלעשאָאָטינג
If you encounter any issues with your cellular shades, refer to the following common problems and solutions:
| פּראָבלעם | מעגלעך סיבה | לייזונג |
|---|---|---|
| Shade does not stay in desired position. | Tension mechanism needs adjustment or is worn. | Gently raise and lower the shade several times to reset the tension. If the issue persists, contact customer support. |
| Shade moves unevenly or gets stuck. | Obstruction in the window frame or internal mechanism. | Check for any obstructions in the window frame. Ensure the shade is properly seated in the mounting brackets. Operate the shade slowly to identify the sticking point. |
| Light leakage around the edges. | Incorrect measurement or installation type. | For inside mount, ensure measurements were precise. For outside mount, consider adding 4-6 inches to width/height for better coverage. |
8. ספּעסאַפאַקיישאַנז
Key specifications for your Allesin Top Down Bottom Up Cellular Shades:
- מאַטעריאַל: Aluminum (Headrail), Polyester (Lining)
- פּראָדוקט דימענשאַנז: 64"L x 35"W (for this specific model)
- קאָליר: White-light Filtering (for this specific model)
- אָופּאַסאַטי: Blackout (for this specific model, other options available)
- אָפּעראַציע מאָדע: Manual, Cordless
- מאַונטינג טיפּ: Outside Mount (for this specific model, inside mount also possible)
- קאָנטראָל טיפּ: מאַנואַל
- נומער פון זאכן: 1
- רעקאַמענדיד ניצט: Indoor (Bathroom, Bedroom, Kitchen, Living Room, Office)
- אַרייַנגערעכנט קאַמפּאָונאַנץ: Cordless Lift System, Mounting Hardware
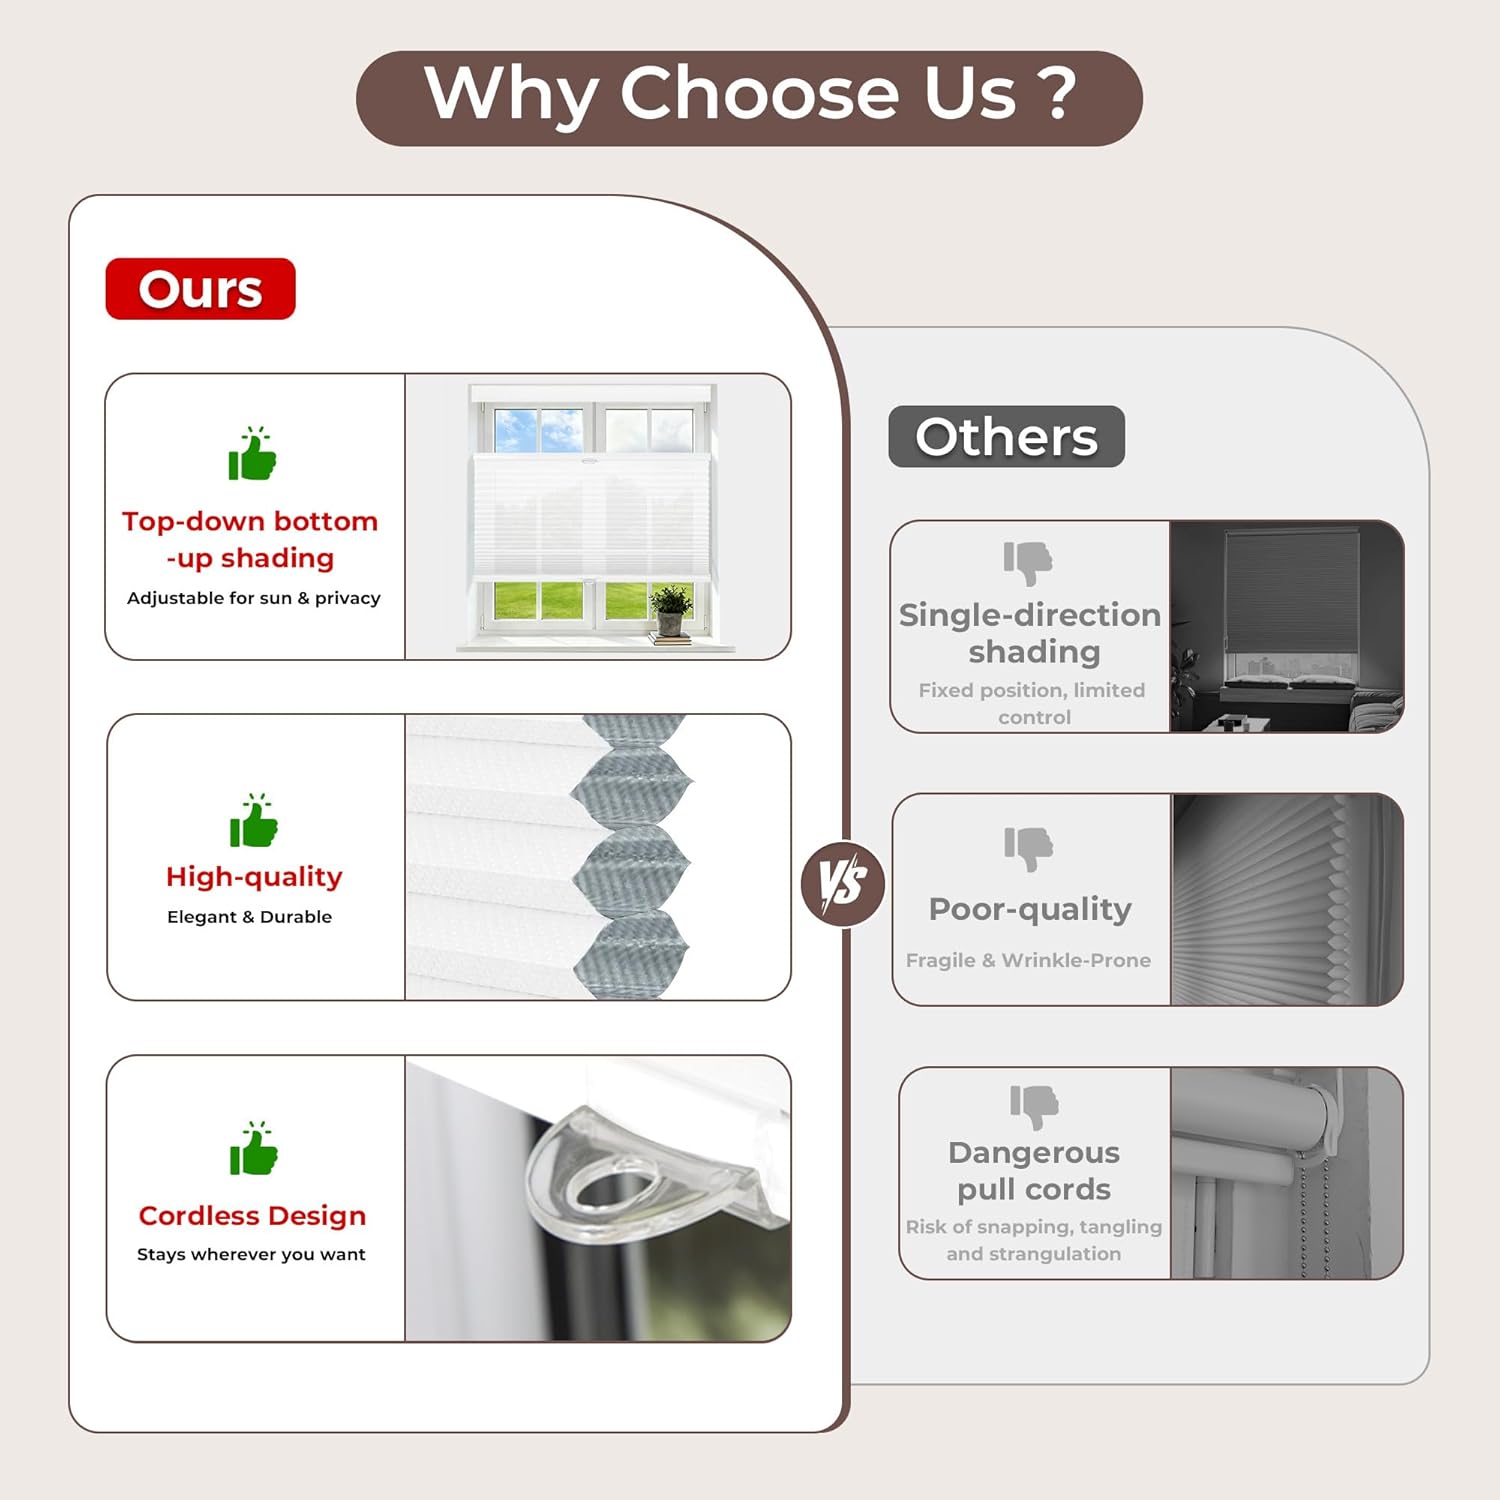
Image: A detailed close-up of the Allesin Cellular Shade, showcasing the quality of the material and the intricate honeycomb cell structure.
בילד: אן עקספלאדירטע view of the Allesin Cellular Shade, highlighting its key components such as the headrail, bottom rail, and the cellular fabric.
Image: A cellular shade installed in a child's room, demonstrating its light filtering capability to create a soft, diffused light environment.

Image: A cellular shade installed in an office, illustrating how it provides soft, eye-friendly light while maintaining privacy.
9. וואָראַנטי און שטיצן
Allesin products are manufactured with quality and durability in mind. For specific warranty information regarding your cellular shades, please refer to the product packaging or contact Allesin customer support directly. Our support team is available to assist with any questions, concerns, or issues you may encounter during the lifespan of your product.
פֿאַר ווייטערדיקע הילף, ביטע באַזוכט די Allesin Store on Amazon or contact the seller directly through your purchase platform.
Ask a question about this manual
Ask about setup, troubleshooting, compatibility, parts, safety, or missing instructions. Manuals+ will review the question and use this page’s manual context to help answer it.