
1. הקדמה
This manual provides detailed instructions for the installation, configuration, and operation of the LC-Power LC-35U3-RAID-2 Hard Drive Enclosure. This device is designed to house two 3.5-inch SATA hard drives, offering various RAID modes for data management and protection. Please read this manual thoroughly before use to ensure proper setup and functionality.

Figure 1: LC-Power LC-35U3-RAID-2 Hard Drive Enclosure, front-side view with stand.
2. פּעקל אינהאַלט
באַשטעטיקט אַז אַלע זאכן וואָס זענען אויסגערעכנט אונטן זענען פאַראַן אין אייער פּעקל. אויב עפּעס פעלן אָדער זענען געשעדיגט, ביטע קאָנטאַקט אייער הענדלער.
- 1 x LC-Power LC-35U3-RAID-2 Hard Drive Enclosure
- 1 רענטגענ שטיין
- 1 x USB Cable (USB-A to USB-A)
- 1 x External Power Supply
- 1 x Mounting Material (screws, screwdriver)
- 1 x באַניצער מאַנואַל (דאָס דאָקומענט)
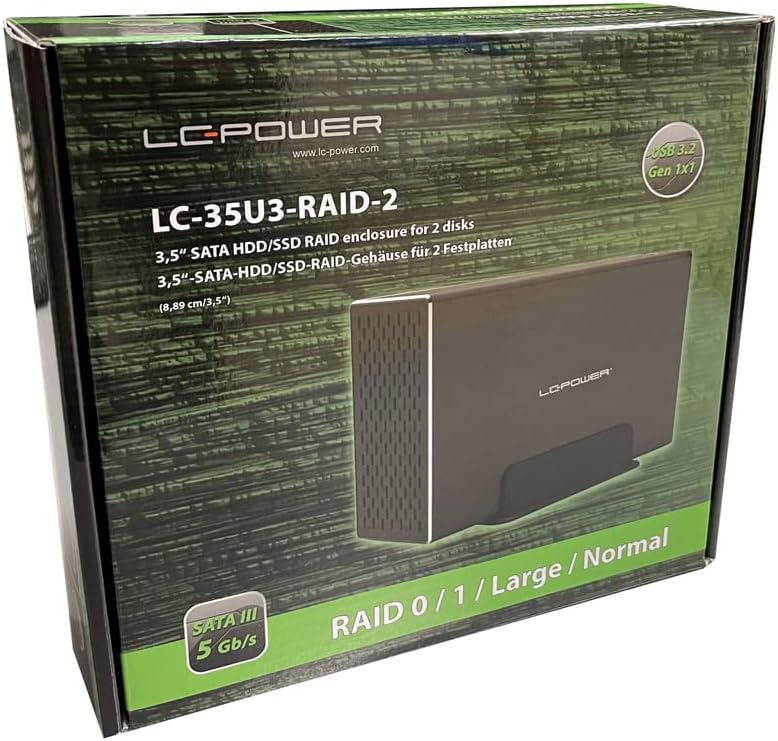
Figure 2: Product packaging, showing the enclosure and its features.
3. פֿעיִקייטן
- Supports two 8.89cm/3.5" SATA hard drives.
- RAID function support: RAID 0, RAID 1, Large, and Normal modes.
- USB 3.2 Gen 1x1 interface (USB-A connector).
- UASP support for enhanced performance (from Windows 8 onwards).
- Chipset for SATA 5Gb/s (SATA I/II/III).
- דוראַבאַל אַלומינום האָוסינג פֿאַר עפעקטיוו היץ דיסיפּיישאַן.
- Integrated fan controller for adjustable cooling.
- Plug'n'Play functionality.
- Nominal data transfer rate up to 5Gb/s.
- System compatibility: Windows 7 or higher, Mac OS 10.8 or higher.
4. סעטאַפּ און ייַנמאָנטירונג
4.1. האַרד דרייוו ינסטאַלירונג
- עפֿנט דעם קעסטל: Carefully slide open the enclosure to access the internal drive bays. Refer to the product diagram for the correct opening mechanism.
- אינסטאַלירן האַרט דרייווז: Insert your 3.5-inch SATA hard drives into the designated bays (HDD1 and HDD2). Ensure they are securely seated into the SATA connectors.
- Secure Drives: Use the provided mounting screws and screwdriver to secure the hard drives within the enclosure.
- פֿאַרמאַכן אַרײַנשליסן: Slide the enclosure cover back into place until it clicks or is firmly closed.

Figure 3: Internal drive tray for 3.5-inch SATA hard drives.
4.2. Connecting to Power and PC
- פאַרבינדן מאַכט: Connect the external power supply to the DC 12V input port on the enclosure's rear panel. Then, plug the power adapter into a wall outlet.
- פאַרבינדן וסב: Use the provided USB-A to USB-A cable to connect the enclosure's USB 3.2 Gen 1x1 port to an available USB port on your computer.
- פּאַזישאַנינג: Place the enclosure on a stable surface, preferably using the included stand for optimal airflow and stability.

פיגורע 4: דערציען view of the enclosure, showing the USB port, power input, and fan.
5. אָנפאַל קאָנפיגוראַטיאָן
The LC-35U3-RAID-2 supports multiple RAID modes. Before configuring RAID, ensure no critical data is on the installed hard drives, as this process will erase all data.
5.1. Understanding RAID Modes
- נאָרמאַל: Each hard drive operates independently as a separate volume.
- Large (JBOD): Combines both hard drives into a single, large volume. Data is written sequentially across drives. No redundancy.
- RAID 0 (סטרייפּינג): Combines both hard drives into a single volume for maximum performance. Data is split and written across both drives simultaneously. No redundancy; failure of one drive results in data loss.
- RAID 1 (שפּיגל): Creates an exact copy of data on both hard drives. Provides data redundancy; if one drive fails, data can be recovered from the other. Capacity is limited to the size of the smallest drive.
5.2. Setting RAID Mode
- מאַכט אַוועק: Ensure the enclosure is powered off and disconnected from your computer.
- Set DIP Switches: On the rear panel, locate the RAID setting DIP switches. Adjust these switches according to the desired RAID mode as indicated on the enclosure. Refer to Figure 5 for switch positions.
- דריקן דעם "Reset" קנעפל: With the enclosure still powered off, use a small pointed object (like a paperclip) to press and hold the "RESET" button.
- מאַכט אויף: While holding the RESET button, power on the enclosure. Continue holding the RESET button for approximately 5-10 seconds until the indicator lights change or flash, then release.
- פאַרבינדן צו פּיסי: Connect the enclosure to your computer via USB.
- איניציאליזירן און פֿאָרמאַטירן: For new RAID configurations or drives, you will need to initialize and format the new volume through your operating system's Disk Management utility (Windows) or Disk Utility (Mac OS). Follow your OS's instructions for creating new partitions and formatting.

פיגורע 5: דעטאַילעד view of the rear panel, highlighting RAID setting DIP switches and the RESET button.

Figure 6: Top panel indicators for HDD activity and RAID mode labels.
6. אָפּעראַציע
6.1. מאַכט אויף / אויסגעלאשן
After connecting the power and USB cables, press the "ON/OFF" switch on the rear panel to power on the enclosure. The power indicator light will illuminate. To power off, press the switch again. Always safely eject the drive from your operating system before powering off to prevent data corruption.
6.2. פאָכער קאָנטראָל
The enclosure features a fan with adjustable speed settings. Use the fan control switch on the rear panel to select your desired fan speed (low, medium, high) or turn it off. Adjust the fan speed based on the operating temperature of your hard drives and ambient conditions.
6.3. Drive Activity Indicators
The enclosure has LED indicators for HDD1 and HDD2 on the top panel. These lights will illuminate when the respective drive is active (reading or writing data).
6.4. סיסטעם קאָמפּאַטאַביליטי
The LC-35U3-RAID-2 is compatible with Windows 7 or higher and Mac OS 10.8 or higher. For optimal performance and UASP support, ensure your operating system is Windows 8 or newer.
7. וישאַלט
- רייניקונג: Use a soft, dry cloth to clean the exterior of the enclosure. Do not use liquid cleaners or solvents. Ensure ventilation holes are free from dust to maintain proper airflow.
- ווענטילאַטיאָן: Ensure the enclosure is placed in a well-ventilated area, away from direct sunlight or heat sources, to prevent overheating.
- קאַבלע פאַרוואַלטונג: Periodically check all cable connections (power and USB) to ensure they are secure and not damaged. A loose USB cable can lead to connection drops.
- Firmware דערהייַנטיקונגען: Check the LC-Power website periodically for any available firmware updates for your device.
8. טראָובלעשאָאָטינג
- Enclosure not recognized by PC:
- זייט זיכער אז דער מאַכט אַדאַפּטער איז זיכער פארבונדן און אז די קעסטל איז אנגעצינדן.
- Verify the USB cable is firmly connected to both the enclosure and the computer. Try a different USB port or cable.
- Check your operating system's Disk Management (Windows) or Disk Utility (Mac OS) to see if the drives are detected but uninitialized or unformatted.
- If you changed RAID modes, ensure you performed the RESET procedure correctly and initialized/formatted the volume.
- לאַנגזאַמע דאַטן טראַנספער גיכקייטן:
- Ensure you are connected to a USB 3.0/3.1/3.2 port on your computer for optimal speeds.
- Verify that UASP is enabled (Windows 8 or higher).
- Check the health of your hard drives.
- Drives not spinning up or making unusual noises:
- זיכער מאַכן אַז די מאַכט צושטעל אַרבעט ריכטיק.
- Check that the hard drives are properly seated in their bays.
- If noises persist, the hard drive itself may be faulty.
- Intermittent connection drops:
- Ensure the USB cable is not loose or damaged. Try a different, high-quality USB-A to USB-A cable.
- Avoid placing the enclosure near strong electromagnetic interference sources.
- Auto-Sleep function not working as expected:
- Ensure your operating system's power management settings are not interfering with the enclosure's sleep function.
- Some operating systems (e.g., certain Linux distributions) may have limited or no support for the enclosure's auto-sleep feature.
9. ספּעסאַפאַקיישאַנז
| שטריך | דעטאַל |
|---|---|
| מאָדעל | LC-35U3-RAID-2 |
| סאָרט | לק-מאַכט |
| מאַטעריאַל | אַלומינום |
| קאַמפּאַטאַבאַל דעוויסעס | פערזענלעכע קאָמפּיוטער |
| שווער דיסק פאָרם פאַקטאָר | 3.5 אינטשעס |
| מאַקס נומער פון שטיצט דעוויסעס | 2 |
| דאַטאַ אַריבערפירן קורס | 5 Gigabits Per Second (USB 3.2 Gen 1x1) |
| RAID מאָדעס | RAID 0, RAID 1, Large (JBOD), Normal |
| ייַזנוואַרג צובינד | יו-עס-בי (יו-עס-בי-א) |
| ייַזנוואַרג פּלאַטפאָרמע | מעק, ווינדאָוז |
| פּונקט וואָג | 0.86 קילאָגראַמס (1.89 פונט) |
| פּראָדוקט דימענשאַנז | Approx. 3.5"L x 3.5"W x 3.5"H (Enclosure only) |
| קאָליר | שוואַרץ |
10. וואָראַנטי און שטיצן
LC-Power products are designed and manufactured to the highest quality standards. For information regarding warranty terms and conditions, please refer to the warranty card included with your product or visit the official LC-Power webפּלאַץ.
For technical support, troubleshooting assistance, or to inquire about replacement parts, please contact LC-Power customer service through their official webזייטל אדער די קאָנטאַקט אינפֿאָרמאַציע וואָס איז צוגעשטעלט אין אייער פּראָדוקט דאָקומענטאַציע.
פאַבריקאַנט: לק-מאַכט
Webפּלאַץ: www.lc-power.com (ביטע קוקט נאך די מערסט אקטועלע קאנטאקט אינפארמאציע און שטיצע רעסורסן.)