
Prechen 19.5-inch 1600x900 LED Monitor
Prechen 19.5-inch 1600x900 LED Monitor User Manual
Model: 19.5-inch 1600x900 LED Monitor (ASIN: B09WTNZJP2)
1. הקדמה
Thank you for choosing the Prechen 19.5-inch 1600x900 LED Monitor. This monitor is designed to provide a high-quality visual experience for various applications, including office work, multimedia, and gaming. Featuring a 1600x900 resolution TN panel, 60Hz refresh rate, and built-in speakers, it offers a versatile display solution. This manual provides detailed instructions for setup, operation, maintenance, and troubleshooting to ensure optimal performance and longevity of your device.

פיגורע 1: פראָנט view of the Prechen 19.5-inch LED Monitor.
2. וויכטיק סאַפעטי אינפֿאָרמאַציע
Please read all safety warnings and instructions carefully before using this monitor to prevent damage or injury.
- Do not expose the monitor to rain or moisture to avoid fire or electric shock.
- עפֿנט נישט דעם מאָניטאָר casinז. עס זענען נישטאָ קיין טיילן וואָס דער באַניצער קען סערוויסן אינעווייניק. לאָזט איבער אַלע סערוויסינג צו קוואַליפֿיצירטע סערוויס פּערסאָנעל.
- שטעלט דעם מאָניטאָר אויף אַ סטאַבילער, גלאַטער ייבערפלאַך כּדי צו פאַרהיטן אַז ער זאָל נישט פאַלן.
- זיכער מאַכן אַז די ווענטילאַציע אַרום דעם מאָניטאָר איז ריכטיק. בלאָקירט נישט די ווענטילאַציע עפענונגען.
- ניצט נאָר דעם מאַכט אַדאַפּטער וואָס ווערט צוגעשטעלט מיטן מאָניטאָר.
- טרענט ארויס דעם שטראָם־שטעקן פֿון דער אַוטלעט אויב דער מאָניטאָר וועט נישט געניצט ווערן פֿאַר אַ לענגערער צײַט.
- Avoid placing the monitor near heat sources such as radiators, heat registers, stoves, or other products (including ampליפיערס) וואָס פּראָדוצירן היץ.
3. פּעקל אינהאַלט
ביטע קאָנטראָלירט דעם אינהאַלט פֿון פּאַקעט צו זיכער מאַכן אַז אַלע זאַכן זענען פֿאַראַן און נישט געשעדיגט:
- Prechen 19.5-inch LED Monitor
- מאַכט אַדאַפּטער
- HDMI קאַבלע
- באַניצער מאַנואַל

Figure 2: Included accessories: Monitor, Power Adapter, HDMI Cable, and User Manual.
4. סעטאַפּ גייד
4.1 צוזאַמענשטעלן דעם שטאַנד
- נעמט פֿאָרזיכטיק אַרויס דעם מאָניטאָר און שטאַנד קאָמפּאָנענטן פֿון דער פּאַקאַדזשינג.
- Attach the stand base to the stand neck, securing it with the provided screw (if applicable).
- Align the assembled stand with the mounting slot on the back of the monitor and gently push until it clicks into place or secure with screws as per the stand design.
4.2 קאַנעקטינג די מאָניטאָר
The monitor supports both HDMI and VGA connections.
- מאַכט קשר: Connect the power adapter to the monitor's DC IN port, then plug the adapter into a power outlet.
- ווידעא קאנעקשאן (HDMI): Connect one end of the HDMI cable to the HDMI port on your computer or device, and the other end to the HDMI port on the monitor.
- ווידעא קאנעקשאן (VGA): Connect one end of the VGA cable to the VGA port on your computer or device, and the other end to the VGA port on the monitor.
- אַודיאָ קאַנעקשאַן: If using a VGA connection and external speakers, connect an audio cable from your computer's audio output to the monitor's audio input port. The built-in speakers will function automatically with HDMI.

Figure 3: Monitor back panel with input ports and control buttons.

Figure 4: Multiple connection options for the monitor.
5. אַפּערייטינג ינסטרוקטיאָנס
5.1 פּאַוערינג אויף / אַוועק
דריק דעם מאַכט קנעפּל וואָס געפינט זיך אויף דער הינטערשטער זייט פון מאָניטאָר צו עס אנצינדן אָדער אויסלעשן. די מאַכט אינדיקאַטאָר ליכט וועט זיך אָנצינדן ווען דער מאָניטאָר איז אנגעצינדן.
5.2 ניצן די OSD מעניו
The On-Screen Display (OSD) menu allows you to adjust various monitor settings. The control buttons are located on the back of the monitor (refer to Figure 3).
- מעניו: דריק צו עפענען דעם OSD מעניו.
- UP/DOWN (Volume Up/Down): ניצט צו נאַוויגירן דורך מעניו אָפּציעס אָדער סטרויערן ווערטן.
- ENTER (Switch): דריקן צו באַשטעטיקן אַן אויסוואַל אָדער אַרייַן אין אַ סובמעניו.
- EXIT (Return): דריקן צו פֿאַרלאָזן דעם איצטיקן מעניו אָדער צוריקקומען צום פֿריִערדיקן לעוועל.
5.3 אַדזשאַסטירן די דיספּליי סעטטינגס
Navigate the OSD menu to adjust settings such as:
- ברייטנאַס / קאַנטראַסט: אַדזשאַסטירן די אַלגעמיינע לומינאַנס און קאָנטראַסט פון דעם עקראַן.
- קאָליר סעטטינגס: מאָדיפֿיצירן קאָליר טעמפּעראַטור, RGB לעוועלס, אָדער אויסקלײַבן פֿאָרגעשטעלטע קאָליר מאָדעס.
- אַרייַנשרייַב אויסקלייַבן: Manually switch between HDMI and VGA input sources.
- אַספּעקט פאַרהעלטעניש: Choose between 16:9 (widescreen) or 4:3 (standard) display modes.
- שאַרפּקייט: Adjust the clarity of the image.
5.4 אַודיאָ סעטטינגס
The monitor features two built-in speakers. You can adjust the volume using the OSD menu or the dedicated volume buttons on the back of the monitor.
6. וישאַלט און קער
געהעריגע זאָרג און וישאַלט וועט פֿאַרלענגערן דאָס לעבן פֿון אײַער מאָניטאָר.
- רייניקונג די פאַרשטעלן: ווישט אָפּ דעם עקראַן מיט אַ ווייכן, לינט-פֿרײַעם שטאָף. פֿאַר שווערע פֿלעקן, דampen the cloth slightly with water or a non-ammonia, non-alcohol based screen cleaner. Never spray cleaner directly onto the screen.
- רייניקונג פון די Casing: ניצט אַ ווייכע, טרוקענע שטאָף צו ווישן דעם מאָניטאָרasinז. פֿאַרמײַדן ניצן אַברייסיוו רייניגער אָדער סאָלווענטן.
- סטאָרידזש: אויב איר לייגט אפ דעם מאָניטאָר פאר א לענגערע צייט, זאָלט איר עס אָפּשטעקן פון עלעקטריע און עס אַוועקלייגן אין א קילן, טרוקענעם אָרט, בעסער אין זיין אָריגינעלער פּאַקעט.
7. טראָובלעשאָאָטינג
If you encounter problems with your monitor, please refer to the following table for common issues and solutions.
| פּראָבלעם | מעגלעך סיבה | לייזונג |
|---|---|---|
| קיין מאַכט | שטראָם קאַבל נישט פארבונדן; שטראָם אַוטלעט דעפעקטיוו; מאָניטאָר אויסגעלאָשן. | Ensure power cable is securely connected. Try a different power outlet. Press the power button on the monitor. |
| קיין סיגנאַל | ווידעא קאַבל נישט פארבונדן; אומרעכטע אַרייַנגאַנג מקור אויסגעקליבן; קאָמפּיוטער גיט נישט ארויס סיגנאַל. | Check HDMI/VGA cable connection. Select the correct input source via the OSD menu. Ensure your computer is on and outputting video. |
| קיין געזונט פון געבויט-אין ספּיקערז | Volume too low/muted; Incorrect audio output selected on PC; Audio cable not connected (for VGA). | Increase monitor volume. Check PC audio settings to ensure monitor is selected as output. For VGA, ensure audio cable is connected. |
| בילד איז פארשוואומען אדער פארדרייט | פאַלשע רעזאָלוציע; קאַבל פּראָבלעם. | Set your computer's display resolution to 1600x900. Try a different video cable. |
8. פּראָדוקט ספּעסאַפאַקיישאַנז
| שטריך | באַשרייַבונג |
|---|---|
| סאָרט | פּרעטשען |
| פאַרשטעלן גרייס | 19.5 אינטשעס |
| ווייַז טיפּ | געפירט |
| מאַקסימום ווייַז האַכלאָטע | 1600 X 900 |
| דערפרישן קורס | 60 הז |
| ענטפער צייט | 5 מיליסעקאַנדז |
| אַספּעקט פאַרהעלטעניש | 16:9 |
| קאַנעקטיוויטי טעכנאָלאָגיע | הדמי, ווגאַ |
| ספּעציעלע פֿעיִקייטן | געבויט-אין ספּיקערז |
| VESA בארג קאַמפּאַטאַבילאַטי | 100 רענטגענ 100 מם |
9. וועסאַ מאָנטירונג
The Prechen monitor supports VESA standard mounting (100 x 100 mm), allowing you to mount it on a wall or an articulating arm for flexible viewing options. This feature makes the monitor lightweight and easy to install in various setups.
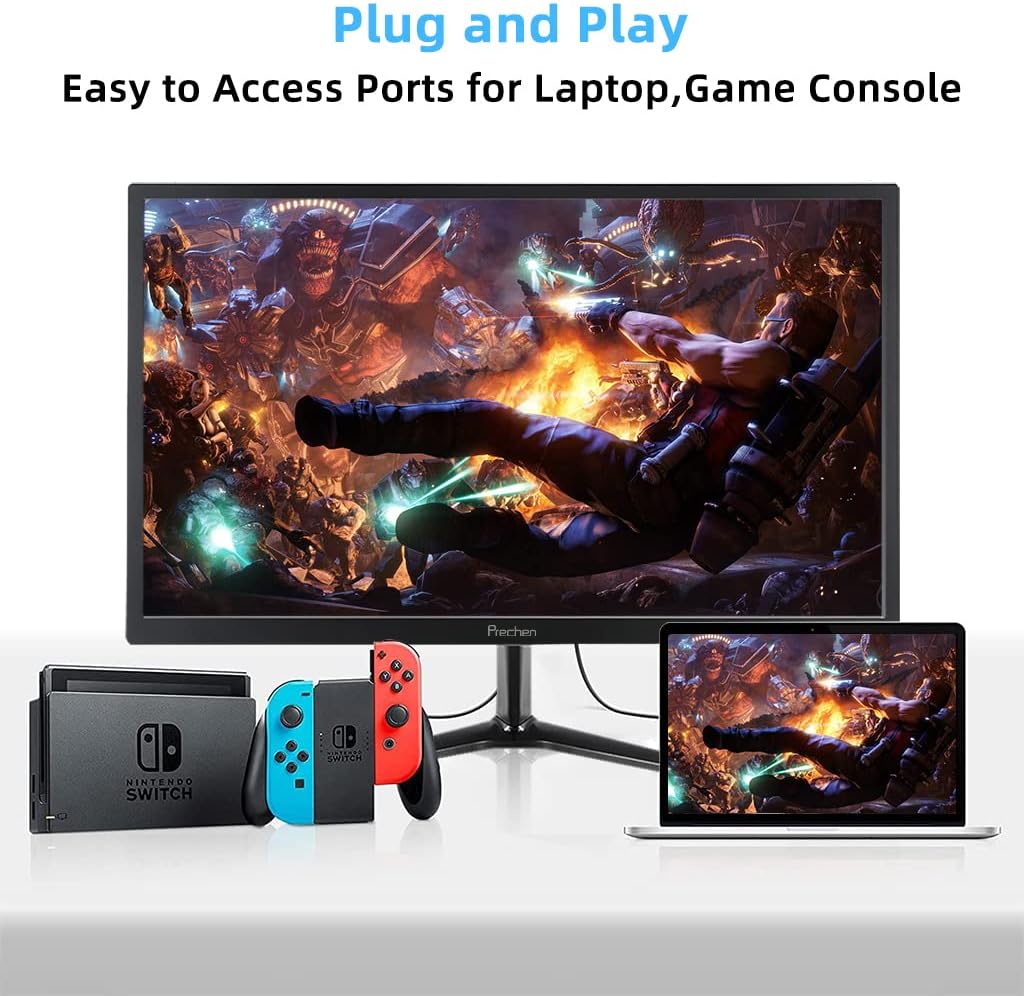
Figure 5: VESA mount dimensions on the monitor back.

פיגורע 6: עקסample of VESA mounting with an articulating arm.
10. וואָראַנטי און שטיצן
Each Prechen product is covered by a one-year warranty from the date of purchase, which includes a one-month refund and exchange policy. This warranty covers manufacturing defects and issues arising from normal use.
For any questions, technical support, or warranty claims, please contact Prechen customer service. Please have your product model and purchase information ready when contacting support.
Contact information for customer service can typically be found on the product packaging or the official Prechen webפּלאַץ.
Ask a question about this manual
Ask about setup, troubleshooting, compatibility, parts, safety, or missing instructions. Manuals+ will review the question and use this page’s manual context to help answer it.