
1. הקדמה
Thank you for choosing the Yard Force EasyMow 260B Robotic Lawn Mower. This manual provides essential information for the safe operation, installation, maintenance, and troubleshooting of your new robotic lawn mower. Please read this manual thoroughly before first use and keep it for future reference.
2. זיכערקייַט אינסטרוקציעס
Always observe basic safety precautions to reduce the risk of fire, electric shock, and personal injury. This robotic lawn mower is designed for cutting grass only. Any other use is considered contrary to the intended purpose.
אַלגעמיינע סאַפעטי
- לייענען אַלע ינסטראַקשאַנז קערפאַלי איידער אַפּערייטינג די אַפּפּליאַנסע.
- Keep children and pets away from the working area of the robotic mower.
- Do not operate the mower if the blades are damaged or worn.
- Ensure the boundary wire is correctly installed and secured to prevent tripping hazards.
- Never lift the mower while it is operating. Always press the STOP button before handling.
- דיסקאַנעקט די מאַכט צושטעלן איידער רייניקונג אָדער דורכפירן וישאַלט.
עלעקטריקאַל סאַפעטי
- Use only the original power adapter and charging station provided with the mower.
- Do not expose the charging station or power adapter to rain or wet conditions.
- Regularly inspect the power cable for damage. If damaged, it must be replaced by a qualified technician.
3. פּעקל אינהאַלט
פֿאָרזיכטיק אויספּאַקן די קעסטל און זיכער מאַכן אַז אַלע זאַכן זענען דאָרט און נישט געשעדיגט. אויב עפּעס פֿעלט אָדער איז געשעדיגט, קאָנטאַקטירט אייער הענדלער.
- 1x Yard Force EasyMow 260B Robotic Lawn Mower
- 1x טשאַרדזשינג סטאַנציע
- 80m Boundary Wire
- 100x Fixing Pegs
- 9 ם מאַכט קאַבלע
- 3x Replacement Blades
- 3x Replacement Screws
- 3x Cable Connectors
- 1x Spacer Ruler
- 1x באַניצער מאַנואַל
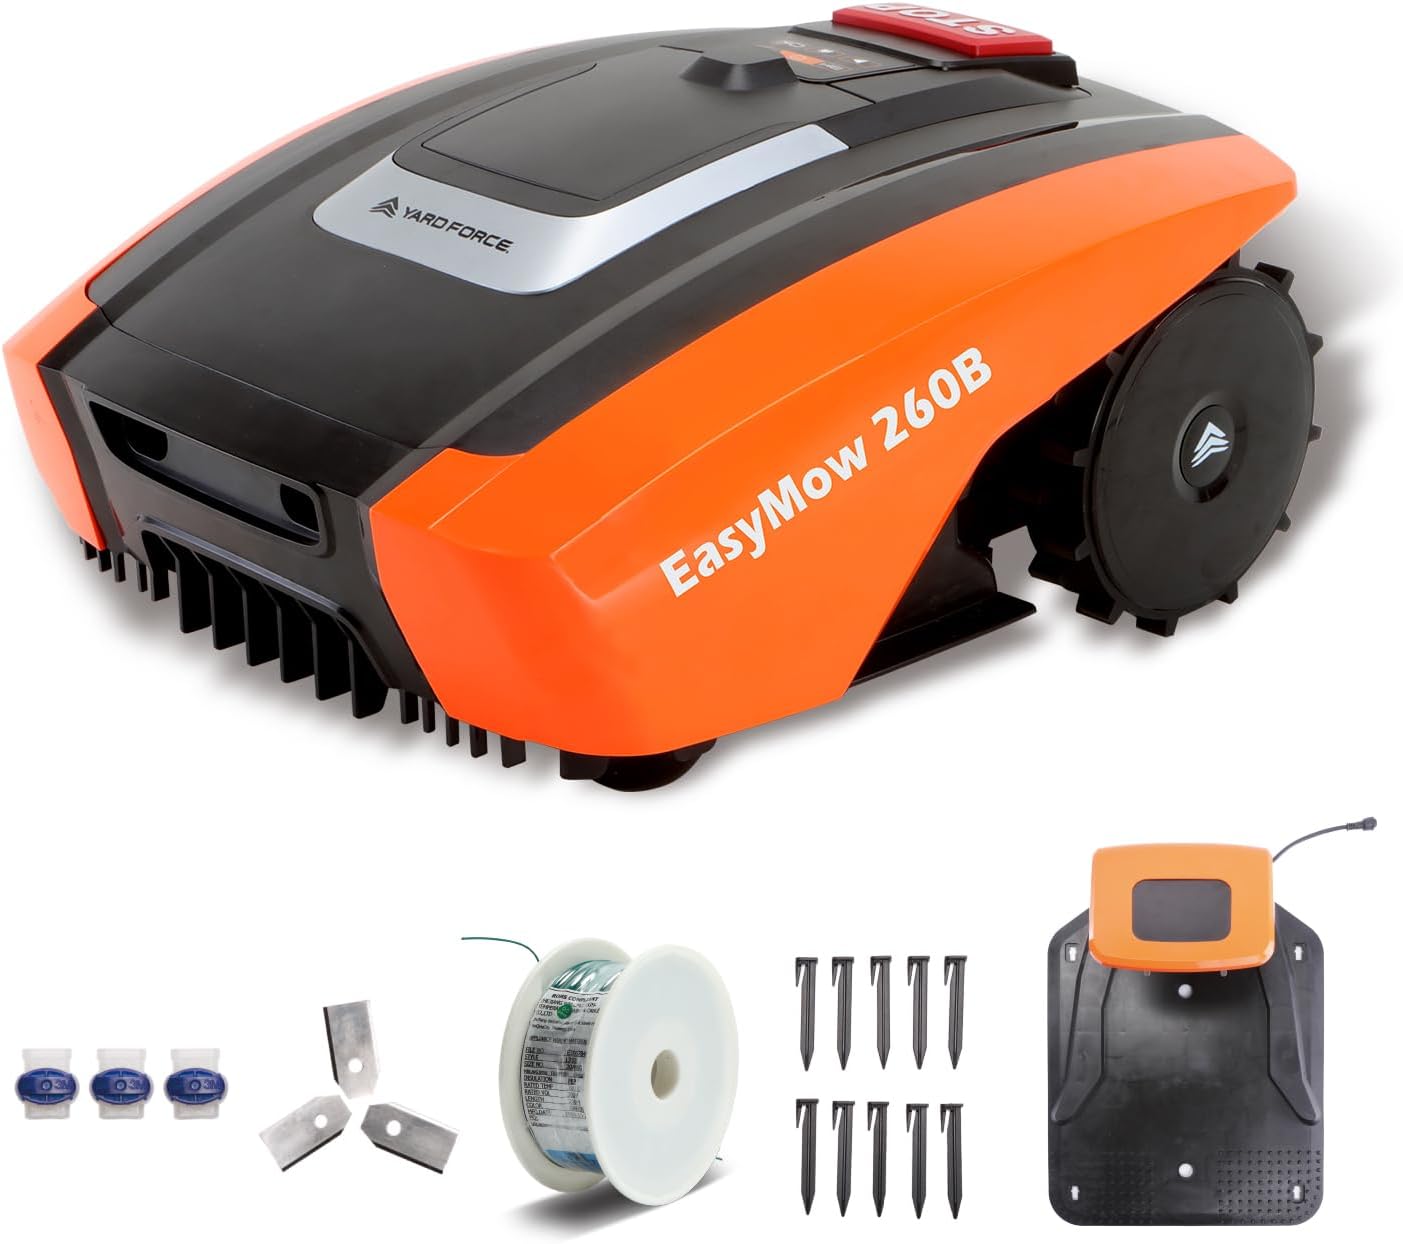
Image: The Yard Force EasyMow 260B robotic lawn mower shown with its charging station, boundary wire, fixing pegs, replacement blades, and cable connectors.
4. פּראָדוקט איבערview
Familiarize yourself with the main components of your robotic lawn mower.
Mower Components
- STOP Button: Immediately stops the mower and cutting blades.
- Control Panel: For manual operation and settings.
- Cutting Height Adjustment Dial: To set the desired grass cutting height.
- Charging Contacts: For connecting with the charging station.
- Blades: Located underneath the mower for cutting grass.
- Drive Wheels: Provide traction for movement.
- Front Wheel: Steering and balance.
טשאַרדזשינג סטאַנציע קאַמפּאָונאַנץ
- Charging Pins: Connect with the mower's charging contacts.
- Boundary Wire Terminals: For connecting the boundary wire.
- Power Input: For connecting the power adapter.
- LED Indicator: Shows the status of the charging station.
5. סעטאַפּ
5.1 פּלאַצירונג פון די טשאַרדזשינג סטאַנציע
Choose a flat, level area for the charging station, preferably in the shade and close to an outdoor power outlet. Ensure there is enough clear space around the station for the mower to dock easily (at least 1.5m in front and 0.5m on each side).
5.2 גרענעץ דראָט ינסטאַלירונג
The boundary wire defines the mowing area for your robot. Lay the wire around the perimeter of your lawn, securing it with the provided fixing pegs. Use the spacer ruler to maintain the correct distance from obstacles like walls, fences, and flowerbeds. Ensure the wire forms a continuous loop and is connected securely to the charging station terminals.

Image: The Yard Force EasyMow 260B robotic lawn mower is shown operating on a well-maintained lawn, demonstrating its ability to cover the designated area.
5.3 ערשט טשאַרדזשינג
Once the charging station is powered and the boundary wire is installed, place the robotic mower manually onto the charging station. Ensure the charging contacts align. The mower will begin charging. Allow it to fully charge before its first operation, which typically takes a few hours.
5.4 Bluetooth and App Connection
The EasyMow 260B can be controlled via Bluetooth using the dedicated Yard Force app. Download the app from your smartphone's app store. Follow the in-app instructions to pair your mower. This allows for easy scheduling, cutting height adjustment, and monitoring of the mower's status.

Image: The Yard Force EasyMow 260B robotic lawn mower is displayed alongside a smartphone showing the intuitive mobile application interface, highlighting its Bluetooth control capabilities.
6. אָפּערייטינג
6.1 סטאַרטינג און סטאָפּפּינג
- צו אָנהייבן: Ensure the mower is within the boundary wire. Press the START button on the control panel or initiate mowing via the app.
- אויף הערן: Press the large red STOP button on top of the mower. The mower will immediately cease operation and the blades will stop rotating.

Image: A hand is shown pressing the prominent red STOP button on the top of the Yard Force EasyMow 260B robotic lawn mower, indicating an immediate halt to operation for safety.
6.2 Mowing Schedule
Use the Yard Force app to set a customized mowing schedule. You can define specific days and times for the mower to operate, ensuring your lawn is always neatly trimmed without manual intervention.
6.3 Cutting Height Adjustment
The cutting height can be adjusted between 20mm and 55mm in 3 levels. Rotate the cutting height adjustment dial located on the top of the mower to your desired setting. For best results, avoid cutting more than one-third of the grass blade length at a time.
6.4 Edge Cutting Function
The EasyMow 260B features an edge cutting function to ensure clean and tidy lawn borders. The mower is designed to cut close to the boundary wire, minimizing the need for manual trimming.

Image: The Yard Force EasyMow 260B robotic lawn mower is shown with graphical overlays highlighting its key specifications: 20V battery, 2Ah capacity, 30% slope capability, and suitability for areas up to 260m².
7. וישאַלט
רעגולערע אויפהאלטונג גאראנטירט אפטימאלע פאָרשטעלונג און פארלענגערט די לעבנס-צייט פון אייער ראָבאָטישן גראָז-שניידער.
7.1 בלייד פאַרבייַט
The blades should be replaced regularly, typically every 1-3 months depending on usage and grass type. Always wear protective gloves when handling blades. Turn off the mower and disconnect it from the charging station before replacing blades. Use the provided replacement blades and screws.
7.2 רייניקונג
- Clean the exterior of the mower with a damp cloth. Do not use high-pressure washers or running water.
- Regularly clean grass clippings from the underside of the mower, especially around the blades and wheels. Use a brush or scraper.
- Keep the charging contacts on both the mower and the charging station clean to ensure proper charging.
7.3 באַטערי קער
The mower is equipped with a 20V / 2.0 Ah lithium-ion battery. For optimal battery life:
- Store the mower in a dry, frost-free environment during winter months.
- טשאַרדזש די באַטאַרייע גאָר איידער סטאָרינג פֿאַר עקסטענדעד פּיריאַדז.
- Recharge the battery every 3-4 months during storage to prevent deep discharge.
8. טראָובלעשאָאָטינג
די סעקציע גיט לייזונגען צו געוויינטלעכע פראבלעמען וואָס איר קענט באַגעגענען.
| פּראָבלעם | מעגלעך סיבה | לייזונג |
|---|---|---|
| מאָוער הייבט נישט | Battery low; STOP button pressed; Boundary wire issue; Safety sensor triggered. | Charge battery; Release STOP button; Check boundary wire connection/integrity; Clear obstacles. |
| Mower stays in charging station | Scheduled mowing time not reached; Battery not fully charged; Charging contacts dirty. | Check schedule; Allow full charge; Clean charging contacts. |
| אומגלייכע שנייד רעזולטאַט | Blades dull or damaged; Cutting height too low for grass length. | Replace blades; Adjust cutting height. |
| שניידער בלייבט אָפט שטעקן | Obstacles in mowing area; Uneven terrain; Boundary wire too close to obstacles. | Remove obstacles; Adjust boundary wire placement; Level uneven areas if possible. |
9. ספּעסאַפאַקיישאַנז
| שטריך | באַשרייַבונג |
|---|---|
| מאָדעל נומער | EasyMow 260B |
| באַטערי טיפּ | ליטהיום-יאָן |
| באַטערי וואָלtagE / קאַפּאַציטעט | 20 וו / 2.0 אַה |
| קאַטינג ברייט | 160 מם |
| קאַטינג הייך | 20 mm - 55 mm (3 levels) |
| מאַקס. סלאָופּ קייפּאַביליטי | 30% |
| רעקאָמענדירטע גראָז־שטח | אַרויף צו 260 מ² |
| קאָנטראָל מעטאָד | Bluetooth and App Control |
| פּראָדוקט דימענשאַנז (L x W x H) | 44 X 38.4 X 20.6 סענטימעטער |
| וואָג | 8.1 קג |
| מאַטעריאַל | פּלאַסטיק |
10. וואָראַנטי און שטיצן
Yard Force products are manufactured to high-quality standards. For warranty information, technical support, or spare parts, please refer to the warranty card included with your product or visit the official Yard Force webזייטל. האַלט דיין קויפן באַווייַז פֿאַר וואָראַנטי קליימז.