
1. פּראָדוקט איבערview
The Vividia TVS-507 Telescopic Pole Video Inspection Camera is designed for detailed visual inspections in hard-to-reach areas. It features a strong, extendable carbon fiber pole, a high-resolution 5MP camera, and a video viewing system with DVR recording capabilities. This system is ideal for various applications including roof and building inspections, gutter cleaning, and examining areas inaccessible by direct view.
שליסל פֿעיִקייטן אַרייַננעמען:
- Flexible gooseneck camera head with a Φ18mm diameter, extendable up to 5 meters (16 feet).
- 1/3 inch 5MP resolution sensor with a 90° field of view.
- 12 high-intensity white LED lights with adjustable brightness, providing visibility over 5 meters in total darkness.
- 7-inch LCD touchscreen monitor with photo and video recording functions.
- Control box with DVR controls, SD card slot (max 32GB), LED brightness adjustment, and AV/photo selection.
- High-capacity 7500mAh lithium battery for over 5 hours of continuous operation.

Figure 1: The Vividia TVS-507 Telescopic Pole Video Inspection Camera Borescope System, showing the extended pole, monitor, and camera head.
2. סיסטעם קאַמפּאָונאַנץ
The Vividia TVS-507 system includes the following main components:
- טעלאַסקאָפּיק פלאָקן: Extendable carbon fiber pole for reaching elevated or distant areas.
- Waterproof Camera Head: High-resolution 5MP camera with 12 adjustable LED lights, mounted on a flexible gooseneck.
- 7-אינטש LCD טאָוטשסקרין מאָניטאָר: פֿאַר רעאַל-צייט viewאויפֿנעמען, אויפֿנעמען און ווידערשפּילן.
- קאָנטראָל קעסטל: Integrated with the monitor, featuring DVR controls, SD card slot, and power management.
- קריקאָנלאָדלעך ליטהיום באַטערי: Provides portable power for extended operation.
- Sturdy Carry Case: For safe transport and storage of the entire system.
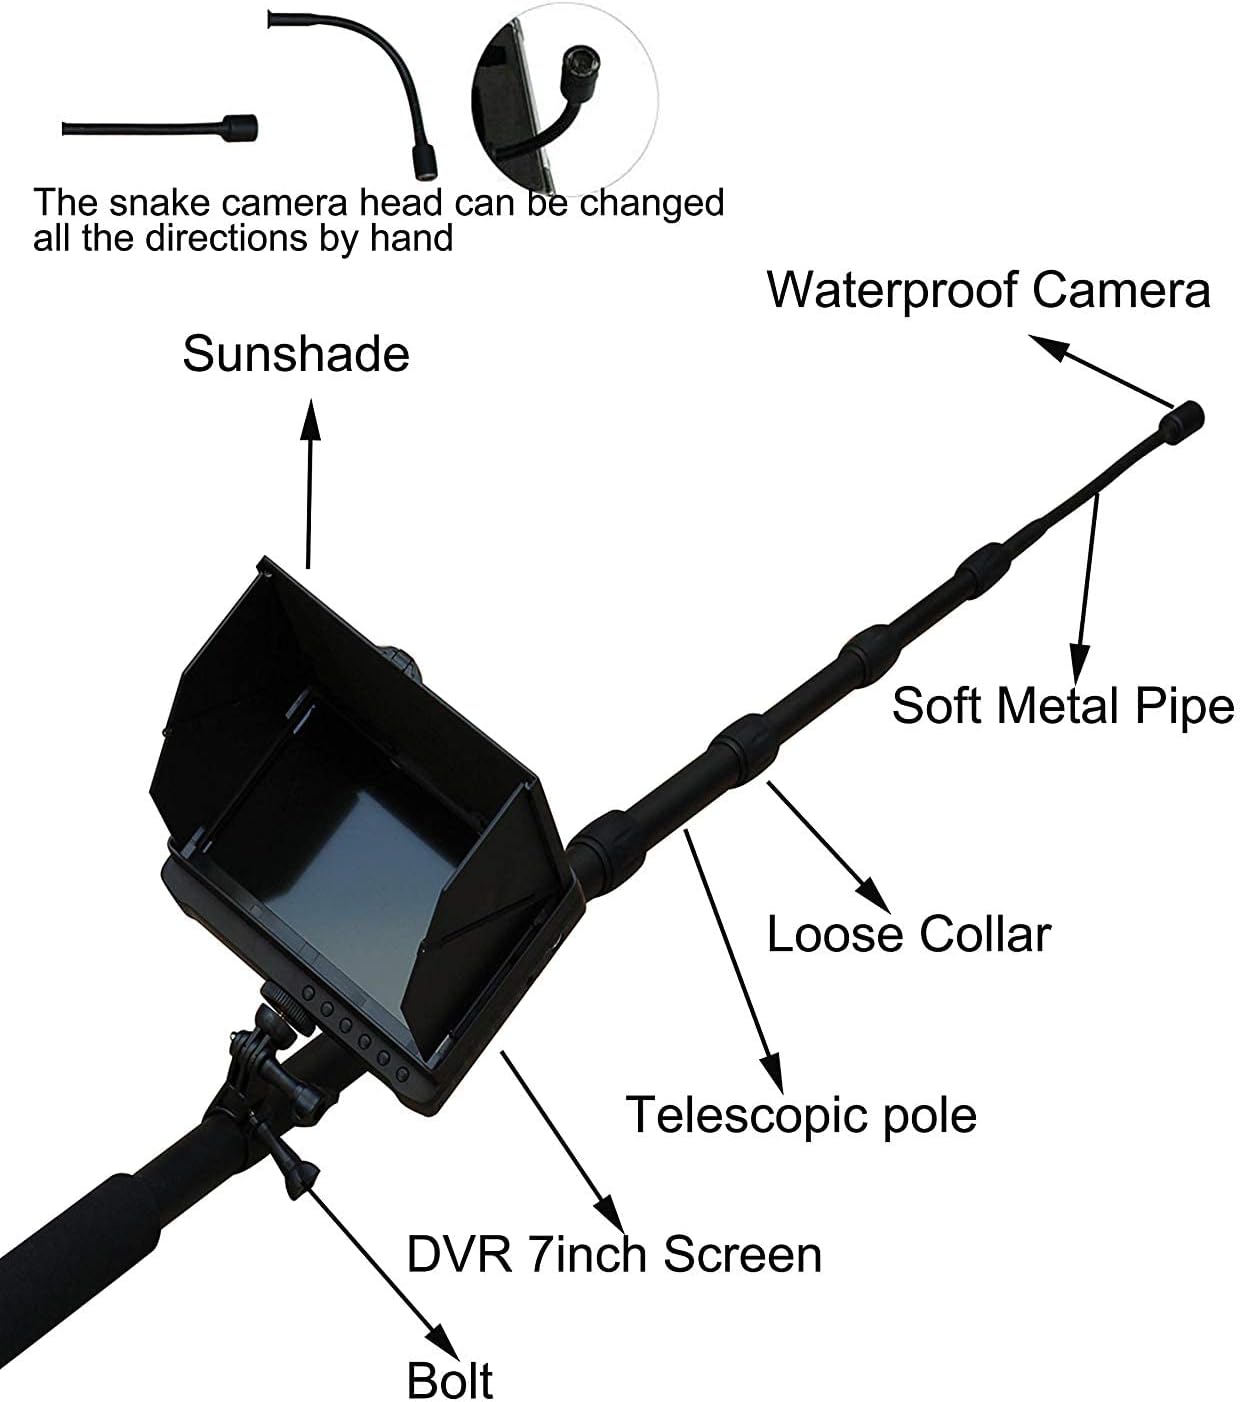
Figure 2: Main components of the Vividia TVS-507 system, illustrating the sunshade, camera, pole sections, and monitor.

Figure 3: Detailed structural diagram of the inspection system, highlighting the flexible camera and audio sensor.
3. סעטאַפּ גייד
3.1 אויספּאַקן און ערשטע דורכקוק
Carefully remove all components from the sturdy carry case. Inspect each part for any signs of damage. Ensure all listed components are present.
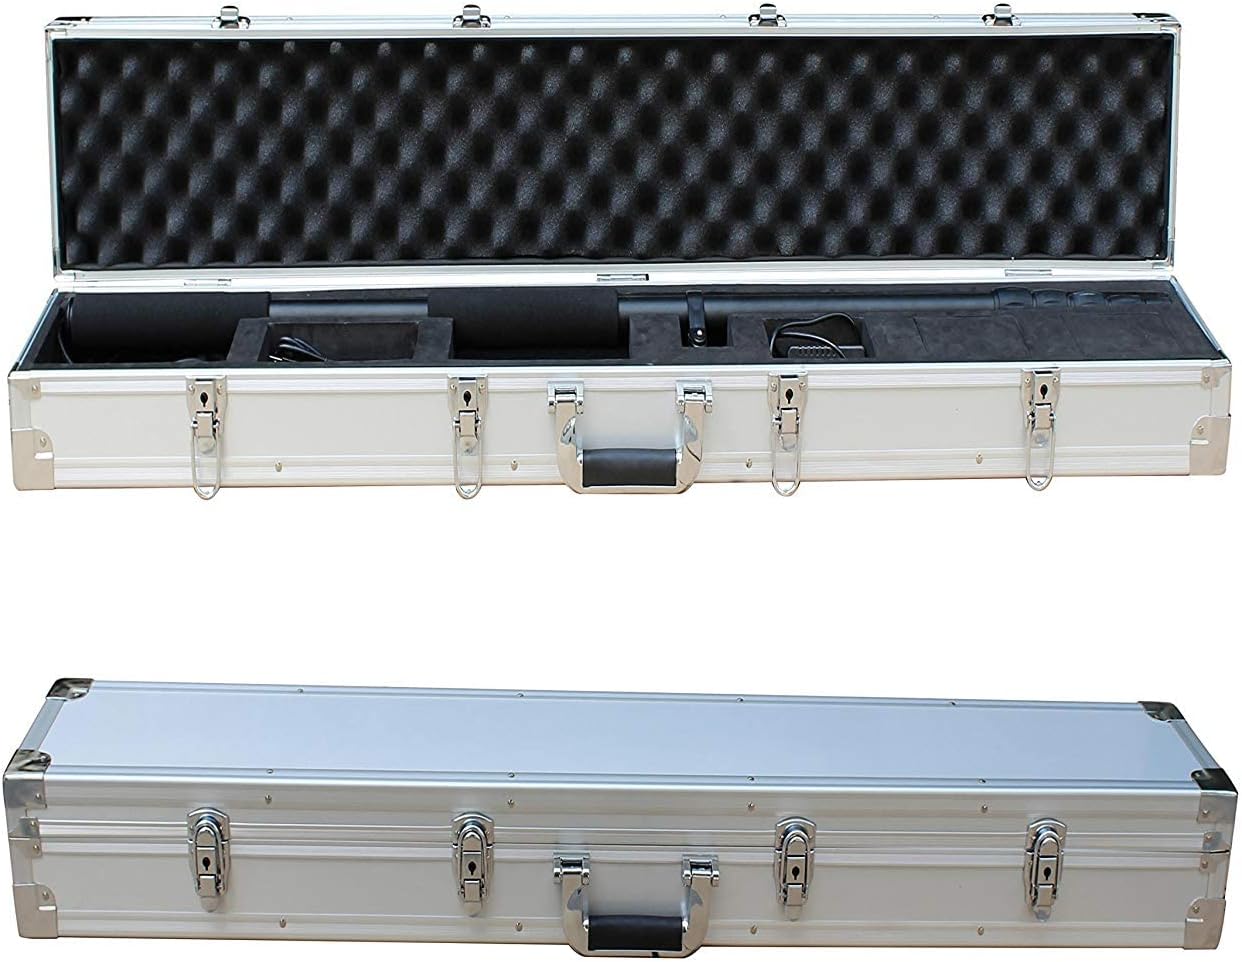
Figure 4: The system components neatly arranged within the protective carry case.
3.2 Assembling the Pole and Camera
- Extend the telescopic pole sections by twisting and pulling them to the desired length. Secure each section by twisting in the opposite direction.
- Attach the flexible gooseneck camera head to the top of the pole. Ensure it is securely fastened.
- Connect the camera cable to the designated port on the control box/monitor unit.
3.3 Attaching the Monitor and Control Box
- Mount the 7-inch LCD touchscreen monitor onto the pole using the provided bracket. Adjust the viewינג ווינקל פֿאַר אָפּטימאַל וויזאַביליטי.
- Ensure all connections between the monitor, control box, and pole are firm.

Figure 5: The 7-inch LCD monitor and control panel, detailing input/output ports and control buttons.
3.4 Inserting the SD Card and Charging the Battery
- Locate the SD card slot on the control box. Insert a compatible SD card (up to 32GB) for recording photos and videos.
- Connect the power adapter to the control box and a power outlet to fully charge the lithium battery before first use. The charging indicator will show the battery status.
For a visual guide on assembly and basic operation, please refer to the video below. Note that this video features the TVS-500 model, but the general assembly and operational principles are similar.
ווידעא 1: איבערview of the Vividia Telescopic Pole Inspection Camera (TVS-500 model shown), demonstrating its features and applications. This video provides a general understanding of the system's capabilities.
4. אַפּערייטינג ינסטרוקטיאָנס
4.1 פּאַוערינג אויף / אַוועק
To power on the system, press and hold the 'Power ON/OFF' button on the control box until the LCD screen illuminates. To power off, press and hold the same button until the screen shuts down.
4.2 Adjusting Camera and Lighting
- Camera Direction: The flexible gooseneck camera head can be manually bent and adjusted to the desired viewינג ווינקל.
- LED ברייטנאַס: Use the 'LED brightness adjusting knob' on the control box to increase or decrease the intensity of the camera's LED lights. This helps optimize visibility in varying light conditions.
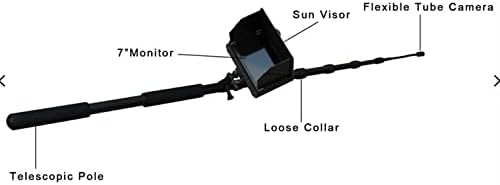
Figure 6: The flexible camera head, which can be adjusted manually for optimal viewing.
4.3 אויפנעמען ווידעא און פאָטאָס
The system supports both video recording and still image capture. Ensure an SD card is inserted before recording.
- באַשטימען מאָדעס: Use the 'AV&photo selection' button to toggle between video and photo modes.
- רעקאָרדינג ווידעא: In video mode, press the 'Record' button to start recording. Press it again to stop.
- גענומען פאָטאָס: In photo mode, press the 'Photo' button to capture a still image.
- מיקראָפאָן קאָנטראָל: Use the 'On/off MIC control button' to enable or disable audio recording.
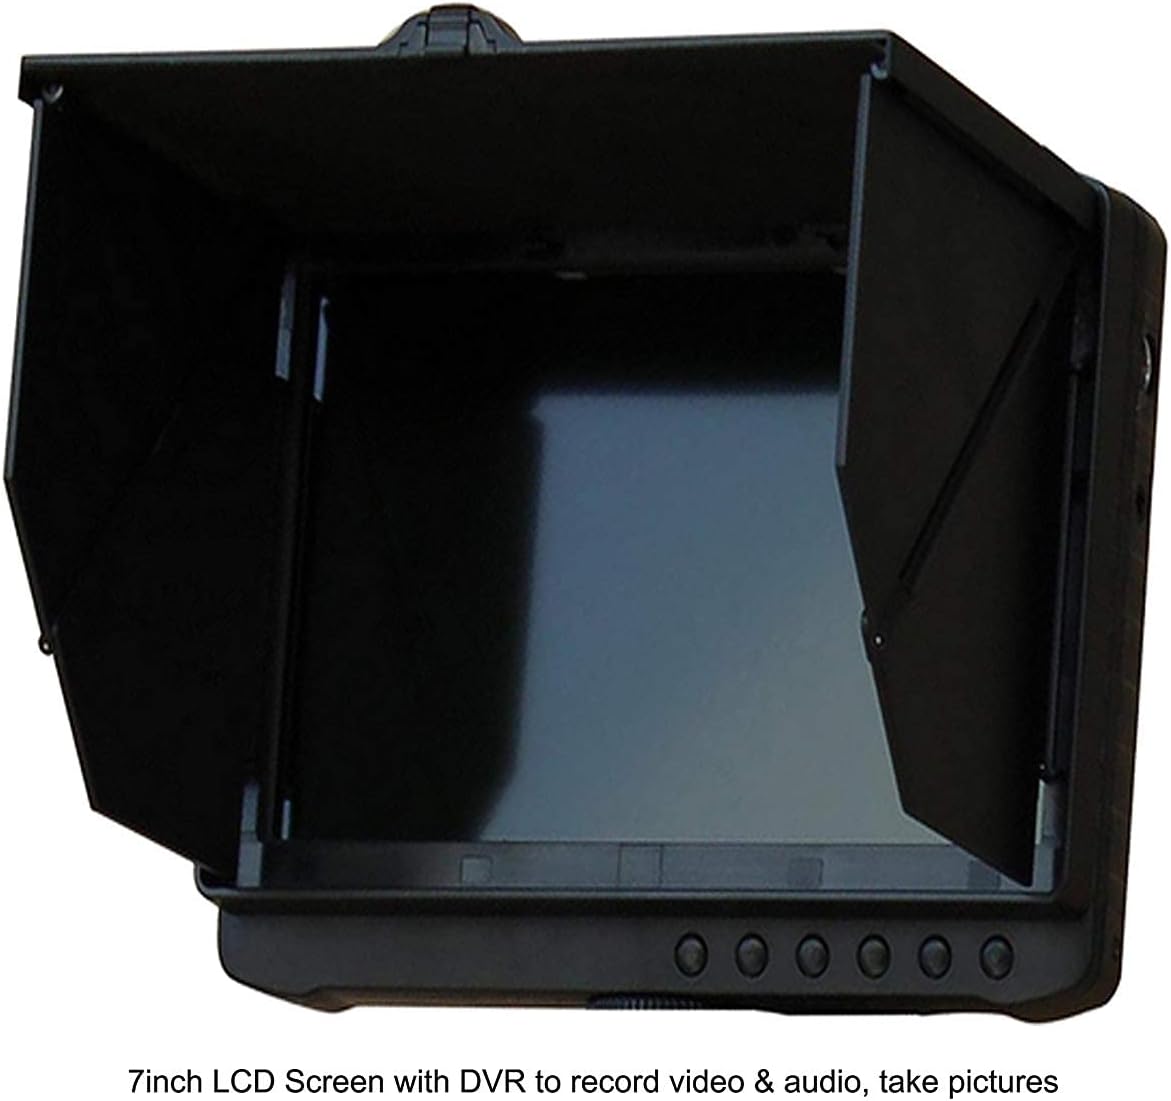
Figure 7: The 7-inch LCD screen showing the live camera feed and recording status.
4.4 ווידערשפּיל און דאַטן טראַנספער
- On-Device Playback: Use the 'Play' button and navigation controls on the control box to review recorded videos and photos directly on the monitor.
- טראַנספערינג Files: Remove the SD card from the control box and insert it into a computer or compatible device to transfer and view your recorded media.
5. וישאַלט
5.1 רייניקונג
- אַפּאַראַט קאָפּ: Gently wipe the camera lens with a soft, lint-free cloth. For stubborn dirt, use a small amount of lens cleaning solution. Ensure the camera head is dry before storage.
- Monitor and Control Box: Use a dry, soft cloth to clean the monitor screen and control box. Avoid abrasive cleaners or excessive moisture.
- פּאָול: Wipe down the telescopic pole with a damp שטאָף צו באַזייַטיקן שמוץ און דעבריס. טריקנט גוט אויס.
5.2 סטאָרידזש
When not in use, store the Vividia TVS-507 system in its original sturdy carry case in a cool, dry place, away from direct sunlight and extreme temperatures. Ensure the pole is fully retracted and all components are securely placed to prevent damage.
5.3 באַטערי קער
To prolong battery life, fully charge the battery before long-term storage and recharge it every 3-6 months if not in regular use. Avoid completely draining the battery frequently.
6. טראָובלעשאָאָטינג
| פּראָבלעם | מעגלעך סיבה | לייזונג |
|---|---|---|
| קיין בילד אויף פאַרשטעלן | Camera cable loose; Battery low; System not powered on. | Check camera cable connection; Charge battery; Press and hold power button to turn on. |
| קען נישט אויפנעמען ווידעא/פאָטאָס | No SD card inserted; SD card full; SD card corrupted. | אַרײַנשטעלן SD קאַרטל; אויסמעקן אַלטע files or use a new SD card; Format SD card (this will erase all data). |
| געפירט לייץ נישט ארבעטן | LED brightness knob set to minimum; Faulty connection. | Adjust LED brightness knob; Check camera head connection. |
| נעבעך בילד קוואַליטעט | Dirty camera lens; Insufficient lighting; Camera too far from object. | Clean camera lens; Increase LED brightness; Move camera closer to the inspection area. |
7. ספּעסאַפאַקיישאַנז
| שטריך | דעטאַל |
|---|---|
| מאָדעל נומער | VV-TVS-507DVR |
| אַפּאַראַט קאָפּ דיאַמעטער | Φ18מם |
| Pole Length (Min-Max) | 1.1m (3.7 ft) - 5m (16 ft) |
| סענסאָר גרייס | 1/3 אינטש |
| אַפּאַראַט האַכלאָטע | 5MP |
| פעלד פון View | 90° |
| געפירט ליגהץ | 12 high-intensity white LEDs (adjustable) |
| מאָניטאָר גרייס | 7-אינטש LCD טאָוטשסקרין |
| רעקאָרדינג מידיאַ | SD Card (max 32GB) |
| באַטאַרייע קאַפּאַציטעט | 7500 מאַה ליטהיום באַטערי |
| אַרבעט שעה | בעערעך 5 שעה |
| Waterproof Rating (Camera) | IP68 |
| ווידעא קאַפּטורע רעסאָלוטיאָן | 720 פּ |
| שיסערייַ מאָדעס | בילד |
| טיפּ פון ויסשטעלן קאָנטראָל | מאַנואַל |
8. וואָראַנטי און שטיצן
For warranty information, technical support, or service inquiries, please contact Vividia customer service. Details can typically be found on the product packaging or the official Vividia webפּלאַץ.
איר קענט אויך באַזוכן דעם באַאַמטער VIVIDIA Store on Amazon פֿאַר מער פּראָדוקט אינפֿאָרמאַציע און שטיצע רעסורסן.