הקדמה
The Keychron Q2 is a fully customizable wired mechanical keyboard featuring a compact 65% layout. Constructed with a solid full aluminum frame, the Q2 is designed for easy assembly and offers a premium typing experience. It supports full QMK and VIA programming for extensive customization and features hot-swappable switches for personalized tactile feedback.

Image: The Keychron Q2 Wired Custom Mechanical Keyboard, showcasing its compact 65% layout and blue color scheme.
סעטאַפּ גייד
1. פּעקל אינהאַלט
איידער איר הייבט אן, זיכערט זיך אז אלע קאמפאנענטן זענען פאראן:
- Keychron Q2 Keyboard Kit (Aluminum Case, PCB, Steel Plate, Sound Absorbing Foam, Case Foam, Gaskets)
- וסב טיפּע- C צו טיפּ- C קאַבלע
- וסב טיפּ-א צו טיפּ-C אַדאַפּטער
- באַשטימען פּולער
- קייקאַפּ פּולער
- שרויפנ - ציער
- העקס דורכפֿאַל
- Stabilizers (4 sets)
Note: All tools are typically located at the bottom of the packaging.

Image: Diagram illustrating the contents of the Keychron Q2 package, including the keyboard, cables, and tools.
2. קאַנעקטינג די קלאַוויאַטור
- Locate the USB Type-C port on the back of the Keychron Q2 keyboard.
- Connect one end of the provided USB Type-C to Type-C cable to the keyboard.
- Connect the other end of the cable to your computer's USB Type-C port. If your computer only has USB Type-A ports, use the included USB Type-A to Type-C adapter.
- Ensure the operating system switch (located on the back edge of the keyboard) is set to the correct position for your system (Mac or Windows).
- די קלאַוויאַטור וועט אויטאָמאַטיש דערקענט ווערן דורך אייער אָפּערייטינג סיסטעם.

בילד: א נאָענטע בילד view of the Keychron Q2 keyboard with a USB-C cable connected, showing the Mac/Win switch.
אַפּערייטינג ינסטראַקשאַנז
1. QMK/VIA קאַסטאַמייזיישאַן
The Keychron Q2 supports full QMK and VIA programming, allowing you to remap keys, create macros, and customize lighting effects. To use VIA software:
- Download the VIA software from the official Keychron webפּלאַץ (keychron.com/pages/qmk-via).
- Connect your Q2 keyboard to your computer via the USB cable.
- Launch the VIA software. The software should automatically detect your Q2 keyboard. If not, you may need to import the Q2 keymap JSON file, also available on the Keychron webפּלאַץ.
- Use the graphical interface to drag and drop functions, assign macros, and configure lighting for each key. Changes are applied in real-time.

Image: Screenshot of the VIA software interface, demonstrating how to remap keys on the Keychron Q2 keyboard.
2. הייס-סוואַפּאַבל סוויטשיז
The Q2's PCB supports both 3-pin and 5-pin MX style mechanical switches, allowing for easy switch replacement without soldering.
- ניצנדיק דעם צוגעשטעלטן קלאַוויאַטור-אויסציער, נעמט פֿאָרזיכטיק אַראָפּ דעם קלאַוויאַטור פֿון דעם סוויטש וואָס איר ווילט פֿאַרבייטן.
- Use the provided switch puller to gently grip the top and bottom clips of the switch. Pull the switch straight up to remove it from the PCB.
- גלייכט אויס די פּינס פון דעם נייעם סוויטש מיט די לעכער אויף דער פּקב. מאַכט זיכער אַז די פּינס זענען גלייך כּדי נישט צו בייגן זיך.
- דריק דעם נייעם סוויטש פעסט אין פלאץ ביז עס קליקט.
- לייג צוריק צו דעם שליסל.

בילד: א נאָענטע בילד view of the Keychron Q2's PCB with several switches removed, demonstrating the hot-swappable feature.
3. Keycaps and RGB Lighting
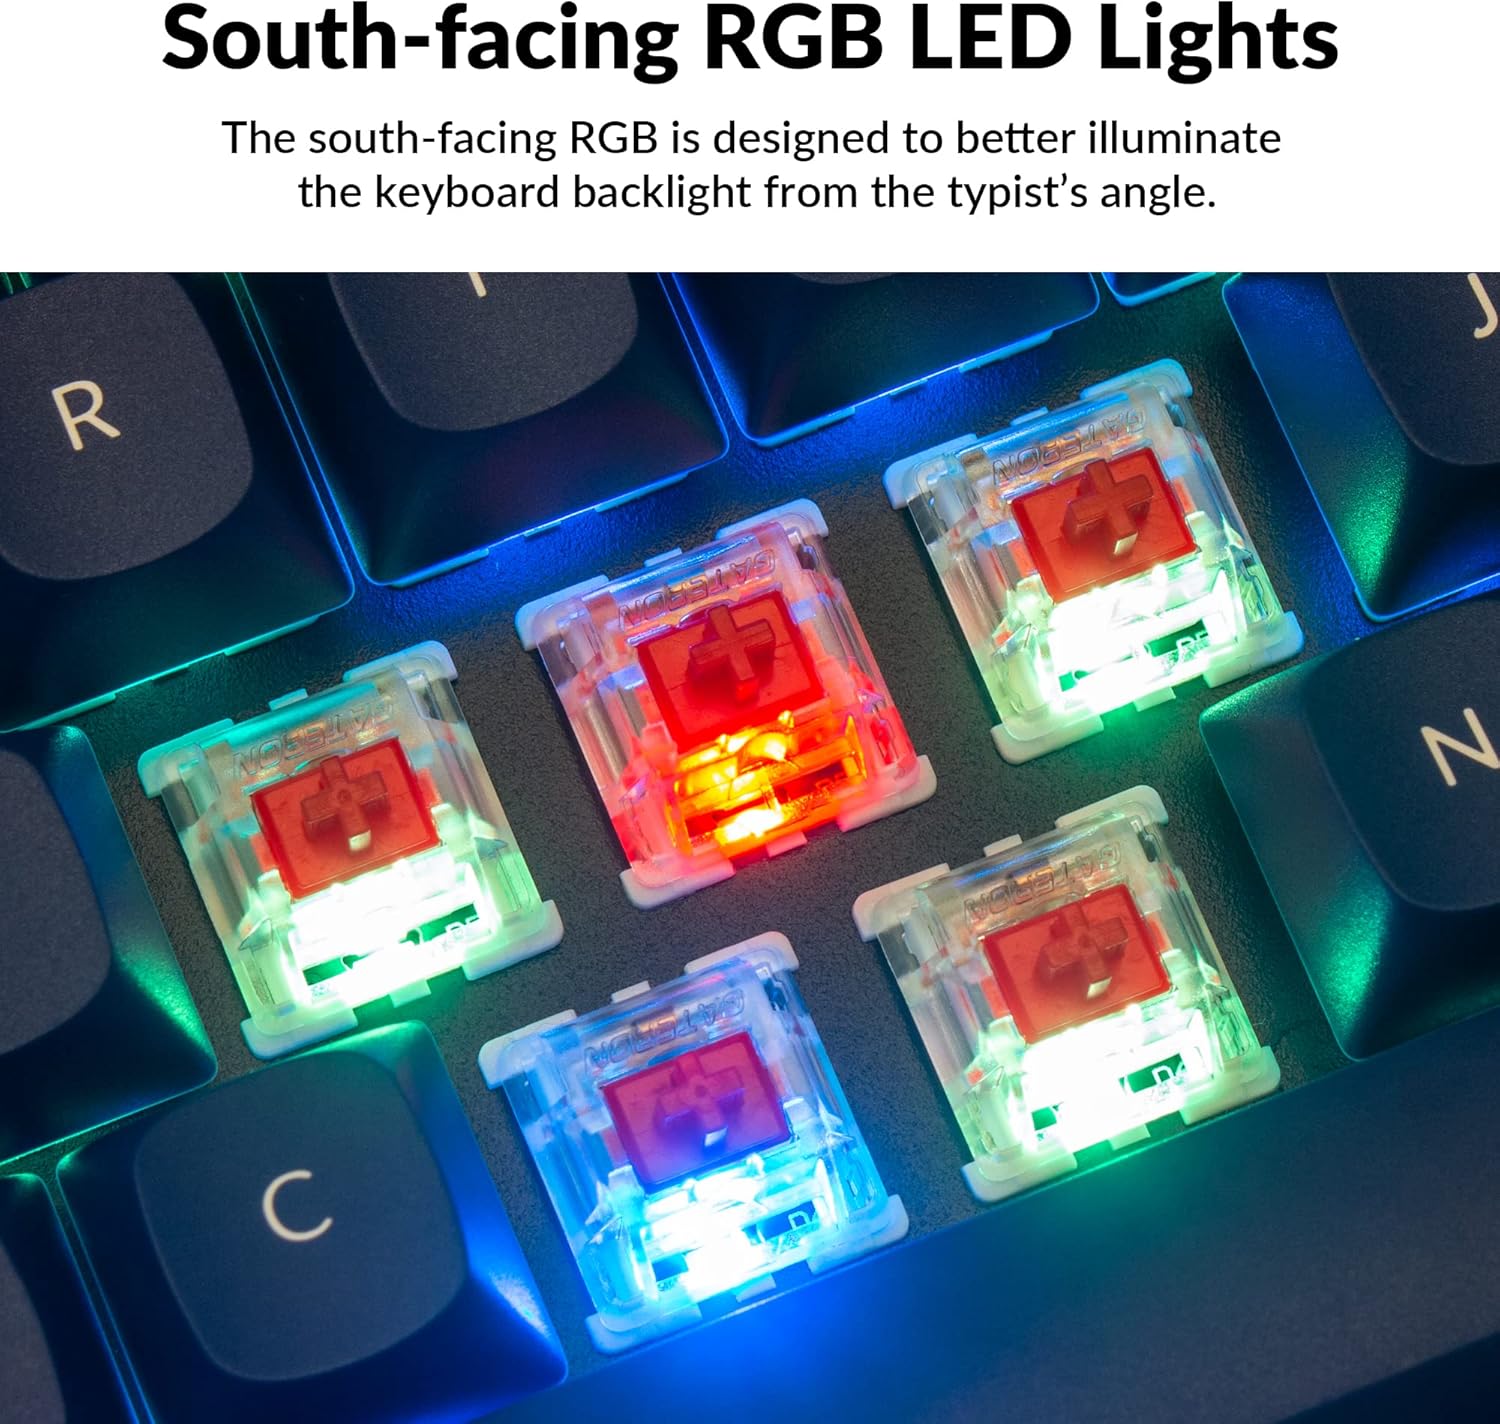
The Q2 comes with premium non-shine-through PBT keycaps, known for their durability and oil resistance. The keyboard features south-facing RGB LEDs, designed to provide better illumination of the backlight from the typist's perspective.
בילד: א דעטאַלירטע view of the Keychron Q2's double-shot PBT keycaps, highlighting their texture and legends.

Image: A close-up of the Keychron Q2's south-facing RGB LEDs illuminating the switches from below.
וישאַלט
1. רייניקן די קלאַוויאַטור
רעגולערע רייניקונג העלפט אויפהאלטן די קלאַוויאַטור'ס פאָרשטעלונג און אויסזען.
- באַזייַטיקונג פון שטויב: ניצט אַ קאַן מיט קאַמפּרעסט לופט צו בלאָזן אַוועק שטויב און דעבריס פון צווישן די קלאַוויאַטורן.
- קלאַוויאַטור רייניקונג: For deeper cleaning, remove the keycaps using the provided keycap puller. Wash them with mild soap and water, then ensure they are completely dry before reattaching.
- קאַסע רייניקונג: Wipe the aluminum case with a soft, damp שטאָף. ויסמיידן האַרב קעמיקאַלז וואָס קען שעדיקן די ענדיקן.
2. Switch and Stabilizer Maintenance
The hot-swappable design allows for easy maintenance of switches and stabilizers.
- סוויטש פאַרבייַט: If a switch becomes faulty, replace it using the hot-swapping procedure described in the Operating Instructions.
- Stabilizer Lubrication: For optimal performance and reduced wobbliness on larger keys (space bar, shift, enter), the PCB-mounted screw-in stabilizers can be lubricated. This typically involves disassembling the keyboard to access the stabilizers.

Image: An exploded diagram of the Keychron Q2, showing its various components like keycaps, switches, top case, gaskets, plate, PCB, sound absorbing foam, case foam, bottom case, and silicone gaskets, illustrating ease of disassembly.
טראָובלעשאָאָטינג
פּראָסט ישוז און סאַלושאַנז:
- קלאַוויאַטור ניט ריספּאַנדינג:
- זיכער מאַכן אַז דער USB קאַבל איז זיכער פארבונדן צו ביידע די קלאַוויאַטור און דעם קאָמפּיוטער.
- Verify the Mac/Windows switch on the back of the keyboard is set to the correct operating system.
- Try connecting the keyboard to a different USB port or a different computer to rule out port issues.
- ריסטאַרט דיין קאָמפּיוטער.
- ספּעציפֿישע קנעפּלעך אַרבעטן נישט:
- Remove the keycap and switch for the non-functional key. Inspect the switch pins for bends or damage. Straighten bent pins carefully or replace the switch if damaged.
- זיכער מאַכן אַז דער סוויטש איז גאָר אַרײַנגעזעצט אין דער פּקב.
- Check VIA software to ensure the key has not been accidentally remapped or disabled.
- RGB לייטינג פראבלעמען:
- זיכער מאַכן אַז די קלאַוויאַטור איז ריכטיק פֿאַרבונדן.
- Use the VIA software to check and adjust lighting settings.
- Perform a factory reset if lighting issues persist (refer to Keychron's official support for specific reset procedures).
- Keyboard Disconnecting Randomly:
- פּרוּווט אַ אַנדערש וסב קאַבלע.
- Ensure the USB port on your computer is stable and providing sufficient power.
- דערהייַנטיקן דיין קאָמפּיוטער ס USB דרייווערס.
If you encounter issues not covered here, please refer to the official Keychron support resources.
ספּעסאַפאַקיישאַנז
| שטריך | דעטאַל |
|---|---|
| סאָרט | Keychron |
| מאָדעל נאָמען | Q2 |
| מאָדעל נומער | Q2-J1 |
| קלאַוויאַטור אויסלייג | 65% (68 Keys), QWERTY |
| קאַנעקטיוויטי טעכנאָלאָגיע | מיט אַ דראָט (USB-A, USB-C) |
| קאַמפּאַטאַבאַל דעוויסעס | PC (Linux, MacOS, Windows) |
| באַשטימען טיפּ | Gateron G Pro Red (Linear), Hot-swappable |
| באַקלייט | RGB (דרום-פייסינג) |
| מאַטעריאַל | Full Aluminum Frame, PBT Keycaps |
| פּראָדוקט דימענשאַנז | 12.89"ל x 4.76"בר x 1.33"ה |
| ספּעציעלע פֿעיִקייטן | QMK/VIA Programmable, Double Gasket Design |
וואָראַנטי אינפֿאָרמאַציע
Keychron products typically come with a standard manufacturer's warranty. For detailed information regarding the warranty period, coverage, and terms and conditions for your Keychron Q2 keyboard, please refer to the official Keychron webוועבזייטל אדער די וואָראַנטי קאַרטל וואָס איז אַרייַנגערעכנט מיט אייער פּראָדוקט. האַלט אייער קויפן באַווייַז פֿאַר וואָראַנטי קליימז.
שטיצן און רעסאָורסעס
For further assistance, software downloads (VIA), firmware updates, and frequently asked questions, please visit the official Keychron support page:
- Keychron Official Webפּלאַץ: www.keychron.com
- QMK/VIA Software & Firmware: www.keychron.com/pages/qmk-via
- Keychron Store: Visit the Keychron Store on Amazon
You can also find community forums and additional user guides online for advanced customization and troubleshooting tips.