
1. הקדמה
Thank you for choosing the 5 CORE RACK STAND 9U DJ Mixer Stand. This instruction manual provides essential information for the safe and efficient assembly, operation, and maintenance of your new equipment. Please read this manual thoroughly before use and retain it for future reference.
This 2-layer DJ stand is designed to securely hold audio mixers on its top platform and accommodate larger equipment such as amplifiers, equalizers, and microphones on its bottom rack. Its robust metal construction and adjustable features ensure a reliable and flexible setup for DJs, live performances, and studio recordings.
2. זיכערקייַט אינפֿאָרמאַציע
- וואָג קאַפּאַציטעט: Do not exceed the maximum weight capacity of 220.5 lbs (100 kg) for the entire stand. The top rack supports up to 110 lbs (50 kg), and the bottom rack supports up to 220 lbs (100 kg). Overloading can cause instability and damage.
- פֿאַרזאַמלונג: Ensure all components are correctly assembled and tightened before placing any equipment on the stand. Refer to the assembly instructions carefully.
- פעסטקייַט: Always engage the locks on all four wheels when the stand is in a stationary position to prevent accidental movement.
- אָרט: Place the stand on a flat, stable, and level surface. Avoid uneven ground or sloped areas.
- קינדער און פּעץ: Keep children and pets away from the stand, especially during assembly and when it is loaded with equipment.
- וישאַלט: Regularly inspect the stand for any loose parts, damage, or wear. Do not use if damaged.
3. פּעקל אינהאַלט
Please verify that all parts listed below are included in your package. If any parts are missing or damaged, please contact customer support.
- Top Rack Frame (1)
- Bottom Rack Frame (1)
- Vertical Support Bars (2)
- Adjustable Angle Brackets (2)
- פארשליסבארע רעדער (4)
- Hardware Kit (screws, nuts, washers, spin knobs)
- פֿאַרזאַמלונג מכשירים (למשל, אַלען שליסל, שליסל)
4. אַסעמבלי אינסטרוקציעס
Assembly of the 5 CORE RACK STAND 9U is straightforward and can be completed in minutes. It is recommended to assemble the stand on a soft, clean surface to prevent scratches.
- Attach Wheels to Bottom Rack: Secure the four lockable wheels to the designated corners of the bottom rack frame using the provided screws and tools. Ensure the locking mechanism is facing outwards for easy access.
- Connect Vertical Support Bars: Attach the two vertical support bars to the bottom rack frame. Ensure the rack mounting holes on the vertical bars are aligned correctly.
- Install Adjustable Angle Brackets: Mount the adjustable angle brackets to the upper section of the vertical support bars. These brackets will hold the top rack.
- Attach Top Rack Frame: Secure the top rack frame to the adjustable angle brackets. Use the spin knobs to initially set a comfortable angle.
- פאַרשטייַפן אַלע פאַסאַנערז: Once all components are in place, systematically tighten all screws and fasteners. Do not overtighten, but ensure all connections are firm and secure.

פיגורע 4.1: Assembly diagram illustrating how to connect the various parts of the rack stand.
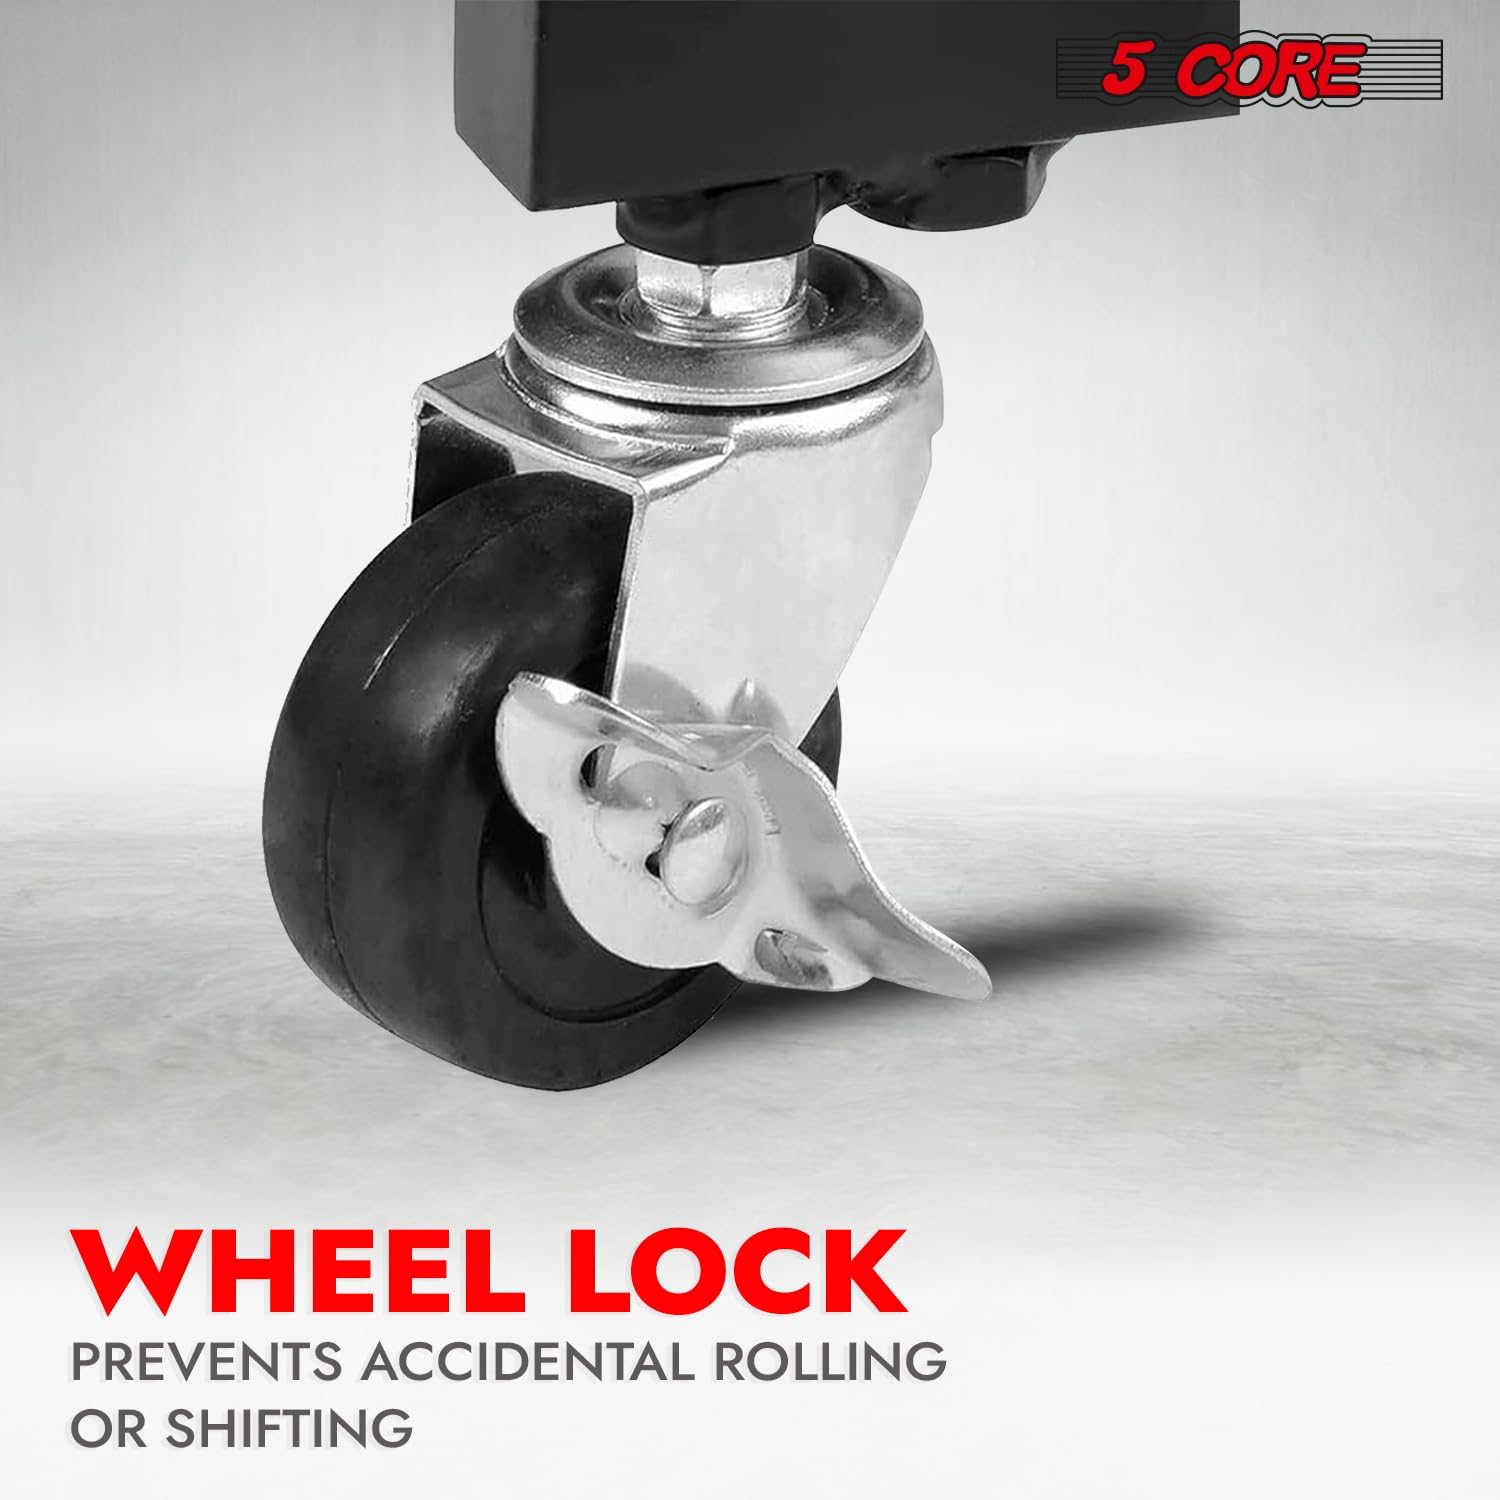
פיגורע 4.2: Detail of the easy installation and knob control mechanism.
5. שליסל פֿעיִקייטן
- 2-Layer Design: The stand features a top frame for mixers and a bottom rack for larger equipment, providing comprehensive storage.
- Angle Adjustable Top Rack: Easily adjust the top rack's angle up to 45 degrees using the spin knobs for optimal access and viewing.
- שטאַרק מעטאַל קאַנסטראַקשאַן: Made from heavy-duty metal with anti-rust paint, ensuring durability and stability for professional use.
- הויך וואָג קאַפּאַציטעט: Supports up to 220.5 lbs (100 kg) total, with the top rack handling 110 lbs (50 kg) and the bottom rack 220 lbs (100 kg).
- פארשליסבארע ראָולינג רעדער: Equipped with four lockable wheels for easy mobility and secure positioning during use.
- Enhanced Airflow: The open frame design and raised bottom promote better air circulation, preventing equipment overheating.
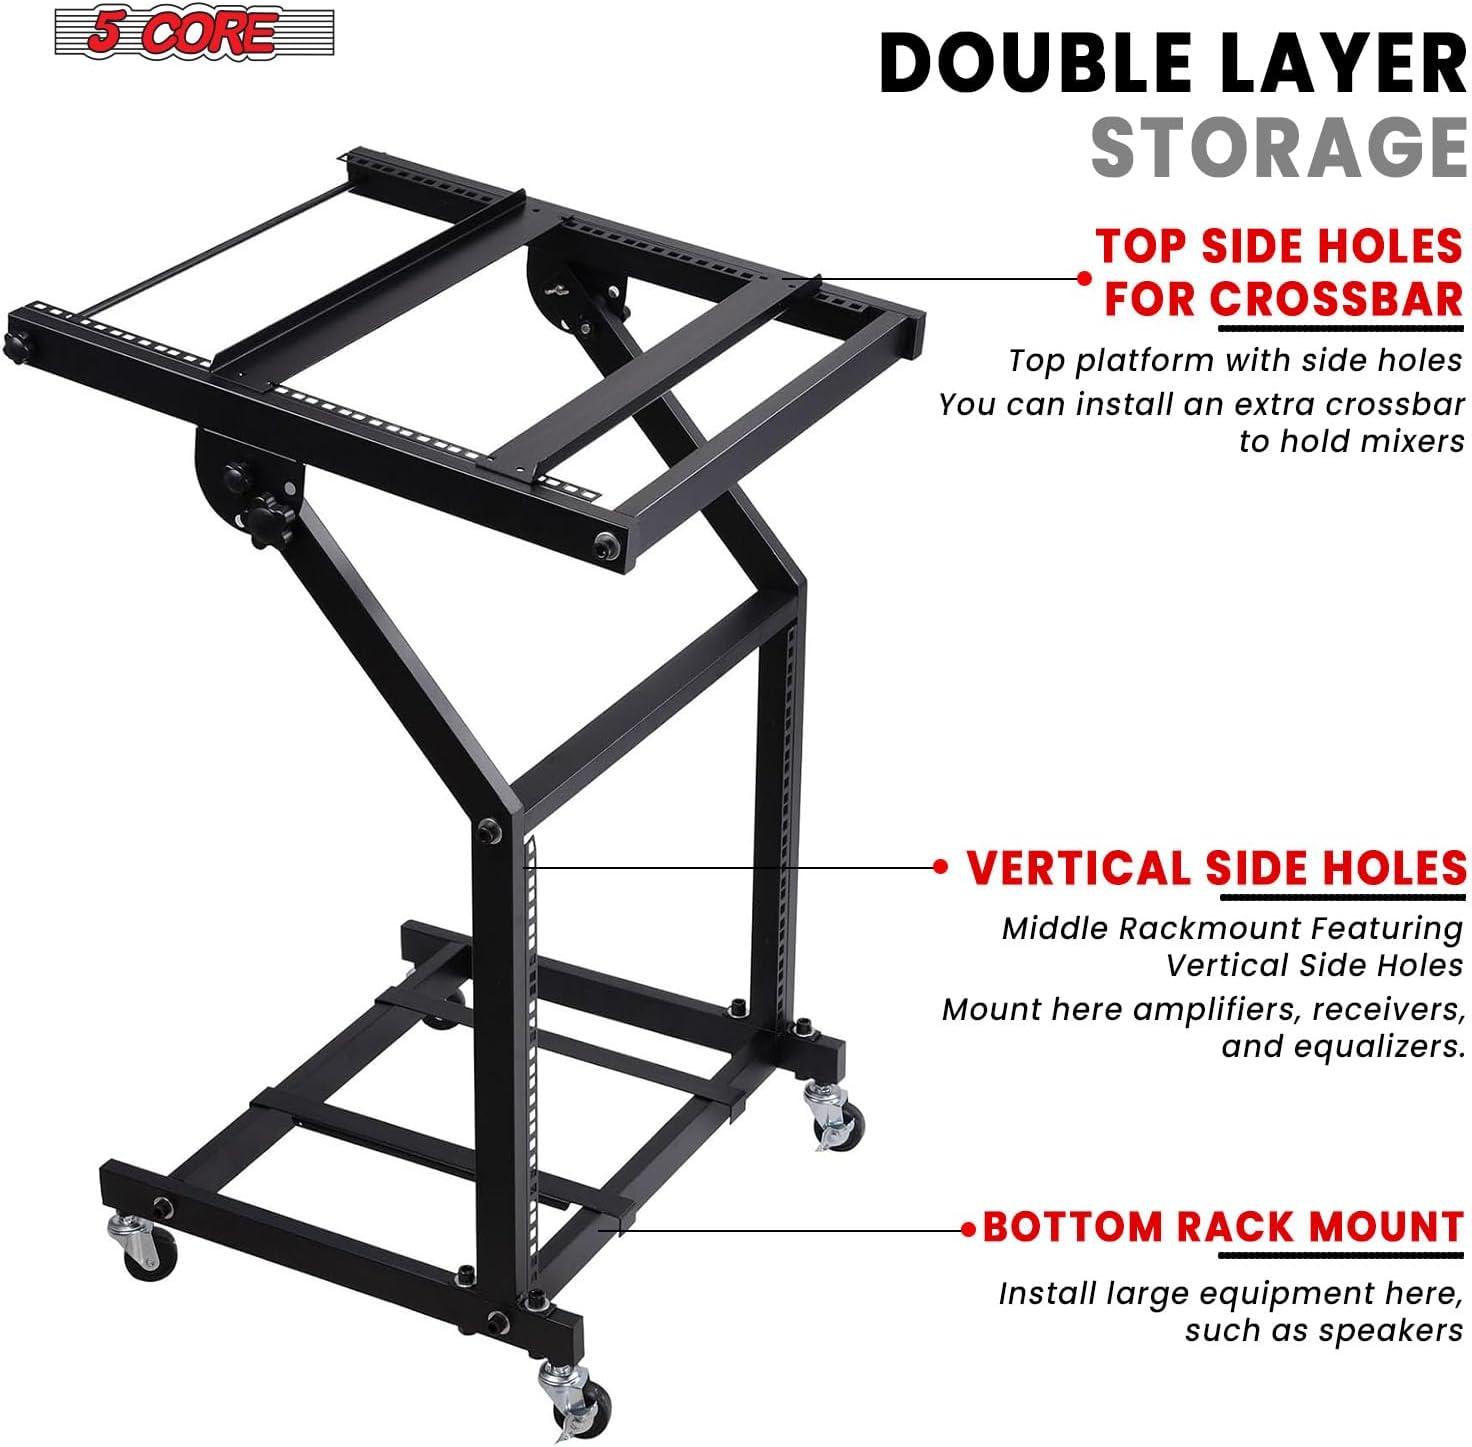
פיגורע 5.1: Double layer storage design for mixers and other equipment.

פיגורע 5.2: Adjustable angle for optimal access to your gear.

פיגורע 5.3: Lockable wheels for secure placement.
6. אַפּערייטינג ינסטרוקטיאָנס
6.1. Placing Equipment
- Carefully place your DJ mixer or similar equipment on the top rack. Ensure it is centered and stable.
- Utilize the bottom rack for amplifiers, equalizers, or other larger audio components. Distribute weight evenly to maintain stability.
6.2. Adjusting Top Rack Angle
- Loosen the spin knobs located on the adjustable angle brackets on both sides of the top rack.
- Adjust the top rack to your desired angle (up to 45 degrees).
- Once the desired angle is achieved, firmly tighten both spin knobs to secure the top rack in place.
6.3. Moving and Securing the Stand
- To move the stand, unlock all four wheels by disengaging their locking mechanisms.
- Carefully push or pull the stand to its new location. Avoid sudden movements or excessive force, especially when loaded.
- Once in the desired position, engage the locking mechanisms on all four wheels to prevent any unintended movement during use.

פיגורע 6.1: Example of the rack stand in use with DJ equipment.
7. וישאַלט
- רייניקונג: ווישט דעם שטאַנד מיט אַ ווייכן, דamp שטאָף צו באַזייַטיקן שטויב און שמוץ. פֿאַרמייַדן אַברייסיוו רייניגער אָדער סאָלווענטן וואָס קענען שעדיקן די ענדיקונג.
- דורכקוק: Periodically check all bolts, screws, and connections to ensure they are tight. Retighten as necessary.
- ראָד זאָרג: Keep the wheels free of debris to ensure smooth rolling. Lubricate the wheel axles if they become stiff.
- סטאָרידזש: If storing the stand for an extended period, ensure it is clean and dry. Store in a cool, dry place away from direct sunlight or extreme temperatures.
8. טראָובלעשאָאָטינג
8.1. Stand is Wobbly
- טשעק פאַסטנערס: זיכער מאַכן אַז אַלע באָלץ און שרויפן זענען זיכער צוגעצויגן.
- מדרגה ייבערפלאַך: Verify that the stand is placed on a flat and level surface. Adjust if necessary.
- וואָג פאַרשפּרייטונג: Ensure equipment weight is evenly distributed across both racks.
8.2. רעדער דרייען זיך נישט גלאט
- טשעק פֿאַר דעבריס: Inspect wheels for any hair, dust, or other debris that might be obstructing movement. Clean as needed.
- שמירן: Apply a small amount of lubricant to the wheel axles if they are stiff.
8.3. Difficulty Adjusting Top Rack Angle
- לאָזט אָפּ די קנעפּלעך: Ensure the spin knobs on both sides of the adjustable angle brackets are sufficiently loosened before attempting to change the angle.
- ויסמעקן אַבסטראַקשאַנז: Check for any cables or equipment that might be preventing smooth adjustment.
9. ספּעסאַפאַקיישאַנז
| אַטריביוט | דעטאַל |
|---|---|
| מאָדעל נומער | RACK STAND 9U |
| מאַטעריאַל | Heavy-duty Metal |
| ענדיקן טיפּ | Painted (Anti-rust) |
| קאָליר | שוואַרץ |
| Number of Rack Units (Top) | 9U |
| Number of Rack Units (Bottom) | 9U |
| Top Rack Capacity | 110 לבס (50 קג) |
| Bottom Rack Capacity | 220 לבס (100 קג) |
| גאַנץ וואָג קאַפּאַסיטי | 220.5 לבס (100 קג) |
| אַדזשאַסטאַבאַל ווינקל | אַרויף צו 45 דיגריז |
| מאָביליטי | 4 לאָקקאַבלע ווהעעלס |
| דימענשאַנז (אַלגעמיינע) | אָפּשיקן צו פיגורע 9.1 |

פיגורע 9.1: Dimension details of the rack stand.
10. פּראָדוקט ווידעאָס
10.1. 5 Core 9U Professional Audio Rack Mount DJ Mixer Stand
דער ווידעא גיט אַן איבערבליקview of the 5 Core 9U Professional Audio Rack Mount DJ Mixer Stand, showcasing its features and functionality for various audio setups.
10.2. 9U Professional Audio Rack Mount DJ Mixer Studio Stand Cart
Watch this video for a detailed look at the 9U Professional Audio Rack Mount DJ Mixer Studio Stand Cart, demonstrating its robust design and ease of use in a studio environment.
11. וואָראַנטי & שטיצן
For warranty information, product support, or to purchase replacement parts, please visit the official 5 CORE website or contact Kaneer Ent. directly through your purchase platform.
אָנליין שטיצן: Visit the 5 CORE Store on Amazon