1. הקדמה
This manual provides detailed instructions for the setup, operation, and maintenance of your BMW Multi-Function Clock, Alarm, and Weather Station. This device combines a digital clock, an alarm with a snooze function, and a weather station that displays temperature. Please read this manual carefully before use to ensure proper functionality and to maximize your experience with the product.
2. פּעקל אינהאַלט
ביטע קאָנטראָלירט די אינהאַלט פון דער פּאַקעט ווען איר נעמט עס אויס. אויב עס פעלט עפּעס אָדער עס זענען צעבראָכן, קאָנטאַקטירט אייער הענדלער.
- BMW Multi-Function Clock, Alarm, and Weather Station Unit
- באַניצער מאַנואַל (דעם דאָקומענט)
3. סעטאַפּ
3.1. באַטאַרייע ייַנמאָנטירונג
דער מיטל ריקווייערז 2 אַאַאַ באַטעריז (נישט אַרייַנגערעכנט) פֿאַר אָפּעראַציע. פֿאָלגט די סטעפּס צו אינסטאַלירן די באַטעריעס:
- געפינט דעם דעקל פונעם באַטעריע־אָפּטייל אויף דער הינטערשטער זייט פונעם אַפּאַראַט.
- לײַכט שלעפּן אָדער הייבן דעם דעקל צו עפֿענען דעם אָפּטייל.
- אַרײַנשטעלן צוויי AAA באַטעריעס, און זיכער מאַכן אַז די ריכטיקע פּאָלאַריטעט (+ און -) איז אָנגעוויזן אין דעם אָפּטייל.
- פאַרבייַטן די באַטאַרייע אָפּטייל דעקן סיקיורלי.
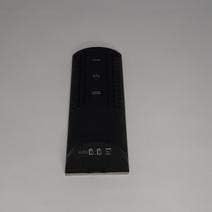
פיגורע 3.1: צוריק view of the device, illustrating the battery compartment and control buttons for setup.
3.2. ערשטע איינשאַלטונג
After battery installation, the device display will illuminate, and it will typically show a default time or begin searching for a signal (if applicable for weather functions). Proceed to the operating instructions to set the time and other functions.
4. אַפּערייטינג ינסטרוקטיאָנס
4.1. באַשטעטיקן צייט און דאַטע
To set the current time and date:
- דריקן און האַלטן די מאָדע button (usually located on the back or side) for a few seconds until the time display starts flashing.
- ניצן די UP or אַראָפּ buttons (often labeled '+' or '-') to adjust the hour.
- דרוק מאָדע again to confirm the hour and move to the minutes.
- שטעל די מינוטן דורך ניצן די UP or אַראָפּ קנעפּלעך.
- פאָרזעצן דרינגלעך מאָדע and adjusting with אַרויף / אַראָפּ for year, month, and day settings.
- דרוק מאָדע נאך איין לעצט מאל צו פארלאזן דעם סעטטינג מאָדוס.
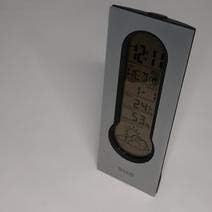
פיגורע 4.1: Front display of the device, showing the digital clock, temperature, and weather forecast icons.
4.2. שטעלן דעם אַלאַרם
צו שטעלן די שרעק צייט:
- אין נאָרמאַל צייט אַרויסווייַזן מאָדע, דריקן די שרעק קנעפּל (אָדער מאָדע repeatedly until 'AL' or an alarm icon appears).
- דריקן און האַלטן די שרעק קנעפּל ביז די אַלאַרם צייט הייבט אָן צו בלינקען.
- ניצן די UP or אַראָפּ קנעפּלעך צו שטעלן די געוואונטשענע אַלאַרם שעה.
- דרוק שרעק again to confirm the hour and move to the minutes.
- שטעל די מינוטן דורך ניצן די UP or אַראָפּ קנעפּלעך.
- דרוק שרעק one last time to save the alarm setting. An alarm icon will typically appear on the display to indicate the alarm is active.
4.3. Using Snooze Function
ווען דער שרעק סאָונדס, דריקן די SNOOZE button (usually a large button on the top of the unit) to temporarily silence the alarm. The alarm will sound again after a few minutes (typically 5-10 minutes, depending on the model). To turn off the alarm completely, press any other button or let it ring until it automatically stops.

פיגורע 4.2: Top view of the device, highlighting the prominent SNOOZE button.
4.4. טעמפּעראַטורע ווייַז
The device continuously displays the ambient temperature. The temperature unit (Celsius or Fahrenheit) can usually be switched by pressing a dedicated button (e.g., 'C/F' or 'TEMP') or by holding down one of the adjustment buttons during time setting.
4.5. Weather Station Function
The integrated weather station provides a basic weather forecast using graphical icons (e.g., sun, clouds, rain). This forecast is based on internal barometric pressure changes and is an estimation for the local area. It is not connected to external weather services.
5. וישאַלט
5.1. רייניקונג
To clean the device, use a soft, dry cloth. Do not use abrasive cleaners, solvents, or chemical sprays, as these can damage the surface and electronic components. Avoid getting moisture into the device.
5.2. באַטערי פאַרבייַט
When the display dims or functions become erratic, it is time to replace the batteries. Follow the battery installation steps in Section 3.1. Always replace both batteries at the same time with new AAA batteries.
6. טראָובלעשאָאָטינג
אויב איר טרעפט פּראָבלעמען מיט אייער מיטל, ביטע זעט די פאלגענדע געוויינטלעכע פּראָבלעמען און לייזונגען:
- דיספּליי איז ליידיק אָדער טונקל:
Check if batteries are installed correctly. Replace with fresh AAA batteries. - צייט אדער דאטום איז נישט ריכטיג:
Refer to Section 4.1 to reset the time and date. Ensure you confirm each setting step. - דער אַלאַרם קלינגט נישט:
Verify that the alarm is set and activated (look for an alarm icon on the display). Ensure the volume is not set to zero if adjustable. - Temperature reading seems inaccurate:
Ensure the device is not placed in direct sunlight, near heat sources, or in drafts, which can affect readings. Allow some time for the sensor to stabilize after placement. - Weather forecast icons are not changing:
The weather forecast is based on local barometric pressure changes and may take time to update. It provides a general trend, not a precise forecast.
7. ספּעסאַפאַקיישאַנז
| שטריך | דעטאַל |
|---|---|
| סאָרט | במוו |
| מאָדעל נומער | 06017443015007 |
| ספּעציעלע פֿעיִקייטן | Alarm, Snooze, Temperature Display |
| מאַכט מקור | באַטערי |
| באַטערי טיפּ | 2 X AAA באַטעריז (ניט אַרייַנגערעכנט) |
| ASIN | B089QGJ9VR |
8. וואָראַנטי און שטיצן
This product is covered by a standard manufacturer's warranty. For specific warranty terms and conditions, please refer to the documentation provided at the time of purchase or contact your retailer. For technical support or service inquiries, please reach out to the point of purchase or the manufacturer's customer service department.