
הקדמה
Thank you for choosing the Vector Optics SCRD-12 Maverick 1x22 Gen2 Red Dot Sight. This manual provides essential information for the safe and effective use of your red dot sight. Please read it thoroughly before installation and operation to ensure optimal performance and longevity of your device.
פּראָדוקט פֿעיִקייטן
- ימפּרוווד פּלאַן: The Gen2 model features an updated design and a stylish mount for improved aesthetics and functionality.
- Optimal Magnification: 1x magnification for true-to-life, unmagnified viewing.
- Clear Reticle: 3 MOA red dot reticle for precise aiming.
- ברייט פעלד פון View: 22mm objective lens diameter provides a broad sight picture.
- אַדזשאַסטאַבאַל ברייטנאַס: 11 levels of red dot illumination for various lighting conditions, including daylight and night vision compatibility.
- דוראַבאַל קאַנסטראַקשאַן: Lightweight yet robust aluminum alloy body, weighing only 188g.
- סאָליד גרייס: Overall length of 75mm, with a lens center height of 38mm.
- ווערסאַטאַל מאַונטינג: Compatible with Picatinny rails, includes both Quick Detach (QD) high mount and low mount options.
- מאַכט עפעקטיוו: Operates on a single CR2032 battery.
- וואָטערפּרוף פּלאַן: Engineered for reliable performance in various weather conditions.
פּעקל אינהאַלט
ביים עפענען דעם פעקל, ביטע זיכער מאכן אז אלע זאכן זענען דא און אין גוטן צושטאנד:
- Vector Optics SCRD-12 Maverick 1x22 Gen2 Red Dot Sight
- Quick Detach (QD) High Mount
- נידעריק בארג
- Rubber Lens Cover
- CR2032 באַטאַרייע
- Adjustment Tools (Hex key, etc.)
- רייניקונג קלאָט
- באַניצער מאַנואַל
קאָמפּאָנענט לעגיטימאַציע
Familiarize yourself with the various parts of your red dot sight:

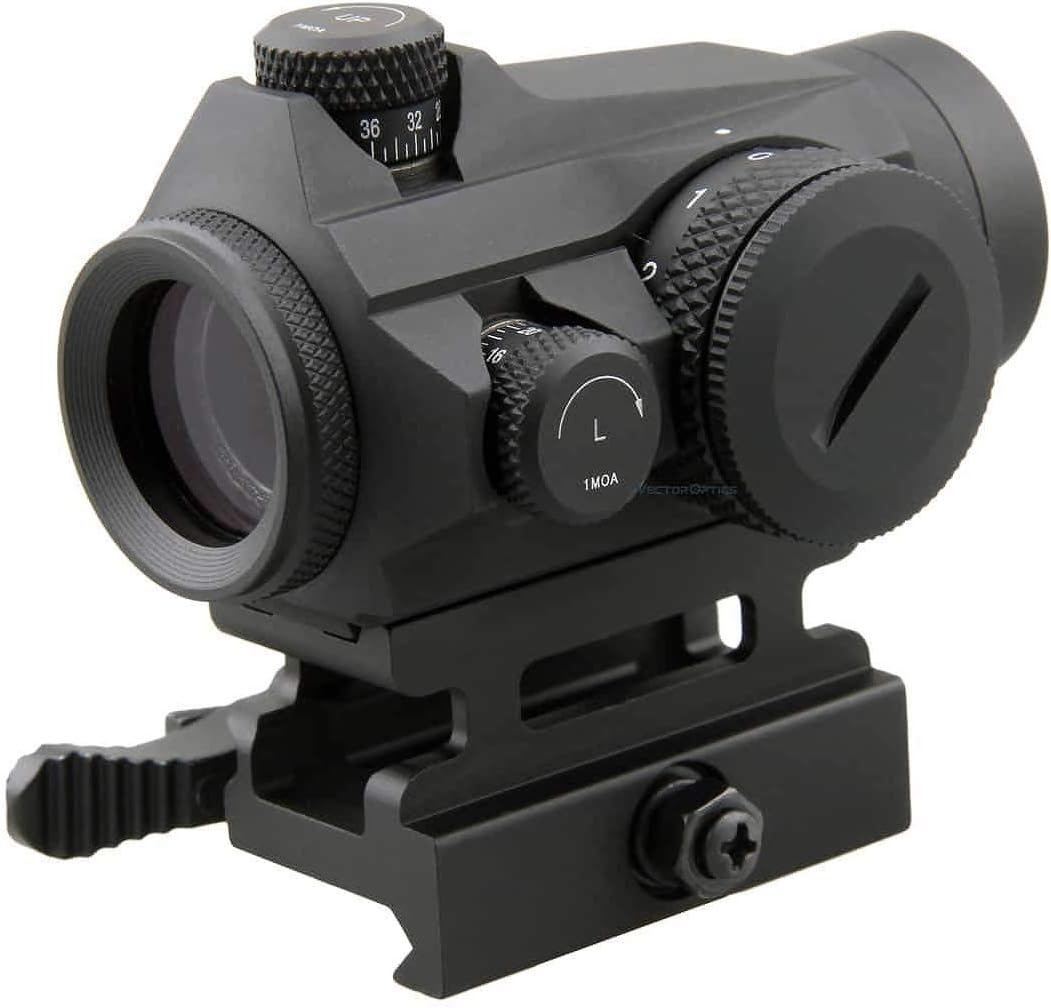
פיגורע 1: קוילעלדיק view of the Vector Optics SCRD-12 Maverick 1x22 Gen2 Red Dot Sight, showing its compact design and integrated mount.

פיגורע 2: זייַט view highlighting the elevation adjustment turret and the Quick Detach (QD) mount with safety lock button.

פיגורע 3: אַנגגאַלד view displaying the windage adjustment turret (marked 'L' for left adjustment) and the rotary brightness control dial. The objective lens is visible with a slight tint.
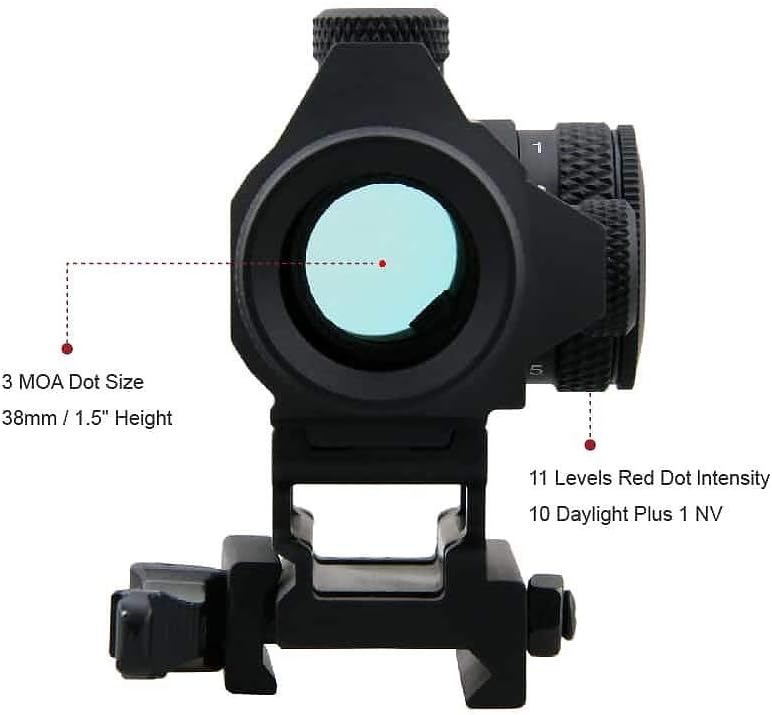
פיגורע 4: דערציען view illustrating the 3 MOA red dot reticle and the sight's height of 38mm (1.5 inches) to the center of the lens. It also indicates 11 levels of red dot intensity, including 10 daylight and 1 night vision setting.
פיגורע 5: נאָענט-אַרויף view of the windage and elevation adjustment turrets, each marked for 1 MOA clicks, allowing for precise zeroing.

פיגורע 6: דנאָ view of the red dot sight, showing the Quick Detach (QD) mount mechanism designed for secure attachment to Picatinny rails.
סעטאַפּ
1. באַטאַרייע ייַנמאָנטירונג
- Locate the battery compartment, typically on the side or top of the brightness adjustment dial.
- Unscrew the battery cap counter-clockwise.
- Insert one CR2032 battery with the positive (+) side facing outwards (towards the cap).
- Carefully screw the battery cap back on clockwise until it is finger-tight. Do not overtighten.
2. מאָנטירן די רויטע פּונקט זיכט
- פאַרזיכערן דיין פייעראַרם איז אַנלאָודיד און שפּיציק אין אַ זיכער ריכטונג.
- Choose the appropriate mount (high or low QD mount) for your application.
- Loosen the QD lever on the mount.
- Place the red dot sight onto your Picatinny rail at your desired position.
- Close the QD lever firmly until it locks into place. Ensure the sight is securely attached and does not wobble.
- Adjust the eye relief to a comfortable position. This red dot sight offers unlimited eye relief.
אַפּערייטינג ינסטראַקשאַנז
1. אײַנשטעלן/אויסשטעלן און ליכטיקייט אדזשאַסטמענט
- To turn on the red dot sight, rotate the brightness adjustment dial (located on the side) clockwise from the "0" (OFF) position.
- Continue rotating the dial clockwise to increase the brightness level. There are 11 distinct brightness settings.
- To decrease brightness, rotate the dial counter-clockwise.
- To turn off the red dot sight, rotate the dial counter-clockwise until it clicks into the "0" (OFF) position.
2. Zeroing the Red Dot Sight
Zeroing is the process of aligning the red dot with your point of impact. This should be done at a controlled range with proper safety precautions.
- Mount the red dot sight securely on your firearm.
- Set up a target at a known distance (e.g., 25 yards/meters).
- Fire a group of shots. Observe where the shots impact relative to your aiming point.
- הייך אַדזשאַסטמאַנט: The top turret adjusts elevation. Turning the dial clockwise moves the point of impact אַראָפּ. Turning it counter-clockwise moves the point of impact UP. Each click represents 1 MOA (Minute of Angle) adjustment.
- ווינדאַגע אַדזשאַסטמאַנט: The side turret adjusts windage. Turning the dial clockwise moves the point of impact רעכט. Turning it counter-clockwise moves the point of impact לינקס. Each click represents 1 MOA adjustment.
- Make small adjustments, fire another group, and repeat until your point of aim matches your point of impact.
וישאַלט
1. רייניקונג
- לענסעס: Use the provided cleaning cloth or a soft, lint-free cloth with lens cleaning solution. Gently wipe the lenses to remove dust and smudges. Avoid harsh chemicals or abrasive materials.
- גוף: ווישט אָפּ די אויסערלעכע זייט פֿון דער זיכט מיט אַ ווייכן, טרוקענעם שטאָף.amp cloth. For stubborn dirt, a mild soap solution can be used, followed by a clean, damp cloth. Ensure no moisture enters the electronic components.
2. סטאָרידזש
- When not in use, turn the red dot sight OFF to conserve battery life.
- Store the sight in a cool, dry place, away from direct sunlight and extreme temperatures.
- Use the rubber lens cover to protect the lenses from dust and scratches during storage.
- For long-term storage (several months or more), it is recommended to remove the CR2032 battery to prevent potential leakage and damage to the electronics.
טראָובלעשאָאָטינג
| פּראָבלעם | מעגלעך סיבה | לייזונג |
|---|---|---|
| Red dot does not appear. | Battery is dead or incorrectly installed. Brightness setting is too low or OFF. | Check battery orientation and replace if necessary. Increase brightness using the dial. |
| Red dot is dim or flickers. | Low battery. Loose battery cap. | Replace battery. Ensure battery cap is securely tightened. |
| Red dot is blurry or distorted. | Dirty lens. Astigmatism (user's eye condition). | Clean lenses with a soft cloth. If the issue persists, it may be due to astigmatism; consult an eye care professional. |
| Point of impact shifts after zeroing. | Sight not securely mounted. Mount screws loose. | Ensure QD lever is fully engaged. Check and tighten any mounting screws with appropriate tools. |
ספּעסאַפאַקיישאַנז
| שטריך | דעטאַל |
|---|---|
| סאָרט | Vector Optics |
| מאָדעל | SCRD-12 Maverick 1x22 Gen2 |
| פאַרגרעסערונג | 1x |
| אָביעקטיוו לענס דיאַמעטער | 22 מם |
| טיפּ רעטיקלע | 3 MOA רויט פּונקט |
| ברייטנאַס סעטטינגס | 11 levels (10 Daylight + 1 NV) |
| Windage/Elevation Adjustment | 1 MOA per click, Total 100 MOA Range |
| אויג רעליעף | ונלימיטעד |
| פּאַראַללאַקס באַשטעטיקן | פּאַראַלאַקס פריי |
| מאַטעריאַל | High-grade Aluminum Alloy |
| וואָג | 188ג |
| לענג | 75 מם |
| Height to Lens Center | 38 מם |
| בארג טיפּ | Picatinny Rail (QD High & Low Mounts included) |
| באַטערי טיפּ | CR2032 |
| וואָטערפּרוף | יא |
| UPC | 192687275892 |
וואָראַנטי אינפֿאָרמאַציע
The Vector Optics SCRD-12 Maverick 1x22 Gen2 Red Dot Sight is covered by a 5-יאָר פאַבריקאַנט ס וואָראַנטי from the date of purchase. This warranty covers defects in materials and workmanship under normal use. Please retain your proof of purchase for warranty claims. For specific terms and conditions, refer to the warranty card included in your package or contact Vector Optics customer service.
שטיצן
Should you encounter any issues not covered in this manual or require further assistance, please contact Vector Optics customer support. Visit the official Vector Optics website for contact details, FAQs, and additional product resources.