
1. הקדמה
Thank you for choosing the Power Acoustik OD41300 1300 Watt 4 Channel Amplifier. This manual provides essential information for the proper installation, operation, and maintenance of your new car audio ampליפיער. ביטע ליינט דעם מאַנואַל גרינטלעך איידער איר פּרוּווט אינסטאַלירן אָדער אָפּערירן צו ענשור אָפּטימאַל פאָרשטעלונג און זיכערקייט.
2. זיכערקייַט אינפֿאָרמאַציע
שטענדיק אָבסערווירן די פאלגענדע זיכערהייט מיטלען בעת ינסטאַלירונג און אָפּעראַציע:
- Disconnect the vehicle's negative battery terminal before making any power connections.
- זיכער מאַכן אַז אַלע וויירינג איז ריכטיק ראָוטאַד און סיקיורד צו פאַרמייַדן שאָדן אָדער קורץ קרייזן.
- Use appropriate gauge wiring for power and ground connections as specified in this manual.
- ינסטאַלירן די ampדער לופט־ליפֿערער אין אַ לאָקאַציע וואָס ערמעגליכט גענוג ווענטילאַציע צו פאַרמייַדן איבערהיצונג.
- ויסמיידן מאַונטינג די amplifier in areas exposed to moisture or excessive vibration.
- דאס פּראָדוקט כּולל כעמיקאַלן באַקאַנט צום שטאַט קאַליפאָרניע צו פאַראורזאַכן ראַק און געבורט-דעפעקטן אָדער אַנדערע רעפּראָדוקטיווע שאָדן. באַהאַנדלען מיט וואָרענונג און וואַשן הענט נאָך נוצן.
3. פּראָדוקט איבערview
The Power Acoustik OD41300 is a 4-channel Class A/B amplifier designed to deliver powerful and clear audio. It features variable crossovers, gain controls, and bass boost for precise sound tuning.
3.1 Ampליפיער אויסלייג
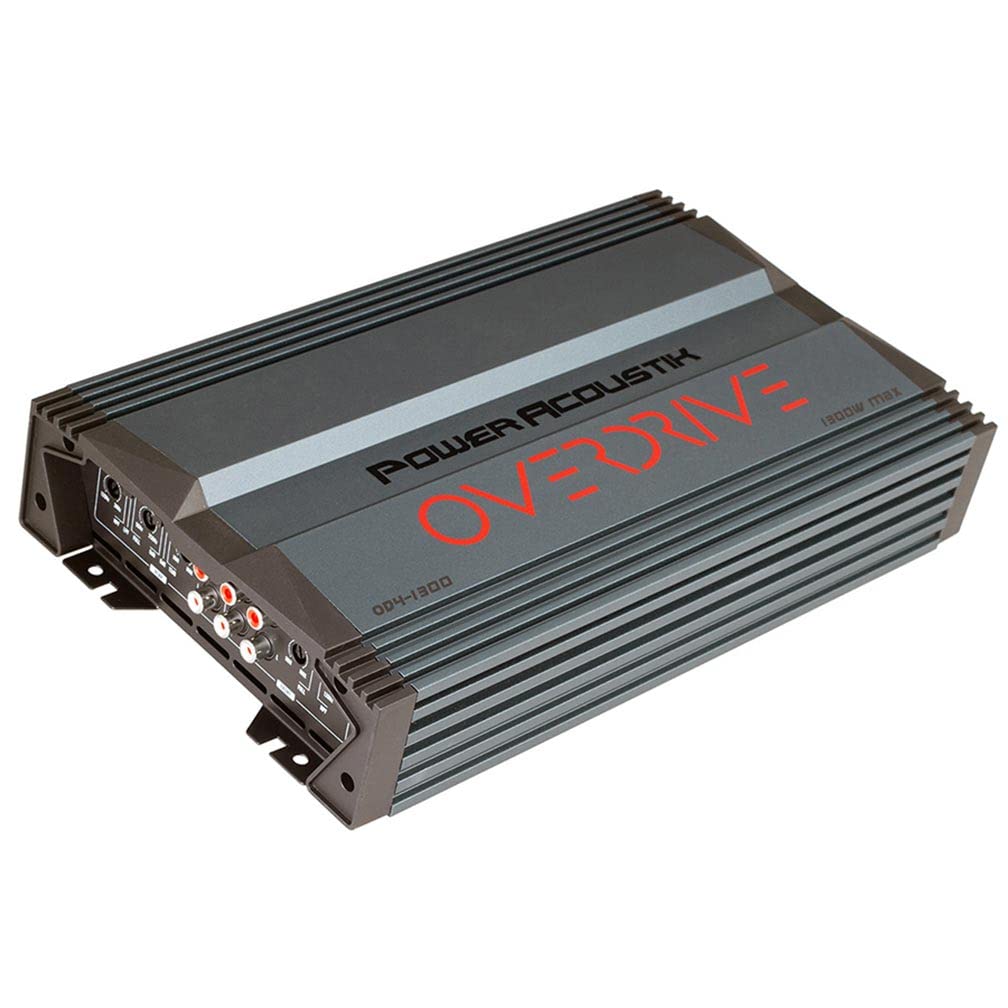
This image displays both the control panel (top section) and the power/speaker connection panel (bottom section) of the Power Acoustik OD41300 amplifier. The top section shows RCA inputs, gain controls, crossover adjustments (HPF, LPF, FULL), and bass boost settings for both front and rear channels. The bottom section illustrates the power input terminals (GND, REM, +12V), fuse slots, and speaker output terminals (FR+, FR-, RR+, RR-, FL+, FL-, RL+, RL-), including bridge mode indicators.
3.2 מאַונטינג בראַקאַץ
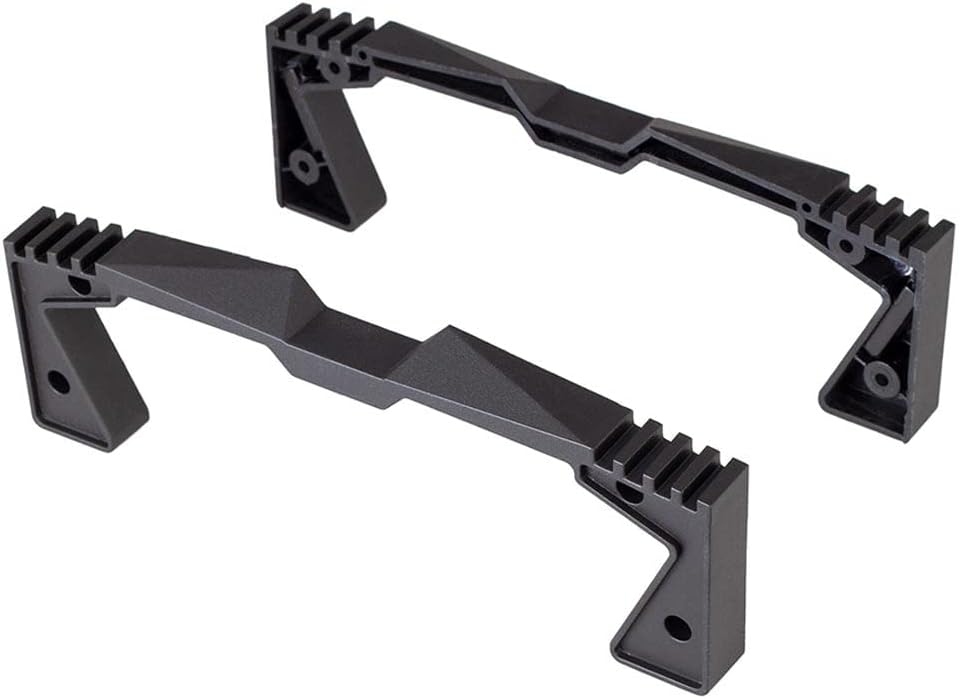
This image shows two black mounting brackets, designed to securely fasten the Power Acoustik OD41300 amplifier in a vehicle. These brackets ensure stable installation and help dissipate heat.
4. סעטאַפּ און ייַנמאָנטירונג
ריכטיקע אינסטאַלאַציע איז קריטיש פֿאַר די פאָרשטעלונג און לאַנגלעבעדיקייט פון אייער ampאויב איר זענט נישט זיכער וועגן קיין שריט, קאָנסולטירט אַ פאַכמאַן אינסטאַללער.
4.1 מאָונטינג אָרט
- Choose a dry, well-ventilated area, away from direct sunlight or heat sources.
- Ensure the mounting surface is sturdy enough to support the ampליפער'ס וואָג.
- Allow at least 2 inches of clearance around the ampליפיער פֿאַר געהעריק לופט לויפן.
- Use the provided mounting brackets and screws to secure the ampליפער.
4.2 וויירינג קאַנעקשאַנז
Refer to the connection panel image in Section 3.1 for visual guidance.
- מאַכט (באַטעריע +12V): Connect a heavy-gauge wire (e.g., 8 AWG or larger) directly from the positive terminal of the vehicle's battery to the +12V terminal on the amplifier. Install an in-line fuse (not supplied) within 18 inches of the battery.
- ערד (GND): Connect a heavy-gauge wire (same as power wire) from the GND terminal on the ampלייגט דעם עלעקטרישן לײַכטער צו אַ ריינער, נישט-געפֿאַרבטער מעטאַלענער ייבערפֿלאַך אויף דער שאַסי פֿונעם פֿאָרמיטל. זאָרגט פֿאַר אַ גוטע עלעקטרישע פֿאַרבינדונג.
- ווײַט (REM): Connect a smaller gauge wire (e.g., 18 AWG) from the REM terminal on the ampלייט צו די ווײַט-אויסלעשונג ארויסגאַנג פון אײַער קאָפּ-איינהייט. דער דראָט דרייט דעם amplifier on and off with your stereo.
- RCA Inputs (IN): פֿאַרבינדט RCA קייבלס פֿון אייער קאָפּ יוניט'ס פּרע-amp outputs to the corresponding RCA input jacks (FRONT and REAR) on the ampליפער.
- רעדנער אַוטפּוץ: Connect your speakers to the speaker terminals (FL, FR, RL, RR) on the amplifier. Observe correct polarity (+ to + and - to -). For bridged operation, refer to the markings on the amplifier's connection panel.
5. אַפּערייטינג ינסטרוקטיאָנס
אַמאָל אינסטאַלירט, נאָכפאָלגן די סטעפּס צו קאָנפיגורירן און אָפּערירן אייער ampליפער.
5.1 ערשט סעטאַפּ
- Before powering on, set all GAIN controls to minimum.
- Set crossover switches (HPF/LPF/FULL) to the desired mode (e.g., FULL for full range, LPF for subwoofers, HPF for component speakers).
- Set BASS BOOST to 0dB initially.
5.2 אַדזשאַסטירן קאָנטראָלס
- געווינען קאָנטראָל: Play a familiar music track at a moderate volume on your head unit. Slowly increase the amplifier's GAIN control until you hear distortion, then back it off slightly. This matches the amplifier's input sensitivity to your head unit's output.
- קראָסאָוווער (HPF/LPF): Adjust the HPF (High Pass Filter) or LPF (Low Pass Filter) frequency knobs to tailor the sound. HPF allows frequencies above the set point to pass, ideal for component speakers. LPF allows frequencies below the set point to pass, ideal for subwoofers.
- באַס באָאָסט: Use the BASS BOOST control (0/+6/+12dB) to enhance low frequencies. Use sparingly to avoid distortion and speaker damage.
6. וישאַלט
Your Power Acoustik ampדער ליפיער דארף מינימאַלע אויפהאלטונג.
- קאָנטראָלירט פּעריִאָדיש אַלע וויירינג פֿאַרבינדונגען צו זיכער מאַכן אַז זיי זענען זיכער און פֿרײַ פֿון קעראָוזשאַן.
- האַלטן די ampדער ליפיער איז ריין און פריי פון שטויב און שמוץ. ניצט א ווייכן, טרוקענעם שטאָף פארן רייניגן.
- פאַרזיכערן ווענטאַליישאַן אָופּאַנינגז זענען נישט אַבסטראַקטיד.
- If a fuse blows, replace it only with a fuse of the same type and rating (2 x 20A).
7. טראָובלעשאָאָטינג
אויב איר דערפאַרונג ישוז מיט דיין amplifier, consult the table below for common problems and solutions.
| פּראָבלעם | מעגלעך סיבה | לייזונג |
|---|---|---|
| קיין מאַכט / קיין געזונט | Blown fuse, loose power/ground/remote wire, ampליפיער אין שוץ מאָדע. | Check fuses (amplifier and in-line). Verify all power, ground, and remote connections. Ensure battery voltage איז גענוג. |
| פאַרקרימט סאָונד | Gain set too high, improper crossover settings, poor speaker connections, damaged speakers. | Reduce gain. Adjust crossover frequencies. Check speaker wiring for shorts or loose connections. Test speakers. |
| קיין באַס | LPF not engaged or set too high, phase issues, subwoofer wiring incorrect. | Ensure LPF is active and set to an appropriate frequency. Check subwoofer polarity. |
| Ampליפיער אָוווערכיץ | Insufficient ventilation, impedance too low, prolonged high output. | זיכער מאַכן גענוג לופט-פלוס אַרום דעם amplifier. Check speaker impedance. Reduce volume or gain. |
| Engine Noise / Whine | שלעכטע גראַונדינג, RCA קייבלס צו נאָענט צו מאַכט דראָטן, דעפעקטיווע קאָפּ אַפּאַראַט. | Improve ground connection. Reroute RCA cables away from power wires. Install a ground loop isolator if necessary. |
8. ספּעסאַפאַקיישאַנז
Technical specifications for the Power Acoustik OD41300 ampלייבער:
| שטריך | באַשרייַבונג |
|---|---|
| מאָדעל | OW-OD4-1300 |
| רעזולטאַט מאַכט (מאַקס) | 1300 וואטס |
| RMS מאַכט (4 אָום) | 100 וואט x 4 קאנאלן |
| RMS מאַכט (2 אָום) | 160 וואט x 4 קאנאלן |
| RMS Power (4 Ohms Bridged) | 320 וואט x 2 קאנאלן |
| Ampליפיער קלאַס | קלאַס א/ב |
| נידעריק פּאַס קראָססאָווער | 50 - 250 Hz (Variable 12dB) |
| הויך פאָרן קראָסאָוווער | 120 - 3 kHz (Variable 12dB) |
| באַס באָאָסט | 0 / +6 / +12dB |
| פוסעס | 2 רענטגענ 20אַ |
| דימענשאַנז (B x H x L) | 7.25" x 2.5" x 12.25" (אומגעפער) |
| נומער דימענשאַנז (L X W X H) | 16 x 8.75 x 4 אינטשעס (פּאַקאַזש/אַלגעמיין) |
| קרייַז פּראַטעקשאַן | Direct Short, Thermal, Overload |
| PCB טיפּ | מיליטערישע גראַד |
| מאַכט צושטעלן | PWM מאָספעט |
9. וואָראַנטי און שטיצן
Power Acoustik products are designed for reliability and performance. For specific warranty details, please refer to the warranty card included with your product or visit the official Power Acoustik website. For technical support or service inquiries, please contact Power Acoustik customer service through their official channels.