
1. הקדמה
Welcome to the Batavia Maxxbrush 1020W electric cleaning brush. This powerful tool is designed for efficient removal of weeds, moss, algae, sand, and other stubborn dirt from various outdoor surfaces. It is also suitable for smoothing and combing artificial turf. Please read this instruction manual carefully before operating the device to ensure safe and effective use.

אַן איבערview of the Batavia Maxxbrush 1020W electric cleaning brush, showcasing its design with the telescopic handle and brush head.
2. זיכערקייַט אינסטרוקציעס
Always observe the following safety precautions when using electrical tools to reduce the risk of electric shock, fire, and serious injury.
- לייענט דעם גאנצן מאַנואַל: מאַכט זיך באַקאַנט מיט די קאָנטראָלס און ריכטיקן באַניץ פֿון דעם אַפּאַראַט.
- טראָגט פּאַסיקע פּערזענלעכע שוץ-עקוויפּמענט (PPE): This includes safety glasses, gloves, and sturdy footwear.
- האַלט קינדער און פֿאַרבייגייער אַוועק: Do not allow children or untrained persons to operate the device.
- Ensure proper power connection: Connect the device to a properly grounded outlet. Do not modify the plug.
- ויסמיידן נאַס טנאָים: Do not operate the device in rain or damp environments. Keep the power cord away from water.
- קאָנטראָלירן איידער נוצן: קוקט נאָך צעבראָכענע טיילן, לויזע פֿאַרבינדונגען, צי קיין אַנדערע צושטאַנד וואָס קען אַפֿעקטירן די אָפּעראַציע.
- אָפּשטעקן ווען ניט אין נוצן: Always disconnect the power supply before cleaning, performing maintenance, or storing the device.
3. אַרייַנגערעכנט קאַמפּאָונאַנץ
The Batavia Maxxbrush 1020W package typically includes the following items:
- Batavia Maxxbrush main unit
- Telescopic handle (2 parts)
- Green nylon spiral brush
- מאַכט קאַבלע

The Batavia Maxxbrush standing upright, demonstrating its compact design and the availability of different brush types for various cleaning tasks.
4. סעטאַפּ און אַסעמבלי
Follow these steps to assemble your Maxxbrush:
- Attach the telescopic handle: Connect the two parts of the telescopic handle securely. Then, attach the assembled handle to the main unit of the Maxxbrush. Ensure it clicks into place or is tightened according to the instructions on the device.
- Install the brush head: Align the green nylon spiral brush with the brush mounting mechanism on the main unit. Push and secure the brush until it is firmly seated.
- פאַרבינדן צו מאַכט: Plug the power cable into the device and then into a suitable electrical outlet. Ensure the power cord is routed safely to avoid tripping hazards.
5. אַפּערייטינג ינסטרוקטיאָנס
Before starting, ensure all safety precautions are followed and the device is properly assembled.
5.1 פּאַוערינג אויף / אַוועק
- To turn on the Maxxbrush, press the power switch located on the handle.
- To turn off, release or press the power switch again, depending on the switch type.
5.2 Adjusting Brush Speed
The Maxxbrush features a rotary dial to adjust the brush head speed. Turn the dial to increase or decrease the speed according to the surface and the type of dirt being removed. Lower speeds are suitable for lighter cleaning or delicate surfaces, while higher speeds provide more aggressive cleaning.
5.3 רייניקונג טעכניקן
- For Patios and Paved Surfaces: Guide the Maxxbrush slowly and steadily over the surface. Apply light pressure. The rotating brush will dislodge dirt, moss, and weeds. Be aware that the brush may splash dirt forward and backward, especially on heavily soiled surfaces.
- For Wooden Decks: Use a moderate speed setting. Move the brush along the grain of the wood to avoid damage.
- For Artificial Turf: Use a lower speed setting to gently comb and smooth the artificial grass fibers. This helps to restore the turf's appearance.
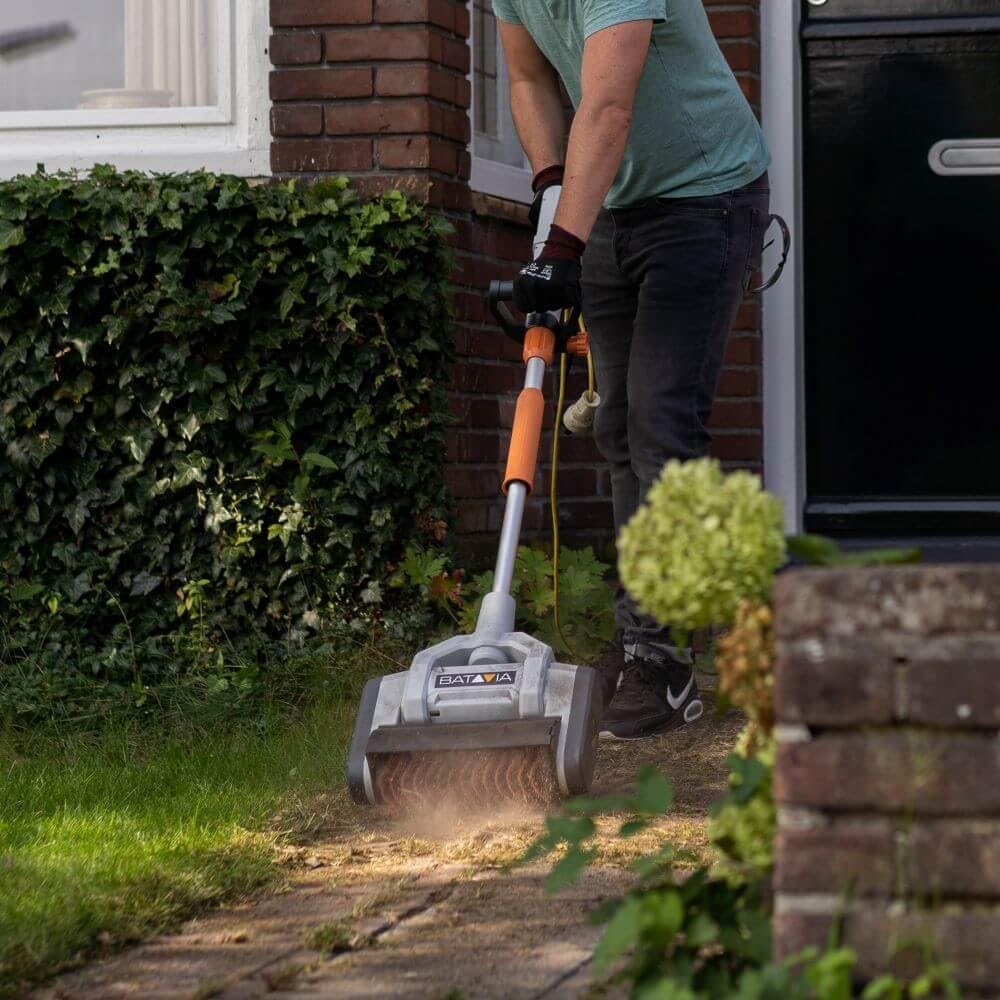
A user operating the Batavia Maxxbrush on a paved outdoor path, illustrating the ergonomic handling and effective cleaning action.

אַ נאָענט-אַרויף view of the Maxxbrush in action, effectively cleaning a wet patio surface and removing accumulated dirt.
6. וישאַלט
Regular maintenance ensures the longevity and optimal performance of your Maxxbrush.
- רייניקונג די באַרשט קאָפּ: After each use, remove any debris, weeds, or dirt accumulated on the brush bristles. If necessary, rinse the brush head with water, ensuring no water enters the motor housing. Allow it to dry completely before storage.
- רייניקונג די הויפּט אַפּאַראַט: ווישן די הויפּט אַפּאַראַט מיט אַדamp שטאָף. דו זאלסט נישט נוצן האַרב קעמיקאַלז אָדער אַברייסיוו קלינערז.
- סטאָרידזש: The 2-part telescopic handle allows for compact storage. Disassemble the handle if desired and store the Maxxbrush in a dry, secure location, away from direct sunlight and extreme temperatures.
7. טראָובלעשאָאָטינג
If you encounter issues with your Maxxbrush, refer to the following common problems and solutions:
| פּראָבלעם | מעגלעך סיבה | לייזונג |
|---|---|---|
| מיטל טוט נישט אָנהייבן | No power supply; Power switch off; Damaged cable | Check power connection; Ensure switch is on; Inspect cable for damage and replace if necessary |
| נעבעך רייניקונג פאָרשטעלונג | Brush worn out; Incorrect brush type for surface; Insufficient speed | Replace brush; Use appropriate brush for the task; Adjust speed setting |
| יבעריק ווייבריישאַן אָדער ראַש | Brush unbalanced or damaged; Debris caught in brush mechanism | Inspect and clean brush; Replace brush if damaged |
אויב די פראבלעם בלייבט נאך פרובירן די לייזונגען, ביטע קאנטאקטירט קאסטומער סופארט.
8. טעכניש ספּעסאַפאַקיישאַנז
| שטריך | באַשרייַבונג |
|---|---|
| סאָרט | באַטאַוויאַ |
| מאָדעל נומער | 7062678 |
| מאַכט | 1020 וו |
| פּראָדוקט דימענשאַנז (L x W x H) | 22 X 139 X 38 סענטימעטער |
| פּונקט וואָג | 7.51 קילאָגראַמס |
| שעפּן מאַטעריאַל | Plastic (Durable, corrosion-resistant, easy-care) |
| בריסטלע מאַטעריאַל | ניילאָן |
| רעקאָמענדירטע פּראָדוקט ניצט | שטאָק רייניקונג |
| ייבערפלאַך רעקאָמענדאַציע | Hard surfaces, artificial turf |
| אַרייַנגערעכנט קאַמפּאָונאַנץ | 1 piece (main unit with brush) |
9. וואָראַנטי אינפֿאָרמאַציע
This product comes with a standard manufacturer's warranty. Please refer to the warranty card included in your product packaging for specific terms, conditions, and duration. Keep your proof of purchase for any warranty claims.
10. קונה שטיצן
For further assistance, technical support, or spare parts inquiries, please contact Batavia customer service. Contact details can typically be found on the official Batavia webוועבזייטל אדער אויף אייער פּראָדוקט פּאַקאַדזשינג.
Webפּלאַץ: www.batavia.eu (עקסampדער לינק, ביטע באשטעטיגן דעם אפיציעלן webפּלאַץ)