
1. הקדמה
Thank you for choosing the Technoline WT 538 Wireless Projection Alarm Clock. This modern device features a touch sensor for projection and illumination, designed to integrate seamlessly into your digital lifestyle. It offers a radio-controlled clock with manual setting options, date and weekday display in 7 languages, 12/24 hour format, time zone adjustment, and indoor temperature display in Celsius or Fahrenheit. The alarm includes a customizable snooze function, and the time can be projected onto a wall or ceiling. This manual provides detailed instructions for setup, operation, and maintenance to ensure optimal performance of your alarm clock.

בילד 1.1: פראָנט view of the Technoline WT 538 Wireless Projection Alarm Clock in use, showing its display and projection feature.
2. זיכערקייַט אינפֿאָרמאַציע
- לייענען אַלע ינסטראַקשאַנז קערפאַלי איידער איר נוצן די מיטל.
- האַלטן די מיטל אַוועק פון וואַסער, נעץ און עקסטרעם טעמפּעראַטורעס.
- Use only the specified power adapter (4.5V) and battery type (2 x 1.5V AAA).
- פרובירט נישט צו צענעמען אדער פאררעכטן דעם אפאראט אליין. לאָזט איבער אלע סערוויסעס צו קוואַליפֿיצירטע פּערסאָנעל.
- אָפּזאָגן געוויינט באַטעריז ריספּאַנסאַבלי לויט די היגע רעגיאַליישאַנז.
3. פּעקל אינהאַלט
ביטע קאָנטראָלירט אַז אַלע זאכן זענען פאַראַן און אין גוטן צושטאַנד:
- Technoline WT 538 Wireless Projection Alarm Clock
- 4.5 וו מאַכט אַדאַפּטער
- 2 רענטגענ 1.5 וו אַאַאַ באַטעריז
- באַניצער מאַנואַל (דעם דאָקומענט)
4. פּראָדוקט איבערview
Familiarize yourself with the main components and controls of your WT 538 alarm clock.
4.1 Front Display and Projection
The front of the device features a clear digital display showing time, date, weekday, and indoor temperature. The projection lens is located on the side, allowing time to be projected onto a surface.

בילד 4.1: דעטאַלירט view of the alarm clock's digital display.
4.2 Rear Controls and Connections
The back of the alarm clock houses the control buttons, battery compartment, and power adapter input.

בילד 4.2: דערציען view showing buttons (SET, ALARM, +, -, WAVE), projection ON/OFF switch, alarm ON/OFF switch, battery compartment, and DC 4.5V power input.
5. סעטאַפּ
5.1 באַטאַרייע ייַנמאָנטירונג
- עפענען די באַטאַרייע אָפּטייל דעקן אויף די צוריק פון די מיטל.
- Insert 2 x 1.5V AAA batteries, ensuring correct polarity (+ and -).
- פאַרמאַכן די באַטאַרייע אָפּטייל דעקן סיקיורלי.
5.2 Power Adapter Connection
For continuous operation and permanent projection, connect the included 4.5V power adapter.
- Plug the small end of the power adapter into the DC 4.5V input jack on the back of the alarm clock.
- שטעקט אריין דעם אנדערן עק פונעם מאַכט אַדאַפּטער אין אַ נאָרמאַלן וואַנט אַוטלעט.
5.3 ערשט סעטאַפּ
Upon first power-on (either with batteries or power adapter), the clock will attempt to synchronize with the radio-controlled time signal. This process may take a few minutes. If the signal is not received, you can set the time manually.
6. אַפּערייטינג ינסטרוקטיאָנס
6.1 Time Setting (Radio-Controlled and Manual)
- Radio-Controlled Time: The clock automatically attempts to receive the DCF-77 radio signal for accurate time. A signal icon on the display indicates reception status.
- מאַנואַל צייט באַשטעטיקן: If radio reception is poor, press and hold the 'SET' button to enter manual time setting mode. Use the '+' and '-' buttons to adjust hours, minutes, and other settings. Press 'SET' again to confirm each step.
- 12/24 שעה פֿאָרמאַט: During manual time setting, you can switch between 12-hour (with AM/PM indicator) and 24-hour formats.
- צייט זאָנע באַשטעטיקן: Adjust the time zone offset if needed, typically during manual setup.
6.2 Date and Weekday Display
The display shows the current date and weekday. The weekday can be displayed in 7 different languages. Refer to the manual setting section to cycle through language options.
6.3 Indoor Temperature Display
The alarm clock continuously displays the indoor temperature. Press the '°C/°F' button to switch between Celsius and Fahrenheit units.
6.4 שרעק פֿונקציע
- Press the 'ALARM' button once to view די קראַנט שרעק צייַט.
- Press and hold the 'ALARM' button to enter alarm setting mode. Use '+' and '-' to adjust the alarm hour and minute. Press 'ALARM' to confirm.
- Use the 'ALARM ON/OFF' switch on the back to activate or deactivate the alarm. An alarm icon will appear on the display when active.
6.5 סנוז פונקציע
When the alarm sounds, gently touch the top of the alarm clock (touch sensor area) to activate the snooze function. The alarm will pause for a preset duration (adjustable during alarm setup) and sound again later.
6.6 באַקלייט אַקטיוואַציע
The display backlight can be activated by gently touching the top of the alarm clock (touch sensor area). This provides temporary illumination for easy viewאין נידעריק ליכט באדינגונגען.
6.7 פּראָיעקציע פֿונקציע
The WT 538 can project the time onto a wall or ceiling.
- Temporary Projection: Gently touch the top of the alarm clock (touch sensor area) to activate the projection temporarily.
- Permanent Projection: Permanent projection is only possible when the alarm clock is powered by the included 4.5V power adapter. Use the 'Projection ON/OFF' switch on the back of the device to enable continuous projection.
- Adjust the angle of the projection lens to achieve the desired position and focus.
7. וישאַלט
7.1 רייניקונג
Wipe the device with a soft, dry cloth. Do not use abrasive cleaners or solvents, as these may damage the surface.
7.2 באַטערי פאַרבייַט
When the display dims or the device functions become unreliable, it is time to replace the batteries. Follow the battery installation steps in Section 5.1.
8. טראָובלעשאָאָטינג
- קיין עקראַן/אַפּאַראַט טוט זיך נישט אָן: Check battery polarity, ensure batteries are fresh, or verify the power adapter is correctly connected and plugged into a working outlet.
- Poor Radio Signal Reception: Move the alarm clock to a location away from electronic devices that may cause interference. Try different orientations.
- Projection Unclear/Out of Focus: Adjust the projection lens to focus the image. Ensure the projection surface is within the optimal range.
- Projection Not Permanent: Ensure the alarm clock is connected to the power adapter and the 'Projection ON' switch is activated. Permanent projection is not available when running on batteries alone.
- שרעק ניט קלאַנג: Check if the alarm is set correctly and the 'ALARM ON' switch is activated.
9. ספּעסאַפאַקיישאַנז
| שטריך | באַשרייַבונג |
|---|---|
| סאָרט | טעטשנאָלינע |
| מאָדעל | ווט 538 |
| ווייַז טיפּ | דיגיטאַל |
| ספּעציעלע פֿעיִקייטן | Alarm, Calendar Display, Multiple Time Zones, Snooze, Silent Clock, Illuminated, Projection |
| פּראָדוקט גרייסן (L x H x D) | 15 cm x 9 cm x 1.5 cm (with battery compartment: 4 cm) |
| וואָג (אַרייַנגערעכנט באַטעריז) | 0.202 קג |
| מאַכט מקור | 4.5V Power Adapter (included) or 2 x 1.5V AAA Batteries (included) |
| מאַונטינג טיפּ | טאַבלעטאָפּ |
| ראַם מאַטעריאַל | אַקרילאָניטרילע בוטאַדיענע סטירענע |
| טעמפּעראַטור מעאַסורעמענט ראַנגע | -9.9 °C צו 50 °C |
| טעמפּעראַטור רעסאָלוטיאָן | 0.1 °F |
| טעמפּעראַטור אַקקוראַסי | 0 °C to 40 °C: ± 1 °C; -9.9 °C to -0.1 °C: ± 2 °C; 40 °C to 50 °C: ± 2 °C |
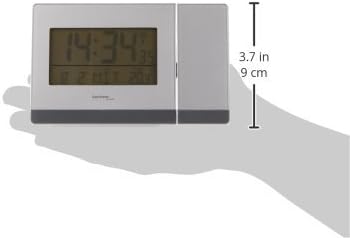
בילד 9.1: זייט view illustrating the dimensions of the alarm clock.
10. וואָראַנטי און שטיצן
For warranty information or technical support, please refer to the documentation provided with your purchase or contact your retailer. Keep your proof of purchase for any warranty claims.