
1. הקדמה
This manual provides detailed instructions for the installation, operation, and maintenance of your SUNNYSKY 60A MPPT Solar Charge Controller. This device is designed to efficiently manage power flow from solar panels to batteries, ensuring optimal charging and battery longevity. It features an intelligent LCD display for real-time monitoring and configuration.
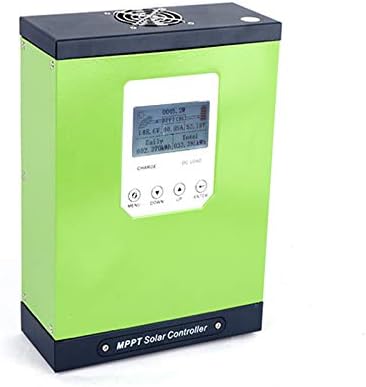
פיגורע 1: פראָנט view of the SUNNYSKY 60A MPPT Solar Charge Controller. The device is green with a black top and bottom, featuring an LCD screen and control buttons on the front panel.
2. שליסל פֿעיִקייטן
- MPPT solar controller with real-time power generation and current display.
- Displays daily and cumulative power generation.
- Records fault history for easy troubleshooting.
- Supports lead-acid, colloidal, and lithium batteries.
- Constructed with premium brand components for a theoretical design lifespan exceeding 10 years and high-temperature resistance above 105°C.
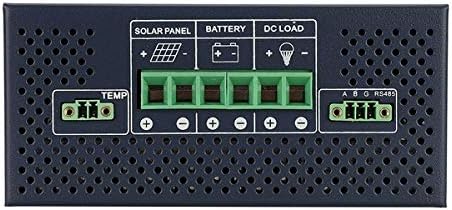
Figure 2: The controller utilizes the latest MPPT algorithm for maximum power point tracking, achieving over 98.5% charging efficiency and over 99.73% tracking accuracy.
3. זיכערקייַט אינפֿאָרמאַציע
ביטע ליינט און פארשטייט אלע זיכערהייט אינסטרוקציעס איידער די אינסטאלאציע און באניץ. נישט נאכפאלגן די אינסטרוקציעס קען רעזולטירן אין עלעקטרישע שאק, פייער, אדער ערנסטע שאדן.
שוץ פֿעיִקייטן:
- פּוו פאַרקערט פּאָולעראַטי שוץ
- PV קורץ-קרייז שוץ
- PV over current alarm protection
- באַטערי אָוווערטשאַרדזש שוץ
- באַטערי איבער אָפּזאָגן שוץ
- באַטערי פאַרקערט פּאָולעראַטי שוץ
- מאַסע קורץ קרייַז שוץ
- לאָוד אָווערלאָוד שוץ
- קאָנטראָללער אָוווערכיטינג שוץ
4. פּראָדוקט איבערview
4.1. גשמיות דימענשאַנז
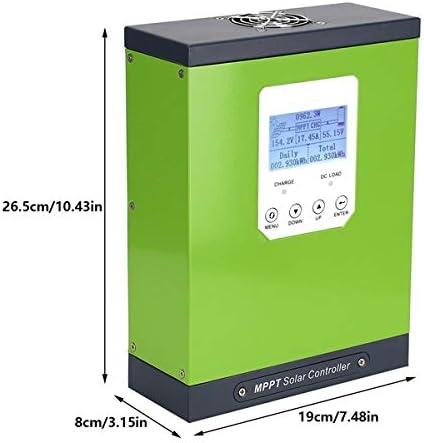
Figure 3: The controller measures 26.5 cm (10.43 inches) in height, 19 cm (7.48 inches) in width, and 8 cm (3.15 inches) in depth.
4.2. Front Panel and Controls

Figure 4: The front panel features an LCD display, charging status indicator, DC output indicator, Menu button, Down page button, Up page button, and Enter button. The wire connection cover is located at the bottom.
4.3. פֿאַרבינדונג טערמינאַלן

Figure 5: The rear panel includes terminals for Solar Panel (+/-), Battery (+/-), DC Load (+/-), and a TEMP sensor port, along with an RS485 communication port.
5. סעטאַפּ און ייַנמאָנטירונג
Proper installation is crucial for the safe and efficient operation of the charge controller. Ensure all connections are secure and correctly polarized.
5.1. וויירינג קאַנעקשאַנז
- Connect the battery to the controller first. Ensure correct polarity (+ to + and - to -).
- Connect the solar panel to the controller. Ensure correct polarity.
- Connect the DC load to the controller (optional). Ensure correct polarity.
- Connect the temperature sensor to the TEMP port.
- If using communication features, connect the RS485 cable.
Video 1: Demonstration of the controller activating a lithium battery. This video illustrates how the MPPT controller can initiate charging even when a battery is deeply discharged.
Video 2: Short demonstration showing the controller's ability to activate a dead battery, allowing it to begin charging from solar input.
6. אַפּערייטינג ינסטרוקטיאָנס
The intelligent LCD display provides real-time data and allows for system configuration.
6.1. על-סי-די דיספּלעי איבערview
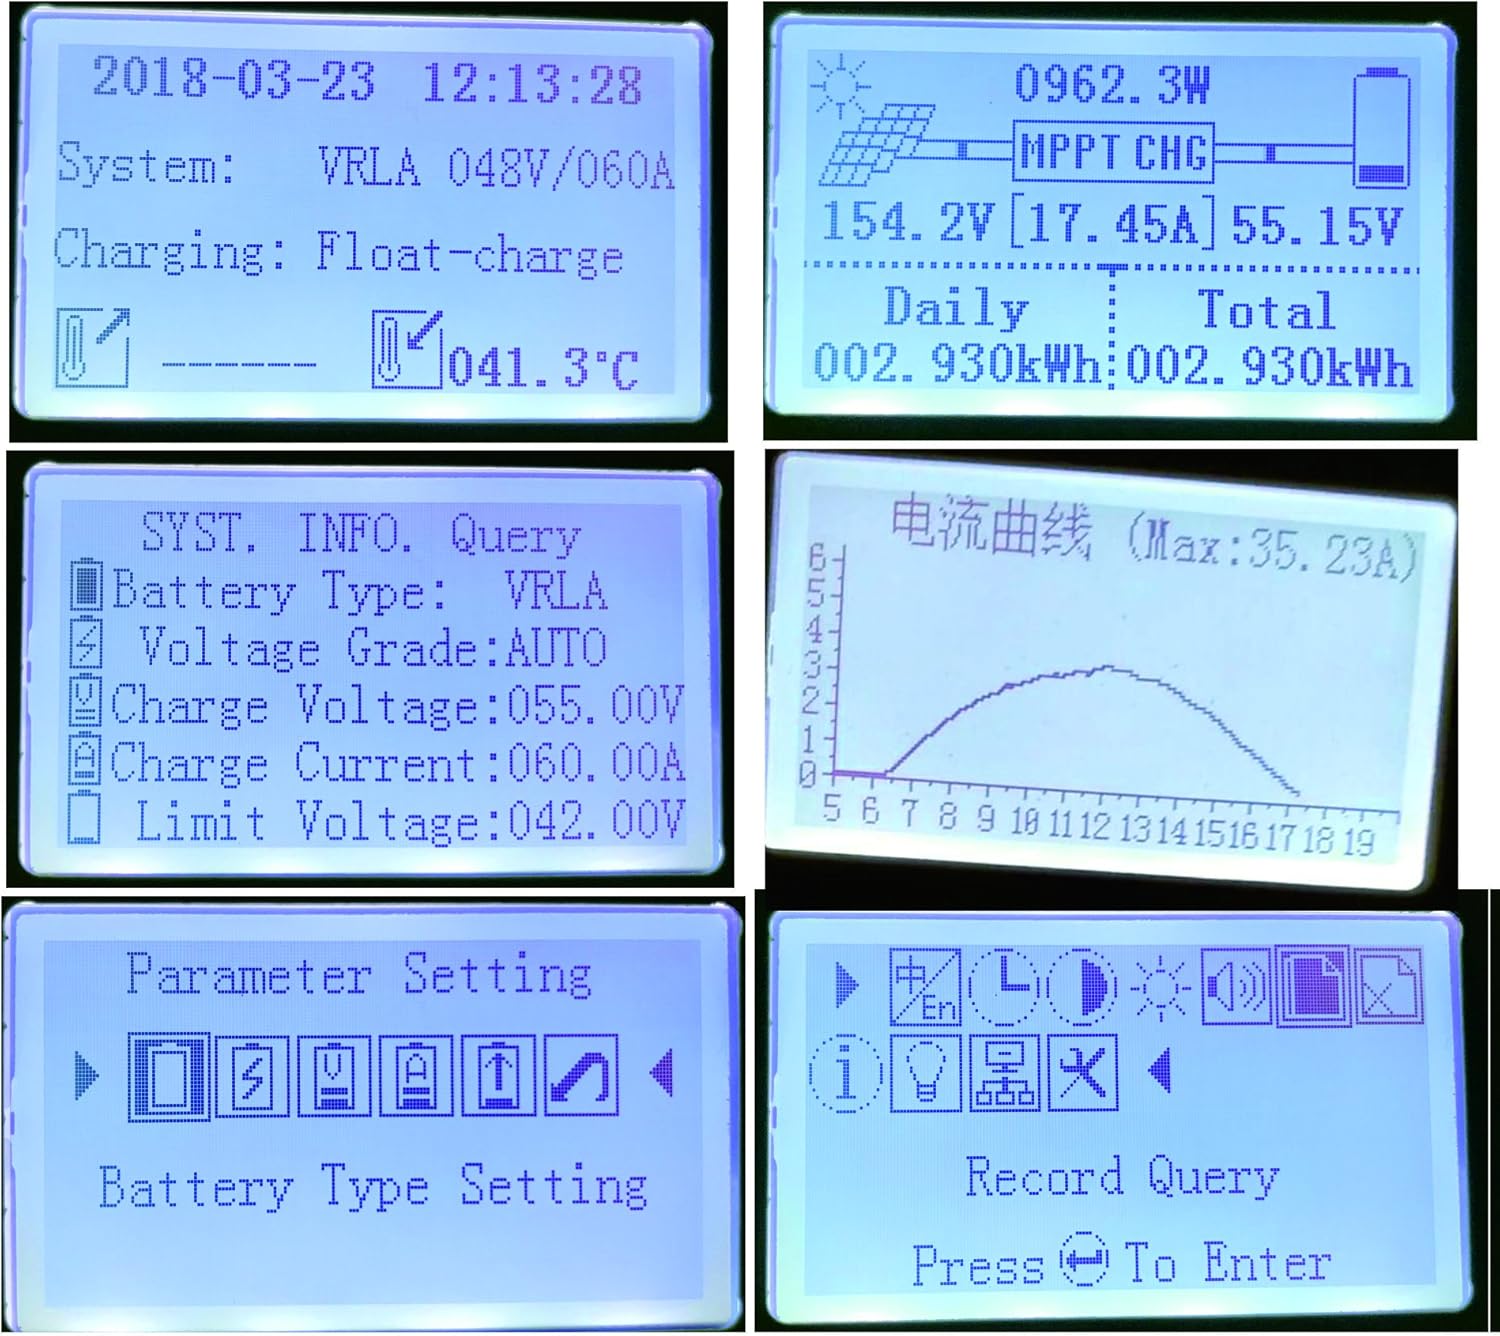
Figure 6: The LCD displays real-time information such as system voltage, charging current, daily and total power generation, battery type, and temperature. It also shows various menu screens for settings and record queries.
6.2. מעניו נאַוויגאַציע
Use the 'MENU', 'DOWN', 'UP', and 'ENTER' buttons to navigate through the display screens and adjust settings.
- מעניו: גייט אריין אין הויפּט מעניו אדער גייט צוריק צום פריערדיקן עקראַן.
- אַראָפּ: Scrolls down through options or decreases a value.
- אַרויף: Scrolls up through options or increases a value.
- אַרייַן: באַשטעטיקט אַן אויסוואַל אָדער גייט אַרײַן אין אַ סובמעניו.
7. פּאַראַמעטער סעטטינגס
To access parameter settings, press the 'MENU' button and navigate to the 'Parameter Setting' option. A password may be required (refer to your product's specific documentation for default password).
7.1. Battery Type Setting
Select the appropriate battery type (lead-acid, colloidal, or lithium) to ensure correct charging algorithms are applied.
7.2. Charge Voltage באַשטעטיקן
Adjust the charge voltage according to your battery manufacturer's specifications. This includes float, boost, and equalization voltages.
7.3. Charge Current Setting
Set the maximum charging current to prevent overcharging or damage to your batteries.
7.4. Discharge Limit Voltage באַשטעטיקן
Configure the minimum voltage at which the load will be disconnected to protect the battery from over-discharge.
7.5. Time and Date Adjustment
Set the current time and date for accurate record-keeping of power generation data.
8. וישאַלט
רעגולערע וישאַלט גאַראַנטירט די לאַנגלעבעדיקייט און אָפּטימאַל פאָרשטעלונג פון דיין זונ - אָפּצאָל קאָנטראָללער.
- פּעריִאָדיש קאָנטראָלירן אַלע וויירינג קאַנעקשאַנז פֿאַר שטרענגקייט און קעראָוזשאַן.
- Clean the controller's exterior and display screen with a dry, soft cloth.
- זיכער מאַכן אַז די ווענטילאַציע אַרום דעם קאָנטראָללער זאָל זיין גענוג צו פאַרמייַדן איבערהיצונג.
- Check battery terminals for corrosion and clean as necessary.
9. טראָובלעשאָאָטינג
The controller's fault record display can assist in diagnosing issues.
- קיין מאַכט/דיספּליי אויסגעלאָשן: קוק די באַטאַרייע קאַנעקשאַנז און וואָלtage. Ensure solar panels are receiving sufficient sunlight.
- באַטאַרייע ניט טשאַרדזשינג: Verify solar panel connections and output. Check battery type settings. Inspect for any fault codes on the display.
- לאָדן אַרבעט נישט: Check DC load connections. Ensure battery voltage is above the discharge limit. Check for load short circuit or overload protection activation.
- איבערהייצונג: Ensure proper ventilation. Reduce load if ambient temperature is high.
ווידעא 3: א דעטאלירטע רעקארדview of the SUNNYSKY MPPT Solar Charge Controller, demonstrating its features, display, and configuration options. This video also highlights comparisons with other controllers and discusses installation aspects.
10. ספּעסאַפאַקיישאַנז
| אַטריביוט | ווערט |
|---|---|
| פּראָדוקט דימענשאַנז | 7.56 X 10.24 X 3.15 אינטשעס |
| פּונקט וואָג | 8.43 פונט |
| פאַבריקאַנט | SUNNYSKY |
| ASIN | B07CXZQQTP |
| באַטעריז פארלאנגט | No (8 12V batteries required for system operation, not included with controller) |
| סאָרט | SUNNYSKY |
| UPC | 606814417296 |
11. וואָראַנטי און שטיצן
For warranty information and technical support, please refer to the documentation included with your purchase or contact SUNNYSKY customer service directly. Protection plans may be available for extended coverage.