
1. הקדמה
This manual provides essential information for the safe and efficient use of your Alienware AW3418DW 34.1-inch Curved Gaming Monitor. This monitor features a WQHD (3440x1440) resolution, a 120Hz refresh rate (overclocked), and NVIDIA G-SYNC technology for an immersive gaming experience. Please read this manual thoroughly before operating the device.
2. זיכערקייַט אינפֿאָרמאַציע
- Always disconnect the power cable from the wall outlet before cleaning the monitor.
- שטעלט נישט אויס דעם מאָניטאָר צו רעגן אָדער פייכטקייט כּדי צו פֿאַרמייַדן פֿײַער אָדער שאָק געפֿאַרן.
- עפֿנט נישט דעם מאָניטאָר casinז. עס זענען נישטאָ קיין טיילן וואָס דער באַניצער קען סערוויסן אינעווייניק. לאָזט איבער אַלע סערוויסינג צו קוואַליפֿיצירטע סערוויס פּערסאָנעל.
- שטעלט דעם מאָניטאָר אויף אַ סטאַבילער, גלאַטער ייבערפלאַך כּדי צו פאַרהיטן אַז ער זאָל נישט פאַלן.
- זיכער מאַכן אַז די ווענטילאַציע אַרום דעם מאָניטאָר איז ריכטיק. בלאָקירט נישט די ווענטילאַציע עפענונגען.
- ניצט נאָר דעם מאַכט אַדאַפּטער און קייבלס וואָס ווערן צוגעשטעלט מיטן מאָניטאָר.
3. פּעקל אינהאַלט
באַשטעטיקן אַז אַלע קאָמפּאָנענטן זענען פאַראַן אין דער פּאַקעט:
- Alienware AW3418DW Monitor
- מאָניטאָר שטאַנד (באַזע און רייזער)
- מאַכט קאַבלע
- DisplayPort קאַבלע
- HDMI קאַבלע
- וסב 3.0 אַפּסטרים קאַבלע
- Documentation (Quick Setup Guide, Safety Information)
4. סעטאַפּ
4.1 פיזישע אויפשטעל
Carefully remove the monitor and its components from the packaging. Place the monitor face down on a soft cloth or cushion to prevent scratches.
אַטאַטשינג די שטיין
- Attach the stand riser to the monitor panel until it clicks into place.
- Attach the stand base to the stand riser and tighten the captive screw.

פיגורע 4.1: פראָנט view of the Alienware AW3418DW monitor with its stand attached.

פיגורע 4.2: זייַט view of the Alienware AW3418DW monitor with its stand.
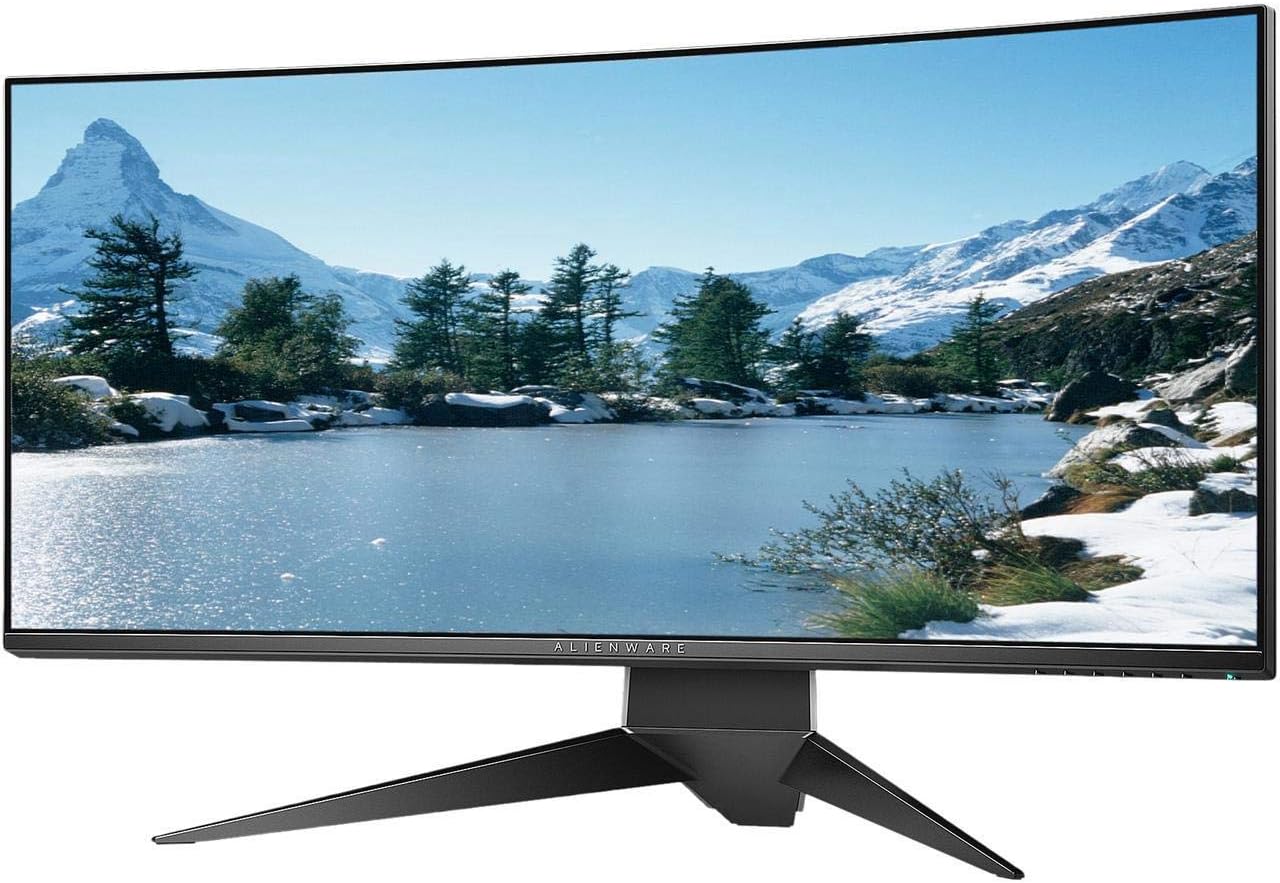
פיגורע 4.3: דערציען view of the Alienware AW3418DW monitor showing the stand and AlienFX lighting.
וועסאַ מאָונטינג
The monitor supports VESA mounting (100 x 100 mm). Remove the stand riser by pressing the release button and then attach the VESA-compatible mount to the monitor using appropriate screws. Ensure the mount can support the monitor's weight of 26.1 pounds (without stand).

Figure 4.4: Monitor dimensions for VESA mount compatibility.
4.2 קאַנעקטינג קאַבלעס
פֿאַרבינדט די נויטיקע קאַבלען צו אייער מאָניטאָר און קאָמפּיוטער.
- מאַכט קאַבלע: פֿאַרבינדט דעם מאַכט קאַבל צום מאָניטאָר'ס מאַכט פּאָרט און דערנאָך צו אַ וואַנט אַוטלעט.
- ווידעא קאַבלע: Connect either the DisplayPort cable or the HDMI cable from your computer's graphics card to the corresponding port on the monitor. For optimal performance, especially for 120Hz refresh rate and G-SYNC, use the DisplayPort connection.
- יו-עס-בי אַפּסטרים קאַבל: Connect the USB 3.0 upstream cable from your computer to the monitor's upstream USB port to enable the monitor's USB hub functionality.
- וסב דאַונסטרים פּאָרץ: Connect your USB devices (e.g., keyboard, mouse, webcam) to the four USB 3.0 downstream ports on the monitor.
5. אַפּערייטינג ינסטרוקטיאָנס
5.1 מאַכט אויף / אַוועק
דריק דעם מאַכט קנעפּל וואָס געפינט זיך אויפן מאָניטאָר צו עס אנצינדן אָדער אויסלעשן. די מאַכט LED וועט ווײַזן דעם מאָניטאָר'ס סטאַטוס.
5.2 אויף-סקרין דיספּליי (OSD) נאַוויגאַציע
The On-Screen Display (OSD) menu allows you to adjust various monitor settings. Use the control buttons, typically located on the bottom right or rear of the monitor, to navigate the OSD.
- דריק א קאנטראל קנעפל צו אקטיוויזירן דעם OSD מעניו.
- ניצט די נאַוויגאַציע קנעפּלעך (אַרויף/אַראָפּ/לינקס/רעכטס) צו באַוועגן זיך דורך מעניו אָפּציעס.
- דריק דעם אויסקלייב קנעפל צו באשטעטיגן אן אויסוואל אדער אריינגיין אין א אונטער-מעניו.
- Use the back/exit button to return to the previous menu or exit the OSD.
5.3 ווייַז סעטטינגס
סטרויערן די אַרויסווייַזן סעטטינגס פֿאַר אָפּטימאַל viewing and gaming performance.
- רעזאלוציע: Set your computer's display resolution to 3440x1440 for the native WQHD experience.
- דערפרישן קורס: The monitor supports up to 120Hz refresh rate (overclocked). Ensure your graphics card drivers are updated and the refresh rate is set in your operating system's display settings or graphics control panel.
- NVIDIA G-SYNC: For tear-free and smooth gameplay, enable G-SYNC in your NVIDIA Control Panel. This feature synchronizes the monitor's refresh rate with your GPU's frame rate.
- ברייטנאַס / קאַנטראַסט: Adjust these settings in the OSD menu to suit your environment and preference.
5.4 AlienFX Lighting
Customize the AlienFX lighting zones on your monitor through the OSD menu or Alienware Command Center software (if installed on your PC). You can select colors, effects, and synchronize lighting with other Alienware devices.
5.5 USB Hub Usage
The monitor acts as a USB 3.0 hub, providing convenient access to four downstream USB ports for connecting peripherals. Ensure the USB upstream cable is connected to your computer for this feature to function.
6. וישאַלט
6.1 רייניקונג די מאָניטאָר
- שטענדיק ארויסנעמען דעם מאָניטאָר פֿון דער עלעקטרישער אַוטלעט איידער איר רייניגט.
- ניצן אַ ווייך, לינט-פֿרייַ שטאָף לייטלי דampגעוואשן מיט וואַסער אָדער אַ ניט-אַברייסיוו פאַרשטעלן רייניגער.
- שפריצט נישט רייניגער גלייך אויפן עקראַן.
- ווישט דעם עקראַן לײַכט צו באַזײַטיקן שטויב און פֿלעקן.
- רייניקן די אויסערליכע קasinג מיט אַ ווייכן, טרוקענעם שטאָף.
6.2 סטאָרידזש
If storing the monitor for an extended period, disconnect all cables, carefully disassemble the stand (if applicable), and store it in its original packaging in a cool, dry place.
7. טראָובלעשאָאָטינג
אויב איר טרעפט פּראָבלעמען מיט אייער מאָניטאָר, זעט די פאלגענדע געוויינטלעכע טראָובלעשווטינג טריט:
- קיין ווייַז: Ensure all power and video cables are securely connected. Check if the monitor is powered on and the correct input source is selected in the OSD.
- פליקערנדיק/שטאַטערנדיק: Verify that your graphics drivers are up to date. Ensure G-SYNC is properly configured in the NVIDIA Control Panel. Check for interference from other electronic devices.
- אומרעכטע רעזאָלוציע/רעפרעש קורס: Adjust the display settings in your operating system or graphics control panel to the native resolution (3440x1440) and desired refresh rate (up to 120Hz).
- דעד פּיקסעלס: The Alienware AW3418DW comes with a Premium Panel Guarantee. Refer to the warranty information for details on pixel policy.
- וסב פּאָרץ נישט ארבעטן: זייט זיכער אז דער USB 3.0 אַפּסטרים קאַבל איז פארבונדן פונעם מאָניטאָר צו אייער קאָמפּיוטער.
8. ספּעסאַפאַקיישאַנז
| שטריך | באַשרייַבונג |
|---|---|
| סאָרט | אַליענוואַרע |
| מאָדעל נומער | AW3418DW |
| פאַרשטעלן גרייס | 34.1 אינטשעס |
| האַכלאָטע | WQHD (3440 x 1440 Pixels) |
| אַספּעקט פאַרהעלטעניש | 21:9 |
| דערפרישן קורס | 120 Hz (Overclocked) |
| ענטפער צייט | 4 מיליסעקאַנדז |
| אַדאַפּטיוו סינק טעכנאָלאָגיע | נווידיאַ ג-סינק |
| ווייַז טיפּ | לעד IPS |
| קערוואַטשער | 1900ר |
| ברייטנאַס | 300 סי / מ² |
| קאַנטראַסט פאַרהעלטעניש | 1000:1 |
| Viewינג אַנגלע | 178 דיגריז |
| קאַנעקטיוויטי | 1x DisplayPort (1.2), 1x HDMI (1.4), 4x USB 3.0 Downstream, 1x USB 3.0 Upstream |
| פּונקט וואָג | 26.1 Pounds (without stand) |
| מאַונטינג טיפּ | VESA Compatible (100 x 100 mm) |
9. וואָראַנטי און שטיצן
Your Alienware AW3418DW monitor is covered by a 3 Years Limited Hardware Warranty און 3 Years Advance Exchange Service, אַרייַנגערעכנט אַ Premium Panel Guarantee. The Premium Panel Guarantee ensures a free panel replacement during the limited hardware warranty period even if only one bright pixel is found.
For technical support, warranty claims, or additional information, please visit the official Alienware or Dell support website. You may also find updated drivers and firmware there.
אָנליין שטיצן: www.dell.com/support