
הקדמה
This manual provides detailed instructions for installing the MMOBIEL Touchscreen Front Display replacement for iPad Mini 1 and iPad Mini 2 models. This high-quality replacement part is designed to restore the touch functionality and display of your device. It comes pre-assembled with essential components and includes a comprehensive tool kit to facilitate the repair process.
קאַמפּאַטאַבילאַטי
This MMOBIEL Touchscreen Front Display is compatible with the following iPad Mini models:
- iPad Mini 1: Models A1432, A1455
- iPad Mini 2: Models A1489, A1490, A1491
Important: Please verify the exact model number of your device BEFORE proceeding with the installation. The model number can typically be found on the back of your iPad or within its settings.

Figure 1: Locating your iPad Mini model number. This screen is NOT compatible with iPad Mini 3, 4, or 5.
פּעקל אינהאַלט
Your MMOBIEL Touchscreen Front Display package includes the following items:
- MMOBIEL Touchscreen Front Display (Digitizer) for iPad Mini 1/2 (White)
- Pre-installed Home button
- Pre-installed Flex cable
- Pre-installed Front Camera holder
- Pre-applied Adhesives
- IC טשיפּ
- גאַנץ מכשירים קיט:
- 1x פּינצעט
- 1x מיקראָפיבער שטאָף
- 1x סאַקשאַן גלעזל
- 2x Spudgers (lever tools)
- 1x Pick
- 1x פיליפּס שרויפנ - ציער
- 1x SIM card ejector tool
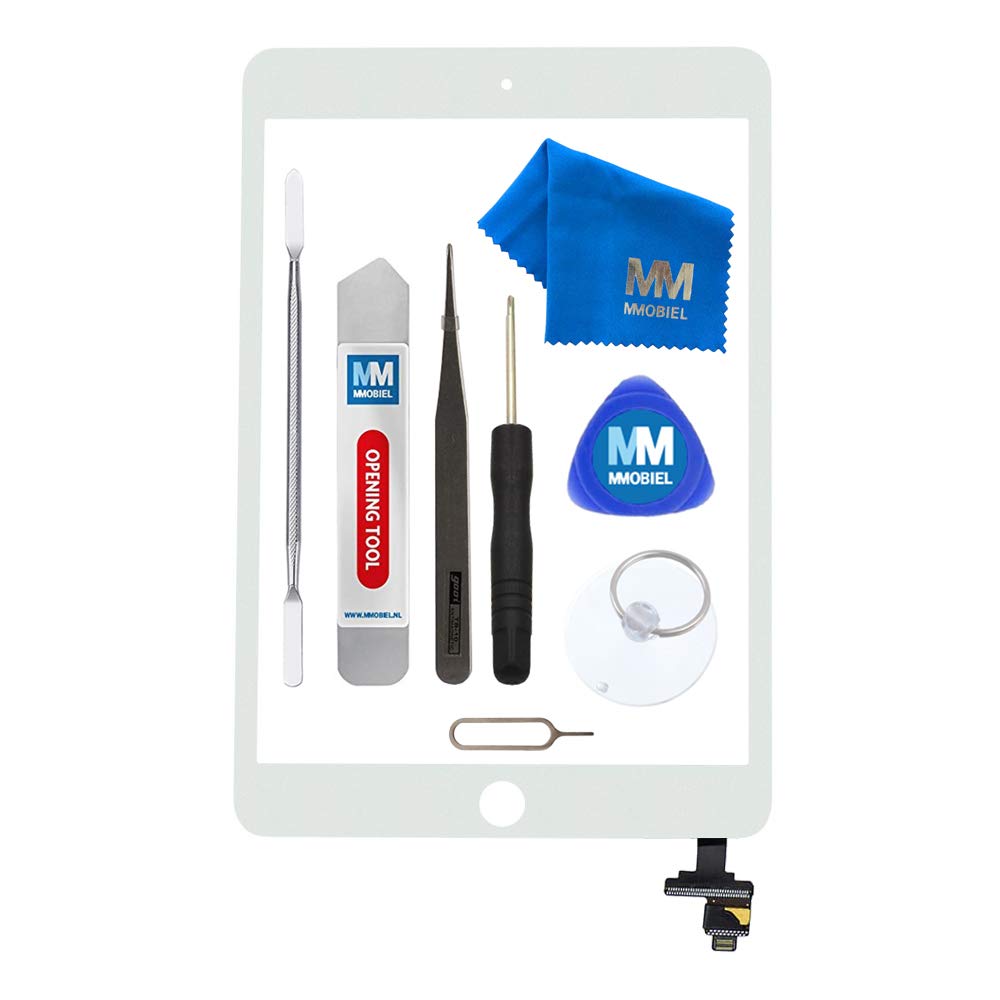
Figure 2: MMOBIEL Touchscreen Front Display with pre-installed components.
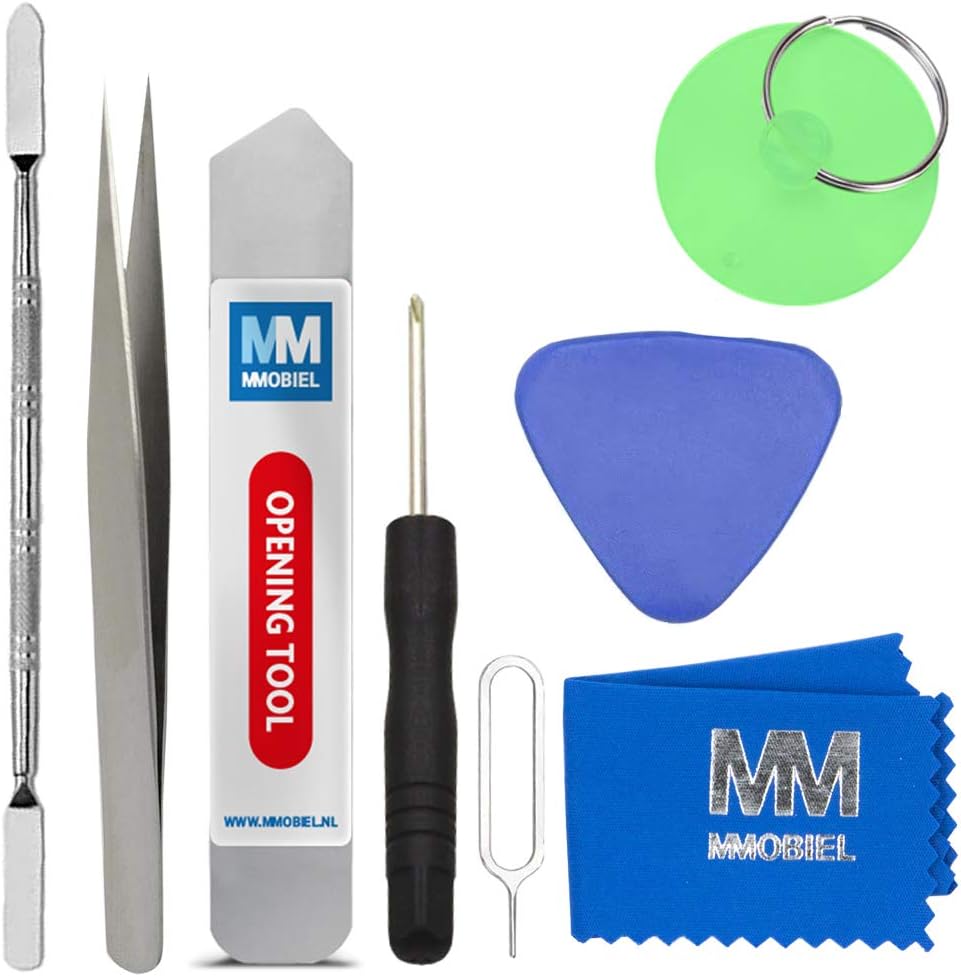
Figure 3: Included professional tool kit for installation.
זיכערקייַט אינפֿאָרמאַציע
Please read and understand all safety precautions before beginning the repair process. Electronic repairs can be complex and carry risks if not performed correctly.
- מאַכט אַוועק: Always ensure your device is completely powered off and disconnected from any power source before starting the repair.
- סטאַטיק עלעקטרע: Take precautions against electrostatic discharge (ESD). Use an anti-static wrist strap or work on an anti-static mat to prevent damage to sensitive electronic components.
- שעפּן מיט זאָרג: Electronic components, especially flex cables and connectors, are delicate. Handle them gently to avoid tearing or bending.
- אויג שוץ: Consider wearing eye protection to guard against small flying debris, especially when prying open the device.
- באַטערי זיכערקייַט: Be extremely careful when handling the device's battery. Puncturing or damaging a lithium-ion battery can lead to fire or explosion.
- פאַכמאַן הילף: If you are unsure about any step or uncomfortable performing the repair yourself, seek assistance from a qualified technician.
סעטאַפּ און ינסטאַללאַטיאָן גייד
This section outlines the general steps for replacing the touchscreen digitizer on your iPad Mini 1 or 2. A detailed visual guide may be available online; search for specific instructions for your iPad model.
- צוגרייטונג: Ensure your iPad is powered off. Gather all tools from the included kit. Clear a clean, well-lit workspace.
- Remove Damaged Screen: Carefully use the included spudgers and suction cup to gently pry open the existing damaged touchscreen from the iPad's frame. Apply heat if necessary to soften the adhesive. Be extremely cautious not to damage internal components or the LCD underneath.

Figure 4: Carefully prying open the screen with a spudger.
- דיסקאַנעקט קאַבלעס: Once the screen is partially lifted, carefully disconnect the digitizer's flex cables from the logic board. There may also be an LCD cable to disconnect, depending on your model.
- ריינע ראַם: Thoroughly clean any remaining adhesive or glass fragments from the iPad's frame. A clean surface is crucial for proper adhesion of the new screen.
- Connect New Screen: Carefully connect the flex cables of the new MMOBIEL Touchscreen Front Display to the corresponding connectors on the iPad's logic board. Ensure all connections are secure and properly seated.
- טעסט פאַנגקשאַנאַליטי: Before fully sealing the new screen, temporarily power on the iPad to test the touchscreen responsiveness, home button functionality, and display quality. Ensure there are no dead pixels or unresponsive areas. Power off the device after testing.
- זיכער נייַער סקרין: Remove the protective films from the pre-applied adhesives on the new digitizer. Carefully align the new screen with the iPad's frame and gently press it into place, ensuring a snug fit.
- לעצט פֿאַרזאַמלונג: Reassemble any other components that were removed during the process.

Figure 5: Visual representation of a successful screen replacement.
אַפּערייטינג
After successful installation, your iPad Mini's touchscreen functionality should be fully restored. The MMOBIEL Touchscreen supports the Smart Sleep and Smart Wake up functions, allowing your device to respond to cover opening and closing if applicable.
- Touch Responsiveness: Test all areas of the screen to ensure accurate and consistent touch input.
- היים קנעפּל: Verify the home button's click and touch ID (if applicable to your model and transferred correctly) functionality.
- ווייַז קוואַליטעט: Check for any visual anomalies, discoloration, or dead pixels on the underlying LCD.
וישאַלט
To ensure the longevity and optimal performance of your new touchscreen, follow these maintenance guidelines:
- רייניקונג: Use the included microfiber cloth or a similar soft, lint-free cloth to gently wipe the screen. For stubborn smudges, slightly dampווישט דעם שטאָף מיט וואַסער אָדער אַ פאַרשטעלן-זיכער רייניגער. פֿאַרמייַדט שטרענגע כעמיקאַלן אָדער אַברייסיוו מאַטעריאַלן.
- שוץ: Consider using a screen protector and a protective case to prevent future damage from drops or scratches.
- ויסמיידן דרוק: Do not apply excessive pressure to the screen, as this can damage the digitizer or the underlying LCD.
טראָובלעשאָאָטינג
If you encounter issues after installation, consider the following troubleshooting steps:
- Unresponsive Touch:
- Ensure all flex cables are securely connected. Disconnect and reconnect them carefully.
- Perform a hard reset of your iPad (refer to Apple's support for your specific model).
- Check for any debris or damage to the connectors on both the digitizer and the logic board.
- Home Button Not Working:
- Verify the home button flex cable is properly connected.
- Ensure the home button itself is correctly seated and not obstructed.
- Display Issues (e.g., lines, no image):
- This replacement part is for the digitizer (touchscreen) only. If you have display issues, the underlying LCD may be damaged or its cable improperly connected. Recheck the LCD cable connection.
- Screen Not Sealing Properly:
- Ensure the iPad frame is completely free of old adhesive and debris.
- Apply gentle, even pressure around the edges of the screen.
If troubleshooting steps do not resolve the issue, it is recommended to contact MMOBIEL customer support or consult a professional repair service.
ספּעסאַפאַקיישאַנז
| סאָרט | MMOBIEL |
| קאָליר | ווייַס |
| קאַמפּאַטאַבאַל דעוויסעס | iPad Mini 1 (A1432, A1455), iPad Mini 2 (A1489, A1490, A1491) |
| נומער מאָדעל נומער | A1432 A1455 / A1489 A1490 A1491 |
| פאַבריקאַנט | MMOBIEL |
| לאַנד פון אָריגין | כינע |
וואָראַנטי אינפֿאָרמאַציע
Specific warranty details for this product are not provided in the available information. Please refer to the seller's return policy or contact MMOBIEL directly for warranty inquiries.
שטיצן
For further assistance, technical support, or questions regarding your MMOBIEL Touchscreen Front Display, please contact:
- MMOBIEL Customer Service: Refer to the contact information provided with your purchase or visit the official MMOBIEL webפּלאַץ.
- פארקויפער שטיצע: Contact the seller from whom you purchased the product for immediate assistance.
No relevant product videos from the seller were found for embedding in this manual.


