
1. הקדמה
This manual provides detailed instructions for installing, configuring, and maintaining your GIGABYTE GA-B150M-D3H Micro ATX motherboard. The GA-B150M-D3H is designed to support 6th Generation Intel Core Processors and features Dual Channel DDR4 memory, PCIe Gen3 x4 M.2 connector, SATA Express, and 8-channel HD audio with Audio Noise Guard.
Please read this manual thoroughly before beginning installation to ensure proper setup and operation.
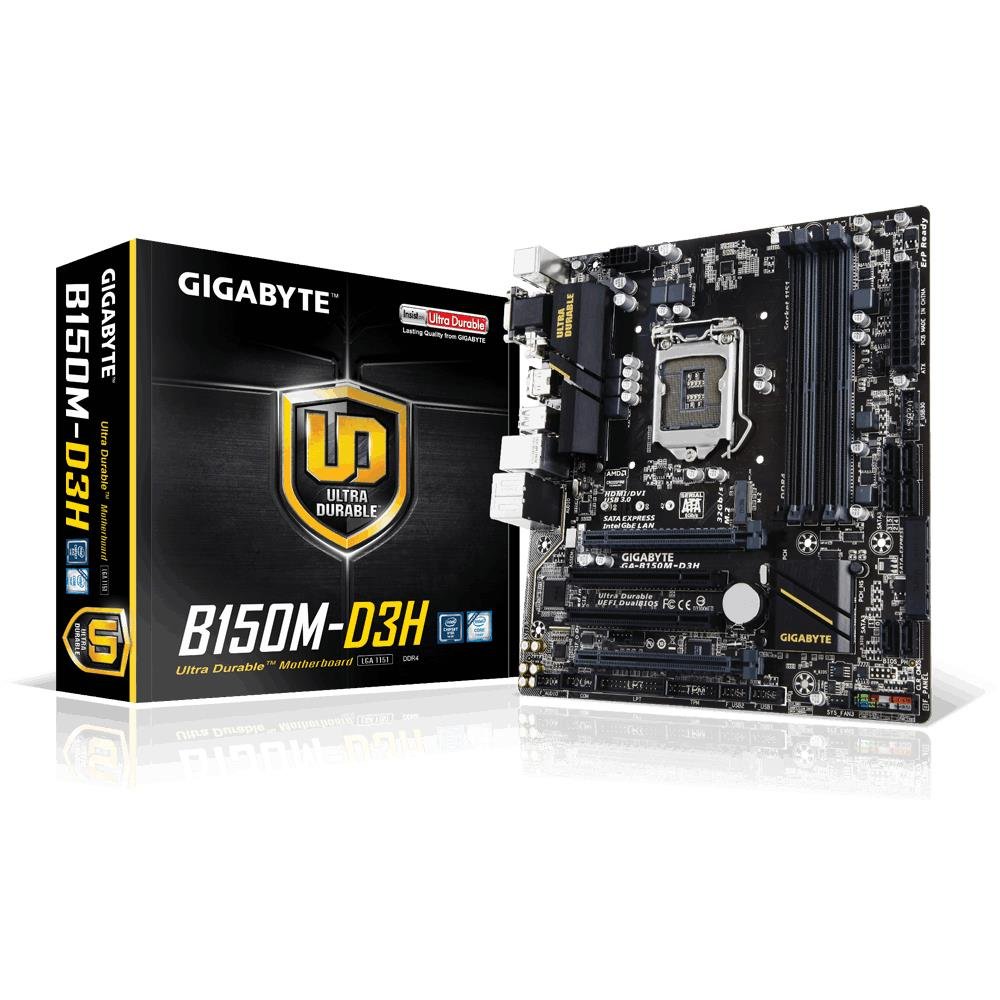
Image 1.1: GIGABYTE GA-B150M-D3H Micro ATX Motherboard. This image displays the overall layout of the motherboard, highlighting its compact Micro ATX form factor and various component slots.
2. זיכערקייַט אינפֿאָרמאַציע
היט די פאלגענדע זיכערהייט מיטלען צו פאַרמייַדן שעדיקן צו די מוטערבאָרד און שאָדן צו זיך:
- שטענדיק אָפּשטעקן דעם עלעקטרישן שנור פֿון דער וואַנט־ווענטיל איידער איר רירט אָן קיין קאָמפּאָנענטן.
- טראָגט אַן אַנטי-סטאַטישן האַנטגעלענק-רימען אָדער רירט אָפט אָן אַן געערדטן מעטאַלן אָביעקט צו אָפּלאָדן סטאַטישע עלעקטריע.
- האַלט אָן דאָס מוטערבאָרד ביי די ברעגן כּדי נישט צו אָנרירן סענסיטיווע קאָמפּאָנענטן.
- האַלט די מאַדערבאָרד אַוועק פון נאַס און עקסטרעמע טעמפּעראַטורן.
- זאָרגט פֿאַר געהעריקע ווענטילאַציע אינעווייניק פֿון קאָמפּיוטער קעסטל כּדי צו פֿאַרמייַדן איבערהיצונג.
3. פּעקל אינהאַלט
באַשטעטיקט אַז אַלע זאכן זענען פאַראַן אין דיין מוטערבאָרד פּעקל:
- GIGABYTE GA-B150M-D3H Motherboard
- באַניצער מאַנואַל
- איך / אָ שילד
- סאַטאַ קאַבלע
- דרייווער סי-די/די-ווי-די
באַמערקונג: אינהאַלט קען זיין אַ ביסל אַנדערש לויט דער געגנט אָדער ווערסיע.
4. מאָטהערבאָאַרד אויסלייג
Familiarize yourself with the various components and connectors on the GA-B150M-D3H motherboard.
Image 4.1: GIGABYTE GA-B150M-D3H Motherboard Layout. This image provides a visual reference for the location of key components such as the CPU socket, DIMM slots, PCIe slots, SATA ports, and M.2 connector.
שליסל קאַמפּאָונאַנץ:
- LGA 1151 קפּו סאָקעט: For 6th Generation Intel Core Processors.
- DDR4 DIMM Slots (4): Supports Dual Channel DDR4 memory up to 2133 MHz.
- PCIe סלאָץ: Includes PCIe Gen3 x16 for graphics cards and PCIe x1 slots for expansion.
- M.2 Connector: Supports PCIe NVMe & SATA SSDs with up to 32Gb/s data transfer.
- SATA Express Connector: For up to 16Gb/s data transfer.
- SATA 6Gb/s פּאָרטן: פֿאַר פֿאַרבינדן טראַדיציאָנעלע SATA סטאָרידזש דעוויסעס.
- 24-Pin ATX Power Connector: הויפּט מאַכט אַרייַנגאַנג.
- 8-Pin ATX 12V Power Connector: CPU power input.
- פראָנט פּאַנעל כעדערז: For power button, reset button, LED indicators, and USB ports.
- אַודיאָ קאַנעקטערז: 8-channel HD Audio with high quality capacitors and Audio Noise Guard.
5. סעטאַפּ און ייַנמאָנטירונג
פֿאָלגט די סטעפּס פֿאַר ריכטיקער אינסטאַלאַציע פֿון אייער מוטערבאָרד און קאָמפּאָנענטן.
5.1. אינסטאַלירן די סי-פּי-יו
- Locate the LGA 1151 CPU socket.
- עפֿנט דעם CPU סאָקעט הייבער און הייבט אויף די לאָוד פּלאַטע.
- פֿאָרזיכטיק גלייכט אויס די CPU מיטן סאָקעט, זיכער מאַכנדיק אַז דער גאָלדענער דרייעק אויפן CPU פּאַסט צום דרייעק אויפן סאָקעט. צווינגט נישט די CPU אַרײַן אין סאָקעט.
- לאָזט אַראָפּ די לאַסט־פּלאַטע און זיכערט עס מיטן הייבער.
5.2. אינסטאַלירן דעם סי-פּי-יו קילער
Refer to your CPU cooler's instruction manual for specific installation steps. Ensure thermal paste is applied correctly between the CPU and cooler base.
5.3. אינסטאַלירן זכּרון (RAM)
- עפֿנט די קליפּס ביי ביידע ענדס פֿון די DDR4 DIMM סלאָץ.
- גלייכט אויס דעם זכּרון מאָדול מיטן שפּאַלט, און מאַכט זיכער אַז דער קערב אויפן מאָדול פּאַסט צום שליסל אין שפּאַלט.
- דריק פעסט אַראָפּ אויף ביידע עקן פון די זכּרון מאָדול ביז די קליפס קליקן אין פּלאַץ.
- For dual-channel performance, install memory modules in matching colored slots (e.g., DIMM1 and DIMM2).
5.4. Installing Expansion Cards
- אַראָפּנעמען די מעטאַלענע קלאַמער פֿון דעם געוואונטשענעם PCIe סלאָט אויף אייער קאָמפּיוטער קעסטל.
- Align the expansion card with the PCIe slot and press down firmly until it is seated correctly.
- Secure the card with a screw to the computer case.
5.5. פֿאַרבינדן סטאָרידזש דעוויסעס
- SATA דעוויסעס: Connect one end of the SATA data cable to a SATA 6Gb/s port on the motherboard and the other end to your hard drive or SSD. Connect the SATA power cable from your power supply to the device.
- M.2 SSD: Insert the M.2 SSD into the M.2 slot at an angle, then gently push it down and secure it with the provided screw.
- SATA Express: If using a SATA Express device, connect it to the designated SATA Express connector.
5.6. קאַנעקטינג פראָנט פּאַנעל קאַנעקטערז
Connect the cables from your computer case's front panel (power button, reset button, HDD LED, power LED, front USB, front audio) to the corresponding headers on the motherboard. Refer to the motherboard layout diagram for exact locations and pin assignments.
5.7. פֿאַרבינדן די מאַכט צושטעל
- Connect the 24-pin ATX main power connector from your power supply to the 24-pin power socket on the motherboard.
- Connect the 8-pin ATX 12V CPU power connector to the 8-pin socket near the CPU.
- זיכער מאַכן אַז אַלע מאַכט קאַנעקשאַנז זענען זיכער.
6. אַפּערייטינג ינסטרוקטיאָנס
6.1. ערשטער שטיוול
After assembling all components, connect your monitor, keyboard, and mouse. Power on the system. The system should display the GIGABYTE splash screen and then enter the BIOS/UEFI setup or attempt to boot from a connected storage device.
6.2. בייאָוס/UEFI סעטאַפּ
כדי אריינצוגיין אין די בייאָס/UEFI סעטאַפּ, דריק די DEL key repeatedly during the boot process when the GIGABYTE logo appears. Here you can configure system settings, boot order, and monitor hardware status. The GA-B150M-D3H features GIGABYTE UEFI Dual BIOS for enhanced reliability.
6.3. דרייווער ינסטאַלירונג
After installing your operating system, install the necessary drivers for the motherboard components. These can be found on the included driver CD/DVD or downloaded from the official GIGABYTE website. Key drivers include chipset, audio (Realtek ALC892 codec), LAN, and any integrated graphics drivers.
6.4. אפערירן סיסטעם אינסטאַלאַציע
Insert your operating system installation media (USB drive or DVD) and configure the boot order in the BIOS/UEFI to boot from it. Follow the on-screen instructions to install your preferred operating system (e.g., Windows 8.1, Windows 10).
7. וישאַלט
7.1. רייניקונג
רייניקט רעגולער דעם אינעווייניגסטן טייל פון אייער קאמפיוטער קעסטל כדי צו פארמיידן שטויב-אנזאמלונגען, וואס קען פירן צו איבערהיצונג. ניצט קאמפרעסטע לופט צו באזייטיגן שטויב פון די ווענטילאטארן, היץ-זינקען, און מאדערבאָרד קאָמפּאָנענטן. זיכערט זיך אז די סיסטעם איז אויסגעלאשן און נישט אריינגעשטעקט פון די עלעקטרישע פלעקל איידער איר רייניגט.
7.2. בייאָוס דערהייַנטיקונגען
GIGABYTE periodically releases BIOS updates to improve system stability, compatibility, and performance. Visit the official GIGABYTE website for your motherboard model (GA-B150M-D3H) to check for the latest BIOS version and follow the provided instructions for updating. Exercise caution during BIOS updates, as an interruption can render the motherboard inoperable.
8. טראָובלעשאָאָטינג
די סעקציע באהאנדלט אלגעמיינע פראבלעמען וואס איר קענט באגעגענען.
8.1. קיין מאַכט / סיסטעם טוט זיך נישט אָן
- Check if the power supply is connected correctly to the motherboard (24-pin and 8-pin connectors).
- זיכער מאַכן אַז דער מאַכט צושטעל סוויטש איז אין דער ON פּאָזיציע.
- וועריפיצירט אז דער פראנט פאנעל פאוער קנעפל קאבל איז ריכטיג פארבונדן צום מאדערבארד כעדער.
- טעסט די מאַכט צושטעל מיט אַן אַנדער סיסטעם אָדער אַ מאַכט צושטעל טעסטער.
8.2. קיין אַרויסווייַז רעזולטאַט
- Ensure the monitor is connected to the correct graphics output (either integrated graphics on the motherboard or a dedicated graphics card).
- לייג צוריק די גראַפיקס קאַרטל און זכּרון מאָדולן.
- Try booting with only one memory module installed.
- קאָנטראָלירט צי דער מאָניטאָר איז אנגעצונדן און איינגעשטעלט אויף דער ריכטיקער אינפוט מקור.
8.3. סיסטעם אינסטאביליטעט / קראכן
- קאָנטראָלירט די CPU און GPU טעמפּעראַטורן צו זיכער מאַכן אַז זיי זענען אין זיכערע אָפּערייטינג לימאַץ.
- Verify that all drivers are installed and up to date.
- לויפט זכּרון דיאַגנאָסטיק מכשירים צו קאָנטראָלירן פֿאַר דעפעקטיווע ראַם.
- זיכער מאַכן אַז די מאַכט צושטעל גיט גענוג און סטאַביל מאַכט צו אַלע קאָמפּאָנענטן.
9. ספּעסאַפאַקיישאַנז
Detailed technical specifications for the GIGABYTE GA-B150M-D3H motherboard:
| שטריך | באַשרייַבונג |
|---|---|
| מאָדעל נאָמען | GA-B150M-D3H |
| פאָרם פאַקטאָר | מיקראָ אַטקס (24.4 קם רענטגענ 22.5 קם) |
| קפּו סאָקקעט | LGA 1151 |
| קאָמפּאַטיבלע פּראַסעסאָרן | 6th Generation Intel Core Processors |
| טשיפּסעט | אינטעל B150 עקספּרעס טשיפּסעט |
| זכּרון טעכנאָלאָגיע | דדר4 |
| זכּרון סלאָץ | 4 x DDR4 DIMM sockets (Dual Channel) |
| מאַקסימום זכּרון קאַפּאַציטעט | 16 גיגאבייט |
| זכּרון זייגער ספּיד | 2133 מהז |
| PCIe Slots | 1 x PCI Express x16, 1 x Total PCIe Ports |
| סטאָרידזש אינטערפייסיז | PCIe Gen3 x4 M.2, SATA Express, SATA 6Gb/s |
| אַודיאָ קאָדעק | Realtek ALC892 codec, 8-channel HD Audio |
| וסב פּאָרץ | Total 8 USB Ports (including USB 2.0) |
| הויפּט מאַכט קאַנעקטער | 24-Pin ATX |
| קפּו מאַכט קאַנעקטער | 8-Pin ATX 12V |
| יינציק פֿעיִקייטן | GIGABYTE UEFI Dual BIOS, Audio Noise Guard with LED Trace Path Lighting, App Center (Easy Tune, Cloud Station) |
10. וואָראַנטי און שטיצן
For warranty information, please refer to the warranty card included in your product package or visit the official GIGABYTE webזייטל. גאַראַנטיע טערמינען און באדינגונגען קענען זיין אַנדערש לויט געגנט.
For technical support, driver downloads, BIOS updates, and further product information, please visit the GIGABYTE official support webפּלאַץ:
https://www.gigabyte.com/Support
When contacting support, please have your motherboard model (GA-B150M-D3H) and serial number ready.