
1. איבערview
The HyperX Cloud II is a high-performance gaming headset designed for comfort and superior audio quality across multiple platforms. It features virtual 7.1 surround sound, large 53mm drivers, and a durable aluminum frame. The headset is equipped with comfortable memory foam ear cushions and a detachable noise-cancelling microphone for clear communication.

Image 1: The HyperX Cloud II Gaming Headset in Gun Metal, showcasinג זײַן דיזײַן און אָפּנעמבאַרן מיקראָפאָן.
Video 1: An official product video highlighting the key features and design of the HyperX Cloud II Gaming Headset.
2. וואָס איז אין דער קעסטל
- HyperX Cloud II גיימינג העאַדסעט
- דיטאַטשאַבאַל ראַש-קאַנסילינג מיקראָפאָן
- USB Sound Card Audio Control Box
- פּיסי עקסטענסיאָן קאַבלע
- שנעל אָנהייב גייד
- Additional Velour Ear Cushions (pre-installed are leatherette)
3. סעטאַפּ
3.1 פֿאַרבינדן די כעדסעט
- Connect the detachable microphone to the headset's microphone port on the left ear cup.
- For PC and Mac, connect the headset's 3.5mm jack to the USB Sound Card Audio Control Box. Then, plug the USB connector of the control box into an available USB port on your computer.
- For PS4, Xbox One, Nintendo Switch, and mobile devices, connect the headset's 3.5mm jack directly to the controller or device's audio port. The USB Sound Card Audio Control Box is not typically used for these connections for optimal stereo sound.

Image 2: A diagram illustrating the multi-platform compatibility of the HyperX Cloud II, showing USB connection for PC/Playstation/Nintendo Switch and 3.5mm connection for Xbox Controller/Mobile/VR.
3.2 Configuring 7.1 Virtual Surround Sound (PC/Mac)
The HyperX Cloud II features a USB sound card audio control box that enables virtual 7.1 surround sound on PC and Mac. Follow these steps to ensure proper configuration:
פֿאַר Windows:
- Open the Control Panel and navigate to 'Hardware and Sound', then select 'Sound'.
- In the 'Playback' tab, locate 'HyperX 7.1 Audio' (or 'USB Audio'). If it's not the default device, right-click and select 'Set as Default Device'. A green checkmark will appear.
- Repeat the same steps for the microphone under the 'Recording' tab, selecting 'HyperX 7.1 Audio' (or 'USB Audio') as the default input device.
פֿאַר מעק:
- Click the Apple menu and select 'System Preferences'.
- Click on the 'Sound' icon.
- In the 'Input' tab, select 'HyperX 7.1 Audio' (or 'USB Audio') for default sound input.
- In the 'Output' tab, select 'HyperX 7.1 Audio' (or 'USB Audio') for default sound output.
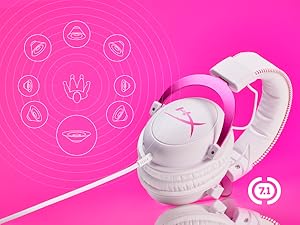
Image 3: The HyperX Cloud II headset with an overlay indicating its 7.1 virtual surround sound capability.
4. אפערירן די כעדסעט
4.1 Audio Control Box Functions
The USB Sound Card Audio Control Box provides convenient access to audio settings:
- כעדפאָון באַנד קאָנטראָל: Use the '+' and '-' buttons on the left side to adjust headphone volume.
- מיקראָפאָן באַנד קאָנטראָל: Use the '+' and '-' buttons on the right side to adjust microphone volume.
- 7.1 Surround Sound Toggle: Press the '7.1' button in the center to activate or deactivate virtual 7.1 surround sound.
- מיקראָפאָן שטום: Use the switch on the side of the control box to quickly mute or unmute the microphone.
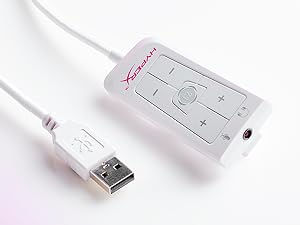
Image 4: The Advanced USB Sound Card Audio Control Box for the HyperX Cloud II headset, showing volume controls and 7.1 surround sound toggle.
4.2 אָפּנעמבאַר מיקראָפאָן
The noise-cancelling microphone can be detached when not needed, allowing the headset to be used for music listening or other audio without the microphone boom in the way.

בילד 5: א נאָענטע בילד view of the HyperX Cloud II's detachable, noise-cancelling microphone.
5. וישאַלט
5.1 Ear Cushion Replacement
The HyperX Cloud II comes with both leatherette and velour ear cushions. These are replaceable, allowing you to maintain comfort and hygiene over time. To replace, gently pull off the existing ear cushions and press the new ones onto the ear cups until securely attached.
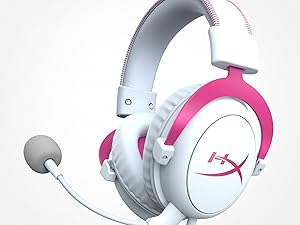
Image 6: The HyperX Cloud II headset highlighting its comfortable memory foam ear cushions.
Video 2: A video demonstrating the memory foam ear cushions of the HyperX Cloud II headset, emphasizing their comfort and flexibility.
5.2 אַלגעמיינע קער
- האַלט די כעדסעט אין אַ ריינעם, טרוקענעם אָרט ווען נישט אין באַנוץ.
- ויסמיידן יקספּאָוזינג די כעדסעט צו עקסטרעם טעמפּעראַטורעס אָדער הומידיטי.
- Clean the ear cushions and headband with a soft, damp שטאָף. דו זאלסט נישט נוצן האַרב קעמיקאַלז.
6. טראָובלעשאָאָטינג
6.1 No Audio or Microphone Function
- טשעק קאַנעקשאַנז: Ensure all cables (3.5mm jack, USB) are securely connected to the headset, control box, and device.
- Default Audio Device: Verify that 'HyperX 7.1 Audio' (or 'USB Audio') is set as the default playback and recording device in your operating system's sound settings (refer to Section 3.2 for detailed steps).
- באַנד לעוועלס: Check both the headset's volume controls on the audio control box and your device's system volume. Ensure the microphone is not muted.
- Microphone Detached: Confirm the detachable microphone is fully inserted into its port.
7. ספּעסאַפאַקיישאַנז
| שטריך | באַשרייַבונג |
|---|---|
| סאָרט | HyperX |
| מאָדעל נומער | KHX-HSCP-GM |
| קאָליר | ביקס מעטאַל |
| אויער פּלייסמאַנט | איבער אויער |
| ימפּידאַנס | 60 אָהמס |
| אָפטקייַט ענטפער | 15-25kKhz |
| אַודיאָ דרייווער גרייס | 53 מילאַמיטערז |
| ראַש קאָנטראָל | פּאַסיוו ראַש קאַנסאַליישאַן |
| קאַנעקטיוויטי טעכנאָלאָגיע | Wired (3.5 mm Jack, USB) |
| קאַמפּאַטאַבאַל דעוויסעס | PC, Mac, PS4, PS5, Xbox Series X|S, Xbox One, Nintendo Switch, Mobile, VR |
| מאַטעריאַל | Aluminum, Faux Leather |
| פּונקט וואָג | 11.29 אונס |
8. וואָראַנטי און שטיצן
For detailed warranty information and technical support, please refer to the official HyperX webוועבזייטל אדער די גאַראַנטיע קאַרטל וואָס איז אַרייַנגערעכנט מיט דיין פּראָדוקט. איר קענט אויך באַזוכן די HyperX קראָם אויף עמעזאן פֿאַר נאָך רעסורסן.