
1. הקדמה
Thank you for choosing the HKC 1818 LED Monitor. This manual provides essential information for the safe and efficient use of your new display. Please read this manual thoroughly before operating the monitor and keep it for future reference.
2. זיכערקייַט אינפֿאָרמאַציע
כדי צו זיכער מאַכן זיכערע אָפּעראַציע און פאַרמייַדן שאָדן, ביטע אָבסערווירן די פאלגענדע זיכערהייט מיטלען:
- Do not expose the monitor to rain or moisture to avoid fire or electric shock.
- עפֿנט נישט דעם מאָניטאָר casinז. עס זענען נישטאָ קיין טיילן וואָס דער באַניצער קען סערוויסן אינעווייניק. לאָזט איבער אַלע סערוויסינג צו קוואַליפֿיצירטע סערוויס פּערסאָנעל.
- שטעלט דעם מאָניטאָר אויף אַ סטאַבילער, גלאַטער ייבערפלאַך כּדי צו פאַרהיטן אַז ער זאָל נישט פאַלן.
- זיכער מאַכן אַז די ווענטילאַציע איז ריכטיק. נישט פאַרשפּאַרן די ווענטילאַציע עפענונגען.
- ניצט נאָר דעם מאַכט אַדאַפּטער וואָס ווערט צוגעשטעלט מיטן מאָניטאָר.
- נעמט ארויס דעם מאָניטאָר פֿון דער עלעקטרישער אַוטלעט בעת בליץ-שטורעמס אָדער ווען ער ווערט נישט גענוצט פֿאַר לאַנגע פּעריאָדן.
3. פּעקל אינהאַלט
ביטע קאָנטראָלירט דעם אינהאַלט פֿון אייער פּאַקעט. אויב עס פֿעלן אָדער זענען געשעדיגט עפּעס, קאָנטאַקטירט אייער הענדלער.
- HKC 1818 LED Monitor
- מאָניטאָר שטאַנד (באַזע און האַלדז)
- מאַכט אַדאַפּטער
- ווגאַ קאַבלע
- באַניצער מאַנואַל (דעם דאָקומענט)
4. סעטאַפּ
4.1 צוזאַמענשטעלן דעם שטאַנד
- נעמט פֿאָרזיכטיק אַרויס דעם מאָניטאָר פֿון זײַן פּאַקעט און לייגט אים מיטן פּנים אַראָפּ אויף אַ ווייכער, ריינער ייבערפֿלאַך כּדי צו פֿאַרמײַדן קראַצן.
- באַפעסטיקט דעם שטאַנד האַלדז צו דער הינטערשטער זייט פון מאָניטאָר, אויסגלייַכנדיק די מאָנטירונג לעכער. באַפעסטיקט מיט שרויפן אויב צוגעשטעלט.
- Attach the stand base to the bottom of the stand neck. Tighten the thumb screw or regular screw at the bottom of the base.
- הייבט פארזיכטיק דעם מאָניטאָר און שטעלט אים גלייך אויף אַ סטאַבילן טיש.
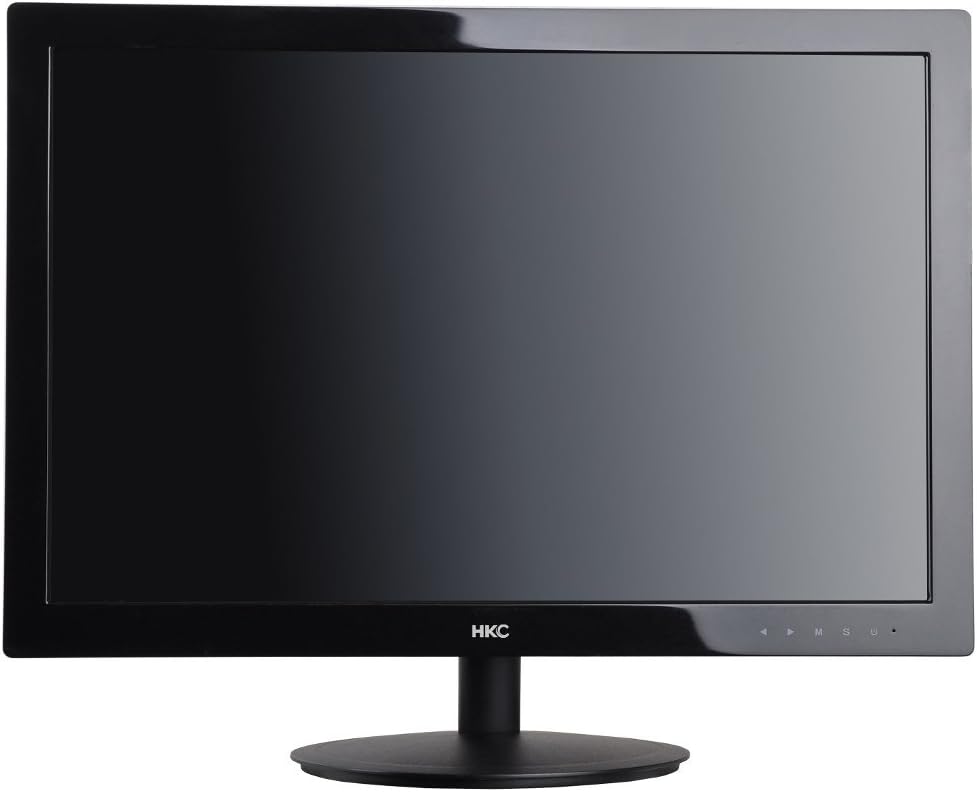
פיגורע 1: פראָנט view of the HKC 1818 LED Monitor with its stand assembled, ready for connection.
4.2 קאַנעקטינג די מאָניטאָר
- פאַרבינדן די ווידעא קאַבלע: Locate the VGA port on the back of the monitor. Connect one end of the supplied VGA cable to this port and the other end to the VGA output port on your computer. Secure the connection by tightening the screws on the VGA connector.
- פאַרבינדן די מאַכט קאַבלע: Plug the power adapter into the monitor's power input jack. Then, plug the other end of the power adapter into a wall outlet.

פיגור 2: ווינקלדיק view of the HKC 1818 LED Monitor, highlighting the rear panel where cables are connected.
4.3 ערשט מאַכט אויף
Press the power button located on the front or bottom right of the monitor. The power indicator light should illuminate, and the monitor will display an image if connected to an active video source.
5. אַפּערייטינג די מאָניטאָר
5.1 קאָנטראָל קנעפּלעך
The control buttons are typically located on the bottom right bezel of the monitor. They allow you to navigate the On-Screen Display (OSD) menu and adjust settings.
- מאַכט קנעפּל: טורנס די מאָניטאָר אויף אָדער אַוועק.
- מעניו (M) קנעפּל: Opens the OSD menu or enters a sub-menu.
- Up/Down (▲/▼) Buttons: נאַוויגירן דורך מעניו אָפּציעס אָדער סטרויערן ווערטן.
- Select (S) Button: Confirms a selection or exits a sub-menu.
- Auto/Exit (U) Button: Performs auto-adjustment or exits the OSD menu.
5.2 OSD מעניו נאַוויגאַציע
- דרוק די Menu (M) קנעפּל צו עפענען דעם OSD מעניו.
- ניצן די Up/Down (▲/▼) buttons to navigate through the main menu categories (e.g., Picture, Color, OSD, Setup).
- דרוק די Select (S) button to enter a selected category.
- ניצן די Up/Down (▲/▼) קנעפּלעך צו סטרויערן ווערטן אדער אויסקלייבן אונטער-אפציעס.
- דרוק די Select (S) button to confirm changes or the Auto/Exit (U) button to go back or exit.
- דרוק די Auto/Exit (U) קנעפּל ריפּיטידלי צו אַרויסגאַנג די OSD מעניו.
5.3 געוויינטלעכע OSD סעטטינגס
- ברייטקייט: אַדזשאַסטירט די אַלגעמיינע לומינאַנס פון דעם עקראַן.
- קאַנטראַסט: אַדזשאַסטיד די חילוק צווישן ליכט און טונקל געביטן.
- קאָליר טעמפּעראַטור: Changes the color balance (e.g., Warm, Cool, User).
- אַרייַנשרייַב אויסקלייַבן: Manually selects the video input source (e.g., VGA).
- אַוטאָ סטרויערן: Optimizes the image automatically for analog (VGA) input.
6. וישאַלט
6.1 רייניקונג די מאָניטאָר
- שטענדיק ארויסנעמען דעם מאָניטאָר פֿון דער עלעקטרישער אַוטלעט איידער איר רייניגט.
- ניצן אַ ווייך, לינט-פֿרייַ שטאָף אַ ביסל דampאָפּגעווישט מיט וואַסער אָדער אַ נישט-אַבראַוויזיוו פאַרשטעלן רייניגער צו ווישן דעם פאַרשטעלן. שפּריצט נישט רייניגער גלייך אויף דעם פאַרשטעלן.
- פֿאַר די סיasinג, ניצט אַ ווייכע, טרוקענע שטאָף. פֿאַרמייַדט ניצן שטאַרקע דיטערדזשאַנץ אָדער אַברייסיוו רייניגער.
6.2 סטאָרידזש
If you plan to store the monitor for an extended period, unplug it, disconnect all cables, and store it in a cool, dry place, preferably in its original packaging to protect it from dust and physical damage.
7. טראָובלעשאָאָטינג
If you encounter problems with your monitor, please refer to the following common issues and solutions:
| פּראָבלעם | מעגלעך סיבה | לייזונג |
|---|---|---|
| קיין מאַכט | שטראָם קאַבל נישט פארבונדן; שטראָם אַוטלעט אַרבעט נישט. | זיכער מאַכן אַז די מאַכט קאַבל איז זיכער פארבונדן צום מאָניטאָר און ווענטיל. פּרובירן די ווענטיל מיט אַן אַנדער מיטל. |
| קיין סיגנאַל | Video cable not connected; Incorrect input source selected; Computer not on. | Check video cable connection. Select correct input source via OSD. Ensure computer is powered on and not in sleep mode. |
| בילד איז פארשוואומען אדער פארדרייט | Incorrect resolution; Auto-adjust needed (VGA); Loose video cable. | Set computer resolution to monitor's native resolution (1366x768 for 18.5"). Use OSD Auto Adjust function. Check video cable connection. |
| Screen is too dark/bright | העלקייט/קאנטראסט סעטינגס זענען נישט ריכטיג. | אַדזשאַסטירן ברייטקייט און קאָנטראַסט סעטטינגס אין די OSD מעניו. |
אויב די פראבלעם בלייבט נאך פרובירן די לייזונגען, ביטע קאנטאקטירט קאסטומער סופארט.
8. ספּעסאַפאַקיישאַנז
| שטריך | באַשרייַבונג |
|---|---|
| סאָרט | HKC |
| מאָדעל נומער | 1818 |
| פאַרשטעלן גרייס | 18.5 אינטשעס |
| ווייַז טיפּ | געפירט |
| אַספּעקט פאַרהעלטעניש | 16:9 |
| ענטפער צייט | 2 מיליסעקאַנדז |
| דערפרישן קורס | 60 הז |
| קאַנעקטיוויטי טעכנאָלאָגיע | VGA |
| באַשרייַבונג פון דער אויבערפלאַך פון דעם עקראַן | גלאָסי |
| פּראָדוקט וואָג | 2.8 קילאָגראַמס |
| פּעקל דימענשאַנז | 50 X 38.5 X 12 סענטימעטער |
9. וואָראַנטי און שטיצן
9.1 וואָראַנטי אינפֿאָרמאַציע
This HKC monitor comes with a standard manufacturer's warranty. Please refer to the warranty card included in your package or contact your retailer for specific warranty terms and conditions. Keep your purchase receipt as proof of purchase for warranty claims.
9.2 קונה שטיצן
For technical assistance, troubleshooting beyond this manual, or warranty inquiries, please contact HKC customer support or your local retailer. Contact information can typically be found on the manufacturer's official webוועבזייטל אדער אויף דער פּראָדוקט פּאַקאַדזשינג.