
1. הקדמה
This manual provides detailed instructions for the proper setup, operation, and maintenance of your AmScope ME1400T Inverted Trinocular Metallurgical Microscope. This instrument is designed for observing opaque or metallic specimens, or larger specimens that cannot be viewed on a standard microscope stage, utilizing reflected light.
The ME1400T features 40X-400X magnification, WF10x eyepieces with a reticle, Kohler condenser, 30W halogen illumination with rheostat, and a double-layer mechanical stage. Please read this manual thoroughly before using the microscope to ensure safe and optimal performance.
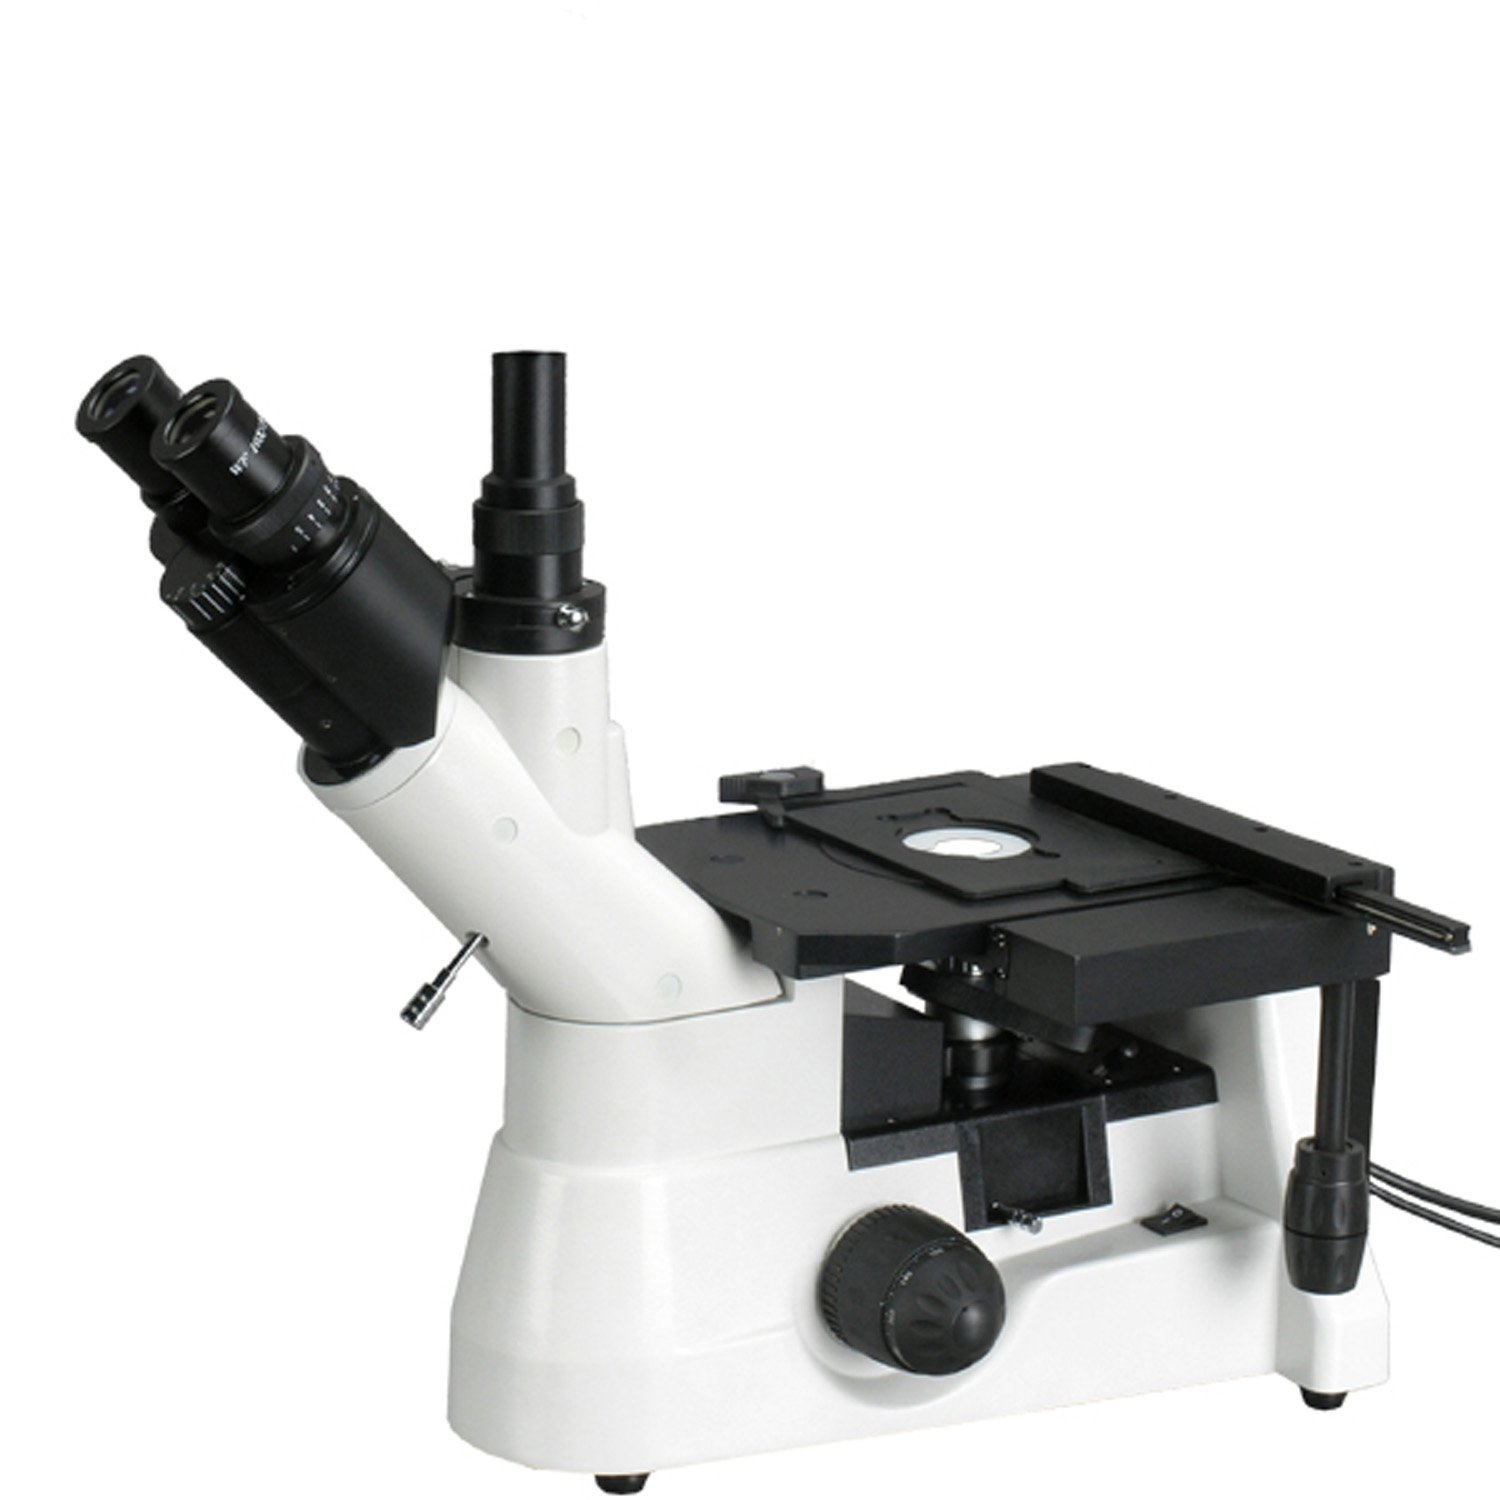
Figure 1: AmScope ME1400T Inverted Trinocular Metallurgical Microscope
2. זיכערקייַט אינפֿאָרמאַציע
- Always handle the microscope with care. Avoid sudden movements or impacts.
- Ensure the microscope is placed on a stable, level surface to prevent tipping.
- Connect the power cord only to a grounded electrical outlet with the correct voltagE (85-230וו).
- Do not expose the microscope to direct sunlight, high temperatures, dust, or high humidity.
- נעמט ארויס דעם עלעקטרישן שנור איידער איר רייניגט אדער פירט אויס קיין שום אויפהאלטונג.
- Never touch optical surfaces with bare hands. Use a soft, lint-free cloth or lens paper for cleaning.
- Keep small parts and accessories away from children.
- If the halogen bulb needs replacement, ensure the microscope is unplugged and the bulb has cooled down to prevent burns.
3. קאַמפּאָונאַנץ איבערview
Familiarize yourself with the main components of your ME1400T microscope:
- Trinocular Head: Allows for simultaneous viewing through eyepieces and connection of a camera to the vertical port. Features a Siedentopf design for interpupillary distance adjustment and 45-degree inclination for comfortable viewing.
- אויגן: Includes a pair of 10x20mm high-eyepoint super-widefield eyepieces and one 10x measuring eyepiece with a built-in reticle and micrometer (0.1mm graduations).
- נאָז: Forward-facing quintuple nosepiece holding the objective lenses.
- אָביעקטיוו לענסעס: Four DIN metallurgical objectives (4x, 10x, 20x, 40x) providing color correction and improved focus.
- מעטשאַניקאַל שtage: Double-layer mechanical stage with a removable stage plate and stage stop to protect specimens and objectives.
- פאָקוס קנעפּלעך: Graduated coarse and fine focus knobs with tension control.
- יללומינאַטיאָן סיסטעם: Episcopic reflected and Brightfield illumination with a 30W halogen light source and rheostat for intensity control. Includes a polarizing condenser.

Figure 2: WF10x Eyepieces with Diopter Adjustment

Figure 3: Quintuple Nosepiece with Metallurgical Objectives
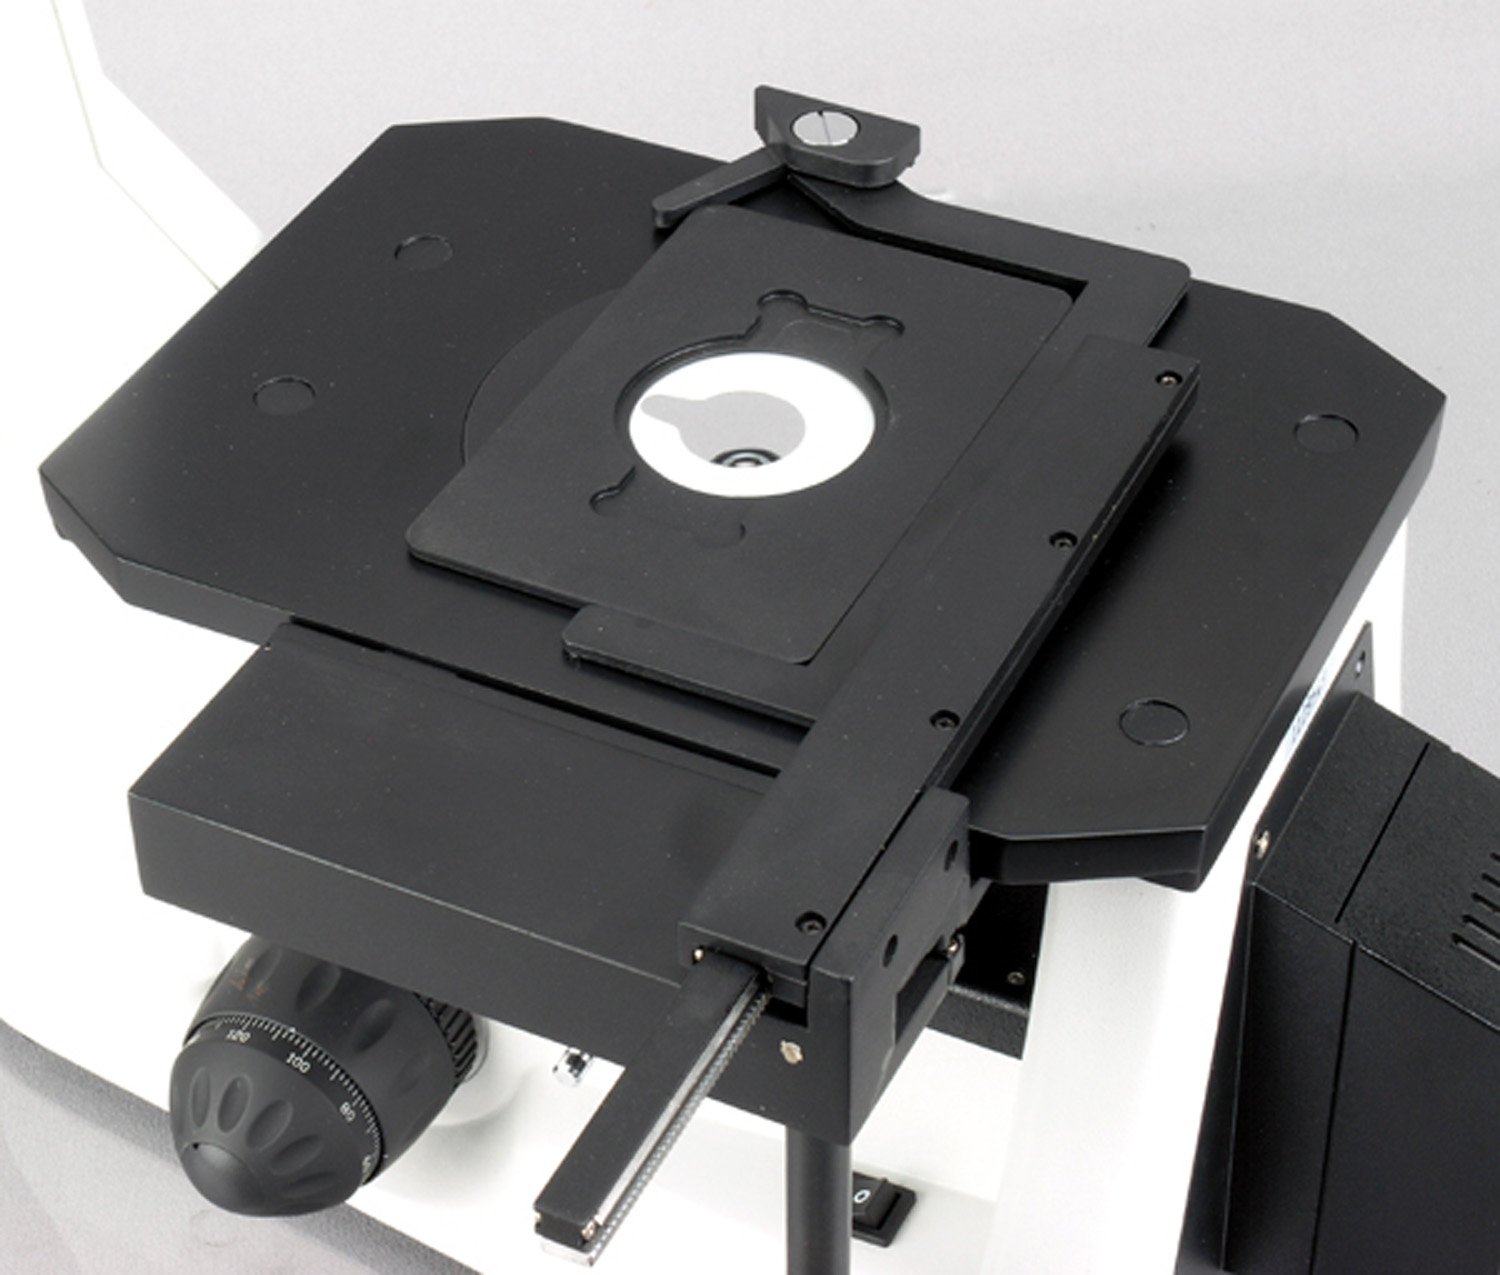
Figure 4: Double-Layer Mechanical Stage
4. סעטאַפּ
- אויספּאַקן: נעמט פֿאָרזיכטיק אַרויס אַלע קאָמפּאָנענטן פֿון דער פּאַקאַדזשינג. האַלט די אָריגינעלע פּאַקאַדזשינג פֿאַר צוקונפֿטיקן טראַנספּאָרט אָדער סטאָרידזש.
- אָרט: Place the microscope on a sturdy, level, and vibration-free surface. Ensure adequate space around the instrument for operation and ventilation.
- Attach Trinocular Head: Gently insert the trinocular head into the top port of the microscope body. Secure it by tightening the set screw.
- Insert Eyepieces: Insert the pair of WF10x20mm eyepieces into the binocular tubes. If using the measuring eyepiece, replace one of the WF10x20mm eyepieces with it.
- פאַרבינדן מאַכט: Plug the power cord into the microscope's power input, then into a grounded electrical outlet.
- ערשטע אַדזשאַסטמאַנץ:
- ינטערפּופּיללאַרי דיסטאַנסע: While looking through the eyepieces, adjust the distance between the two eyepiece tubes until a single, clear circular field of view ווערט באמערקט.
- דיאָפּטער אַדזשאַסטמאַנט: Focus on a specimen using the 10x objective and the right eyepiece only. Then, without touching the coarse or fine focus knobs, adjust the diopter ring on the left eyepiece until the image is sharp through the left eyepiece.
5. אַפּערייטינג ינסטרוקטיאָנס
- מאַכט אויף: Flip the main power switch to the 'ON' position. The halogen illumination should light up.
- סטרויערן באלויכטונג: Use the rheostat knob to adjust the brightness of the halogen light source to a comfortable level.
- אָרט מוסטער: Place your specimen on the mechanical stagה. ניצט די סtage clips to secure it if necessary.
- Select Objective: Rotate the nosepiece to select the lowest power objective (e.g., 4x) first. Ensure the objective clicks firmly into place.
- פאָקוסינג:
- Using the coarse focus knob, slowly raise the stage until the specimen comes into approximate focus.
- Use the fine focus knob to achieve a sharp, clear image.
- טוישן פארגרעסערונג: Rotate the nosepiece to a higher power objective. The microscope is parfocal, meaning only minor adjustments with the fine focus knob should be needed.
- Using the Measuring Eyepiece: If installed, the measuring eyepiece allows for basic measurements. Calibrate the reticle using a stage micrometer (not included) for accurate measurements at different magnifications.
- טרינאָקולאַר פּאָרט: For camera attachment, slide the light path selector (if present) to direct light to the vertical trinocular port. A camera (sold separately) can be mounted here for image capture. The port has a 100% light-splitting rate.
- Polarizing Illumination: The integrated polarizing condenser can be engaged for observing specimens under polarized light, enhancing contrast for certain materials.
- מאַכט אַוועק: After use, turn the rheostat to the lowest setting, then flip the main power switch to 'OFF'. Unplug the microscope if it will not be used for an extended period.
6. וישאַלט
- רייניקונג לענסעס: Use a soft brush to remove dust, then gently wipe with lens paper moistened with lens cleaning solution. Do not use abrasive cloths or solvents.
- אַלגעמיינע רייניקונג: ווישט דעם מיקראָסקאָפּ קערפּער מיט אַ ווייכן, טרוקענעם שטאָף.amp cloth. Avoid getting moisture into electrical components.
- האַלאָגען באַלב פאַרבייַט:
- Unplug the microscope and allow the bulb to cool completely.
- Locate the bulb housing (refer to your specific model's diagram if available).
- Carefully remove the old bulb and insert a new 30W halogen bulb, avoiding touching the glass with bare hands.
- Secure the housing and plug in the microscope.
- סטאָרידזש: When not in use, cover the microscope with a dust cover to protect it from dust and debris. Store in a cool, dry place.
7. טראָובלעשאָאָטינג
| פּראָבלעם | מעגלעך סיבה | לייזונג |
|---|---|---|
| קיין ילומאַניישאַן | Power cord unplugged, power switch off, bulb burnt out. | Check power connection, turn on switch, replace bulb. |
| בילד איז פארשוואומען אדער נישט אין פאָקוס | Incorrect focus adjustment, objective not fully engaged, dirty lens. | Adjust coarse/fine focus, rotate nosepiece until objective clicks, clean lenses. |
| אַניוואַן ילומאַניישאַן | Condenser not centered, light source obstruction. | Adjust Kohler condenser, check for obstructions in light path. |
| Cannot adjust interpupillary distance | Head not properly seated or secured. | Ensure trinocular head is fully inserted and set screw is tightened. |
8. ספּעסאַפאַקיישאַנז
| שטריך | באַשרייַבונג |
|---|---|
| מאָדעל | ME1400T |
| מיקראָסקאָפּ טיפּ | Inverted Trinocular Metallurgical |
| מאַגנאַפאַקיישאַן קייט | 40X - 400X |
| יעפּיסעס | WF10x20mm (pair), 10x Measuring Eyepiece (with 0.1mm reticle) |
| אָביעקטיוו לענסעס | 4x, 10x, 20x, 40x DIN Metallurgical Achromatic |
| נאָזפּיעסע | Quintuple, Forward-facing |
| Viewאין קאָפּ | Siedentopf Trinocular, 45-degree inclination |
| ינטערפּופּיללאַרי דיסטאַנסע | 55 - 75 מ״מ |
| Illumination | Episcopic Reflected Brightfield and Polarizing, 30W Halogen with Rheostat |
| קאַנדענסער | Kohler, Polarizing |
| Stage | Double-Layer Mechanical StagE מיט Stage Stop |
| פאָקוסינג | Coarse and Fine Adjustment with Tension Control |
| מאַכט צושטעלן | 85-230וו |
| פּונקט וואָג | 27.22 ק״ג (60 פונט) |
9. וואָראַנטי און שטיצן
For warranty information, technical support, or service inquiries regarding your AmScope ME1400T microscope, please contact AmScope customer service directly. Refer to the official AmScope webוועבזייטל אדער אייער קויפן דאקומענטאציע פאר די מערסט אקטועלע קאנטאקט דעטאלן און גאראנטיע באדינגונגען.
It is recommended to register your product upon purchase to facilitate any future support needs.