1. הקדמה
The Avaya G430 Media Gateway is a compact, cost-effective, and modular media gateway designed to provide a flexible and scalable solution for voice and data communication. It supports various voice and data interfaces, making it suitable for small to medium-sized enterprises. This manual provides essential information for the proper installation, operation, and maintenance of your G430 Media Gateway.
2. סעטאַפּ און ייַנמאָנטירונג
2.1 אַנפּאַקינג און דורכקוק
Carefully unpack the G430 Media Gateway and all accessories. Inspect the unit for any signs of physical damage. If any damage is found, contact your supplier immediately.
2.2 גשמיות ינסטאַלירונג
The G430 Media Gateway can be placed on a flat surface or rack-mounted. Ensure adequate ventilation around the unit to prevent overheating. Connect the power cord to the AC power input on the rear of the device and then to a grounded electrical outlet.
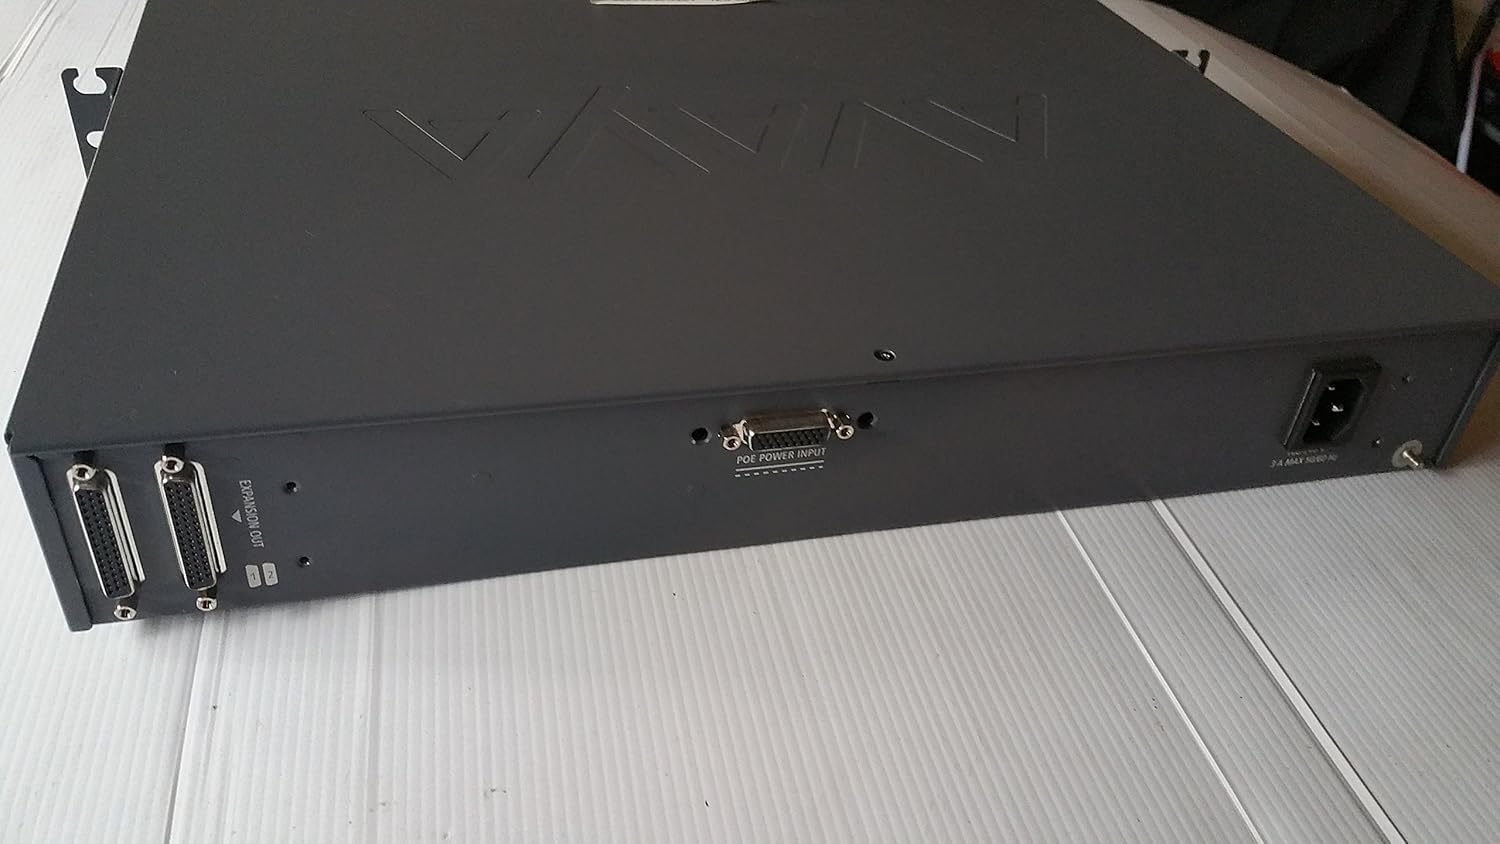
This image shows the rear panel of the Avaya G430 Media Gateway, featuring the AC power input connector and expansion output ports. This view is important for connecting the device to a power source and other system components.
2.3 קאַנעקטינג נעטוואָרק קאַבלעס
Connect your network cables to the appropriate ports on the front panel. The G430 features WAN (10/2) and LAN (10/3, 10/4) Ethernet ports, as well as USB ports and an Audio port. Ensure all connections are secure.

This image displays the front panel of the Avaya G430 Media Gateway, highlighting the various ports including USB, WAN, LAN, and Audio, along with status indicator LEDs for MDM, ALM, CPU, RST, ASB, and PWR. The Compact Flash slot is also visible.
2.4 ערשט מאַכט-אַרויף
After all connections are made, power on the device. Observe the status indicator LEDs on the front panel. The PWR LED should illuminate, and other LEDs will indicate the system's boot status.
3. Operating the G430 Media Gateway
3.1 סטאַטוס ינדיקאַטאָרס
The front panel includes several LEDs to indicate the operational status of the gateway:
- MDM: Modem status.
- ALM: שרעק גראדן.
- CPU: CPU activity.
- RST: באַשטעטיק סטאַטוס.
- ASB: Auxiliary Services Board status.
- PWR: מאַכט סטאַטוס.
Refer to the Avaya G430 documentation for detailed LED status interpretations.
3.2 יקערדיק פאַנגקשאַנאַליטי
Once powered on and configured, the G430 Media Gateway facilitates voice and data traffic routing. Configuration is typically performed via a connected management system or command-line interface, as per your network architecture.
4. וישאַלט
4.1 רייניקונג
Keep the unit clean and free from dust. Use a soft, dry cloth for cleaning. Do not use liquid or aerosol cleaners directly on the device.
4.2 פירמוואַרע דערהייַנטיקונגען
Periodically check the Avaya support website for firmware updates. Keeping the firmware up-to-date ensures optimal performance and security. Follow Avaya's official procedures for firmware upgrades.
4.3 Compact Flash Access
The Compact Flash slot on the front panel allows for storage expansion or system recovery. Handle Compact Flash cards with care to avoid data loss or damage.
5. טראָובלעשאָאָטינג
5.1 שטראָם פּראָבלעמען
- קיין מאַכט: Ensure the power cord is securely connected to both the gateway and the power outlet. Verify the power outlet is functional.
- PWR LED Off: If the PWR LED is not illuminated, check power connections and the power source.
5.2 נעץ קאָנעקטיוויטי פּראָבלעמען
- קיין לינק: Check Ethernet cable connections to WAN/LAN ports. Ensure the connected network devices are operational.
- ינטערמיטאַנט קשר: Verify cable integrity and check for network congestion or configuration issues on connected devices.
5.3 סיסטעם באַשטעטיק
A reset button (RST) is available on the front panel. Pressing this button may resolve certain operational issues. Consult Avaya documentation for proper reset procedures and implications.
6. ספּעסאַפאַקיישאַנז
| שטריך | דעטאַל |
|---|---|
| סאָרט | אַווייַאַ |
| מאָדעל נאָמען | G430 |
| מאַנופאַקטורער טייל נומער | 700469273 |
| UPC | 659427024429 |
| קאַנעקטיוויטי טעכנאָלאָגיע | ווייערד |
| נומער פון פּאָרץ | 1 (WAN, multiple LAN) |
| פּונקט וואָג | 13.2 פונט |
| רעקאָממענדעד ניצט | Home, Small Office |
7. וואָראַנטי און שטיצן
For detailed warranty information, please refer to the official Avaya warranty statement provided with your product or visit the Avaya website. For technical support, product documentation, and software downloads, please visit the official Avaya support portal. Ensure you have your product model and serial number available when contacting support.